


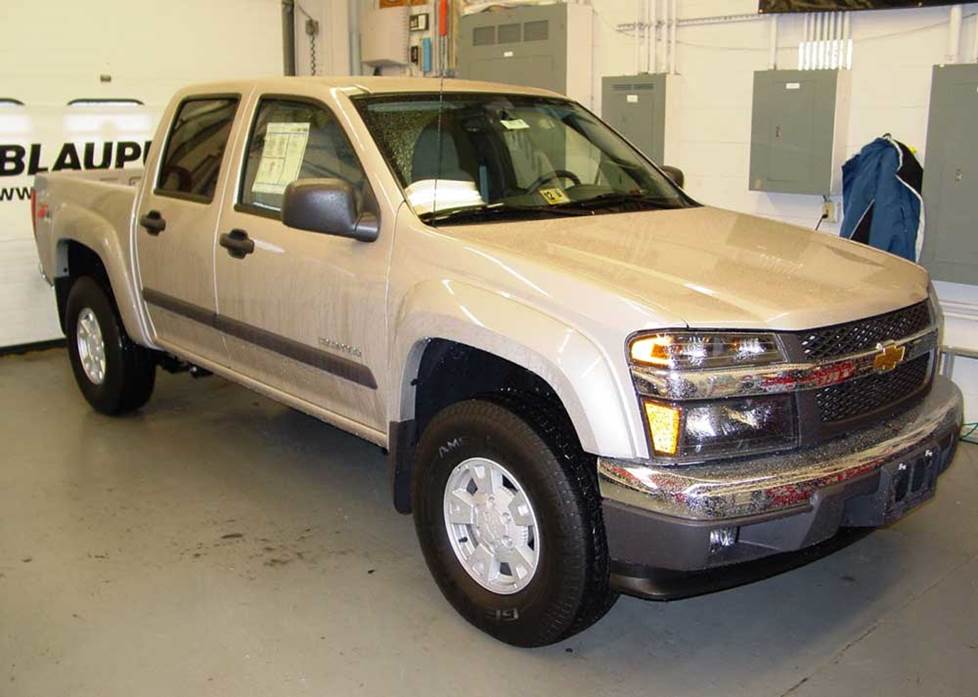
2004-2012 Chevy Colorado and GMC Canyon; 2006-2008 Isuzu I-Series
How to upgrade the stereo system in your Colorado, Canyon, or I-Series

In brief: This Crutchfield Research Garage article gives you an overview of your truck's stock stereo system and your aftermarket upgrade options. We'll tell you all about:
- Removing the factory radio
- Removing the factory speakers
- Adding more bass
- Other options for your Colorado, Canyon, or I-Series
Then, use our vehicle selector to find the gear that will fit your truck.
Overview of the Colorado, Canyon, and I-Series pickups
Nothing succeeds like excess these days, which more or less explains the notion of a full-size pickup truck with enough power to move Mount Rushmore, plus enough luxurious leather to outfit a high-end cigar bar.
But not everyone needs that much awesomeness from a pickup. Some of us just want a solid, capable truck that can haul people and stuff without taking up too much space in the parking lot – or the budget.
And that's where the Chevy Colorado/GMC Canyon twins (and the exceedingly rare Isuzu I-Series) come in. These mid-sized trucks proved to be just the right size for a large number of people. The number of cab variations, options, and engine choices made it easy for anyone to create their perfect truck.
However, the factory stereos were less than perfect and they haven't exactly improved with age. If you're still enjoying your pickup, but getting tired of weak sound and old tech, our experts can help you add new life to your truck's audio system.
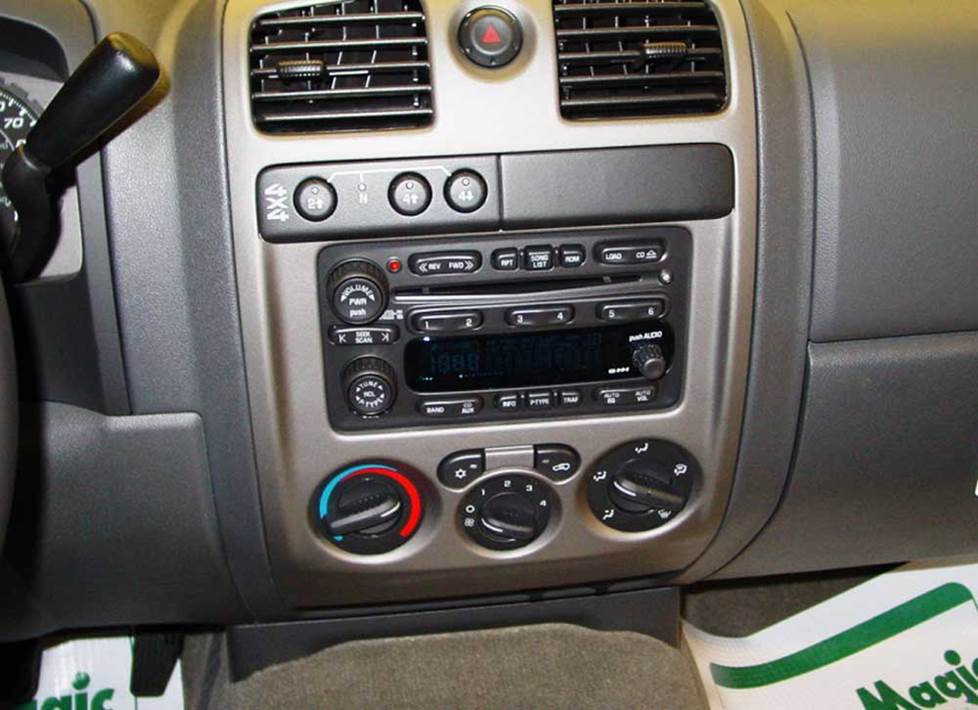
The factory radio is your basic AM/FM/CD receiver (Crutchfield Research Photo)
Removing the factory radio
The Colorado, Canyon, and I-Series (We'll simply refer to the Colorado from here on out, since the instructions are the same for all three and it's easier to type.) were available with an extensive array of options and packages. Satellite radio was one of those options, but you'll lose that when you replace the old radio. Thankfully, many new aftermarket models are SiriusXM ready.
The standard AM/FM/CD receiver and OnStar® will look familiar to anyone familiar with GM vehicles of the era, and the number of speakers varies according to which cab you're dealing with.
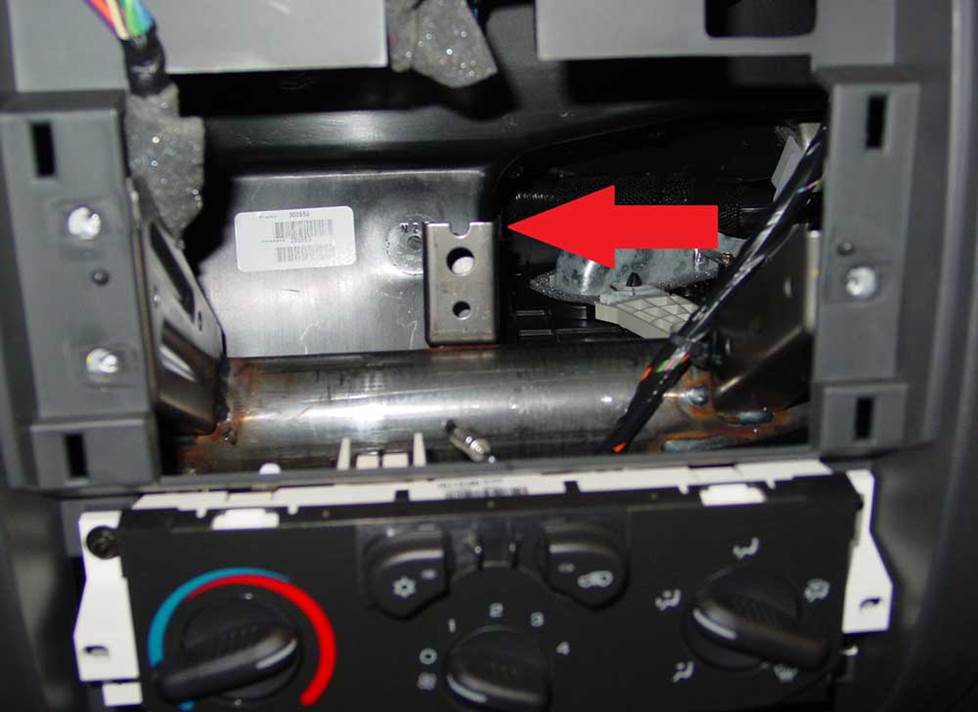
Here's a look at the support bracket you'll (probably) need to remove (Crutchfield Research Photo)
The most challenging aspect of the job is that you'll probably need to remove a rear support bracket inside the dash when you install most car stereos. The only thing the bracket supports is the factory receiver, so don't worry about the dash caving in the second you cut it free.
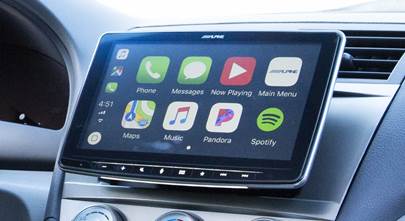
If the thought of hacking something out of your dash makes you a little nervous, you should check out a digital media receiver. These receivers don't have a CD player built-in, so the chassis is often much smaller. Most models will fit in the cavity without the need for any modifications.
Detailed stereo and speaker removal instructions

Installing a new receiver can disable the warning chimes in your Colorado, so you must use the recommended integration adapter to retain these warning chimes. Because this is an important safety issue, we will not provide technical support for any installation that does not utilize the recommended adapter. You don't have to buy the adapter from us, but you'll get a very nice discount when you order from Crutchfield, so it's a good idea to do so.
If you have installation questions, remember that you have free access to Crutchfield's expert tech support staff for the life of your gear.
Tools needed: Panel tool, 7mm socket, ratchet, and extension
Read our Car Stereo Buying Guide for shopping tips and advice.
Shop for car stereos that fit your GMC Canyon
Steering wheel audio controls
In most cases, it's reasonably easy to retain your truck's steering wheel audio controls when you install a new stereo. When you enter your vehicle information, our database will choose the adapter you need to make your factory steering wheel controls work with a compatible aftermarket receiver.
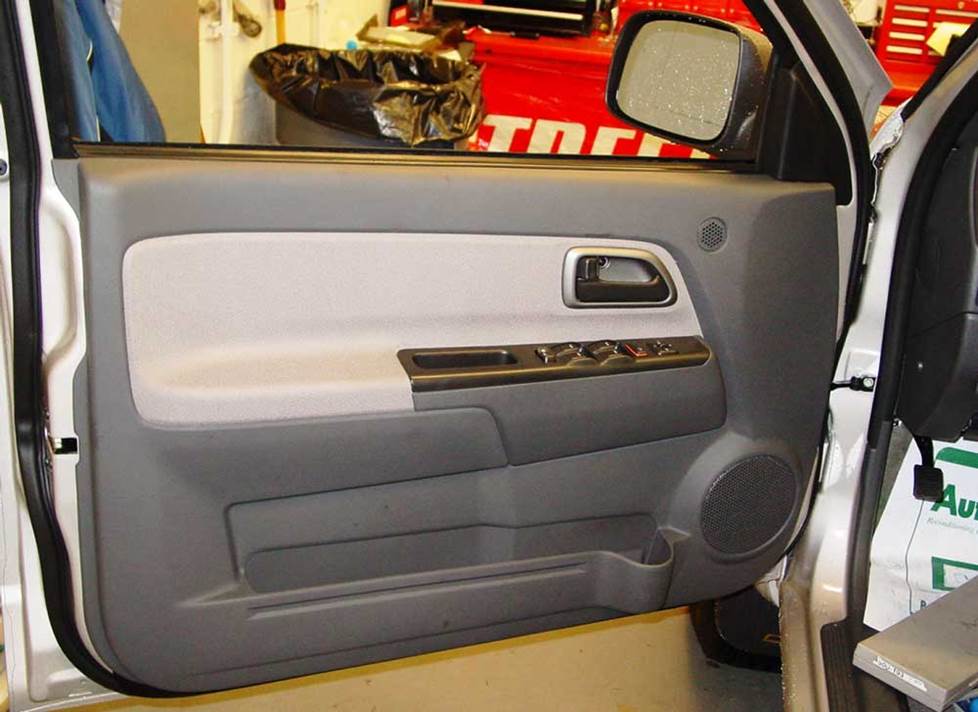
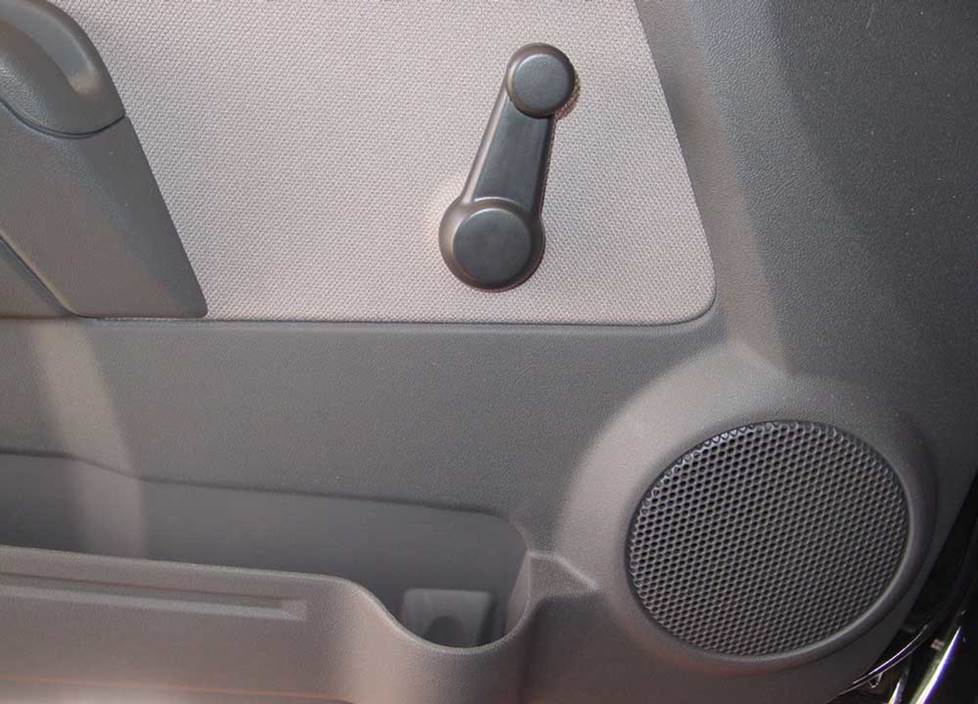
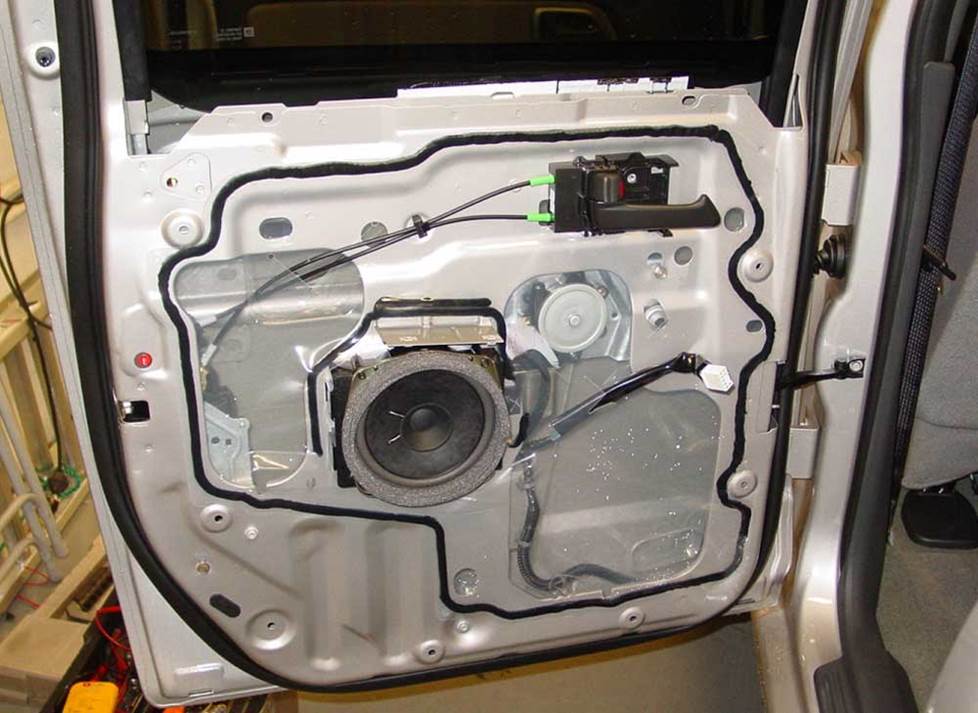
The front doors contain woofers and, in some trucks, tweeters (Crutchfield Research Photo)
Removing the factory speakers
These trucks have speakers in the front and rear doors.
Front door speakers
The front door speakers (or only door speakers, if you have a standard cab) are 6-3/4" models that can be replaced with same-size, 6-1/2", or 5-1/4" aftermarket speakers. You'll need mounting brackets for the smaller ones, and they're available at a deep discount with your Crutchfield speaker order.
You'll start by prying out the top of the sail panel, which will release the clip that holds the panel in place. Remove it, then move down the door, remove the Phillips screw inside the door release trim, and pry off that piece.
What happens next depends on whether you have power or manual windows:

Removing the power window controls (Crutchfield Research Photo)
- If you have the power kind, remove two Phillips screws in the door-pull cup, then lift the door pull/power switch panel from the rear and pry up the front edge. Pull up the panel, disconnect the wiring harnesses and remove it.
This is a window crank, kids. Ask your parents... (Crutchfield Research Photo)
- If you have good old-fashioned manual windows, use a shop rag in a back-and-forth motion to release the “C” clip on the rear of the window crank and loosen it until you can pull it off.
Okay, where were we? Right. Now you'll pry out the sides and bottom of the door panel to release the retaining clips. Lift the panel, disconnect the tweeter wiring harness (if equipped, see below) and remove the panel. Remove one Phillips screw from the top edge of the factory speaker, then fold the speaker forward, disconnect the wiring harness, and remove it.
If you’re using an adapter bracket, secure the speaker to the bracket following the instructions in the bracket package. If not, you'll need to place the speaker in the desired location and use it as a template to mark the spots for the new mounting holes. You'll then use a drill and a 1/8" bit to drill the new holes.
If you're even slightly handy around the home and garage, you already know how to use a power drill. That said, we should remind you to be extremely careful when drilling in a vehicle. Be aware of things such as wiring, windows, fuel lines and safety devices. And, of course, check (and re-check) the drilling depth and location before you drill.
Once everything's in place, test the speakers to make sure they're working properly, then double-check to make sure the windows and door locks are working as they should before you start putting the door back together.
One last thing: Your new speakers might include mounting screws, but then again, they might not. Check your packaging and, if needed, make that run to the hardware store before you start working.
Tools needed: Phillips screwdriver, panel tool, drill and 1/8" bit, shop rag (always a good thing to have handy)
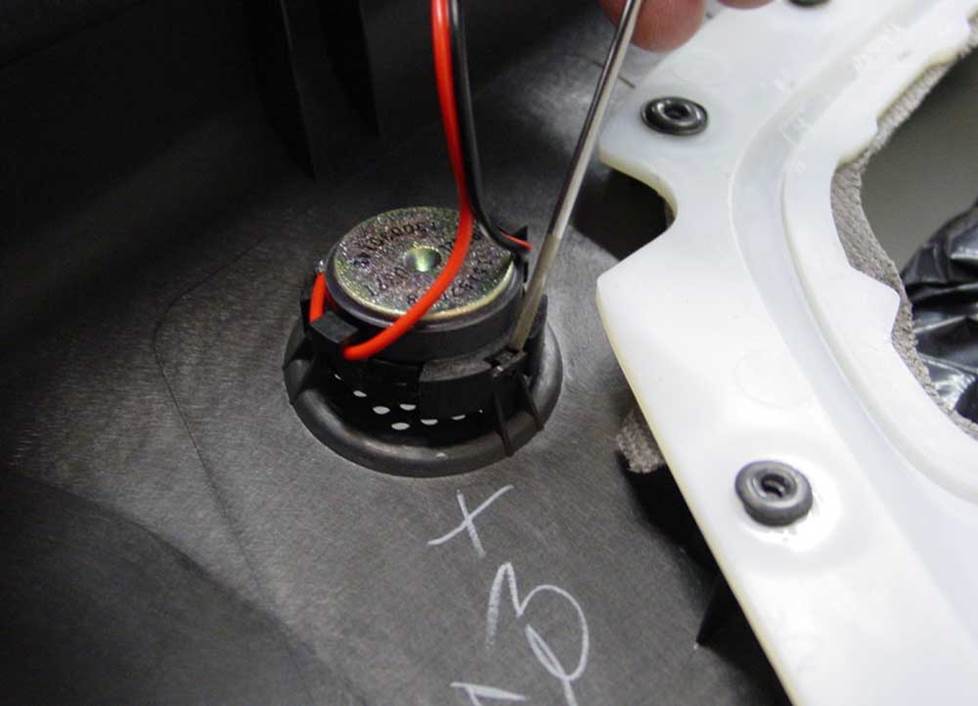
The tweeters are attached to the door panels (Crutchfield Research Photo)
Front door tweeters
If your truck has factory tweeters, they're mounted on the inside of the door panels. They're a tad less than 1-1/2" in diameter, and can be replaced by the tweeters found in most component speaker sets.
They're attached to the panel by three plastic clips, so pry those up, disconnect the harness, and remove the tweeter. A mounting bracket is not available, so you'll need to use backstraps, hot glue, or silicone to secure your new speakers.
If you're feeling brave, there's another approach you can take. Use a hole saw to cut out the factory tweeter grilles and use the hardware included with your new tweeters to flush-mount the tweeters to the doors. It's a bit more work, but it'll look terrific. Refer to the tweeters' installation instructions to see what size whole you'll need to drill.
Tools needed: Panel tool, Phillips screwdriver
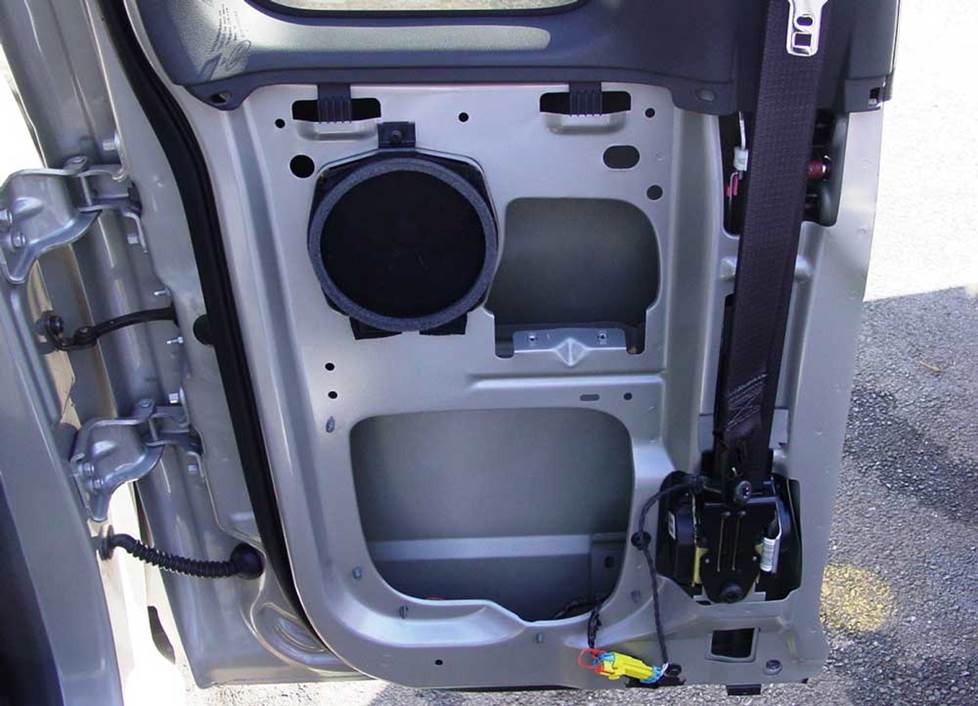
The Crew Cab rear doors contain 6-3/4" stock speakers (Crutchfield Research Photo)
Rear door speakers (Crew Cab)
The rear door speakers on the Crew Cab are also 6-3/4" models, and they can be replaced with same-size, 6-1/2", or 5-1/4" aftermarket speakers. You'll need mounting brackets for the smaller ones, and they're available at a deep discount with your Crutchfield speaker order.
The removal and replacement process is very similar to the front doors, right down to the differences with the windows and the drilling of new mounting holes. Details can be found in your Crutchfield MasterSheet.
Tools needed: Phillips screwdriver, panel tool, Torx T-20 driver, shop rag
The Extended Cab has the same speakers, but in different doors (Crutchfield Research Photo)
Rear door speakers (Extended Cab)
Extended Cab Colorados also have 6-3/4" rear door speakers, but the doors are different and so is the removal process. Not vastly different, mind you, but still worth talking about.
You'll start by removing two Phillips screws from the bottom of the door pull cup. Pry up the front edge of the power switch panel to release one retaining clip, then disconnect the wiring harnesses and remove the panel. From there, move down the door and remove a Torx T50 bolt from the seat belt anchor.
With that out of the way, start prying around sides and bottom of the lower door panel to release the retaining clips, then lift and remove the panel. Remove the Torx T20 screw from the factory speaker/bracket assembly and remove the whole assembly.
Once you've secured the new speaker to the bracket assembly, you'll need to mark your new mounting holes. The marking and drilling process is the same here as it was up front, so the same safety instructions apply. Work carefully and wear eye protection.
Once everything's in place, test the speakers to make sure everything's working properly, then double-check to make sure the windows and door locks are working as they should before you start putting the door back together. You'll also want to make sure the seat belt anchors are properly secured.
Read our Car Speakers Buying Guide for more information.
Shop for speakers that fit your GMC Canyon
Bass in your Colorado, Canyon, or I-Series pickup
Adding a subwoofer box to your truck depends on which type of cab you're working with. In a standard cab, you'll have a 20" W x 15" H x 10"/3" D space to work with – in other words, not much. But that's still more than you get in a Crew Cab or Extended Cab, neither of which offer any space at all.
If you want to add bass to an Extended Cab Colorado, your best bet is probably a powered subwoofer.
Learn more about building a bass system in our Car Subwoofer Buying Guide.
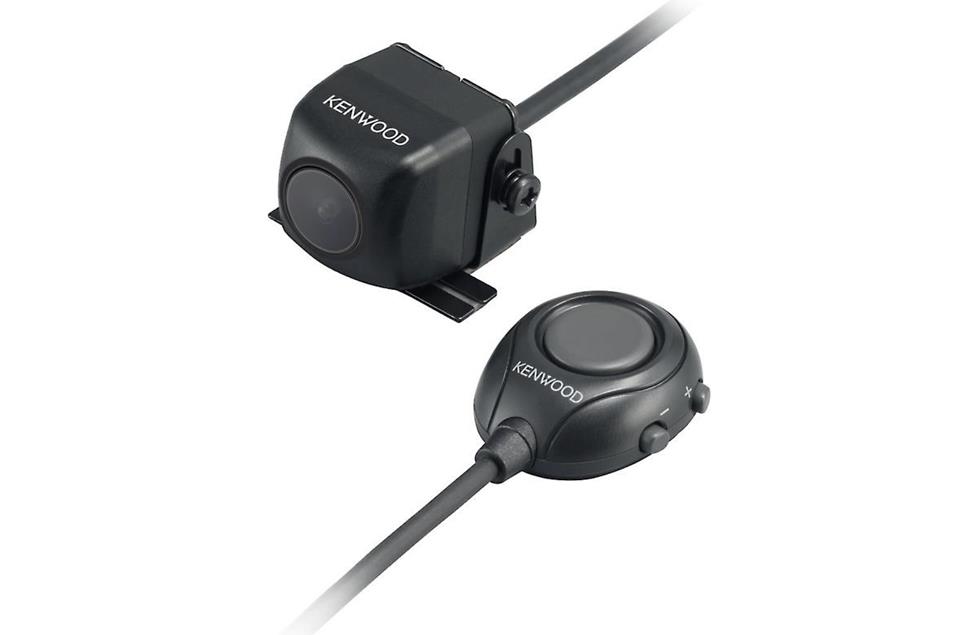
The Kenwood CMOS-320 rearview camera has four viewing modes
Other options for your Colorado, Canyon, or I-Series
Here are some other smart ideas for your Chevy Colorado, GMC Canyon, or Isuzu I-Series pickup.
Rear-view camera
These are mid-sized trucks, but they can still be a handful in tight parking spots. A rear-view camera will enhance your safety and peace of mind.
Add an amplifier
If you're tired of road noise in your truck, a 4-channel amplifier will help you overcome it. You'll be able to hear your music clearly, even at highway speeds. Learn more about adding amps to your system in our Car Amplifier Buying Guide.
Install speaker baffles
We frequently suggest speaker baffles for other vehicles, but for these trucks, we strongly recommend them. Those doors can waste a lot of great sound, and this is an inexpensive way to rein it back in. These foam baffles are easy to install, and they'll give you improved performance while also protecting your speakers.
Protect your stuff with a security system
Installing a security system in your truck won't be easy (security systems rarely are), but it's definitely a good idea. Our Crutchfield Advisors can help figure out what you need to get the job done, but we usually recommend taking your car and new gear to a professional installer.
Let's get started!
Ready to shop? Use our vehicle selector to find the gear that will fit your car or truck. If you have questions of your own, give us a shout via phone, chat, or email
Comments (3)
Please share your thoughts below.


Andrew from Philadelphia
Posted on 5/19/2021
I ordered JBL components and used the free recommended wiring harnesses for both the woofer and tweeter. This was super easy and it sounds fine to me, but I'm left with the crossover, which I was not able to incorporate with the supplied harnesses. Is it fine, long term for the health of the tweeter to forgo the cross over, if using the factory tweeter wires? Is there already a crossover or equivalent from the factory?
Jon Paul from Crutchfield
on 5/19/2021
Nicholas Ziems from Detroit
Posted on 10/15/2020
Replacing the factory stereo can result in your truck activating its security lock feature. This is a security system in the trucks that prevents the engine from being able to turn over and start. I have purchased a new stereo and plug and play harness from Crutchfield. And as a result my truck has securely locked itself from running the engine. GM has informed me that the fix is a servicing at a dealership and there will be an out of pocket fee. So make sure to budget the possible cost of having your truck towed and then serviced (or unlocked) for simply replacing the stereo. I wish I would have been educated about this before investing hundreds of dollars into a stereo.
Jon Paul from Crutchfield
on 10/19/2020
RUDOLPH m PARKINSON from ROYAL PALM BEACH
Posted on 3/3/2019
what other brand comes with a back up system
Jon Paul from Crutchfield
on 3/4/2019