
How to tune your car audio system
Expert tips to make your music sound better

W
hether you're a car audio newcomer or a seasoned competitor, there's nothing quite like adding new audio equipment to your vehicle. However, it can be disappointing when your carefully designed system doesn't sound the way you expected it to. But don't lose your cool — spend some time tuning your system before you go back to the drawing board.
Our car audio tuning guide
This guide contains tips and suggestions for maximizing your existing or future car stereo system's potential. We also point you to some of our other articles for more in-depth sound tweaking.
Check speaker phase
The speakers in your system should all be firing in phase — simply put, all the cones should be moving out and in at the same time. If they're not, you lose bass response, which makes your system sound anemic and unfocused. It's important to check all your speakers, even if your system was professionally installed.
The 5-minute phase check
To determine if a pair of speakers in your vehicle are in phase, listen to some bass-heavy music with your stereo's balance control all the way to one side. Now return the balance control to the center — you should hear significantly more bass. If you don't, your speakers are out of phase. Switch the positive and negative leads on a single speaker, and try again. If you hear more bass, leave it! Use this method to check the front and rear speakers independently.
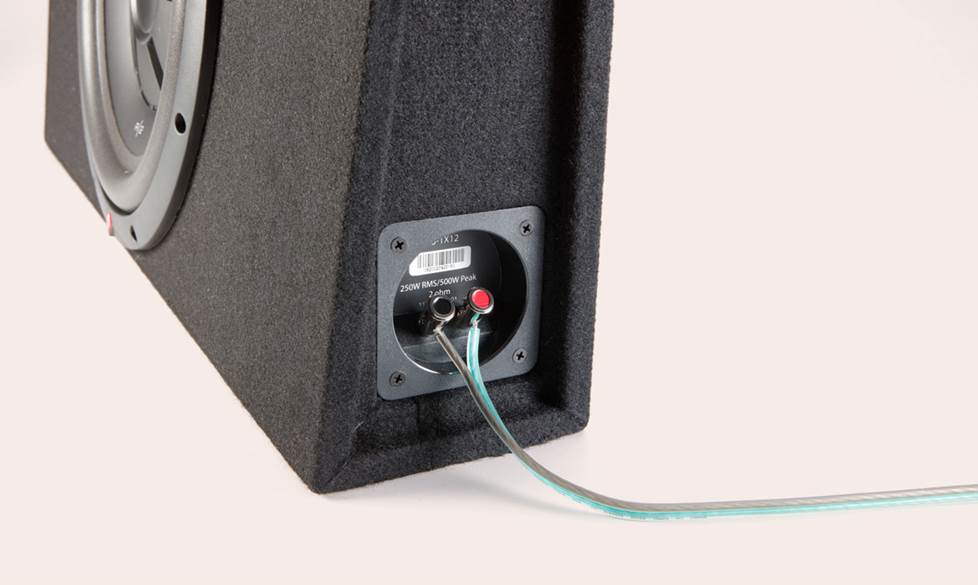
The same suggestion holds true for your subwoofer system. If your amp has a phase switch, try it. If the bass increases, you're good! If it doesn't or that doesn't help, reverse the speaker wires going to your sub and listen for a change in bass response. Again, if it gets louder, leave it alone. Another tip — always make sure that multiple subs are wired in phase with each other.
Tune your stereo and speakers
Now that you know your speakers are all working together, adjust the stereo settings so that they give you a balanced sound.
Start with the EQ, tone controls, balance, and fade all set to the middle or flat. Turn your subwoofer off.
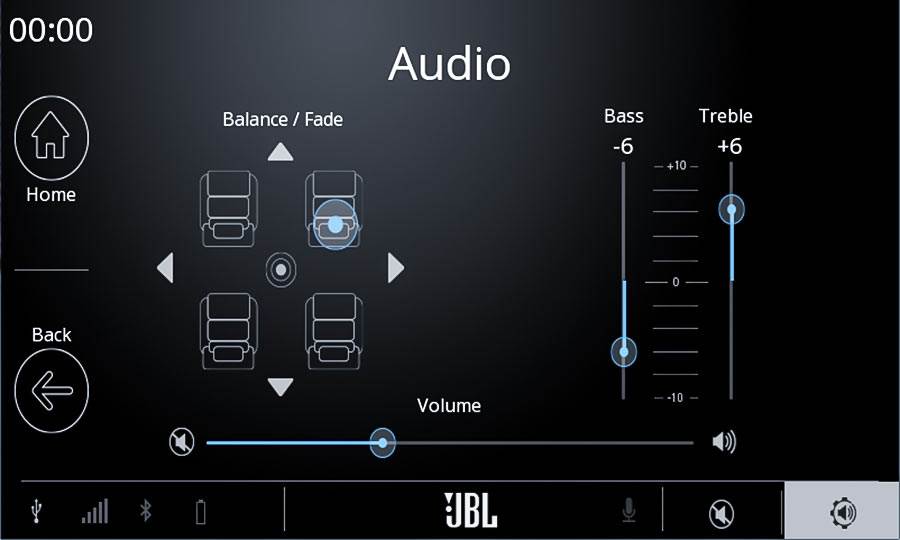
Set the left-to-right balance
Tune your receiver's fade control until the music comes out of the front speakers only. Then adjust the left-to-right balance to your satisfaction. Note where that setting is. Then do the same with the rear speakers. If the balance settings for the front speakers and the rear speakers are the same, leave them. If they're different, set the balance to a compromise between the two settings.
Set the front-to-rear fade
Adjust your receiver's fade control all the way to the front again. Slowly bring up the rear volume with the fade control until your music has a pleasing depth, but still sounds like it's generally coming from in front of you.
Some receivers let you control the tone differences between the front and rear speakers. If yours can do this, tune your rear speakers to have a little less treble than your front speakers. This ensures that the music sounds like it's coming from the front, even when the volume is high. (Human hearing locates high notes better than low notes.)
Listen to the tonal qualities of your music
Now sit and listen to some of your favorite music for a few minutes. Play a mix of musical styles and artists. Are the high notes, the mid-range notes, and the low notes all there? Are they in balance? Determine what, if anything, is wrong with the tone before trying to adjust it.

Adjusting your subwoofer
Now it’s time for the details. It may be tempting to crank up the bass on your receiver, especially if you've just installed a sub. But it'll sound better if you take the time to balance the the subwoofer's bass with your other speakers.
Again, start with the stereo's equalizer set flat — all tone controls at "0" and no EQ curve engaged. With the subwoofer off, turn some familiar music up to a moderate listening level, then slowly increase the subwoofer output until you hit the "sweet spot" — the place where the bass really kicks in without overwhelming the rest of the music.
If the bass sounds like it's coming from behind you, lower the subwoofer amp's crossover point to "de-localize" the bass. If your stereo and amp don't have adjustable crossovers, try repositioning the subwoofer. For example, if the subwoofer is firing toward the rear, turn it around so it fires forward or sideways. Remember to check your phase again when the sub is in its final position.
When you're finished, all the bass notes should punch out at an even volume level. If you hear bass notes dropping out or booming, check your phase and experiment with different crossover points until it's smoothed out. Once your sub is tuned properly, you can use your receiver's equalization controls to make minor adjustments.
We also have a popular, more-detailed article that will guide you through tuning your subwoofers.
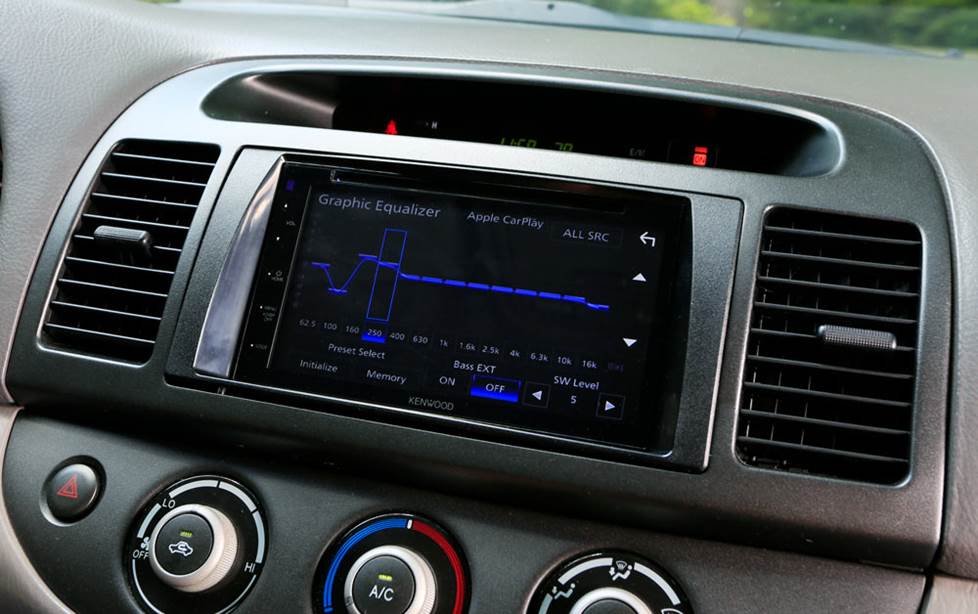
A built-in equalizer is a big help in tuning your system
Setting your equalizer
When you get around to playing with the EQ, remember to make small adjustments where you need them most. For example, instead of cranking the bass way up to increase your system's impact, raise the bass a little bit and lower the highs and mids. It's smart to keep equalization to a minimum — pumping up the bass control just robs your system of its effective power.
If your receiver has tone-adjusting (EQ) presets, try each to see if one of them makes the music sound better. If necessary, fine-tune the sound with the receiver's bass, treble, and mid-range controls, or any other EQ adjustments that it has.
Repeat the last two steps using different combinations of presets, bass and treble boosts, and cuts until your music sounds right.
When it's right:
- The bass should sound full without being boomy.
- The highs should be crisp, but not shrill.
- The mid-range should be smooth and clear.
If you spend a lot of time listening and adjusting now, it'll all be worth it later. If your tone settings look a bit extreme, don't worry about it. Trust your ears. Whichever way sounds best to you is the right way to do it.
To learn more about properly using your equalizer, read our article about adjusting your EQ settings.
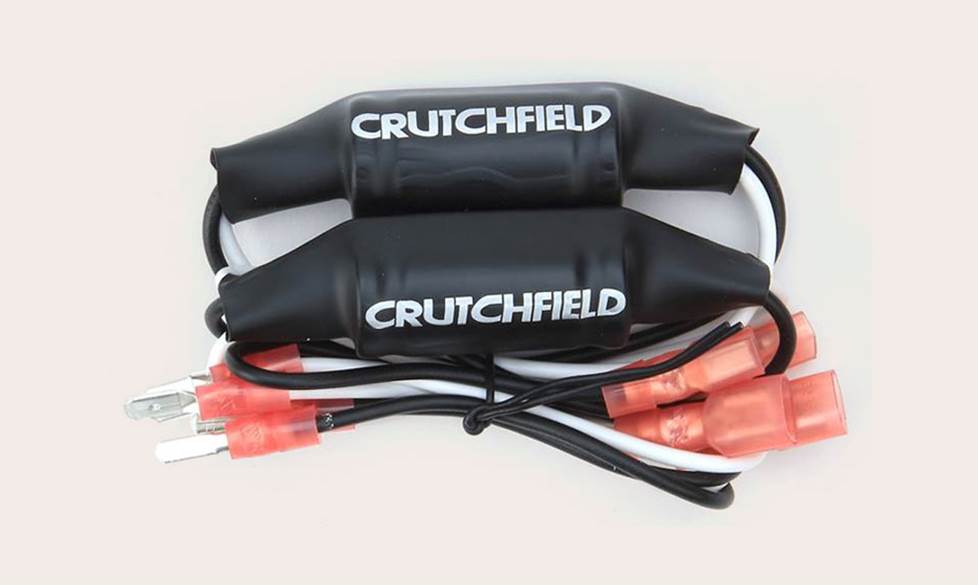
Bass Blockers remove low frequencies, which helps smaller speakers perform better
Tips for creating the perfect soundstage
Your system should create a "soundstage" – when you close your eyes, you should hear the instruments as though they're directly in front of you, arranged from far right to far left, with (if you're listening to a little rock'n'roll) the kick drum, bass guitar, and lead vocal right dead center. When your soundstage is set up correctly, it's like the band is playing a set on your dashboard.
Some vehicles make it tough to establish a strong front soundstage, but there are several workarounds that can help you get the sound you want:
Front speakers mounted low in the doors
Low-mounted front speakers can have a negative impact on soundstaging. Some aftermarket receivers feature independent front/rear tone controls or signal processing that raises the front image, so make those adjustments if you can. Some receivers even offer a DSP mode to seemingly lift the sound of those low speakers for better imaging — JVC's "Sound Lift" feature is a great example.
Or, if possible, install a set of tweeters higher up front and let the low door speakers handle the mid-bass. Once again, our article about adjusting an equalizer can be a big help.
If your car has small front speakers
Install some Bass Blockers. They'll filter out the low frequencies so your speakers will play louder and clearer, bringing the soundstage back in front of you. If your receiver has built-in crossover capability, use its high-pass filter to remove low bass from smaller speakers for improved performance.
Don't ignore your center dash speaker
If your vehicle has one, that is. If you're replacing your dash speakers, buy another speaker (preferably from the same speaker series) to go in the center dash location. This usually means buying a pair of small speakers and only using one, but the extra musical details will be worth it. If you can't find one from the same series, you should make sure that the center replacement speaker is similar in efficiency to the dash speakers
If you have a subwoofer (or larger speakers in the back)
Use your receiver's fader to move the music forward and then turn up the overall level to bring the bass back into play.

The right amount of bass in your music
Great bass isn't just for rap, heavy metal, or reggae fanatics — if you're a fan of classical music or jazz, you might be surprised at the quiet authority a subwoofer brings to your music. Even at low listening levels, a sub can produce richness and impact you wouldn't otherwise hear.
If you don’t currently have a subwoofer, consult our Subwoofer Buying Guide to get started.
Anything missing?
After a few hours of listening, you'll be able to notice any weaknesses in your system.
System sound dull?
Put a set of tweeters or a component speaker system (which includes tweeters and woofers) up front to strengthen your front image and add liveliness to your sound. Many receivers feature signal processing to enrich the sound, or extensive equalization which can do a lot to improve a dull-sounding system. Read more about adding tweeters and component speakers.
Vocals and instruments sound buried?
If your receiver has a midrange control, boost it up a little bit. If it includes a parametric equalizer, try adding a little bump in the 400-1000 Hz range. Replace your rear full-range speakers with high-quality midrange speakers to bring out warmth and detail without adding more sizzle. Installing Dynamat in your vehicle will reduce road noise, which masks crucial midrange details.
System too bright?
If your front speakers have swiveling tweeters, aim them away from you. If you have installed component tweeters, check the crossovers for output level switching — a drop of 3 dB can make a huge difference in the way your tweeters match up to the rest of the system. Experiment with your receiver's EQ. If that doesn't nail it, consider a receiver with more equalization control or (for an amplified system) an outboard equalizer. Once again, our article about adjusting an equalizer can be a big help.
Plan ahead before you buy
Once you've taken the time to adjust the system, you'll know whether or not you've made smart purchases. Always buy with an eye to the future — you might be saving 40 bucks on your receiver now, but what's the point if it's missing some crucial features you'll need when you expand your system?
If you plan on adding a sub to your system later, spend a little more now and get a multi-channel amp (instead of a 2-channel) so you can power your front speakers and subs with one amp. Oh, and don't install 10-gauge power wire if your ultimate goal is a thumpin' multi-amp system — go with a bigger gauge for future amp upgrade. If you're thinking big, thinking ahead can save you a lot of time and money when you're building the car stereo system of your dreams.
For tips on how to build a great car stereo system in stages, check out this article about our Budget-Friendly Car Audio Buildup. If you need any recommendations, one of our knowledgeable Advisors will be happy to help you find the right gear for your vehicle, or check out our vehicle selector to get started.
Let us help you
For more information on improving the performance of your Crutchfield audio gear, check out some of the articles mentioned above or chat with or call our Advisor team for expert advice.


James
Posted on 5/3/2025
What if your system runs more than audio?
Hector from El Paso
Posted on 8/20/2024
Hello I recently installed a 12 inch sub but the shop has all the highs up front and I can't hear any mids. Only songs with hard bass hit hard. Would a simple (4)4 6.5 speaker replacement do the trick or should I include it with a mini alpine amp
Ben from Somerville
Posted on 1/28/2023
I have a 2021 Lincoln Corsair with the standard Lincoln Premium speakers which consist of 10 speakers . Beside the a woofer and tweeter in each of the 4 doors, I have a subwoofer and center front speaker. Although the front speaker sounds pretty good, it overtakes all the door speakers. I bought a set of Focal RSE165 component speakers for the front door and had them professionally installed. Although I can hear a little difference with the Focals, the front center speaker is still overtaking the rest of the speakers. I have moved the fader to the rear position but feel it lowers the Foal speakers. Any suggestion. Thanks.
Chris Lemieux from Manchester
Posted on 7/13/2021
Great article here, my 2016 Silverado single cab has all new gear from mostly crutchfield, here's what's installed & my 2 issues I am having! alpine ILX-207 with the TuneIt app, infinity kappa 6x9 components in the doors, infinity kappa plate separates in the rear pillars, kappa tweeters& crossovers in the dash , custom built box for 2 10" JL audio 10tw3-4 subs sealed , JL audio rd1500-1 & the JL audio rd400-4 , all new wiring rca battery cables & fuses, very impressed with how loud this system is but I noticed if I turn down the volume to zero, roll both windows up & turn the volume up to the first notch I hear a humming noise coming from the rd400-4, double checked all wiring even installed a different amp which did not hum, maybe defective unit? Also I asked you if you knew any professional tuners in my area but you recommended local installers which was weird! I am no novice But I did pent over 3000$ on this set up & I would like a recommendation of a local professional tuner with DTA capabilities? I just want the best sound out of my installed system to showcase it a little bit & enjoy my hour ride to work all week! Thanks for your time & response! Chris
Alexander H. from Crutchfield
on 7/16/2021
Recharged95 from Dc
Posted on 9/17/2020
Intrigued. I've used my fader to bring my components forward for decent front stage, but I noticed when I raise the subwoofer crossover point from 80 to 120hz the bass feels like it moves forward too, opposite of what is said. 80hz definitely sounds like rear bias, but if I throw the bass under 60hz is becomes more muted, but deeper which makes sense. Yes I have 5x7 woofers aka mids in the front doors.
Eliezer Serrano from Cape Coral
Posted on 9/14/2020
Im using an external 7 band equalizer to separate my subwoofer amp, my front amp, and rear amp. Should I leave the radio eq flat and only work with the external eq settings? Im using 4 polk audio 6x9s that I bought from you. Two are my front and the other two are my rear. Then one 12 inch sub in a ported box. I ended up using the HP filter on both amps front and rear because it was getting too much bass. Any tips?
Alexander H. from Crutchfield
on 9/16/2020
Vincent from Irvine
Posted on 7/26/2020
Is it recommended to adjust EQ settings in the car stereo or music app? Should one be flat and one adjusted to my liking? Or both adjusted?
Dave Delamere from Crutchfield
on 7/28/2020
Raul Salinas from dallas
Posted on 7/2/2020
After reading your article How to tune up..., decided it was time to reach out for an expert's advice. I replaced my factory stereo with a Kenwood DDX6906s and also upgraded my factory speakers with Kenwood KFC-1696PS in both front & rear with baffles, have no sub nor amp installed. When I raise volume and get past half way sound starts to get distorted, where should I start troubleshooting? I have double checked all wiring, I did not see any issue there as well your items mentioned in this article. Does it mean I have to add an amp to resolve? Please seeking your professional advise and direction in getting my system up & performing where it should be!
Alexander H. from Crutchfield
on 7/7/2020
Sal from San Diego
Posted on 5/11/2020
How come the left side of my car has more powerful sound because it's a big difference, the low side I hear no bass, appreciate some help please
Alexander H. from Crutchfield
on 5/12/2020
Gene from Bloomingtion, IN
Posted on 11/27/2019
Since the front door speakers are facing each other, wouldn't it logically make sense to purposefully wire them out of phase with each other?