Crossover/equalizer installation guide
Tips for a successful install


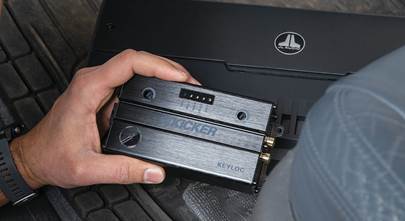
Alpine PXE-C60-60 digital signal processor
This installation guide offers examples of crossover and equalizer (EQ) installation types and suggested system layouts. The installation of your crossover or EQ will depend on the make and body style of your vehicle as well as the equipment purchased.
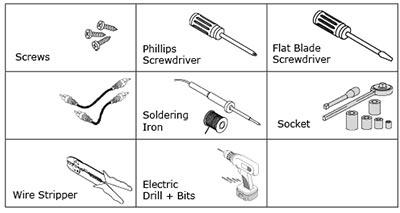
Tools needed, depending on vehicle
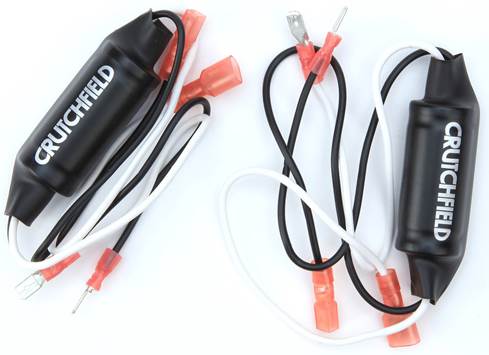
A note about wiring: In addition to the tools listed above, your equalizer or active crossover installation will require power and ground wiring, plus RCA cables, terminals, and a remote turn-on lead. The easiest way to get all of these items is in an amplifier wiring kit, available at Crutchfield.
You can also download a pdf of the Crossover/EQ Installation Guide. Note: To view this file, you will need the Adobe Acrobat PDF reader (free download).

The passive crossover from a set of component speakers
Crossovers
Passive crossovers:
A passive crossover steps into the signal path after the amplification. It's a capacitor or coil usually installed right on your speaker lead. A passive crossover comes with every pair of drivers in a set of components, sometimes mounted on the speaker's frame.
Crutchfield also carries passive high-pass crossovers, called Bass Blockers, that clean up the sound of midrange speakers and tweeters by removing the low frequencies. They get installed by the speakers and use the factory wiring with standard quick-slide connectors.

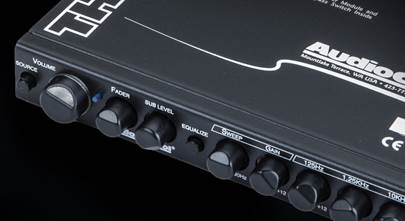
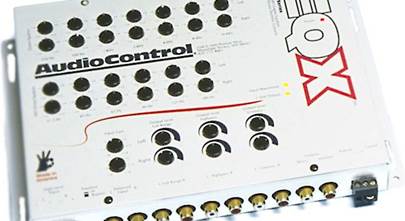
AudioControl DM-810 processor
Active crossovers:
Installing an active crossover requires a little more work. You have to connect 12-volt power, ground, and a turn-on lead. The active crossover gets installed between your receiver and your amplifier. (Many active crossovers have both speaker-level and preamp inputs, so they can usually accommodate either type of connection.)
Equalizers
Like a crossover, the equalizer gets installed between your receiver and your amplifier. And like a crossover, an equalizer needs power, ground, and turn-on wires. You'll find equalizers that are designed to be installed in the dash, above or below your receiver. These might require custom installation work. Other equalizers are designed to be mounted in a remote location, like the trunk. Either way, the wiring connections required will be the same. To install:
1. Installing (active crossover or equalizer):
A remote-mount equalizer or crossover can be securely mounted with just a few screws. Anywhere between the receiver and the amp is fine. Most people mount the device in the trunk near their amp, especially if you have more than one amp. This also makes it easier to add additional amps later. You should mount it where it will be easy to get to so that you can make adjustments without too much trouble. Don't mount your equalizer or crossover directly on steel — you will invite noise problems. Instead, install it on a non-conductive board and attach the board to the car body (or use rubber grommets under the screws to isolate the chassis).
Locate the remote turn-on lead behind your radio (usually a blue wire).
Connect the turn-on lead from your amplifier wiring kit to the blue wire. You can wrap the bare wire ends together and cover with electrical tape, or use solder.
2. Making the power connections:
- To obtain 12-volt power: Cut a length of small-gauge cable (16 gauge is typically sufficient) long enough to reach from the EQ or crossover location to your vehicle's fuse panel. Strip one end of the wire, and attach it to the device's power input. This may require a crimp-on connector, or bare wire might be sufficient, depending on the equipment you're installing. Route the wire from the device's location to your car's fuse panel. Using a fuse tap, connect the wire to a source of switched 12V power.
- To ground the equalizer or crossover: Remove a bolt near the mounting location. Crimp a ring terminal to one end of a length of small-gauge wire, and then bolt the terminal tightly to the vehicle's metal chassis. Scrape away any paint and clean the bolt location thoroughly. If you can't find a convenient ground screw or bolt, drill a hole for one — be careful not to drill into the gas tank or a gas or brake line.
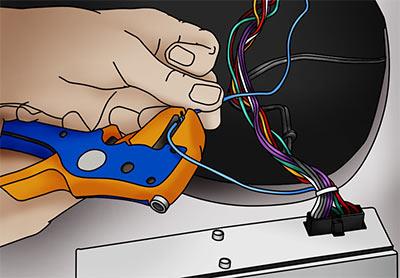
- Making the turn-on connection: In most cases, you can tap into your in-dash receiver's amp turn-on lead to get a turn-on signal for your device. Remove the receiver from the dash to access the turn-on wire (usually a blue wire). For step-by-step instructions on removing your vehicle's radio, see your vehicle-specific Crutchfield MasterSheet™, or read our In-Dash Receiver Installation Guide. Strip the insulation off a small section of this wire coming from the radio. Strip the insulation off another small-gauge cable that's long enough to reach from the in-dash receiver to the EQ or crossover, then connect the two with crimp caps or solder. Wrap the solder or crimp connection with electrical tape to guard against a short. Using wire ties to secure the wire, route the turn-on lead behind your dash all the way to the mounting location.
3. Making the signal connections:
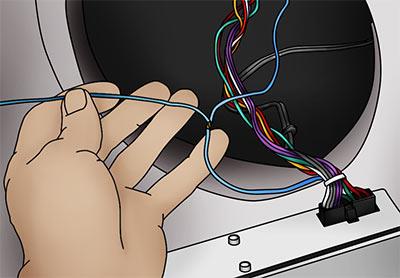
In most cases, you'll be routing RCA cables from your in-dash receiver's preamp outputs to the inputs of your EQ or crossover. While your receiver is out of the dash to access the turn on lead, connect a set of RCA patch cables (long enough to reach your crossover in its mounting location) to these outputs, taping them together so they won't come apart. Route the patch cables (again using wire ties) behind the dash, and to the crossover mounting location.
The best of both worlds
If you plan on using both an equalizer and a crossover together, the order of connection should be:
- The receiver's outputs go to the equalizer's inputs
- The equalizer's outputs go to the crossover's inputs
- The crossover's outputs go to your amplifier's inputs
-
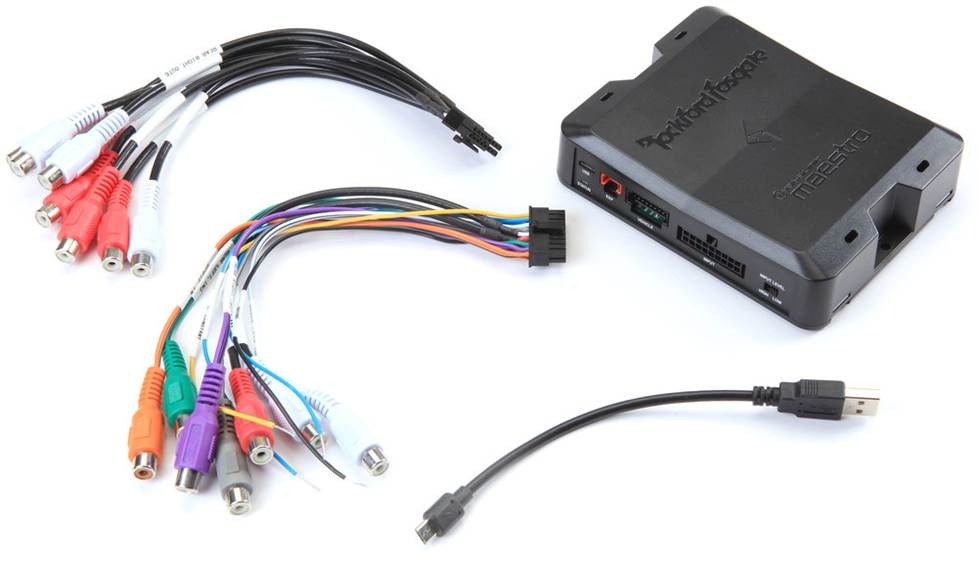
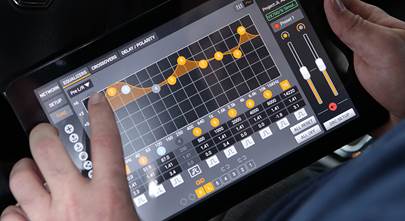
Rockford Fosgate DSR-1 processor with Maestro AR amp replacement module and connectors.


Timothy from Northglenn
Posted on 6/7/2026
I've installed kicker is series 2 way components up front that have passive inline crossovers included, and coaxial 2 way speakers in the rear. I have an alpine optim 6 dsp sending signal to a 4 channel amp. Do I set active crossovers on the dsp as well as use the inline crossovers? If so, would I do this before or after taking the sound measurements for tuning?
Sedrick from Palestine, Texas
Posted on 2/20/2023
Hi Quick question. Does adding a Crossover along side with a EQ give me Any benefits when it comes to My Sub Clearness?
Buck Pomerantz from Crutchfield
on 2/20/2023
William Caylor from Tampa
Posted on 1/30/2023
Not a professional just to be clear. I suggest staying away from external equalizers and crossovers. Spend the money on a nice radio that eliminates all the external equipment. Pioneer radio with network mode is a great option in my opinion. Less equipment to find places to mount. Less wires and rca plugs. Less chances to introduce distortion into your music. Everything you need in one piece of equipment. Makes everything simple if you understand how to wire speakers correctly to amps. Feel free to let me know if I've given bad information.
Buck Pomerantz from Crutchfield
on 1/31/2023
Lewball from Kernersville NC
Posted on 9/15/2022
Hello... 4 ea - JBL Stadium GTO860-c with the 20M midrange components in the four corners of the car (2004 lincoln town car). JBL 122SSI sub (2 ea) in parallel all being driven by a Soundstream RS5.4500D amp. Head unit is a Boss be10ACP-C.... The GTO860-C speakers already have crossovers within their world (a crossover for the woofer & tweeters & that crossover connected to the mid-range crossover. 1) The lincoln has a double din mounting well - The Boss is a single din chassis... Can I still mount a 1/2 din equalizer in the mounting well? 2) looking at the MB Quart MBEQ7B (I like the red/black look of it). It says: a. Half-DIN, 7-Band Preamp EQ With Front/Rear Active Crossover Features b. Line Driver Circuit Delivers 9 Volts Of Preamp Level Signal Through The RCAs c. Master Volume Control Of The SPL-Level For Both Sound Sources d. Selectable Subwoofer Output Frequency: 60Hz, 80Hz, 120Hz e. Frequency Response: 10Hz - 20kHz | Signal to Noise Ratio: >99dB will these specs interfere with my current installation? 3) Is there a better configuration for an equalizer that I should consider? 4) Am I missing anything? Thank You
Buck Pomerantz from Crutchfield
on 9/16/2022
James from Batesville
Posted on 3/1/2022
I have a audiopipe line driver and 7 band EQ I have a taramps 2.6s DSP I have an audiopipe digital base restorer and a soundstream digital base storer. 2 6 farad battery capacitos .. a audiopipe 3000 watt amp for subs a ds18 4500.1 amp for subs and a crunch 1000 amp for door speakers... I have problems with remote turn on I have a relay but having problems installing it... My Eq and Dsp are not getting power.... Can u help me with a wiring diagram so I can wire correctly please... Thank you... Also can you have a 2nd battery just to compliment the first to add power??? Like could I add a small 750 stealth to my existing battery... And have it so my amps aren't connected to small amp? And do I have to have the capacitors run to the battery then to the amp or can I have the capacitors off of a power block not even connected to the amp?
Buck Pomerantz from Crutchfield
on 3/1/2022
Jose from New york
Posted on 1/18/2022
What side fuse do i need for eq and cross over ??
Buck Pomerantz from Crutchfield
on 1/18/2022
Barry Lampke from Hinesburg
Posted on 1/1/2022
I bought a Kenwood KAC-M1824BT from you and love it. Because it has no tone or EQ capabilities, I would like to install an equalizer. It seems like it needs to go between the amp and the speakers, but all I see is speaker wires from the harness. Or should it go on the side with the RCA jacks? Thanks!
Buck Pomerantz from Crutchfield
on 1/3/2022
kurt from Durand
Posted on 11/9/2021
When replacing factory component speakers with component aftermarkets. How is the aftermarket crossover integrated? I assume the signal to the factory speakers is already going through a crossover in the head unit, so adding the aftermarket one seems tricky. Is the signal to the woofer full range from the factory head unit? This is a 2016 Ford Fusion.
Buck Pomerantz from Crutchfield
on 11/9/2021
John Wood from RENTON
Posted on 6/29/2021
Can I use the decks sub rca output and/or rear output on deck to connect more amps while having the decks front rca output go to equalizer? Will it work or no? I understand that the equalizer will not be working on them if so. Thanks John
Buck Pomerantz from Crutchfield
on 6/29/2021
Michael bass from Gig Harbor
Posted on 6/24/2021
I'm having issues getting sound to my d.s. component set. Headunit is a pioneer avh521ex. I have rca from front to the input on a skar ska7eq, then three sets of rca 1 going to my master amp ppi 2600.1 which is strapped to same and then 2 sets going to my midrange amp ppi 1000.4 ( front l,r and rear l,r) I have sound from everything but the drivers side front. All connections are proper and shielded, heat shrinked,ect...
Buck Pomerantz from Crutchfield
on 6/24/2021