
How to choose a sound bar for your TV
Find the best sound bar for your space and budget

In this article: We'll talk about the benefits of adding a sound bar to your TV and cover everything you need to know to find the right one, including...
- Choosing the right sound bar for your space
- Key sound bar features to look for
- Options for music
- Convenient control options
...we'll also explain how to connect your sound bar to your TV and other A/V components.
Are you tired of getting lackluster sound from your TV's built-in speakers? Adding a sound bar is one of the easiest ways to bring high-quality sound to TV and movies. But with all the available options, how do you know which one is best for you?
I recently went on the hunt for a sound bar myself and picked up a few tricks along the way. Let's dig in.
What are the benefits of a sound bar?
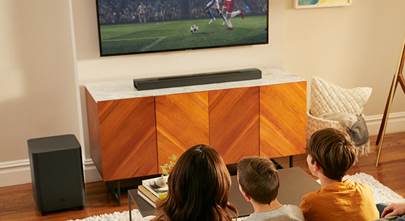
Sound bars neatly consolidate several speakers into a single slim cabinet that can fit under most TVs. Their built-in speakers, or "drivers," tend to be larger and higher quality than the speakers built into the average TV.
Sound bars provide a serious improvement to TV sound with a simple, low-profile installation.
Sound bars are often a less expensive route to immersive surround sound than a traditional home theater system. And you generally only need to deal with a couple wires: an A/V cable connected directly to your TV and a power cord plugged into an AC outlet.
But one of the biggest reasons to upgrade to a sound bar is so you can finally catch those hard-to-hear lines. Voices frequently get lost in the sound mix, especially coming out of a modern TV's tiny speakers. A sound bar can help fix that problem.
A sound bar can also pull double duty as a music player. Most models let you stream music from your phone via Bluetooth or Wi-Fi. And some can even be part of a wireless multi-room music system when you use them with compatible wireless speakers and components.
To narrow down your options, it helps to ask yourself a few questions. Do you want a cinematic movie experience at home, or do you just want to hear the TV more clearly? Do you plan on using your sound bar for music? And is it going in your living room, or will you be using it in a smaller space?
We’ll cover what you need to know to make the right choice in the sections below.
What size should you get?
Generally speaking, the bigger the bar, the bigger the sound. If you have a large space, like a living room with an open floorplan, you'll want a bigger sound bar. And on the flipside, if you have a smaller space, like a bedroom, you can get great sound with a more modestly sized sound bar.
Sound bar placement tips
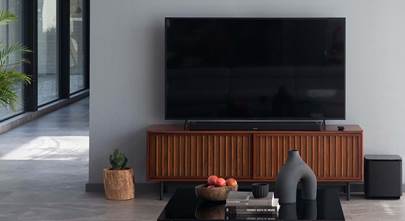
Placing a sound bar directly under your TV on a cabinet or table is the simplest way to go. The bar will be pretty close to your TV, so you won't need a particularly long cable. You'll just want to double-check the bar's dimensions to make sure it will fit. (This is exactly how I have mine set up.)
Pay attention to the height spec on any sound bar you're considering. If your bar is too tall, it will obscure the bottom portion of your screen. The bar should be shorter than your TV's base.


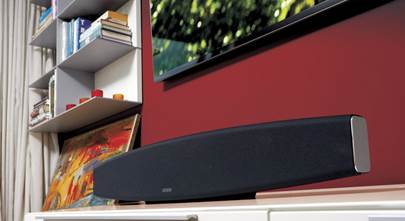
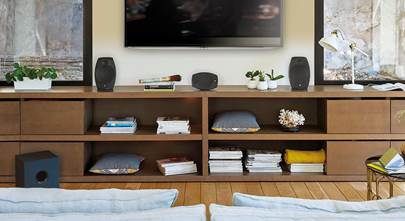
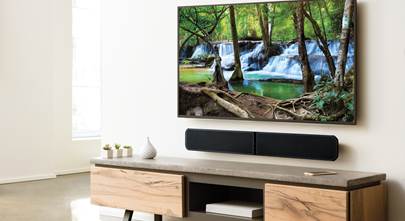
Most sound bars can slide right in front of your TV's base or be mounted on the wall under your TV for a sleek-looking setup.
If your TV is mounted on a wall, you can always place your sound bar on a cabinet below it. But if you don't have a table or cabinet wide enough for it or just prefer a cleaner look, wall-mounting your sound bar is great for a tidy installation. And it's easier than you might think.
Sound bar features to look for
Sound bars might all seem relatively similar at a glance, but they vary a lot in pricing and features. Here are some important differentiators to help you wade through all the choices.

Sound bars like the popular Sonos Arc Ultra deliver spacious home theater sound and a bevy of helpful smart features.
Dialogue enhancement
Even the most basic sound bar can help you hear dialogue better. I hate missing important lines, so if you have trouble hearing voices over background sounds like me, look for a sound bar with dialogue enhancement. This features makes voices clearer and more prominent in the mix. A sound bar with a dedicated center channel can also highlight voices by playing them right in the center of the bar.
Do you need a subwoofer?
Any sound system can benefit from powerful bass. Few things bump up your home theater immersion like low-frequency impact to match the action onscreen, whether it's the rumble of an explosion or the “thud” of a dinosaur's footstomp. That feeling is exactly why a subwoofer is a must for me. It's not just for movies either, a sub will make your music sound fuller and more dynamic, too.
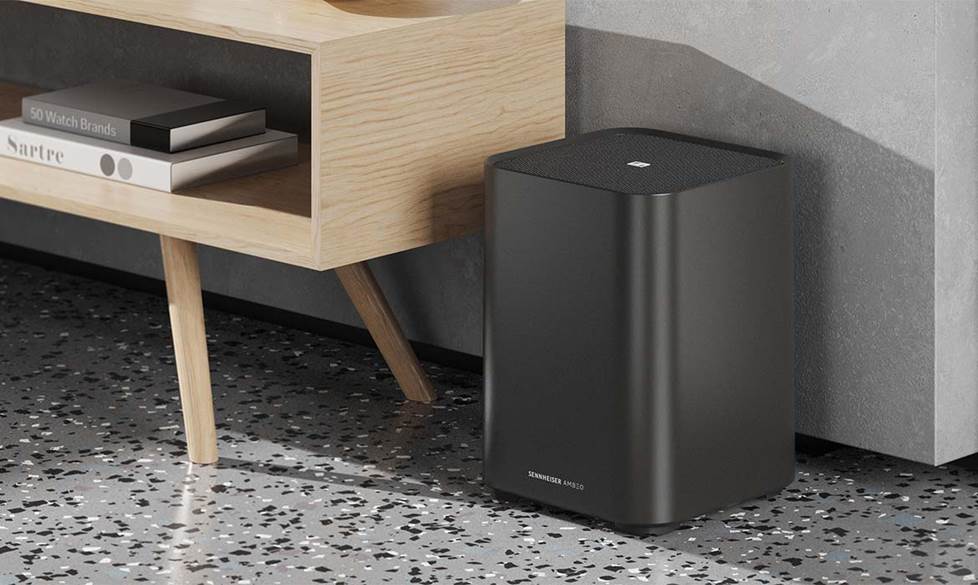
You can place your sub just about anywhere near a wall outlet within wireless range of your sound bar.
Over half of the sound bars we carry include a separate wireless subwoofer. And others are compatible with an optional wireless subwoofer that you can buy at the same time or pick up later. If you've got your own powered subwoofer or have your eye on a particular model, a sound bar with a subwoofer output will let you hook up a sub of your choice.
If you're not concerned with adding bass to your system, you can save money by choosing a sound bar without a separate subwoofer.
Surround sound effects
In a traditional home theater, a receiver decodes surround sound signals from movies and TV and sends different sounds to each speaker in the system. This separation of sound effects into channels is called “discrete” surround sound. Check out our article on Dolby and DTS to learn about the different surround sound formats.
Sound bars can also decode surround sound signals, but different bars reproduce the effects in different ways.
Sound bars with virtual surround sound use special processing to bounce sound off nearby surfaces, like your walls or ceiling. This makes it seem like sound effects are coming from all sides when they’re actually coming from the front of the room.
Wireless rear speakers for true surround sound
For real wraparound surround effects, look for a sound bar that includes or allows you to add wireless rear speakers. These systems can give you discrete surround sound, or a more convincing combo of virtual and discrete surround effects. I ended up picking up a bar that included wireless surrounds, precisely because I wanted the most immersive experience I could get with a sound bar system.
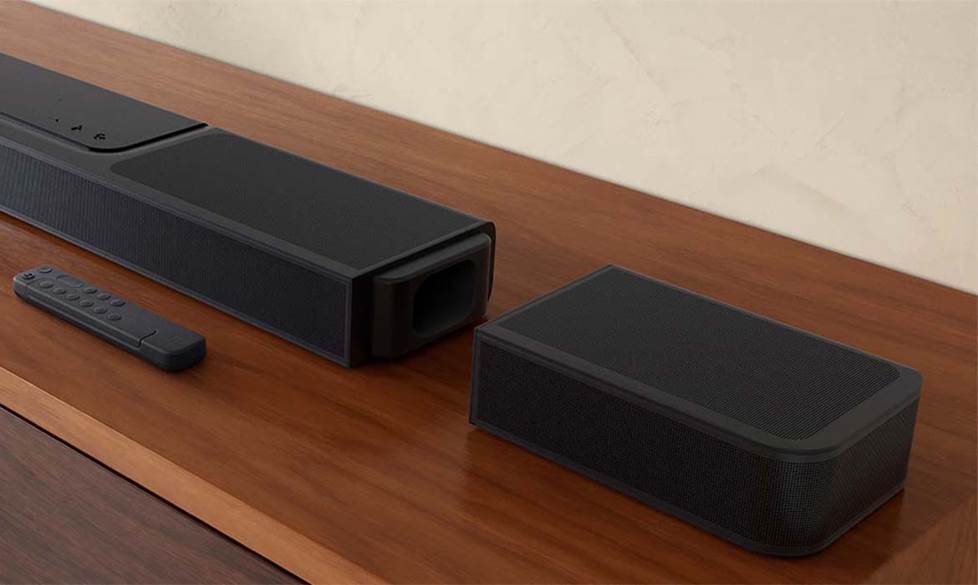
JBL offers some sound bars with 100% wire-free rear speakers that recharge when attached to the main unit.
Some sound bars come with both a wireless sub and wireless rear speakers, and others allow you to add them on when you're ready to expand. If you're looking to pick up everything you need at once, we frequently bundle compatible bars, subs, and rear speakers into a single package.
Dolby Atmos sound bars
Dolby Atmos and DTS:X are immersive home theater surround sound formats that use overhead effects and precise placement of sounds to create a more realistic sense of space, with sounds coming from where you’d expect them to in real life.

By directing and reflecting sounds off your walls and ceiling Dolby Atmos sound bars can provide surprisingly expansive, immersive sound.
In a receiver-based home theater system, you’d need at least seven speakers placed in precise locations throughout your living room to get true Dolby Atmos surround sound. But since sound bars have been getting in on the action, it’s easier than ever to get those 3D sound effects.
But not all Dolby Atmos sound bars are the same. Some of them can produce discrete Atmos effects, while others can decode Dolby Atmos and reproduce the effects virtually. For the most realistic Atmos experience, look for a sound bar with up-firing drivers. I'm always pushing for deeper immersion, so I focused my own search on bars like these.
If you want 3D surround effects on a budget, look for a sound bar that supports DTS Virtual:X.
Options for music
Sound bars offer great sound for music when you're not watching TV. You can pop on a bumping soundtrack to help inspire you to finally wash the dishes or just relax on the couch to a few dulcet tones after a hard day's work.
Most sound bars support Bluetooth, so you can stream music directly from your phone. But tons of bars also support online music streaming via Wi-Fi or services like Spotify, Pandora, or TIDAL. And if you've got your favorite tunes stashed on a flash drive, lots of models also have a USB input, so you can just plug in and play — some sound bars even support high-res audio playback via USB.
Wireless multi-room music
Sound bars that support wireless multi-room audio are great for music lovers. Many brands offer sound bars that can communicate with other music players, powered speakers, and receivers over a network connection.
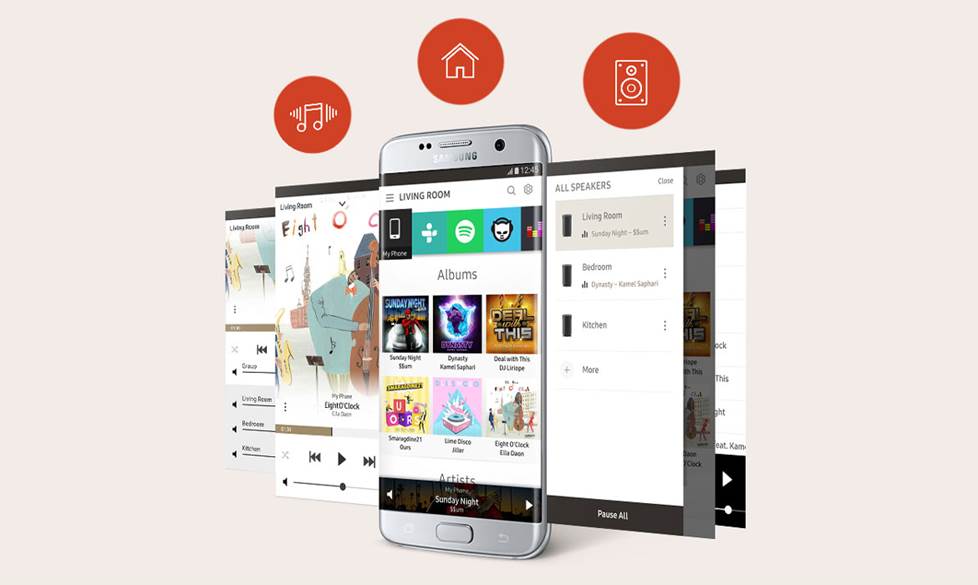
Wireless multi-room audio systems let you create different zones and control what's playing in each room with an app on your phone or by using voice commands.
A wireless multi-room system gives you a ton of options to add equipment and fill your home with music as your time and budget allow. You can jam out to your favorite tune in the kitchen while washing the dishes and play the same song (or something completely different) in the living room for the rest of the household. And you can control everything through a single streamlined app.
Here's the current list of wireless multi-room music platforms that work with sound bars:
- Sonos
- HEOS
- Yamaha MusicCast
- Bluesound
- Bowers & Wilkins Formation
- Chromecast built-in
- Apple AirPlay 2
Convenient control options
Most sound bars come with a remote, but lots of models can learn to recognize commands from your TV remote. Many bars can also be controlled by a smartphone app, which can also make it easy to dive into your audio settings. I personally prefer to use my TV remote. It keeps thing simple, and I don't have to worry about keeping track of a second remote. With a few kids in the house, it's already hard enough to keep track of the one remote!
There are also sound bars that support voice control so you can go totally hands-free. If you already have a voice control assistant in your home, there are bars that support either Google Assistant or Amazon Alexa. But there are also sound bars with microphones built in that can do voice control without the help of an external smart device. These smart sound bars generally come with Google Assistant or Amazon Alexa already built in.
What kinds of connections do you need?
Sound bars tend to be pretty easy to set up, but depending on what other gear you've got in your system, you might have a few extra considerations. We'll run through the most common types of connections you might need to make below. Check out our full sound bar connection and setup guide for more details.
Connect to your TV or projector with HDMI
The most common way to connect a sound bar to a TV is via a high-definition HDMI cable. If you're wall-mounting your sound bar, you can run your HDMI cable through your wall for the cleanest-looking installation. You'll want an HDMI cable that's in-wall rated as a safety precaution.
Alternatively, you can avoid having all sorts of dangling wires by using a cable cover alongside other types of cable management like ties and wraps for a tidy installation.
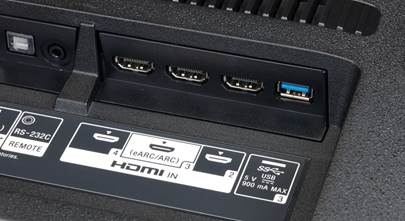
ARC vs eARC
If your sound bar has ARC (Audio Return Channel) or eARC (enhanced Audio Return Channel), you only need a single HDMI cable running from the back of your sound bar to your compatible TV. ARC and eARC enabled HDMI ports allow two-way communication between your bar and the TV for a simplified setup.
ARC lets you pass standard audio formats like Dolby Digital or DTS with just one HDMI cable. But if you want to take advantage of more advanced audio formats you'll want a sound bar with an eARC port. This enhanced version of ARC has a higher bandwidth and can pass uncompressed multi-channel audio formats like Dolby Atmos and DTS:X.
I love a simple installation, so I got a sound bar system that supported eARC. I hooked up to AC power, plugged in an HDMI cable, and was basically done. What's not to love?
Head over to our HDMI cables buying guide for more information and tips on getting the right cables.
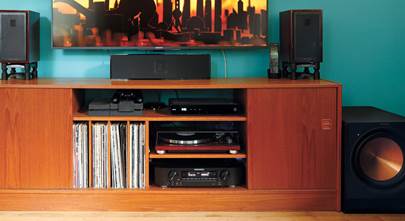
Connecting A/V components to your sound bar
If you have other components, like a Blu-ray player or gaming console, and you want to connect them to your sound bar, look for a model with multiple HDMI inputs.
Connecting your A/V components to your sound bar gives you a cleaner installation with just one cable to plug into your TV. It can also be more convenient since your sound bar is likely closer to your other gear than your TV is.
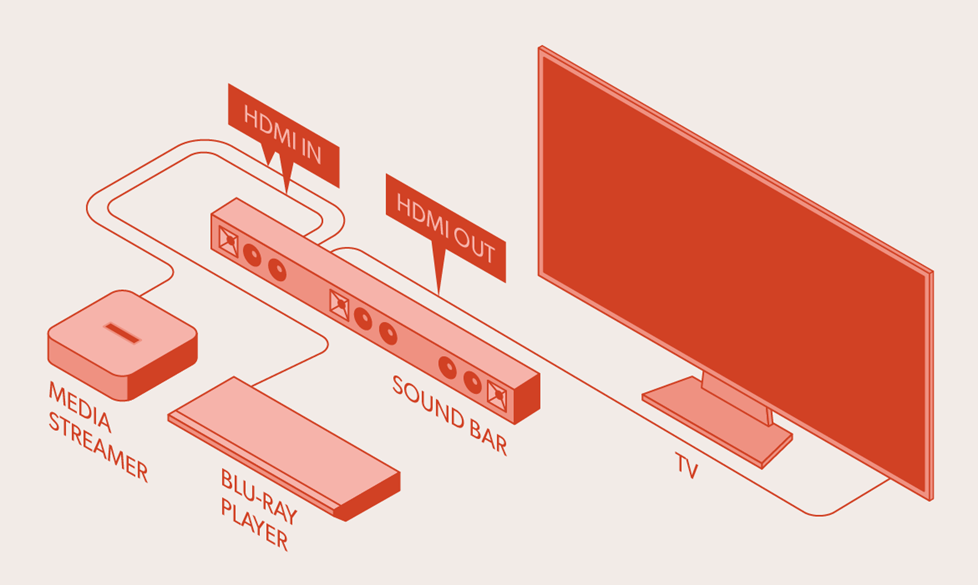
A sound bar with extra HDMI inputs can act as a hub for other A/V components in your system.
Keep in mind that in this kind of setup your video quality will depend on the bandwidth supported by your bar's video passthrough. If you want to enjoy the full benefits of 4K picture quality, make sure your sound bar has 4K passthrough. And if you're a gamer looking to take full advantage of a powerful PC or a next-gen console, you'll want a sound bar that can support passthrough for 4K at 120 Hz.
Connections for older TVs
Do you have an older TV without an HDMI port? Look for a sound bar with an optical digital input. While HDMI can pass the highest-resolution audio formats, a sound bar with an optical digital input can still pass most standard audio formats.
Can you connect a sound bar to a receiver?
Most sound bars are "powered," which means they have built-in amplification. They can connect directly to your TV, which makes them a great solution for a simple setup that doesn't require a receiver.
Passive sound bars require a home theater receiver, just like most home theater speakers. Receivers usually have more powerful amplifiers than the ones built into most powered sound bars. And they also provide advanced sound processing, along with additional setup flexibility.
Get started today!
There are tons of great sound bar systems to choose from, and we're here to help. Check out our top sound bar picks for some solid suggestions. And if you need a little guidance to find exactly what you’re looking for, don’t hesitate to get in touch with one of our friendly Advisors.
Free lifetime tech support is included with your Crutchfield purchase.


ARTHUR from HUNTINGTON WOODS
Posted on 8/3/2025
Is broascast tv just 2 chanel?? Must I source from blu ray to get sub woffer and surround effect????
Colin M. from Crutchfield
on 8/5/2025
Mike struewing from Walton ky
Posted on 2/9/2023
Can I use a Bose cinemate speakers and a sub woofer on my new flat screen tv??? Or with a sound bar??? I used it on my old tv....
Colin M. from Crutchfield
on 2/9/2023
Ferd from Ben Lomond
Posted on 1/13/2023
I have a very simple requirement. I have a Samsung UN46D6000 TV, which has an HDMI ARC port. The speakers are blown. I want a simple 2.1 channel soundbar that I can control the volume of which from my TV/Caimcast remote. I do NOT want to have to use a separate soundbar remote. And don't care about a subwoofer. No descriptions I see explicitly say "control volume with TV remote using HDMI ARC". Is that what I need?
Colin M. from Crutchfield
on 2/9/2023
Noble from San Diego
Posted on 1/8/2023
Nice! Thank you for sharing informative and useful content.
Colin M. from Crutchfield
on 1/12/2023
tai nguyen from allen
Posted on 3/2/2022
What is the best soundbar for a great room with a vaulted ceiling?
Colin M. from Crutchfield
on 3/3/2022
Jerrie from Sarasota
Posted on 2/4/2022
Looking for a sound bar for elderly parents who are hard of hearing. Would like to have 2 side speakers (wireless?) where voice comes through so we don't have to crank the volume up on the whole sound bar.
Colin M. from Crutchfield
on 2/7/2022
Denise Fausett from Philadelphia
Posted on 11/25/2021
Need a sound bar that goes with a Sanyo TV .
Colin M. from Crutchfield
on 12/1/2021
Gary Olson from Bella vista Ar
Posted on 11/6/2021
What sound bar for movies and sports got 65 inch tv a ge want sound bar that I can add on later 800 dollar range
Colin M. from Crutchfield
on 11/8/2021
Robert s Kerr from Jackson
Posted on 4/14/2021
hello, just bought the Klipsch cinema 600 soundbar with surround 3 rear speakers from you guys. i have a Sony XBR-65X950G tv. What settings should i use in the TV for best DD sound to the Cinema 600. I use Xfinity cable for TV service plus stream from TV apps. The Xfinity box also has different sound modes? The box is connect to the TV via HDMI. I plan on using HDMI arc between the TV and Cinema 600.
Colin M. from Crutchfield
on 4/15/2021
Colin M. from Crutchfield
Posted on 12/4/2020
Hi Garry, Not a problem! The Yamaha 209 has an extra HDMI input. You could connect the fire stick there, then use the ARC connection to link up to the TV. As far as placement, we usually recommend having the sound bar lined up directly below the TV. That being said, it couldn't hurt to test out the other placement to see if the sound still works for you. If it doesn't, you can test alternative positions until it feels just right.