


1994-2000 Ford Mustang
How to upgrade the stereo system in your Mustang


In brief: This Crutchfield Research Garage article gives you an overview of your Mustang's stock stereo system and your aftermarket upgrade options. We'll tell you all about:
- The factory stereo system
- Removing the factory radio
- Removing the factory speakers
- Adding more bass
- Other options for your Mustang
Then, use our vehicle selector to find the gear that will fit your Mustang.
Overview of the Ford Mustang
If Helen of Troy was the face that launched a thousand ships, the 1994-2000 Mustang is the car that launched a thousand racing, tuning, and customizing careers. That number might be low, actually, but even if it isn't, there's no denying this Mustang's place in muscle car and motorsports culture.
Even if your well-preserved Mustang's never gotten closer to the racetrack than a spectator parking lot, you're still a Mustang owner, so you obviously appreciate things like performance, functionality, and style. This car has all three in abundance, but the factory stereo systems are well past their primes. If you're ready to pump up the audio performance in your ponycar, you've come to the right place.

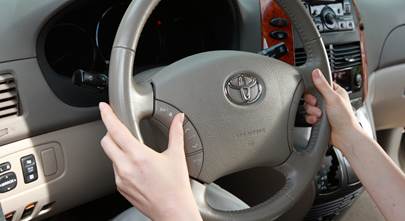
The base radio is a standard-for-the-time AM/FM/cassette deck (Crutchfield Research Photo)
The factory stereo system
The stock receivers ranged from a bare-bones radio all the way to an AM/FM/Cassette deck with a separate CD player in the spot ordinarily occupied by a storage cubby. Whether you have one unit or two to deal with, they're easy to remove and there are plenty of aftermarket receivers to choose from. You won't be able to install a receiver with a fold-down face, though, because there's just no room for it to operate.
If you choose a double-DIN (4" tall) receiver, you'll have to modify the car's subdash to make room for it. And once you've done that, you won't be able re-install the factory radio. It's a one way trip.
When you install a new stereo, you can either bypass the factory amplifier for better fidelity or keep it, which is a simpler installation. To bypass the amp, you'll need to run wiring from the dash to the factory amp. The procedure for connecting the receiver wiring adapter varies according to the type of factory radio the car has.
- If your car has an AM/FM radio, disconnect the wiring harnesses from the rear of the radio and connect them to the receiver wiring adapter that's included at a deep discount with your Crutchfield order.
- Mustangs equipped with a factory AM/FM cassette or CD player will also be equipped with a factory amplifier. To use the stock amp, you'll need an additional adapter (available from Crutchfield). To bypass the factory amp, you'll need to connect an extra speaker harness located on the passenger’s side of the radio opening to the discounted receiver wiring adapter included with your order.
- On cars equipped with the Mach 460 sound system, there are three factory amps, and bypassing them is not an option. You'll need an adapter, which is available from Crutchfield, plus a 12V-to-5V convertor (120AFDI5V) to prevent "turn-on pop" from the factory amps.
If this is confusing or scary, don't worry. We'll make sure you get the parts you need and also give you a steep discount on them if you're buying your new stereo at the same time. We'll also give you detailed instructions to walk you through the installation.
Before you start working on your Mustang, remember to set the parking brake and disconnect the negative battery cable to prevent any electrical short.

The CD player is mounted below the AM/FM receiver (Crutchfield Research Photo)
Removing the factory radio
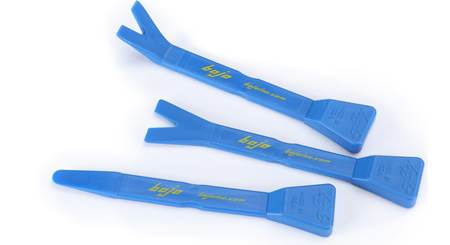
Removing the factory head unit (or units, if your car has the CD player) is very easy. Insert the DIN tools that are included with your stereo purchase into the holes in either side of the factory radio's face. Gently press the tools into the holes (approximately 1") until you hear a "click" from each location. Spread the tools slightly apart and pull the radio from the dash. Disconnect the receiver wiring harness, unplug the antenna lead and remove the radio.
To install the new stereo, you'll start by connecting the receiver wiring adapter included with your stereo. Follow the instructions supplied with the wiring adapter, and if you run into trouble, remember that your Crutchfield purchase includes free lifetime (of the stereo, not you) tech support.
Detailed stereo and speaker removal instructions

If there's a DIN sleeve on your new receiver, remove it, slide the sleeve into the dash opening, and secure it by bending the tabs. Once that's in place, hold the receiver near the dash, connect the receiver wiring adapter to the car's harness and plug in the antenna lead. Slide the receiver all the way into the sleeve, then reconnect the car's battery and test the receiver. If it's working, pop the trim ring back into place and you're good to go.
Tools needed: DIN tools, small flat-blade screwdriver
Read our Car Stereo Buying Guide for shopping tips and advice.
Shop for car stereos that fit your Ford Mustang

The front door speakers are reasonably easy to reach and replace (Crutchfield Research Photo)
Removing the factory speakers
Replacing the speakers isn't hard in these Mustangs, but there are some differences between the coupe and the convertible.

You'll need to remove the door panels to replace the front speakers (Crutchfield Research Photo)
Removing the front door speakers
The stock front speakers, whether they're full-range (base models) or component woofers (Mach 460), can be replaced by 5-1/4" or 6"x8" aftermarket models. You'll need mounting brackets for the smaller ones, and they'll be included with your speaker purchase from Crutchfield.
The Mach 460 system also includes sail panel tweeters that you'll replace as part of your component speaker system installation. Components are recommended for lots of reasons, one of which is that the Mach woofers only receive bass frequencies from the stock amp, so it's just the easiest, best way to go. If you're looking for that amp, it's behind the pocket, below the radio.
You'll need to remove the door panels to replace the woofers, which isn't that hard regardless of whether your car has manual or power windows.
If you're dealing with power windows, you'll start by using a panel tool to pry out the top edge of the power accessory panel, then prying up the bottom of the panel. Remove two Phillips screws from the underside of the switch panel to disconnect the power window and lock switches. You should also disconnect the power mirror switch if you need to. Finally, remove the two Phillips screws exposed when you remove the switch panel.
For cars with crank windows, things are a bit easier. Just use a (clean) shop rag in a "shoeshine" motion to release the "C" clip on the rear of the crank until it's loose enough to remove.

The panel removal process begins with the removal of the sail panels (Crutchfield Research Photo)
From here on out, everything's pretty much the same. You'll need to pry off the sail panel (starting at the top) for all cars, whether there's a tweeter behind it or not. We'll talk more about the tweeters below.
With the sail panel out of the way, pry out the press-pin from the lower front edge of the door panel. Carefully pry out the door release trim, then slide the door panel upward to release it. Disconnect the wiring harness from the rear of the panel, and remove the panel.
From here, all you need to do is remove the four Phillips screws securing the speaker to the door. Remove the old speaker, then set it aside and get to work installing the new one. Once both of them are installed, test them out and make sure they're working properly. If they are, and if the windows and locks are, too, start putting the doors back together using the hardware you just removed.
Tools needed: Phillips screwdriver, small flat-blade screwdriver, panel tool, Torx T15 driver, shop rag (manual windows)

The Mach 460 system includes tweeters in the sail panels (Crutchfield Research Photo)
Removing the sail panel tweeters
The Mach 460 system's component speaker set includes 2" factory tweeters in the door sail panels. These cone-type tweeters are in a small, removable enclosure that can be modified to accept aftermarket tweeters. In some cases, you may need to use backstraps, hot glue, or silicone to secure them, though.
That's not hard to do, and it's well worth the work. Removing them is the really easy part, though. Pry the grille off, remove two Torx T-15 screws securing the tweeter to the enclosure, and disconnect everything.
Tools needed: Phillips screwdriver, small flat-blade screwdriver, panel tool, Torx T15 driver, shop rag (manual windows)

Replacing the coupe's rear deck speakers means working in tight spaces (Crutchfield Research Photo)
Removing the rear speakers
Whether you have a coupe or a convertible Mustang, rear speaker replacement involves a healthy number of steps. The upside is that none of those steps are particularly difficult. The key in either case is to work patiently and stay organized.
Coupe: The coupe's rear deck speakers can be replaced with 6"x8" or (with the included brackets) 5-1/4" aftermarket models. Whether those are full-range or components mostly depends on your car.
You'll start by folding down the rear seat back. Pry open the seat belt hanger covers and remove one Torx T50 bolt from each hanger. Remove the clip below each hanger bolt opening by pressing the center of the clip in, then prying the clip out. Next, remove one Phillips screw from each coat hook and remove the hooks.
Pry outward on the upper rear side panel to release the retaining clips, then move the panel out of the way. Remove three 10mm bolts from the upper rear seat trim then slide the trim upward and remove it. Next, pry out the two press pins from the front edge of the carpeted rear deck panel, then lift and pull the deck panel toward the front of vehicle and remove it.
That'll expose the speakers, and the exact ins and outs of what you do here will depend on which speaker system you're dealing with. The base model is obviously simpler than the Mach 460's component system, which includes 8-ohm woofers powered by a separate amplifier. If you're using the stock amp, whatever you put in here will only reproduce bass. The tweeters can be replaced by pretty much any component tweeters, but you'll need to use our universal backstraps (or hot glue or silicone) to secure them.
Complete instructions for both speaker systems can be found in your Crutchfield MasterSheet.
Tools needed: Phillips screwdriver, 10mm/7-16" socket, ratchet & extension, panel tool, Torx T50 driver

The convertible's Mach 460 rear speakers are mounted in an enclosure (Crutchfield Research Photo)
Convertible: If your Mustang convertible is equipped with the Mach 460 sound system, the rear speakers will be mounted in an enclosure. The speakers are actually components, and the signals going to each driver are crossed over from the factory amps. We don't have hard data on the crossover point, but there's probably some info on a Mustang owners' forum if you need it. In other news, the factory speakers' bolt pattern is kind of non-standard, so you'll need to drill a couple of extra mounting holes for your new speakers or brackets.
The regular rear side panel speakers are a little more straightforward, but the overall processes are the same.
When it comes to getting the old ones out, you'll start by dropping the top and rolling down the windows. That'll make it a lot easier to remove the lower seat cushion, which you'll do by pressing the white plastic release button under each side and lifting. Remove the two 10mm bolts (one on each side) below the sides of the rear seat back, then slide the seatback upward and remove it.
Remove the Phillips fastener from the convertible top well, which is located to the rear of the rear side window. The fastener is removed by first unscrewing the center pin, then prying out the outer portion. Do the same thing on the other side.
Pry out the two push pins from the rear edge of the rear side panel and one from the bottom edge of that panel. Next, pry out two push pins from the rubber trim that's located at the upper front area of the side panel. Move down the car for a moment and pry up the door scuff plate. This will allow you to lift the rear seat panel enough to fold it in towards the center of the car, which will give you access to the speaker location.
Remove the four Phillips screws securing the speaker to the mounting bracket, then remove the old speaker. Install the new one, secure it with the mounting screws you just removed, then test the speakers and see how they sound. If they're good, put it all back together – but make sure the seats and seat belts are secured properly while you're doing this.
Tools needed: Phillips screwdriver, 10mm socket, ratchet and extension, panel tool
Read our Car Speakers Buying Guide for more information.
Shop for speakers that fit your Ford Mustang

There's not a lot of room for a sub (or anything else, really) in the convertible's trunk (Crutchfield Research Photo)
Bass in your Mustang
Neither of these cars offer a ton of room for a subwoofer box, but we've seen some pretty creative custom solutions to that problem. If you come up with something, send some pics and info to our Custom Car Showroom.
When it comes to "off the rack" boxes, the coupe has a 36" W x 14" H x 36" D space. The convertible, which has a lot more going on in the trunk area because of the top, offers even less, with a 34" W x 7"/12" H x 26" D space.
And that's before you factor in luggage, groceries, or anything else you might want to put back there. Considering that the rear seats are barely spacious enough for normal adult humans as it is, a powered subwoofer in the footwell might be a good option.
Learn more about building a bass system in our Car Subwoofer Buying Guide.

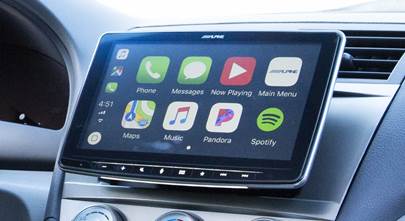
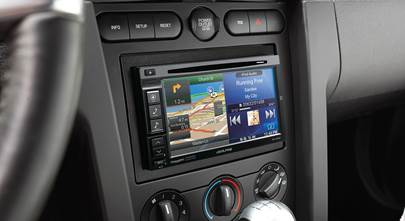
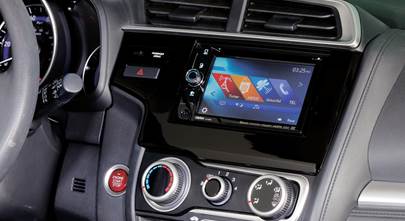
Who needs a touchscreen nav receiver? Not you, if you add a portable GPS like this Garmin to your Mustang.
Other options for your 1994-2000 Mustang
Here are some other ideas for your Mustang.
Navigation
You can still get aftermarket nav functionality without installing a touchscreen nav receiver in your car's dash. A portable GPS will mount on your dash and give you turn-by-turn directions, traffic updates, and everything you need to make your road trip go smoothly. Plus, when you get where you're going, you can put your GPS in your pocket and use it to find points of interest around town.
Kick panel speakers
To add even more sound to your Mustang, install a set of Q-Forms kick panel enclosures. They look like the stock kick panels, but once you cut a mounting hole, they'll hold the 6-1/2" component speakers of your choice. They're located near your feet and angled up towards your ears, so the driver's seat becomes the "sweet spot" for your stereo.
Add an amp (or two)
A new 4-channel amplifier will help you get the most out of your new speakers. You'll get cleaner power (and a lot more of it), which will result in much better sound. Learn more about adding amps to your system in our Car Amplifier Buying Guide.
Replace the antenna
If the existing antenna is in good working order, there's no need to replace it unless you really want to. But if it's damaged or inoperable for any reason (age, one too many car washes, some jerk in a parking lot, etc.), we have replacements available and the instructions can be found in your MasterSheet.
Security
Installing a security system in your Mustang isn't easy (security systems rarely are), but it's definitely a good idea. Our Crutchfield Advisors can help figure out what you need to get the job done, but we usually recommend taking your car and new gear to a professional installer.
Let's get started!
Ready to shop? Use our vehicle selector to find the gear that will fit your car or truck. If you have questions, give us a shout via phone, chat, or email
Comments (2)
Please share your thoughts below.


Anson Blevins from Bluff City
Posted on 3/25/2023
Tying to find out what wires are what on my 1999 mustang it has factory stereo and the cd player under it but someone cut my harness please help me find my color codes for my stereo
Jon Paul from Crutchfield
on 3/27/2023
Ronnie E Sanderson from Chinquapin
Posted on 6/22/2021
Will the factory head unit work if the amp is bypassed?
Jon Paul from Crutchfield
on 7/21/2021