


2016-2019 Chevrolet Cruze
How to upgrade the stereo system in your Cruze


In brief: This Crutchfield Research Garage article gives you an overview of your Cruze's stock stereo system and your aftermarket upgrade options. We'll tell you all about:
- The factory stereo system
- Removing the factory radio
- Removing the factory speakers
- Adding more bass
- Other options for your Cruze
Then, use our vehicle selector to find the gear that will fit your Cruze.
Overview of the Chevy Cruze
The redesigned Chevy Cruze is everything a modern small sedan is supposed to be — economical, roomy, comfortable, and capable. Available in sedan and (from 2017 on) hatchback form, the Cruze is an ideal everyday car with a little more style than most. If you see a little bit of Camaro in the nose and more than a little Volt in the body, Chevy’s designers wouldn’t mind at all. It’s just a sharp little car.
Then again, most cars in this hotly-contested segment are pretty sharp, so Chevy’s engineers worked hard to make sure the Cruze is up to breed standard. Part of that effort went into making the car as quiet as possible, which means plenty of sound dampening material.

All that insulation does a nice job of keeping the outside world at bay, which makes even the stock stereos sound surprisingly decent, all things considered. But if you really want to take full advantage of the Cruze’s potential, you’ll need to upgrade with some aftermarket gear. Read on to learn more.
Note: This new Cruze sedan (above) debuted for the 2016 model year, but the previous generation hung around for another year of fleet sales under the name "Cruze Limited." Make sure you choose the right car when you enter your vehicle information and start shopping for car stereo gear.

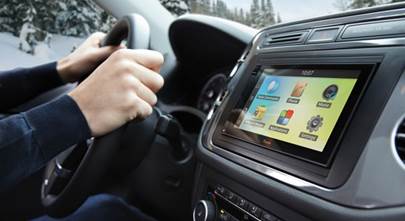
The upside to having the base radio (above) in your Cruze is that you can replace it with an aftermarket model. The same cannot be said for the Bose® system's navigation receiver. (Crutchfield Research Photo)
The factory stereo system
The Cruze’s base systems are pretty, well, basic, with a 7" AM/FM receiver and your choice of four or six speakers. Replacing any or all of those components will improve your car’s sound dramatically. In order to retain the factory warning chimes, though, you must use the recommended Crutchfield integration adapter. Not using the recommended adapter can be dangerous for you and your passengers, so we strongly recommend that you do. So much so that we can’t provide tech support if you don’t.
That said, you’ll will get a nice discount on the adapter and the necessary dash kit when you buy your new receiver at Crutchfield. We’ll also include free, vehicle-specific radio and speaker removal instructions.

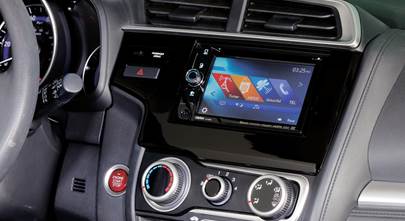
The optional 8" navigation receiver is a pretty nifty unit. This is a good thing, because you can't replace it. Upgrading the speakers is the best way to get better sound. (Crutchfield Research Photo)
The Bose® upgrade is better, sporting an 8" AM/FM receiver with built-in SiriusXM capability (subscription required) and nine speakers. In the sedan, two of these speakers are subwoofers mounted in the rear deck. The hatchback, on the other hand, has only a dual voice coil sub that counts as two of those speakers mounted under the floor of the cargo area.
The downside to this system is that the thing in the dash that you might think of as a receiver is actually just a control/display panel. The tuner module and the amp are located behind the passenger’s side trunk trim panel. Because this system is so thoroughly integrated into the rest of the car, you really can’t replace it. You can still replace the speakers, though, which will really boost your sound.
That said, the Bose® system includes a factory amplifier. If you’re replacing the low-impedance factory speakers with standard 4-ohm aftermarket speakers, you’ll need to bypass that amp or add an aftermarket amp to prevent overheating and other damage to your new gear.

The Cruze's base radio is reasonably easy to reach and replace (Crutchfield Research Photo)
Removing the factory radio
Removing the base radio is a reasonably simple procedure. Before you start, make sure you disconnect the negative battery cable and set the parking brake. Safety first, you know.
Once that’s done, grab your panel tool and pry off the lower driver's side trim panel. After releasing four clips, you can remove the trim panel. Next, pry off the passenger's side dash endcap to release seven clips, then remove that endcap. That’ll expose one 7mm screw, which you’ll need to remove, too. From there, pry off the glove box’s upper trim panel.
Pry off the receiver trim panel to release twelve retaining clips and remove the panel. We suggest using an index card to protect the dash finish while you do this. Next, pry out both center dash vents.
Detailed stereo and speaker removal instructions

Remove the two 7mm screws securing the climate control panel to the dash, then pull out the panel to release two clips, disconnect the harness, and remove the control panel. That’ll expose two 7mm screws and you’ll need to remove those before prying out the receiver assembly to release four retaining clips. From there, you just need to disconnect the harnesses and remove the assembly.
To install your new receiver, follow the instructions included with your dash kit and wiring harness adapter.
Tools needed: Panel tool, small flat blade screwdriver, 7mm socket, ratchet and extension
Read our Car Stereo Buying Guide for shopping tips and advice.
Shop for car stereos that fit your Chevrolet Cruze
Steering wheel audio controls
In most cases, it's reasonably easy to retain your Chevy's steering wheel audio controls when you install a new stereo. When you enter your vehicle information, our database will choose the adapter you need to make your factory steering wheel controls work with a compatible aftermarket receiver.

Replacing the speakers can give you a huge difference in sound quality, so it's an excellent DIY project (Crutchfield Research Photo)
Removing the factory speakers
Depending on the system you're starting with, your Cruze will have four, six, or nine speakers. Generally speaking, the replacement process is pretty simple, but there are a few instances that will require some extra effort on your part. It's nothing the average DIY-er can't handle, but pay close attention to the notes below to know what you're getting into.

The Bose-only center dash speaker is very easy to reach and replace (Crutchfield Research Photo)
Removing the center dash speaker (Bose® only)
The Bose® system includes a 3-1/2" center dash speaker that’s reasonably easy to reach and replace. Use your panel tool to pry up the center dash grille, releasing five clips, then twist the sensor to release it from the grille and remove the grille. Remove the two 7mm screws securing the speaker, then disconnect the harness and remove the speaker.
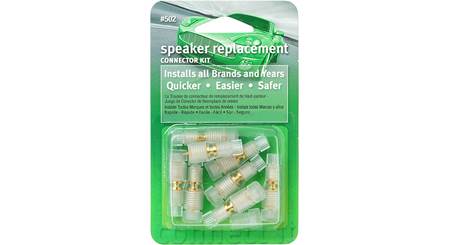
A wiring harness adapter is not available for this speaker, so you'll have to splice or tap the vehicle's speaker wires to your new speaker wires. If you’re looking for an easier solution, we highly recommend Posi-Products speaker connectors.
Tools needed: Panel tool, 7mm socket, ratchet and extension

In most Cruze models, you'll find speakers in the dash corners (Crutchfield Research Photo)
Removing the corner dash speakers
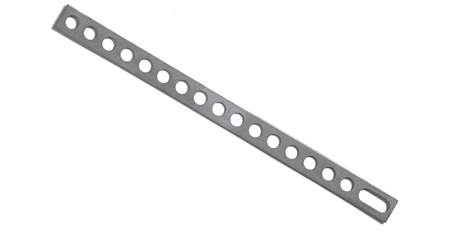
The 6-speaker and Bose® audio systems have 1.385" speakers molded to brackets in the corners of the dash. The brackets are smaller than aftermarket 3-1/2" speakers, so you’ll need to fabricate a bracket or use our universal backstraps to mount aftermarket tweeters. In other news, there’s no wiring harness adapter available for these speakers, either, so you'll have to splice or tap or use Posi-Products speaker connectors.
On the upside, they’re easy to remove. Pry up the corner dash grille to release four clips and remove the grille. Remove the two 7mm screws securing the tweeter to the dash, then disconnect the harness and remove the tweeter.
Note: If you’re installing 1" tweeters that are part of a component system, you'll need a hole-saw drill bit to help flush-mount the tweeter into the bracket that’s included with your order.
Tools needed: Panel tool, 7mm socket, ratchet and extension

Replacing the door speakers is pretty much the same front and rear in the Cruze (Crutchfield Research Photo)
Removing the front door speakers
The 6-3/4" front door speakers can be replaced by same-size or 6-1/2" aftermarket speakers. The job’s not that difficult, and the improvement in sound quality makes this a worthwhile DIY project.
Starting at the top edge, pry out the screw cover behind the door release handle and remove one exposed 7mm screw. Next, starting at the front edge, pry out the armrest outer cover to release nine clips and remove the outer cover. That’ll expose two 7mm screws, and you’ll need to remove those, too.
Moving down the door, remove the 7mm screw at the bottom/front corner of the door panel. Once that’s done, pry out the sides and bottom of the door panel to release eight clips, then disconnect the harnesses and door release cable before removing the panel and storing it someplace safe and dry.
Remove the 7mm screw securing the speaker, then pry out the speaker at the top to release the retaining clip, then lift the speaker up, disconnect the harness, and remove the speaker.
You'll need speaker mounting brackets (included with your Crutchfield speaker purchase) to install 6-1/2" or 6-3/4" speakers. For 6-3/4" models, you’ll need to remove the inner tabs on that speaker bracket. There are some specialized speakers that require their own brackets, and those will be included with your purchase.
Once the speakers are installed test them out to make sure they’re working. If they are, you’re ready to put the door back together. Be sure to check the door locks and door releases to make sure they’re working, and also make sure the wires aren’t interfering with the windows.
Tools needed: Panel tool, small flat blade screwdriver, 7mm socket, ratchet and extension

You'll need speaker mounting brackets (included with your Crutchfield speaker purchase) to install 6-1/2" or 6-3/4" speakers (Crutchfield Research Photo)
Removing the rear door speakers
The Cruze’s rear door speaker situation is pretty much the same deal. There’s a pair of 6-3/4" speakers that can be replaced by same-size or 6-1/2" aftermarket speakers. The removal/replacement process is pretty much the same, too, so we’ll avoid the temptation to repeat ourselves here and simply note that complete, step-by-step illustrated instructions are included free when you buy your stereo or speakers at Crutchfield.
And if you run into a bit of a challenge, your order also includes free tech support for the life of the gear. Our experts are right here in Virginia and available via call or chat. They’ll be happy to help you get the job done right.
Tools needed: Panel tool, small flat blade screwdriver, 7mm socket, ratchet and extension
Removing and replacing the Bose® subwoofers
The Cruze's Bose® system includes a subwoofer, but the size and location of that sub depends on which body style you're working with. In the sedan, there’s a 6"x9" sub in the rear deck, while in the hatchback, there’s a 6-3/4" sub under the cargo floor in the rear of the car.

In the sedan, the Bose® subwoofers are located in the rear deck (Crutchfield Research Photo)
Rear deck sub (Sedan)
Removing the sedan’s Bose® sub is pretty easy. Replacing it is a bit more involved, not least because replacing the low-impedance factory sub with an aftermarket 4-ohm model can result in lower volume levels. So shop carefully.
To remove the old woofers, you’ll start by folding down both rear seat backs. Pry out three clips along the front edge of the rear deck panel, then push up the rear deck panel to release two more clips. Next, bow the panel in the center to release it from the pillar trim panels.
Pull the panel toward the front of the vehicle to remove it. The panel will remain tethered to the seat belts during all this, by the way. From here, just remove the 7mm screws securing the speakers to the rear deck steel, then pull up the speakers, disconnect the harness, and remove the speakers.
The challenging part of this upgrade is that you’ll need to fabricate a mounting bracket to install the new 6"x9" woofers. If that’s not something that’s in your DIY wheelhouse, you might want to farm this job out to a professional installer.
Tools needed: Panel tool, 7mm socket, ratchet and extension

The hatchback's 6-3/4" Bose® sub is located in the enclosure to the left of the spare tire. There's an amp there, too. (Crutchfield Research Photo)
Cargo floor sub (Hatchback)
The hatchback’s sub is a 6-3/4" dual voice coil model that’s located in a polymer enclosure under the cargo floor. Each voice coil has a 2.3-ohm impedance. Due to the size of the recess in the factory enclosure, your aftermarket choices are limited to 6-1/2" subs. As in the sedan, replacing the low-impedance factory sub with an aftermarket 4-ohm model can result in lower volume levels, so we recommend going with a 2-ohm model.
The removal/replacement process starts with removing the cargo floor panel and cargo cover (if equipped). With that done, remove the three 10mm screws and one 10mm nut securing the subwoofer enclosure to the floor, then disconnect the harnesses and remove the enclosure. Remove the four 1/4" screws securing the sub to the enclosure, then disconnect the harnesses and remove the old sub.
Due the stock sub’s oblong bolt pattern, you’ll need to drill new mounting holes for the new sub. This isn’t hard, but you should always be careful when drilling or cutting in a vehicle — especially your vehicle. Pay attention to what’s around the area you’re drilling into, double-check the depth before you drill, and always wear eye protection.
Tools needed: 10mm deep socket, ratchet and extension, 1/4" socket, ratchet and extension, drill and 1/8" bit
Read our Car Speakers Buying Guide for more information.
Shop for speakers that fit your Chevrolet Cruze

The Cruze sedan sports a good-sized trunk, so there's some room for a sub box if you want to add one (Crutchfield Research Photo)
Adding bass to your Cruze
Both Cruze body styles offer a reasonable amount of space for an aftermarket subwoofer box, so if you really dig bass, you have some real estate to work with.
In the hatchback, there’s a 40" W x 15" H x 22"/29" D space, while the sedan offers a 41" W x 18" H x 31"/38" D space.
Then again, you might need most of that space for everyday things like groceries and cargo and stuff. If that’s the case, you might want to check out a powered subwoofer.
You can learn more about building a bass system in our Car Subwoofer Buying Guide.

A set of custom-fit WeatherTech floor liners will protect your Cruze's carpeting
Other options for your Cruze
There are plenty of other ways to improve the sound, safety, and comfort of your Cruze. Here are some of the ways Crutchfield can help.
Protect your car's interior
The Cruze is a pretty nifty little car, but the factory floor mats are...just regular old factory floor mats. A set of custom floor liners from WeatherTech will help protect your car's carpeting from dirt and damage.
Add an amplifier for better sound
If you install new speakers in your Cruze, consider installing a 4-channel amplifier to further improve the sound. That will let you get the best sound from your music. And if you install subwoofers, you'll also need to install a mono amplifier to power them as well. Talk to one of our advisors to get some ideas for how to economically and easily build your system.
Remote start and security systems
Adding remote start capability to your vehicle lets you warm it up in the winter or cool it down in the summer. Ask a Crutchfield Advisor about adding remote start to your Cruze.
You can also talk to your Crutchfield Advisor about a security system. They’re not as easy to install (we suggest letting a professional do the job), but we can help you shop for a system that’ll work in your vehicle.
Let's get started!
Ready to shop? Use our vehicle selector to find the gear that will fit your car or truck. If you have questions of your own, give us a shout via phone, chat, or email


Comments (0)
Please share your thoughts below.