


2010-2013 Mazda 3
How to upgrade the stereo system in your Mazda 3


In brief: This Crutchfield Research Garage article gives you an overview of your Mazda 3's stock stereo system and your aftermarket upgrade options. We'll tell you all about:
- The factory stereo system
- Removing the factory radio
- Removing the factory speakers
- Adding more bass
- Other options for your Mazda 3
Then, use our vehicle selector to find the gear that will fit your Mazda.
Overview of the Mazda 3
In a recent and thoroughly unscientific parking lot survey, we determined that an awful lot of cars these days look like they're annoyed about something. We’re not sure when the "angry cyborg" look became a thing, but there are some current cars that make a 1960 Plymouth Belvedere look like a mall greeter. It's weird.
The Mazda 3 is welcome exception to the current rule. This smart, practical little car looks like it's happy to be here and ready to go do stuff. And in a world full of cars that seem to have a perpetual case of the Mondays, that's pretty cool. When you smile, your Mazda 3 smiles back. And that should make you smile more, which is what a good car should do in the first place.
Whether you have a sedan or a hatchback, you've got a practical, efficient car that's also a lot more fun to drive than the average econobox. The stereo systems are mostly just average, though, so an aftermarket upgrade is a great way to make every drive a lot more enjoyable.

The 3's radios are pretty easy to remove and replace — mostly. (Crutchfield Research Photo)
The factory stereo system
The 3 was offered with your choice of base or Bose audio systems. The base model included either 4 or 6 speakers, and the Bose system added more rear speakers and a subwoofer.
In 2010-2012 models, there's an optional navigation system in the display above the radio. In 2013, Mazda made some changes and the navigation moved into a 5.8" touchscreen receiver. As a result, the disassembly process for that radio is different from the standard model. We'll touch on that again below.
Depending on how your car is equipped, replacing the factory stereo can mean losing the AUX input, your stock satellite radio, and the navigation system's voice guidance feature. On the upside, all of those can be regained (and, honestly, improved) with a new aftermarket receiver.
Both systems include a factory amp. If you choose a new stereo with front and rear preamp outputs, the discounted wiring harness will connect directly to the new receiver. If you choose a receiver without those outputs, our installation package will include the line converter you'll need to retain use of the amp.
Replacing the standard radio is reasonably easy in this car, but the 2013 nav receiver has some unique quirks that we'll discuss below. Replacing some of the speakers can be a bit challenging because there's some extensive disassembly involved in some cases. It's nothing the average DIY-er can't handle, but you'll need to stay organized and stay patient. Remember that your Crutchfield purchase includes free tech support for the life of the gear. If you have questions, just give us a call.

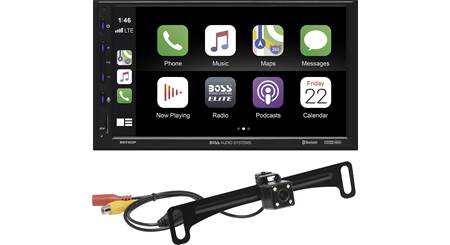
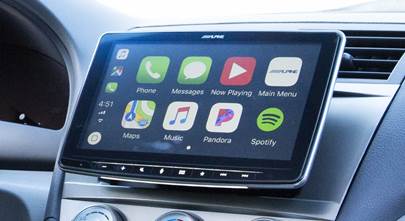
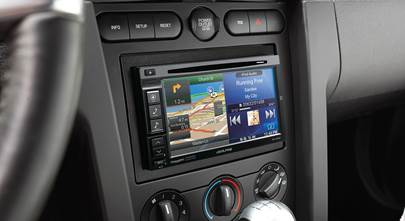
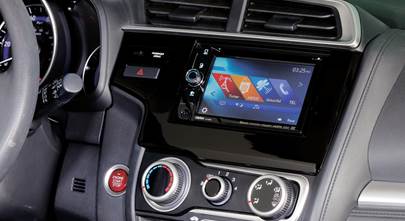
You can replace the stock radio with single-DIN or double-DIN aftermarket models (Crutchfield Research Photo)
Removing the standard factory radio
Before you do anything else, set the parking brake and disconnect the negative battery cable to prevent any electrical short. Once that's done, you're ready to get to work.
Pry out the center dash vent assembly toward the rear of vehicle to release five retaining clips. Place the assembly on the top of the dash while you keep working. You might want to place a clean shop rag between the two.
Remove two Phillips screws from the brackets at the top of the factory radio, then pull the radio from the dash to release four clips. Disconnect the wiring harnesses and remove the old radio.
Those basic disassembly steps are applicable to the 2013 nav receiver, but there are also two hidden screws that need to be removed. You'll have to remove the glove box to reach them. This isn't hard, but it is more work. Give us a call and talk to one of our tech experts before you start your installation.
Detailed stereo and speaker removal instructions

Installing the new receiver is pretty much that, but backwards. When you buy your receiver at Crutchfield, we'll give you a very nice discount on the dash kit and receiver wiring adapter you'll need to connect the receiver to the factory wiring.
Between the instructions included with each of those and your free Crutchfield MasterSheet, you'll be good to go. Just be sure to test the radio and make sure it's working before you put the dash back together. It's an easy job, but you don't want to do it twice.
Tools needed: Panel tool, Phillips screwdriver
Read our Car Stereo Buying Guide for shopping tips and advice.
Shop for car stereos that fit your Mazda 3
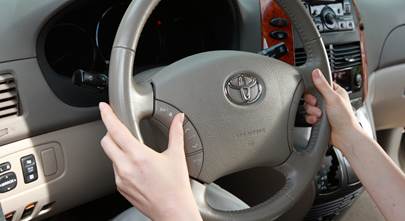
Steering wheel audio controls
In most cases, it's reasonably easy to retain your Mazda's steering wheel audio controls when you install a new stereo. When you enter your vehicle information, our database will choose the adapter you need to make your factory steering wheel controls work with a compatible aftermarket receiver.

The 3's door speakers are reasonably easy to reach and replace (Crutchfield Research Photo)
Removing the factory speakers
The 3's speakers are generally pretty easy to deal with, but the rear speakers in the Bose system can present some challenges.

If you're going to replace the radio, you might as well replace the Bose center dash speaker while you're up (Crutchfield Research Photo)
Replacing the Bose center dash speaker
If your 3 has a Bose stereo system, there's a 3-1/2" speaker in the center of the dash. You don't have to replace this speaker if it's working, but if you do want to upgrade, we highly recommend replacing the speaker at the same time you replace the factory radio.
We do so not (just) because we want to sell you a center dash speaker, but because removing the radio is part of the speaker removal process anyway. And since getting to the speaker takes a fair amount of work, this is one of those "While you're up…" scenarios in which the time saved is probably more valuable than the money spent.
There's no speaker wiring adapter available for this location, so you'll need to use Posi-Products speaker connectors to connect the new speaker to the factory wiring. Complete removal instructions can be found in your Crutchfield MasterSheet.
This is a do-able DIY project, but it'll take some time and patience and we want you to know what you're getting into before you get into it.
Tools needed: Panel tool, right-angle Phillips screwdriver, small flat-blade screwdriver

All 3's have component speakers in the front doors (Crutchfield Research Photo)
Replacing the front door speakers
All 3's have woofers and tweeters in the front doors, and this replacement process isn't that bad. You'll need to remove the sail panels and the door panels, but it's not that complicated.
The tweeters come first, because you'll need to remove the sail panels anyway. Pry off the panel to release two retaining clips, then disconnect the wiring harness and remove the panel.
The tweeter is attached to the panel, so you'll need to pry that off and remove it. You'll need to use our universal backstraps (or hot glue or silicone) to attach your new tweeters. You'll also need to use Posi-Products speaker connectors for the tweeters.
To remove the woofers, you'll start by prying out the screw cover behind the door release and removing one exposed Phillips screw. Then you'll pry off the door pull cover and remove two exposed Phillips screws. Pry around the sides and bottom of the door panel to release nine retaining clips, disconnect the door lock and release cables and wiring harnesses, and remove the door panel.
The stock speaker is secured by four Phillips screws. Keep them handy after you remove them, because you'll need them to secure the new speakers. You can use 6"x8" or 5-1/4" aftermarket speakers in the front doors, and the mounting brackets needed for the smaller ones will be included with your Crutchfield speaker purchase.
Once you've installed your new component speakers, be sure to test them and make sure they're working. You'll also want to make sure the door locks and windows are working properly before you put the doors back together.
Tools needed: Panel tool, Phillips screwdriver

New rear speakers will really fill out your car's sound (Crutchfield Research Photo)
Replacing the rear door speakers
The rear door speakers are pretty easy to deal with, too. You'll start by prying off the screw cover behind the door release and remove one exposed Phillips screw. Then, pry off the door pull cover and remove two exposed Phillips screws. Pry around the sides and bottom of the door panel to release seven retaining clips, then disconnect the door lock and release cables, disconnect the wiring harnesses, and remove the door panels.
Once you remove the four Phillips screws securing the factory speaker, you can pull it out, disconnect it, and replace it with your choice of 6"x8" or 5-1/4" aftermarket models. The speaker mounting bracket required for the smaller ones will be included with your Crutchfield speaker purchase.
Once you've test the speakers, locks, and windows, you're ready to reinstall the door panels.
Tools needed: Panel tool, Phillips screwdriver

Getting to the hatchback's Bose rear pillar speakers involves a fair amount of work (Crutchfield Research Photo)
Replacing the hatchback's rear pillar speakers
Your Bose-equipped hatchback's rear pillar speakers aren't exactly hard to remove and replace, but there are a few steps involved, so patience and organization will come in very handy here. You'll be removing a healthy number of screws, gaskets, panels, and pins, so it's important to keep track of what came from where as you're taking things apart. You'll be happy you did so when it's time to put it all back together, trust us.
All of the nitty-gritty details can be found in your Crutchfield MasterSheet, of course. And don't forget the Posi-Products speaker connectors you'll need to connect these speakers to the factory wiring.
Tools needed: Panel tool, Phillips screwdriver, small flat blade screwdriver

Removing and replacing the rear deck speakers is a truckload of work (Crutchfield Research Photo)
Replacing the sedan's rear deck speakers
You'll need to remove the entire rear deck to replace the Bose system's rear deck speakers, and that is not an easy job. The various tasks involved aren't that difficult, but there are a lot of them and there's a lot of disassembly involved.
It's a lengthy process, and we're going to avoid weighing this article down with a lengthy series of paragraphs. The step-by-step, illustrated disassembly instructions in your Crutchfield MasterSheet will make a lot more sense, anyway. Can you, the average DIY-er, do this? Yes, but it'll take time, patience, and organization.
Bose-equipped sedans also have a rear deck subwoofer (see below), and getting to that involves a lot of the same steps. As with the radio/center dash speaker system discussed earlier, this is a situation in which we'd recommend replacing everything at once. You'll be glad you did.
Tools needed: Panel tool, 8mm socket, ratchet and extension, needlenose pliers
Read our Car Speakers Buying Guide for more information.
Shop for speakers that fit your Mazda 3

The hatchback's Bose subwoofer sits in a spare tire-mounted enclosure (Crutchfield Research Photo)
Bass in your Mazda 3
If you want to add a subwoofer enclosure to your 3, you do have some room to work with. In the hatchback, you have a 40" W x 15" H x 30"/21" D space to work with, measured under the cargo cover. The sedan offers a 41"W x 15" H x 36"/31" D space, measured under the trunk's cross brace. It's not acres of room, but both models give you some room to add boom
If you're not a total bass-head and you want to save some room for cargo, you can opt for a more compact powered subwoofer.
Learn more about building a bass system in our Car Subwoofer Buying Guide.
Factory subwoofers
The hatchback's 6-3/4" Bose subwoofer can be found under the cargo floor panel. It's not hard to reach and remove, but you will need to drill new mounting screw holes for the replacement sub. This isn't hard to do, but work carefully, know what's around and below the area you're drilling into, and wear eye protection.
We've already established that the sedan's Bose sub is not the easiest thing in the world to replace, so you won't be stunned to learn that there are a couple of other things to keep in mind. Nothing awful, though. You'll need to fabricate a speaker mounting bracket or spacer for the new sub, and you'll also need to use Posi-Products speaker connectors to connect the new sub to the factory wiring.
Tools needed (Hatchback): 1/4" socket, ratchet and extension, small flat blade screwdriver (used to disconnect harness), drill and 1/8" bit
Tools needed (Sedan): Panel tool, 8mm socket, ratchet and extension, needlenose pliers

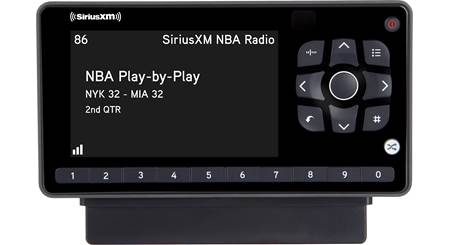
SiriusXM satellite radio gives you a wide variety of music and entertainment options
Other options for your Mazda 3
Here are some other cool ideas for your Mazda
Add an amp (or two)
A new 4-channel amplifier will help you get the most out of your new speakers. You'll get cleaner power (and a lot more of it), which will result in much, much better sound. A mono amp can provide the juice you need for your new subwoofer, too. Learn more about adding amps to your system in our Car Amplifier Buying Guide.
Satellite radio
Don't want to replace the stock radio? You can add a Dock-and-Play satellite radio that you can take from car to car. Getting a new stereo? Look for an aftermarket model that’ll work with an outboard SiriusXM tuner.
Protect your car with a security system
Installing a security system in your Mazda 3 isn't easy (security systems rarely are), but it's definitely a good idea. Our Crutchfield Advisors can help figure out what you need to get the job done, but we usually recommend taking your car and new gear to a professional installer.
Let's get started!
Ready to shop? Use our vehicle selector to find the gear that will fit your car or truck. If you have questions, give us a shout via phone, chat, or email
Comments (1)
Please share your thoughts below.


Nic Zollhoefer from Christchurch, NZ
Posted on 9/13/2020
Hi there I've recently changed the head unit on my 2010 Mazda 3 MPS to a 8" Eonon GA9463. I have played around with the eq on the eonon unit and overall the sound isnt quite as high quality and full as I'd like, through both carplay and Bluetooth. I am wondering if it may be worthwhile upgrading the Amp in my car? I understand the Amp is under the passenger seat and shouldnt be too hard to replace. Will an Amp improve the sound quality and potentially bass? And will my stock Bose speakers and sub be able to handle it? Thanks for any help! Regards, Nic
Jon Paul from Crutchfield
on 9/14/2020