


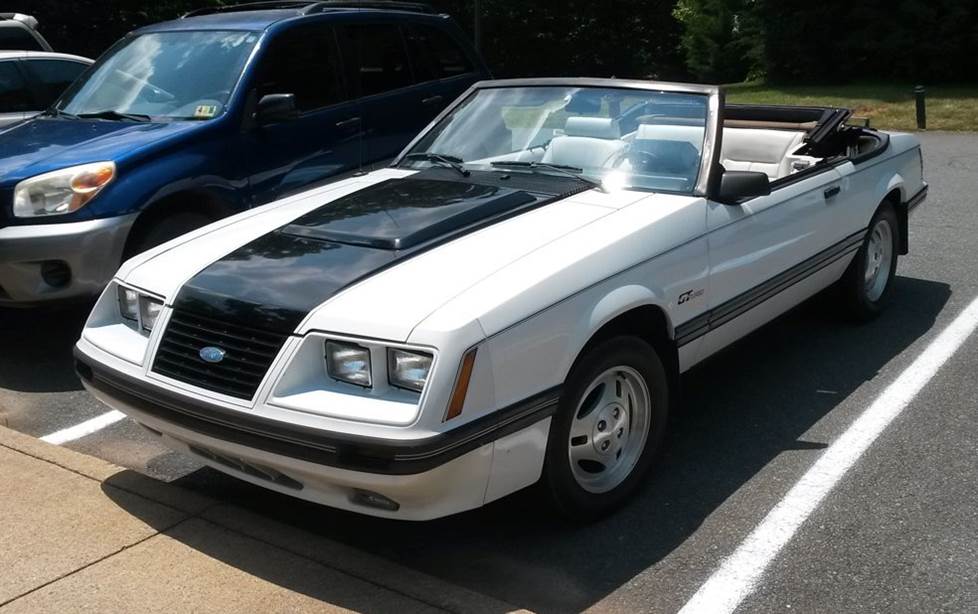
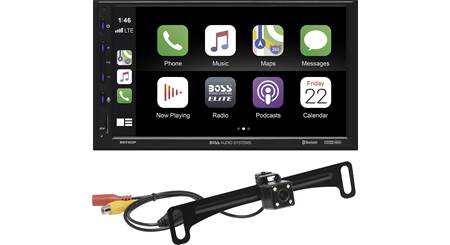
1979-1986 Ford Mustang and Mercury Capri
How to upgrade the stereo system in your Mustang or Capri

In brief: This Crutchfield Research Garage article gives you an overview of your Mustang's stock stereo system and your aftermarket upgrade options. We'll tell you all about:
- The factory stereo system
- Removing the factory radio
- Removing the factory speakers
- Adding more bass
- Other options for your Mustang
Then, use our vehicle selector to find the gear that will fit your Mustang.
Overview of the 1979-1986 Ford Mustang
The Fox-body (Fox-chassis, technically) Mustangs don't get nearly as much adulation as the revolutionary 1964-1/2 models, but maybe they should. Like its ancestor, this Mustang was THE cool car when it came out, and thanks to great looks, peppy performance, and plenty of options, pretty much anyone could create their idea of what a cool Mustang should be.
The basic platform hung around until 1993, with yearly upgrades and improvements that kept things interesting until the new car arrived in 1994. We’ll focus on the first generation here, but we have tons of research and info on Mustangs of all types, so enter your vehicle info to see what fits your car.
Oh, and in case you were wondering, the info below also applies to 1979-1984 Mercury Capri.
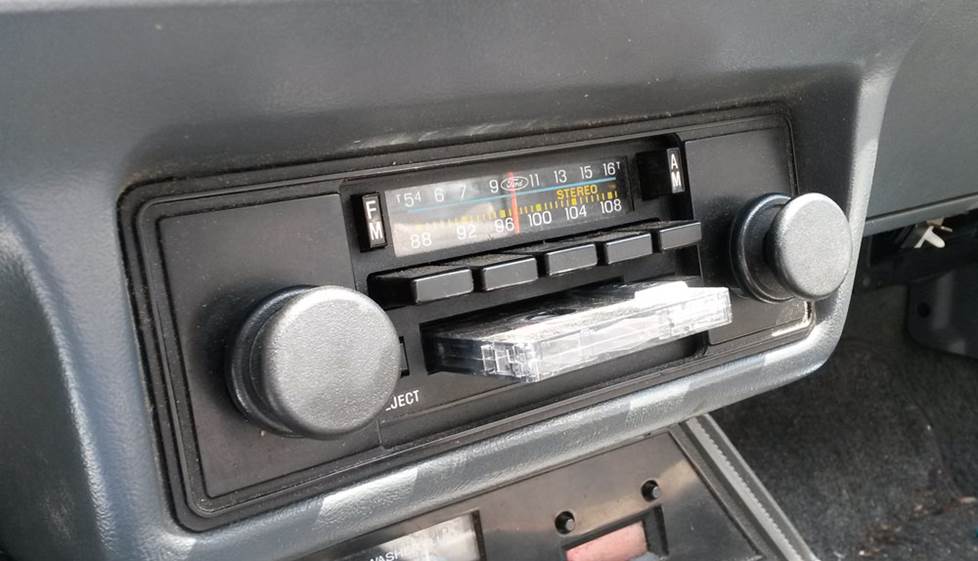
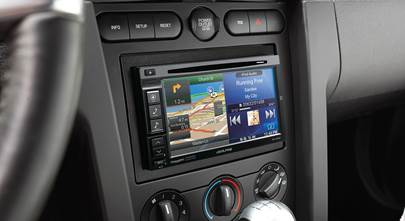
An AM/FM/cassette receiver was a popular choice for these Mustangs (Crutchfield Research Photo)
The factory stereo system
The Mustang's factory radio packages were pretty typical of the era. The base radio was a humble AM-only unit, mid-grade was an AM/FM radio, and the top-shelf model was an AM/FM tape deck, which could be an 8-track or cassette throughout most of the early years.
The 1979-1984 cars were equipped with shaft-style radios, while the 1985 and 1986 cars sport a single-DIN (2” tall) factory receiver. The basic radio removal process is the same for both, but there are some detail differences that will be addressed in the Crutchfield MasterSheet for your car.
The "Premium Sound" Package included extra speakers and an amplifier (look for the amp switch on the dash beside the radio) for the rear speakers. On the complete opposite end of the spectrum was a radio-delete package for fleet sales, frugal people, and those who believed radio was just a silly fad that would go away soon.
Though it was no doubt a blast back in the day, your Mustang’s audio gear is probably a little tired at this point. Though they’re usually inexpensive, these cars are edging into the "collectable" category, so if you have an especially well-preserved Mustang, upgrade with care.
On the other hand, many early Fox Mustangs were enthusiastically flogged on both street and strip, so there’s no shortage of less-than-pristine examples just waiting for restoration or resto-modding. Have fun, and don’t forget the stereo!

Long before the Crutchfield Research Garage, we did our field research in actual fields. That's what we used to do to get photos like this, which gives you a good look at the Mustang's shaft-style radio opening. (Crutchfield Research Photo)
Removing the factory radio
Before you do anything else, set the parking brake and disconnect the negative battery cable to prevent electrical shorts. Once that’s done, you’re ready to start removing the stock radio.
Whether you have a shaft-style radio or the more recent single-DIN, the radio removal process is pretty much the same. Remove the ashtray, then remove two Phillips screws from the top of the ashtray bracket. Next, remove one 7/16" bolt from above the ashtray bracket and one nut from the rear center of the receiver. That nut secures the rear support bracket to the radio, so you’ll then be able to remove the bracket. Hang onto the bracket, because you’ll need it when you install the new receiver.
Remove one 7/16" bolt and one 3/8" bolt from the dash brace located at the rear of the radio on the driver’s side. This will allow the brace to pivot, which will give you more clearance when you’re removing the factory radio. This is a good thing, since these radios will take some wiggling anyway. Be careful not to hurt your hands or the old receiver. Mostly the first thing, though. The radio’s not all that important, but you do want to keep your hands looking good and functioning normally.
Detailed stereo and speaker removal instructions

For example, you’ll need them when you remove the knobs, shaft nuts and faceplate from the old shaft-style radio. And again when you disconnect the wiring harnesses and unplug the antenna lead from the rear of the radio. And definitely when you push the radio toward the front of the vehicle to allow the shafts to the clear openings, then remove the radio from behind the dash. The single-DIN involves a bit less fiddling, but you’ll still have to wriggle it out of the dash opening, so work carefully.
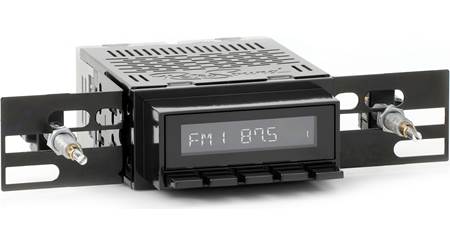
On the early cars, the path of least resistance is to install a shaft-style receiver from RetroSound. If you choose to install a single-DIN (2" tall) aftermarket receiver, you’ll need to cut out the factory radio opening. This isn’t the easiest thing ever, but people have been making this swap in these cars for three decades now, so it’s obviously not beyond the capability of the average DIY-er. Work carefully, wear eye protection, and you’ll be fine. Your deeply discounted single-DIN installation kit will include complete instructions.

RetroSound's RetroRadio M4HD is a shaft-style digital media receiver that's ideal for your Mustang
If you go with the shaft-style option, it’s important to know that the radio loads from behind the dash, and you may need to cut the factory shaft cups to allow the new radio’s nosepiece and shafts to protrude far enough through the dash. This isn’t hard to do, either, but we want you to know that you might have to do it. We’ll include spacers with your order, so that’ll help. You’ll also save money on the wiring harness adapter you’ll need to connect the new receiver to the car’s factory wiring.
The single-DIN radios can be replaced by same-size models, and we’ll give you a discount on the wiring harness adapter and the trim plate needed to mount the new receiver in the dash opening.
Tools needed: Phillips screwdriver, 3/8" and 7/16" sockets, ratchet and extension
Read our Car Stereo Buying Guide for shopping tips and advice.
Shop for car stereos that fit your Mercury Capri
The Mustang's factory amp (if present) lives under the the dashboard (Crutchfield Research Photo)
Factory amplifier info
A lot of these Mustangs were equipped with the Ford “Premium Sound” system, which included an amplifier. If you’re not sure what’s in your car, look for the amplifier switch on the dash beside the radio. If your car has a factory amp, there are two ways to deal with it when you install a new receiver.
The first option is to keep using the factory amplifier. It’s not very powerful, but it’s there and if it’s working, what the heck. If your new receiver has an output of less than 5 watts RMS per channel, connect the receiver’s power antenna wire to the blue power antenna wire found on the wiring harness adapter included at a discount with your Crutchfield order. If the new stereo produces more than 5 watts RMS per channel, you’ll need an OEM integration adapter. Talk to a Crutchfield Advisor to make sure you get the adapter you need.
Your second option is to bypass the factory amp. This is a good idea, since almost any current aftermarket receiver will be more powerful than the old stock model. You’ll get to the stock amp by removing the dash panel. It’s not hard (and you’ll need to do it if you replace the dash speakers anyway), but it takes some work. Instructions on getting to the amp and replacing it can be found in your Crutchfield MasterSheet.
Important note: When it comes to amp bypassing, you’ll have to rewire the speakers, and there are some technical differences between the 1979-1981 cars and the 1982-1983 models. With 1984 Mustangs, you can’t bypass the amp at all. The 1985-1986 cars have their own peculiarities, depending on whether the factory amp is a 2-channel or a 4-channel model.
Your Mustang's factory speakers probably need replacing by now, doncha think? (Crutchfield Research Photo)
Removing the factory speakers
The number and location of the speakers in these cars varies by body style. They're mostly easy to deal with, though.
Replacing the dash speakers
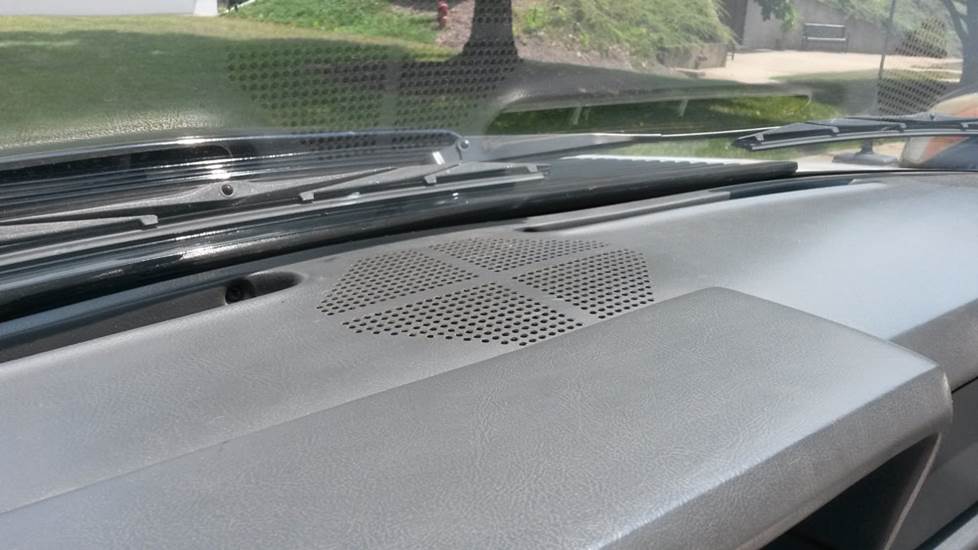
If your Mustang has the stock 3-1/2" dash speakers, they've been exposed to harsh sunlight since rock’s New Wave Era and they’re probably as fried as a bad perm at this point. Thankfully, these speakers are easier to get rid of than the photo of your bad eighties haircut that a "friend" helpfully posted online.
You’ll start by removing three Phillips screws from the upper edge of the dash trim panel. Lift the trim panel up and pull it away from the dash. Removing that trim panel will expose two Phillips screws. You’ll need to remove those, and also the two dash pad screws on the passenger’s side.
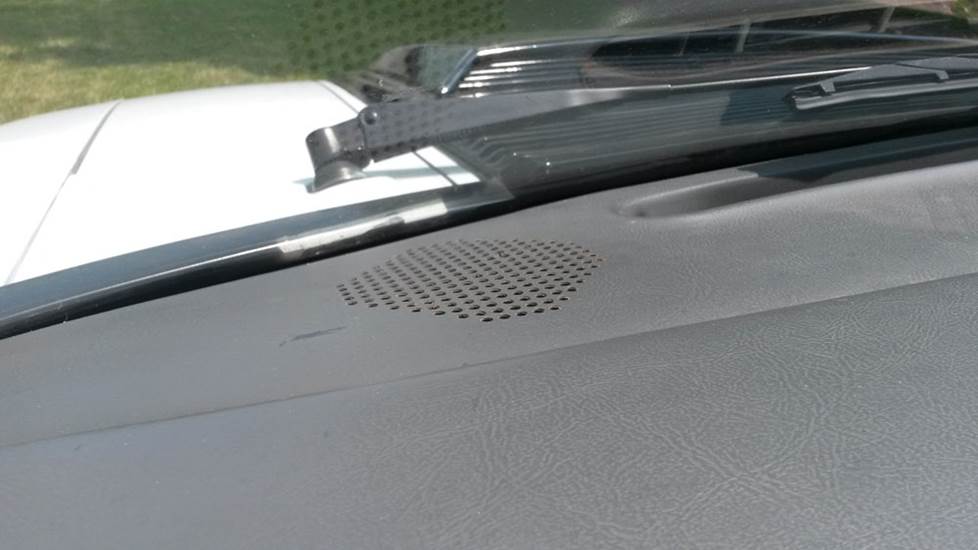
The dash speakers can be replaced by 3-1/2" aftermarket models (Crutchfield Research Photo)
Next, remove four Phillips screws from the defroster vents (two in each vent) and remove the whole dash pad. With that out of the way, just remove the two Phillips screws securing the speaker to the dash, then pull the old thing out of there and set it aside. From there, connect the new speaker’s wiring adapter to the vehicle’s speaker connector. Secure the speaker, test it or them out, and if everything sounds good, start putting the dash back together.
Note: You can modify the dash pad to obtain an additional 1/4" in mounting height if you need to.
Tools needed: Phillips screwdriver
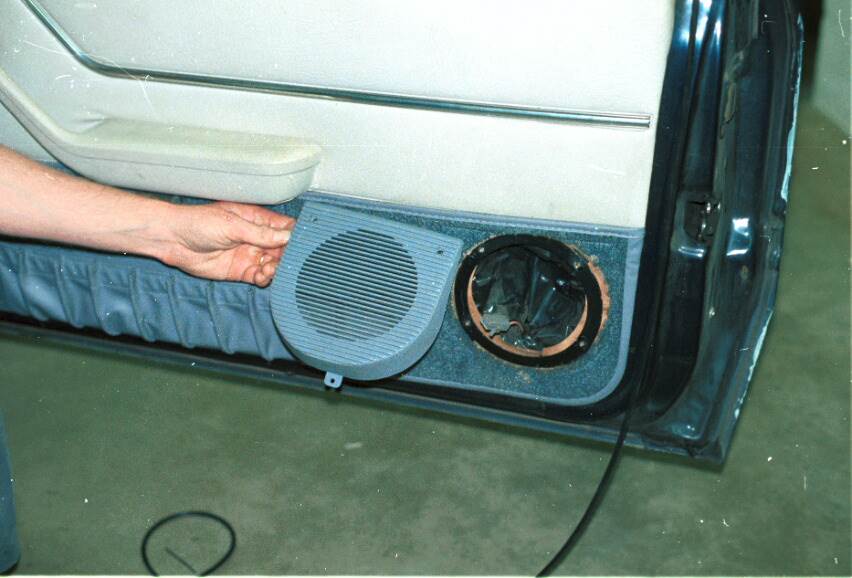
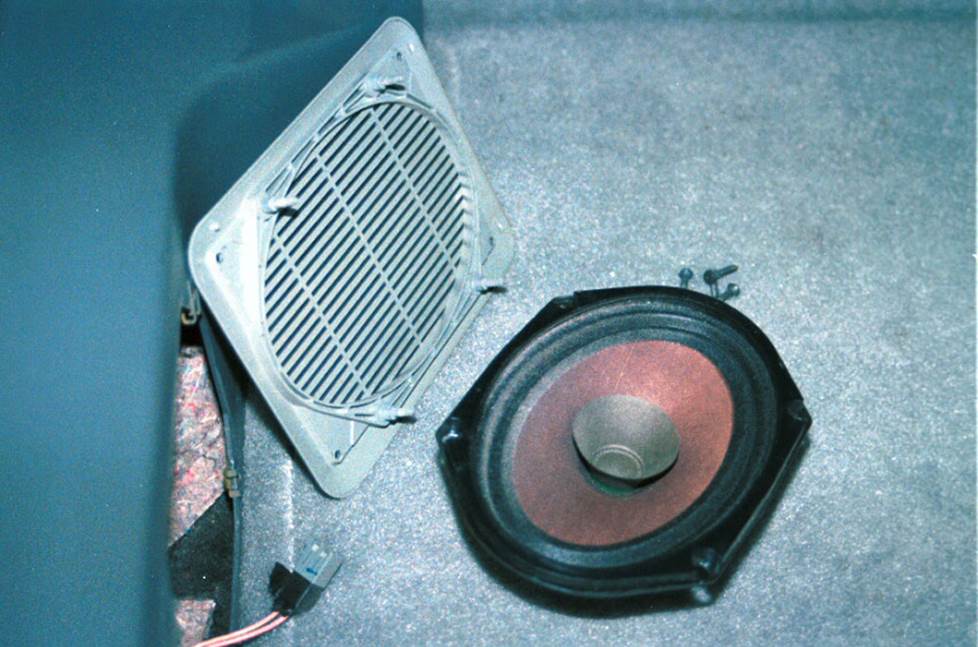
The convertible's door speakers are pretty easy to reach and replace (Crutchfield Research Photo)
Replacing the door speakers
A variety of 5-1/4" or 6-1/2" aftermarket speakers can replace the stock models. To make the swap, start by removing the three Phillips screws securing the speaker grille and remove the grille. Remove the four Phillips screws securing the speaker, then remove the sad old thing and start connecting the new one. Once it’s tested and working, reinstall the grille and start enjoying vastly better sound.
If your Mustang doesn’t have door speakers, you can still install 5-1/4" or 6-1/2" aftermarket models. You’ll have to cut out the openings, though, which is not the easiest thing in the world if you’re new to car audio DIY. If that seems a bit much for you and your skill set, consult a car audio professional in your area.
Tools needed: Phillips screwdriver
Replacing the rear deck speakers (Coupe)
The notchback coupe (or “notch,” in Mustang slang) came with a pair of speakers in the rear deck. Anything that’s been back there for a while is probably fried to a crisp by sunlight and plain old age, so a new set of speakers will make a noticeable difference.
You’ll have to fold yourself into the rather miniscule trunk for a bit to replace these speakers. If you’re roughly the same vintage as the car (or older), you might want to stretch first!
Once you’re in there, remove the cover under the rear deck (if there is one), then disconnect the speaker wire connector. Use an adjustable wrench to remove the nuts securing the speaker, then remove it and set it aside. Install the new one by reversing those steps, then connect the speaker wiring adapters (deeply discounted with your Crutchfield purchase), and test the speakers.
If vehicle was not equipped with factory speakers, you can still install new ones. Insert “quickie” bolts into the openings in the rear deck and secure them following the instructions in your Crutchfield MasterSheet.
Tools needed: Adjustable wrench
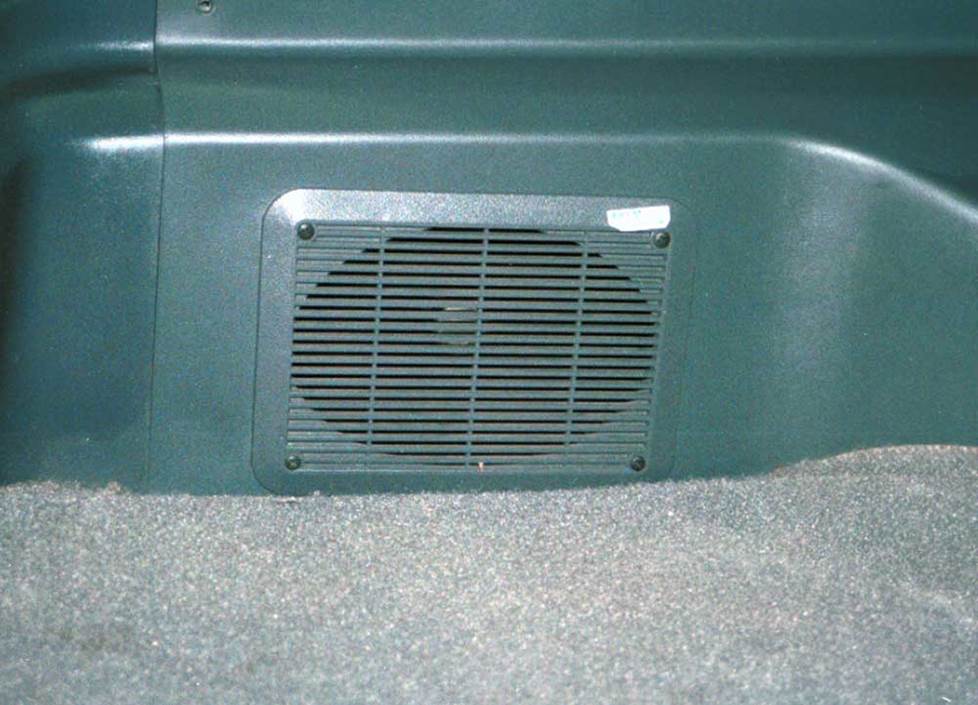
The hatchback speakers are very easy to work with, too. (Crutchfield Research Photo)
Replacing the rear side speakers (Hatchback)
The hatchback is a little easier to deal with, mostly because there’s less bending and folding of the car owner. Just lean in, remove the four Phillips screws securing the speaker/grille assembly, pull it out, and disconnect the speaker wiring connector.
Remove the four nuts securing the speaker to the back of the grille, toss the old speaker and secure the new one using the same bolts. Once you’ve finished both sides, connect the speaker wiring adapters to the speakers, test them out, and if they’re working, reinstall the speaker/grille assembly.
Tools needed: Phillips screwdriver, adjustable wrench
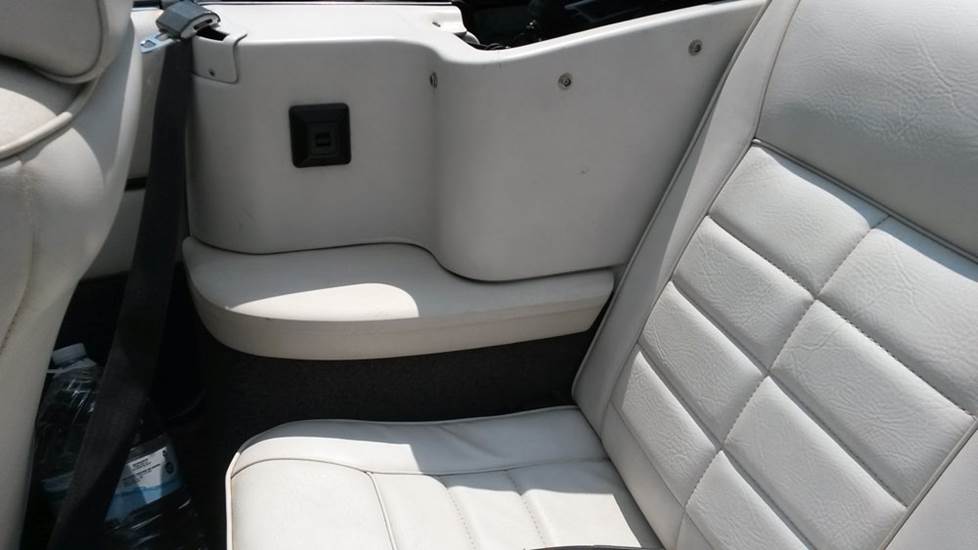
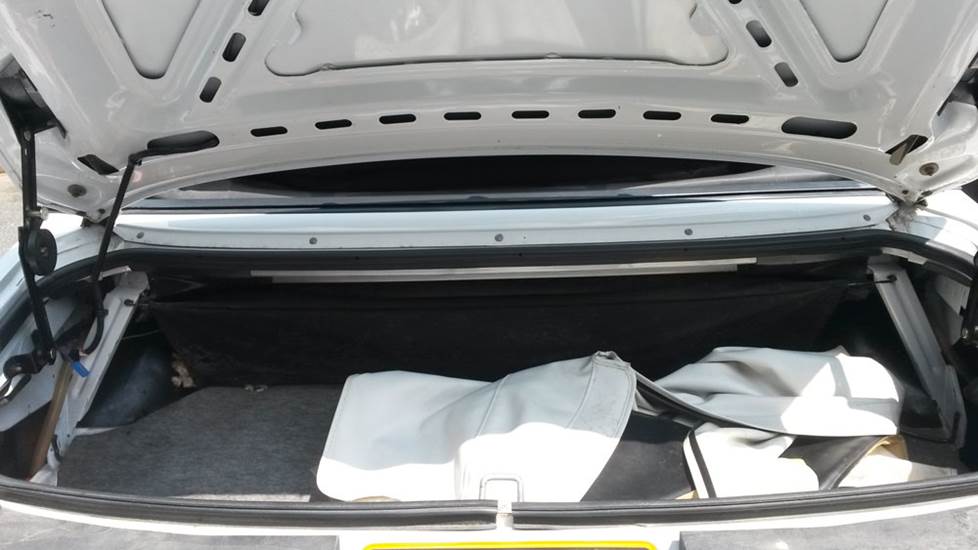
If this Mustang had rear side speakers, which it doesn't, they'd be in the side panels (Crutchfield Research Photo)
Replacing the rear side speakers (Convertible)
The Mustang ragtop pictured here doesn’t have rear side speakers, but it does have rear sides, so we’re running the photos anyway. We have researched a different Mustang convertible, though, so we can tell you how the speaker removal process goes. It’s a little more complicated than the coupe and the hatchback, but it’s still a thoroughly do-able DIY project.
You’ll start by removing the rear seat bottom cushion. Push it downward, then toward the rear of the car to release the retaining hooks. Lift the cushion up and set it aside in a safe place.
The next step depends on how the car is equipped. If you have power options, you’ll need to remove one Phillips screw from the power switch plate. If you have manual windows, remove one Phillips screw from the window crank and remove the crank from the side panel.
Next, remove two Phillips screws (located near the door jamb) from the rear side panel and another screw from the bottom center of that same panel. If your car has power options, reach behind the rear side panel to disconnect the speaker wiring harness and power switch harness. Once that’s done, lift the rear side panel out and remove it. You won’t need to remove the seat belts while you’re replacing the speakers, by the way.
Turn the panel around to access the speaker that’s mounted on the panel. Use a power drill and a 1/8" bit to carefully drill out the rivets securing the speaker. This isn’t hard, but it’s wise to work carefully and very wise to wear eye protection.
You can secure the new speaker to the panel using the hardware that usually comes with any set of new speakers. “Usually” does not mean “always,” though, so check the box before you start and make a run to the hardware store if you need to acquire some hardware.
Once you’ve done that on both sides, connect the speaker wiring adapters to the speakers, test them out, and if they’re working, start putting the side panels back together by doing everything you just did, but in reverse.
Tools needed: Phillips screwdriver, drill and 1/8" bit
Read our Car Speakers Buying Guide for more information.
Shop for speakers that fit your Mercury Capri
There's not a lot of space for anything in the Mustang convertible's trunk. Same goes for the notchback. A powered subwoofer is a good idea for these cars. (Crutchfield Research Photo)
Bass in your Mustang
The coupes and convertibles are not known for their trunk space, so achieving big-time bass performance can be a challenge. There are subwoofer boxes that will fit, but if you still plan to store anything besides a subwoofer back there, a compact powered subwoofer might be the best option. We also recommend installing some Dynamat on the trunk lid to reduce rattling.
The hatchbacks offer a lot more room to work with, but that big expanse of glass might get a little rattly, so plan accordingly.
Learn more about building a bass system in our Car Subwoofer Buying Guide.
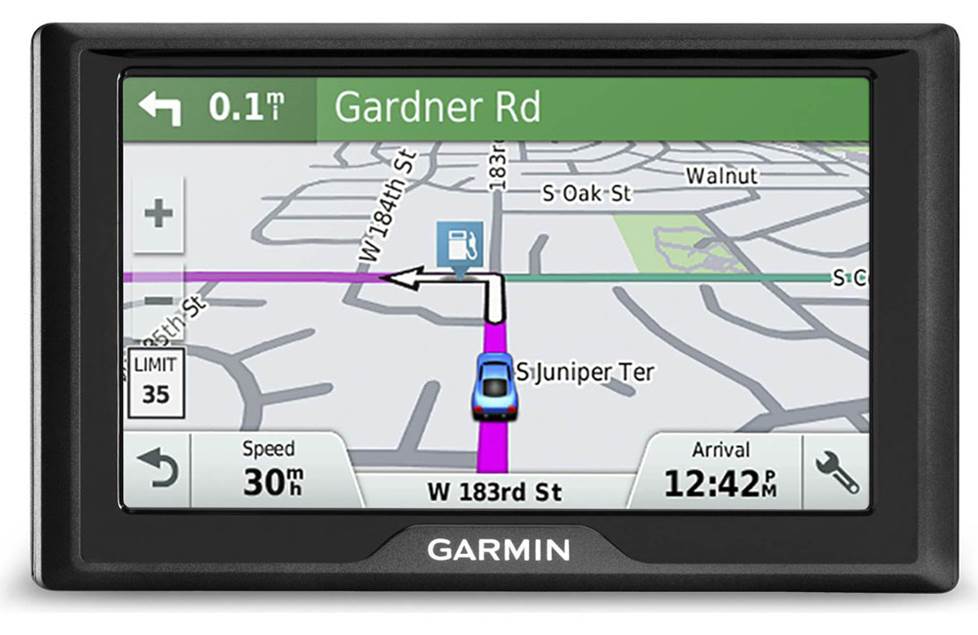
A Garmin portable GPS will be a smart addition to your vintage Mustang
Other options for your Mustang
Here are some other ideas for your Fox-chassis Mustang
Antenna replacement
A whip antenna lives a hard life, so if your Mustang’s antenna isn’t working or looks like it’s seen better days (or isn’t there at all), replacements are available. This is a good project to tackle while you’re replacing the old stereo, since radio removal is part of the process anyway. There are a few steps to this, but it’s nothing the average DIY-er can’t handle. Complete instructions can be found in your Crutchfield MasterSheet.
Navigation
A big-screen navigation receiver won’t fit in your Mustang, but that doesn’t mean you have to drive around lost. A portable GPS can mount on your dash and give you turn-by-turn directions, traffic updates, and everything else you need to make your drive go smoothly. Plus, when you get where you're going, you can put your GPS in your pocket and use it to find points of interest around town. And you won’t have to drain your phone battery, either.
Security
These Mustangs were wildly popular when new, so they're probably still popular with joyriders and car thieves. Installing a security system in your Mustang isn't easy (security systems rarely are), but it's less complicated than it could be. Our Crutchfield Advisors can help figure out what you need to get the job done, but we usually recommend taking your car and new gear to a professional installer.
Let's get started!
Ready to shop? Use our vehicle selector to find the gear that will fit your car or truck. If you have questions, give us a shout via phone, chat, or email
Comments (3)
Please share your thoughts below.


Donny Short
Posted on 12/16/2021
I still have the factory location amplifier in my 1983. I've bought a new stereo that will produce more than 5 watts RMS per channel, as well as new speakers. Is there a wiring diagram that will show me how to bypass the amplifier?
Jon Paul from Crutchfield
on 12/17/2021
Steve from Phoenix
Posted on 7/25/2021
This was HUGELY helpful and that is no surprise dealing with Crutchfield. You guys have always been great. Couple things: Speaker recommendations for front 3 1/2 inch and then the rear hatch back? You dont mention what size they are I would run the factory premium amp as I dont want to cut the thing up so the speakers do not need to carry a lot of power but im sure you guys sell some upgrades that are better than stock even with the weezy factory amp. thanks SOOOO much
Jon Paul from Crutchfield
on 7/26/2021
Logan from LISBON
Posted on 5/3/2021
Honestly I wish I would have read this first. Tons of help and answered every one of my questions. I also found of my 1985 Foxbody GT Hatchback is missing a few things thanks to this article. Thank you guys!!
Jon Paul from Crutchfield
on 5/3/2021