


The right tools for testing a car audio system
A quick look at the oscilloscope, real-time analyzer, and SPL meter

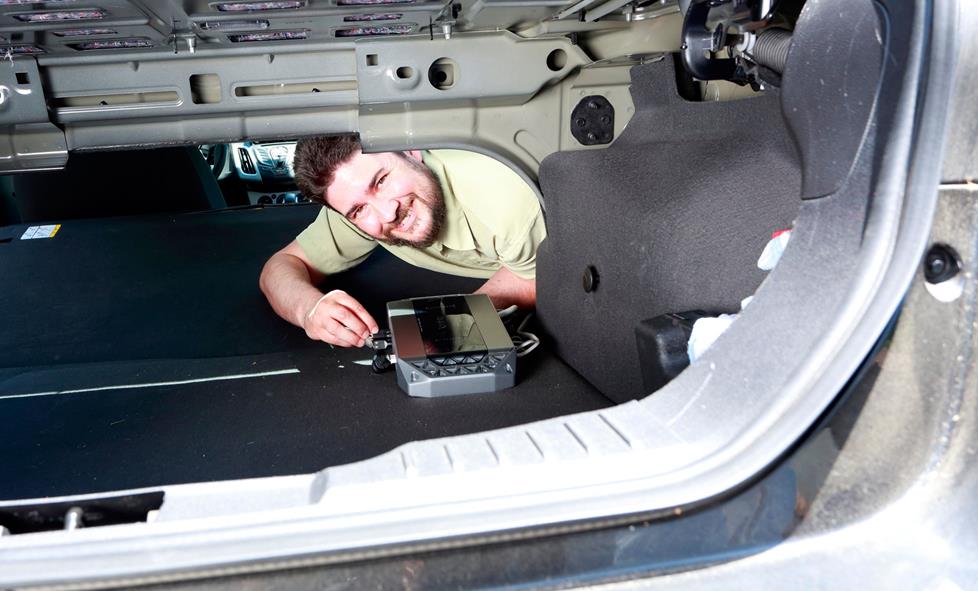
Whenever we embark on a new Crutchfield Labs car audio project, we tend to rely on three tools to help ensure that we set up everything correctly, and that we get the most accurate results. These tools test three essential elements: how clean a stereo’s signal is, how well a system plays all the frequencies in the musical spectrum, and how loudly a system plays.
Oscilloscope — helping keep distortion at bay
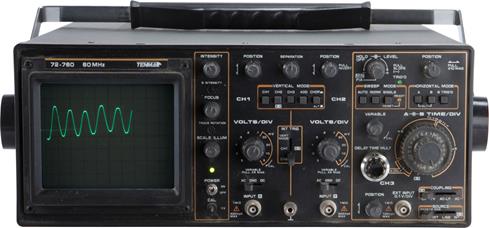
We use this oscilloscope in the Crutchfield Labs for a wide range of audio tests.
Sound reproduction is fundamentally about the manipulation of electricity in order to make speaker cones move. Good sound reproduction is about making sure the signal — the pulses of electricity a stereo sends to speakers — isn’t altered in any way by “noise,” such as electrical interference or distortion caused by excess current generated when the stereo’s volume is turned up too high. An oscilloscope can help us sniff out and eliminate this distortion.
Sound and electricity travel in invisible waves. An oscilloscope lets us “see” these waves by receiving the signal from the stereo and displaying a visual representation of the sound waves the stereo is putting out.
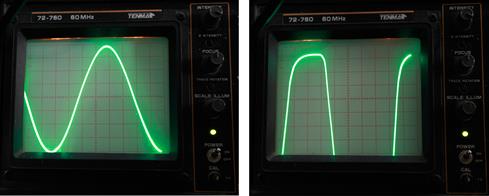
The round wave, on the left, means a clean signal. The square wave, on the right, indicates distortion.
When a signal is “clean,” it moves in a perfect sine wave; the top and bottom of the wave look nice and round. When distortion is introduced, say, when the volume of a stereo is turned up too far, the wave “clips,” or becomes square at the top and bottom.
The advantage to using an oscilloscope is that it makes it easier to detect distortion — we can often see it before we can hear it. When we use the oscilloscope to test a stereo, we play “white noise” — a simple tone at a single frequency (1,000Hz, for example, which is towards the upper end of the human vocal range) from an audio test disc. We then turn the volume up on the stereo until the wave squares off, then back the volume down until the wave is round again. This helps ensure that we’re testing the cleanest signals possible at maximum output level.
Real-time Analyzer (RTA) — testing across the frequency spectrum
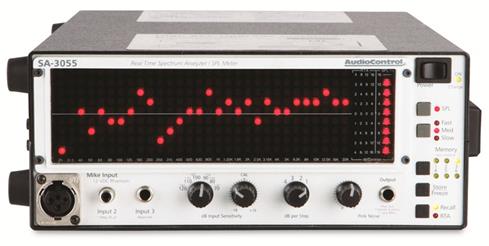
The RTA displays a system's audio performance across the entire range of the audible sound spectrum.
Music, of course, is made up of several frequencies. A typical song or piece of music can feature frequencies at most points along the audible spectrum — 20-20,000Hz. A stereo system’s frequency response is the relative level at which the system is playing the individual frequencies. The visual representation of the frequency response is called the “sound curve,” and it shows how loud different instruments and different sounds are in relation to each other.
The RTA uses an external microphone to listen to the sound coming from the speakers, then analyzes and displays the results. To make sure the data is accurate, whenever we run an RTA, we use a “pink noise” disc. Pink noise features frequencies across the spectrum, each played at equal power levels, so we know that the resulting sound curve is due to the components, not the recording.
Generally speaking, an RTA is a more accurate analytical tool than simply tuning by ear. It can pinpoint the exact levels of each frequency, which makes it easier to know where the flaws are, or how a given vehicle’s acoustics affect output. This can make it easier to compensate for these flaws, with better gear, adjusting a stereo’s audio settings, or a combination of the two.
SPL meter — how loud is it?
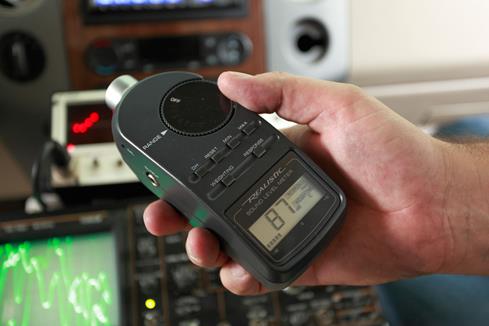
An SPL meter tells us exactly how loud, in decibels, a system is playing.
Sound pressure level, or SPL, expressed in decibels, measures sound energy. A handheld SPL meter lets us know exactly how loud a system can play. The built-in mic of an SPL meter “listens” to the output of a speaker, or set of speakers, then calculates the generated air pressure in decibels. Simply put, the louder a speaker plays, the higher the SPL rating will be. SPL does not take the quality of the sound, as expressed by the oscilloscope, into account.
An SPL meter is particularly useful when trying to understand the relationship between power and loudness. A one-decibel difference in sound pressure is the smallest amount of difference that the human ear can notice. Every ten-decibel increase in sound pressure roughly translates into twice the volume level, or loudness. And every three-decibel increase in sound pressure requires twice the amount of wattage from an amplifier.
Understanding SPL helps us more accurately evaluate elements such as the efficiency of a given set of speakers or the strength of an amp we’re testing. And when we’re tuning a system, the SPL reading, along with the RTA and oscilloscope data, can help us make sure we’re getting the best sound quality and maximum impact from the gear we’re working with.
Comments (3)
Please share your thoughts below.


Graham from Oakley, CA
Posted on 1/29/2022
Is there a cheaper alternative to the DM-RTA? $650 is a bit pricey for the average end-user.
Matt Freeman from Crutchfield
on 5/2/2022
Chris Stivers from Cleveland
Posted on 8/21/2020
I'm trying to determine my car audio's decibel level. I have a sound level meter app on my iPhone. Which frequency weighting setting would I use? dB A, C or Z?
Alexander H. from Crutchfield
on 8/24/2020
leonie from deer park
Posted on 2/8/2019
when using a rta how do I know what is a good setting and a bad? is there a certain way the rta should be to see good results?
Matt Freeman from Crutchfield
on 2/11/2019