


1993-1998 Toyota Supra
How to upgrade the stereo system in your Supra


In brief: This Crutchfield Research Garage article gives you an overview of your Supra's stock stereo system and your aftermarket upgrade options. We'll tell you all about:
- The factory stereo system
- Removing the factory radio
- Removing the factory speakers
- Adding more bass
- Other options for your Supra
Then, use our vehicle selector to find the gear that will fit your Supra.
Overview of the Toyota Supra
Muscle car enthusiasts have their Mustangs, Camaros, GTOs, and anything with a "Hemi innit," but the generation that came of age during the first golden age of hot imports has its own list of dream cars. The fourth-generation Supra is one of them.
The base Supra was a nice-looking ride with tons of potential. The Turbo model looked great, too, plus it was also screamingly fast. And once the tuning community got into that set-up, they discovered that the rock-solid engine could produce in the neighborhood of 1000 horsepower with the right mods. Needless to say, a star was born.

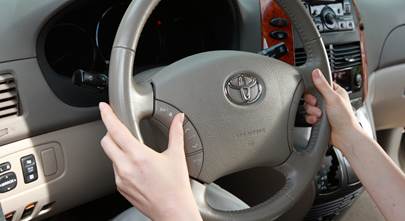
Best seat in the house, by far (Crutchfield Research Photo)
The Supra was already legend by the time a heavily-modded version took a star turn in a certain movie in which cars were driven fast and furiously. Since then, the legend has only grown, and 100% original cars are currently trading for a pretty penny. Modified cars, on the other hand, can still be found and enjoyed if you know where to look. If you're reading this, you probably do. Either way, a car that's this much fun shouldn’t sit in a garage forever.

The factory radio wasn't bad for its day, but not everything old is a classic (Crutchfield Research Photo)
The factory stereo system
The stock stereo systems consisted of an AM/FM/cassette receiver or an AM/FM/CD receiver with up to seven speakers, including a rear subwoofer. While nobody ever bought a Supra to sit in the driveway and play music, this wasn't a bad set-up for the time. If it's still in there, though, it's probably pretty worn out and the same can probably be said for any aftermarket gear installed by a previous owner.
If you replace a stock radio, remember that it's anti-theft coded. If there's a chance you'll want to reinstall it someday, you'll need that code, so write it down and tuck it into the owner's manual.

Once you remove the panels, the receiver is pretty easy to deal with (Crutchfield Research Photo)
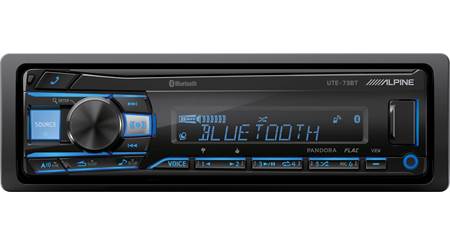
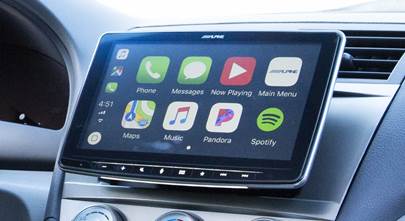
Removing the factory radio in your Supra
The stock radio can be replaced by a variety of single-DIN (2" tall) or double-DIN (4" tall) aftermarket models. Removing and replacing the old radio isn't that hard, but some of the finer points of installing the new one will depend on the aftermarket receiver you choose.
First off, set the parking brake and disconnect the negative battery cable to prevent any electrical short. With all that taken care of, you're ready to start taking the dash apart.
Use a panel tool to pry up the edges of the gear shift trim. Lift the trim and disconnect it from the ashtray. Then open the Velcro flap around the shift lever, slide the boot over the shift knob, and remove the trim.
Detailed stereo and speaker removal instructions

Remove five Phillips screws from the upper dash trim panel and pull the panel away from the dash. Disconnect the odometer, hazard, and security wiring harnesses, then remove the panel. Remove one Phillips screw from the top edge of the receiver/climate control trim panel, then carefully (we mean it) separate the control trim panel from the instrument trim panel. Disconnect the wiring harnesses and remove the panel.
After all that, you're finally ready to deal with the receiver. Remove the four Phillips screws securing it to the dash, then disconnect the harness and remove it.
As noted, there are some differences in how you'll install a DIN or double-DIN receiver. It's nothing scary, it's just different, and it's all explained in the Crutchfield MasterSheet that's included with your stereo purchase. You'll also get a big discount on the wiring harness adapter and dash kit needed for the installation.
Tools needed: panel tool, Phillips screwdriver
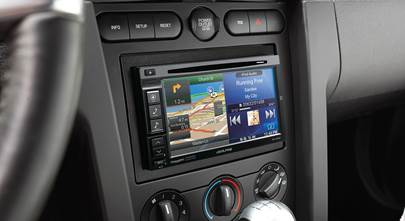
Read our Car Stereo Buying Guide for shopping tips and advice.
Shop for car stereos that fit your Toyota Supra

Your car's door speakers probably don't look as new as this one (Crutchfield Research Photo)
Replacing the speakers in your Supra
Replacing the Supra's stock speakers isn't all that hard to do, so it's a great project for the car audio DIY-er.

Getting to the dash speakers is incredibly difficult. As far as we know, anyway. (Crutchfield Research Photo)
Corner dash tweeters
We'd love to tell you all the many things we know about replacing the dash corner tweeters, but all we know is that we couldn't get the grilles to unsnap. Seriously, that's all we know. We just couldn't make it happen without snapping the grilles into pieces or something, so we gave up. We imagine it's possible to remove these grilles, but working on a borrowed car means erring on the side of caution. On the upside, hey, Toyota sure can screw a car together, can't they?
That was twenty-odd years ago, though, and even Toyota panels can loosen up over time. It might be easier now, or we might've been dealing with an exceptionally tight car. Who knows? But if you've managed to swap out your Supra's dash tweeters, we salute you and we also hope you'll share what you learned in the comments section below.
Tools needed: Panel tool, probably a screwdriver, possibly a Torx driver, patience. You tell us!

Your aftermarket door speakers will fit behind the factory grilles (Crutchfield Research Photo)
Door speakers
The Supra's 4" front door speakers were considered adequate for their time, but so were cassette tapes, so what does that tell you? If you care about sound, you'll need to replace them. A variety of aftermarket 4" models will work, but with no mounting brackets available, you'll need to use our universal backstraps to secure the new ones.
Removing the old factory speakers isn't that hard to do. Remove two screw covers in the upper front area of the door panel and remove the exposed Phillips screws. While you're in the neighborhood, remove one retaining clip by pressing in at the center, then prying out the clip.
Remove four Phillips screws from the bottom edge of door panel, then remove three retaining clips from the rear edge of the panel. Remove one Phillips screw from the door release trim, remove the trim, then remove one Phillips screw from the exposed cavity. Use a hook took to remove the screw cover from the bottom of the door pull cup and remove one Phillips screw.
Once all that's done, pull the door panel upwards and away from the door. Disconnect the wiring harnesses, remove the door panel, and store it somewhere safe while you keep working.
All that's left is removing the three Phillips screws securing the old speaker and getting it out of there. Installing the new one basically means doing all that stuff backward. Be sure to test the speakers before you button everything up again. Also make sure that the windows and locks are working properly.
As we said earlier, this isn't a hard job, but it's even easier if you stay organized and patient. Take your time on the panels and keep track of all the screws you're removing. You'll need them to put everything back together.
Tools needed: Phillips screwdriver, panel tool, small flat blade screwdriver, hook tool

Use care when removing the Supra's rear side speakers (Crutchfield Research Photo)
Rear side speakers
The rear side speakers are bigger and (slightly) better than the front door speakers, but they're still pretty weak at this point in their lives. You can replace these 6-3/4" speakers with same-size, 5-1/4", or 6-1/2" aftermarket speakers, and it's a pretty simple DIY project.
You'll start by using a panel tool to pry off the speaker grille. With that out of the way, remove the four Phillips screws securing the speaker. Pry the edges of the speaker (Our notes say to do so "vigorously," but use your best judgement….), pull it out, disconnect the harness, and remove it. When new, the speaker was firmly glued to factory bracket. That may still be the case, but on the other hand, the glue may have hardened over time. Be vigorously careful, whatever that means.
Tools needed: panel tool, Phillips screwdriver
Read our Car Speakers Buying Guide for more information.
Shop for speakers that fit your Toyota Supra

The rear subwoofer is our of the way and easy to replace (Crutchfield Research Photo)
More bass in your Supra
The Supra's optional rear subwoofer can be found in the car's rear floor. It's a 6"x8" model that can be replaced by a same-size or 5-1/4" aftermarket sub. The job's pretty easy, too, so if you're a DIY-er, you're in luck.
To reach the sub, fold back the carpeted floor mat. Remove the four Phillips screws securing the grille, then remove the grille and set it aside. Remove the four Phillips screws securing the factory speaker, pull it out, disconnect everything and set it aside.
Tools needed: Phillips screwdriver
Even more bass
If you want to go in a bigger, boomier direction, there's some room in the Supra's cargo area, but not much. You'll have a 29" W x 8" H x 18"/20" D space for a sub box (measured below the cargo cover) if that's what you want to do. You can get more creative, of course, and if you do, send some photos to our Customer Car Showroom.
Learn more about building a bass system in our Car Subwoofer Buying Guide.
A more compact powered subwoofer would also be a good choice for this car. It'll boost your bass without devouring what little cargo room you have to begin with.
Other options for your Supra
Here are some other ways to make your Supra an even cooler ride:
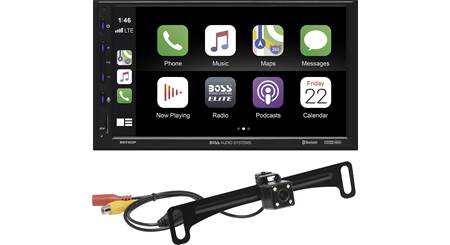
Cameras everywhere
With or without that iconic rear wing, the Supra is not the easiest vehicle to see out of when you're backing up in a crowded parking lot. We offer a wide variety of backup cameras that will make that a lot easier. You can go for a camera that mounts to your license plate and works with your new aftermarket nav receiver, or choose one that mounts onto your rear view mirror.
If you enjoy taking your Supra to track day or your local dragstrip's weeknight test n' tune, a dash cam is a great way to record your best laps. And on the way home, they're very handy for recording the behavior of other, decidedly less-talented motorists.
Connect your iPod® adapter or a satellite radio
If you don't want to replace your Supra's factory receiver, you can still add versatility and great sound to the system. We offer several adapters that will allow you to use an iPod with the factory system. Or, you could add a dock-and-play satellite radio.
Security systems
Installing a security system in your Supra isn't easy (security systems rarely are), but it's definitely a good idea. Our Crutchfield Advisors can help figure out what you need to get the job done, but we usually recommend taking your car and new gear to a professional installer.
Let's get started!
Ready to shop? Use our vehicle selector to find the gear that will fit your car or truck. If you have questions, give us a shout via phone, chat, or email
Comments (2)
Please share your thoughts below.


Lobuxracer from Atlanta
Posted on 9/6/2023
To remove the dash tweeters, you'll have to remove the dash. They're attached with screws from the underside. Most people won't do this. I did it because I had to remove the dash to fix the HVAC foam anyway, and I ended up using most of the OEM hardware but replaced the tweeters with new using hot glue to hold them in the OEM mounts. It's not for the faint of heart for sure.
Jon Paul from Crutchfield
on 9/7/2023
Mike A from Washington, D.C.
Posted on 6/24/2020
Great article! Thank you! Are there any aftermarket amplifiers that could be swapped into the factory amplifier location and use or easily convert to use the factory harness? Thank you!
Jon Paul from Crutchfield
on 6/25/2020