


2011-2015 Ford Explorer
How to upgrade the stereo system in your Explorer


In brief: This Crutchfield Research Garage article gives you an overview of your Explorer's stock stereo system and your aftermarket upgrade options. We'll tell you all about:
- The factory stereo system
- Removing the factory radio
- Removing the factory speakers
- Adding more bass
- Other options for your Explorer
Then, use our vehicle selector to find the gear that will fit your Explorer.
Overview of the Ford Explorer
There was a whole lot of "new" in the new-for-2011 Ford Explorer. Longer, wider, and sleeker than its predecessors, the fifth-generation Explorer was also the first of the breed not to be based on a truck chassis. The car-based, unibody platform delivered vastly better ride and handling characteristics and eliminated the real or imagined tippiness that some older Explorers were known for.
All in all, this Explorer was and is a pretty slick piece of work. Whether you call it an SUV or a crossover, the Explorer has the space you need for family, friends, dogs, camping gear, and bulk-size buys from the local warehouse store. Explorers are ubiquitous, but that's only because they're very, very good at doing what they do.
The stock stereos aren't bad at what they're supposed to do, either, but there are areas you can improve. What you can do depends on which stereo system you're starting with. Read on to learn more.

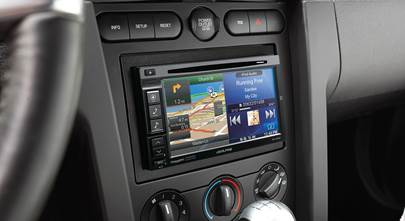
The base radio (shown here) can be replaced. The premium receiver, however, cannot. (Crutchfield Research Photo)
The factory stereo system
The base receiver is thoroughly integrated with the rest of the dash, but it can be removed and replaced with a variety of single-DIN (2" tall) and double-DIN (4" tall) aftermarket radios.
The optional 8" LCD and Sony receivers, however, are thoroughly integrated with the vehicle's climate control, passenger's side airbag, and other important things. You can install select iDatalink-ready receivers in your vehicle, but you'll also need to install an iDatalink Maestro ADS-MRR interface along with this package. Even so, you'll lose your SYNC functionality when you replace the stock radio. Enter your vehicle info to see the radios that will work, and give us a call if you have questions.
The standard speaker array is a 6-speaker system, but there's also an 8-speaker system and the 10-speaker Sony system, which includes a subwoofer. None of them are terrible (the Sony's quite nice, we hear), but if you want to take your Explorer's sound to new and previously unexplored heights, you'll want to upgrade where you can.

Replacing the base radio is a very do-able DIY project (Crutchfield Research Photo)
Removing the factory radio
Before you do anything else to your Explorer's stereo system, set the parking brake and disconnect the negative battery cable to prevent any electrical short. No one wants to grab a hot wire, and let's face it, you do not want to chase this truck down the driveway.
Once that's all taken care of, the receiver is pretty easy to remove and replace. Starting at the bottom edge, use a panel tool to pry out the receiver's side trim panels to release six retaining clips on each. Remove the panels, then remove the four exposed 7mm screws (two on each side). We suggest using a piece of paper to make sure the panel tool doesn’t mess up any of the dash panels.
Pull the receiver control panel toward the rear of the vehicle to release two retaining clips. Disconnect the wiring harness and remove the control panel, then remove the four 7mm screws securing the factory radio chassis. Pull it out, disconnect the harness, and remove the radio.
Removing the Sony or 8" receivers is largely the same process, which is good news. If you have questions, remember that your Crutchfield stereo purchase comes with free installation and tech support for the life of your new gear.
Depending on the aftermarket receiver you install, some dash modifcations may be required to make it fit. If that's the case, follow the instructions provided with the dash kit.

The aftermarket dash kit will hold either a single-DIN or a double-DIN (shown) receiver (Crutchfield Research Photo)
When you purchase your new stereo at Crutchfield, you'll get a nice discount on the dash kit and wiring harness you'll need to replace the base receiver it in your Explorer. The wiring interface for thisinstalaltion allows you to retain most functions of the Ford SYNC system. You'll also need a couple of other cables to make everything work, and they're part of the package. Oh, and you'll need a Windows PC to program the iDatalink interface, because it's not compatible with Macs.
For the upgraded radios, you'll need a different iDatalink interface (as noted above), which comes with its own set of installation and flashing instructions.
Detailed stereo and speaker removal instructions

Installing the new receiver is largely a matter of hooking everything up (instructions are included with the dash kit and wiring harness), then reversing the disassembly process. Once everything's hooked up, test the receiver to make sure it's working before you button the dash up again.
Tools needed: Panel tool, paper, 7mm socket, ratchet and extension
Read our Car Stereo Buying Guide for shopping tips and advice.
Shop for car stereos that fit your Ford Explorer
Steering wheel audio controls
In most cases, it's reasonably easy to retain your Ford's steering wheel audio controls when you install a new stereo. When you enter your vehicle information, our database will choose the adapter you need to make your factory steering wheel controls work with a compatible aftermarket receiver.

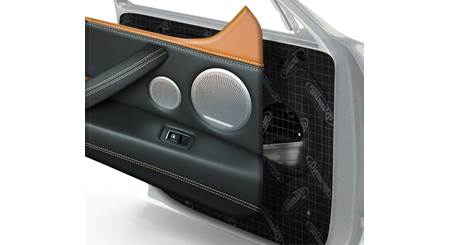
The Explorer's door speakers are pretty easy to reach and replace (Crutchfield Research Photo)
Removing the factory speakers
Replacing the speakers will make your new aftermarket receiver sound great. If you can't replace the receiver, at least it'll sound much better with new speakers.

The center dash speaker is not easy to reach. But once you get there, it's at least easy to replace. (Crutchfield Research Photo)
Center dash speaker (Sony)
Replacing the Sony system's 3-1/2" center dash speaker is a worthwhile endeavor, but you'll have to perform all of the steps needed to remove the radio without actually being able to remove or replace the radio. Interior design can be unintentionally cruel sometimes, what can we say?
Once you've done all that, all you need to do is pry up the grille, which is held in place with four retaining clips. Disconnect the wiring harness, remove the grille, then remove the two Torx T20 screws that hold the speaker in place.
A wiring harness is not available for this speaker, so you'll need to use two Posi-Products speaker connectors to connect it to the factory wiring. Once it's connected, test the speaker to make sure it's working properly.
Before you start putting things back together, make absolutely sure the airbag wiring harnesses are connected. Complete, step-by-step receiver removal instructions can be found in the Crutchfield MasterSheet that's included with your purchase.
Tools needed: Panel tool, 7mm socket, ratchet and extension, Torx T20 driver

There are lots of aftermarket component speaker options for the Explorer (Crutchfield Research Photo)
Removing the Explorer's front door speakers
All Explorers feature component speakers in the front doors. You'll need to remove the door panels to replace these speakers, which isn't a difficult task as long as you work carefully and keep track of all the screws and panels you remove along the way.
A variety of aftermarket component systems will work in the front doors. Woofer-wise, you can go with 6"x9", 6-1/2", or 6-3/4" systems, and most component tweeters will work. Some woofers will require mounting brackets, and they'll be included with your Crutchfield purchase. Securing the tweeters, on the other hand, will require universal backstraps (or hot glue or silicone). You'll also need to use Posi-Products speaker connectors for the tweeters, because there's no wiring harness available.
In some cases, you may need to drill new mounting screw holes for the speakers. This isn't hard, but you'll want to work carefully and wear eye protection.
Once you've finished replacing the speakers, test them out before you put the doors back together. Also be sure to make sure the locks are working properly and the wires aren't interfering with the windows.
Note: There's no speaker harness available for 2011-12 models with the 8-speaker systems. You'll need to use Posi-Products speaker connectors as part of this upgrade.
Tools needed: Panel tool, paper, 7mm and 10mm sockets, ratchet and extension, small flat blade screwdriver, drill with 1/8" bit

You'll need to drill new mounting holes before you replace the rear door speakers (Crutchfield Research Photo)
Removing the rear door speakers
The regular rear door speakers are full-range models that can be replaced by 6-1/2" or 6-3/4" aftermarket models. The job's not that hard, but you will need to drill new mounting holes for the bracket. This is not an awesomely challenging task, but you'll want to know what you're drilling into. Work carefully and wear eye protection.
Start at the top corner and pry off the sail panel. Move on down the door and pry out the screw cover behind the door release, then remove one 10mm screw. Next, pry out the screw cover behind the door pull and remove one 10mm screw.
Remove two 7mm screws along the bottom edge of the door panel, then pry out the sides and bottom of the door panel to release nine retaining clips. Disconnect the wiring harnesses and door release cable, then remove the panel.
Remove the three 7mm screws securing the speaker, then disconnect the wiring harness and pry the speaker off of the door. Secure the new speaker to the mounting bracket included with your order, then place the entire assembly into the cavity and mark the two new mounting holes. Remove the assembly and drill the holes with a 1/8" bit, then secure the speaker. As noted above, work carefully and wear eye protection.
When you're done, be sure to test the new speakers before you start putting the door back together. Make sure the locks and windows are working properly before you button everything up again.
Tools needed: Panel tool, 7mm and 10mm sockets, ratchet and extension, drill with 1/8" bit

The Sony system's rear pillar tweeters should be replaced at the same time you replace the sub. You'll see why in the next photo. (Crutchfield Research Photo)
Removing the rear pillar speakers (Sony)
The Explorer's Sony system includes an 8" subwoofer and a pair of 3-1/2" rear pillar speakers. We mention the subwoofer here because if you're going to replace the speakers or the sub, you might as well change that "or" to an "and," since you'll have to pretty much take the rear of the interior apart to do either.
Once you've gotten to the speakers, the actual replacement part is pretty straightforward, aside from using another set of Posi-Products speaker connectors to connect the new speakers to the factory wiring.
Tools needed: Panel tool, 7mm socket, ratchet and extension
Read our Car Speakers Buying Guide for more information.
Shop for speakers that fit your Ford Explorer

It's not as hard as it looks, really. Close, though. (Crutchfield Research Photo)
Bass in your Explorer
As noted above, replacing the Sony subwoofer involves quite a bit of work. None of the steps are remarkably hard, it's just that there are a whole bunch of them. You'll want to reserve an afternoon for this job, and you might want to bribe a handy friend with pizza and beverages, too.
Direct-fit (more or less) subs can be found, but in most cases, you'll need to drill new mounting holes with a 1/8" bit. Again, it's essential to know the area you're drilling into, work patiently, and wear eye protection.
This is a low-impedance sub, so look for something similar in an aftermarket model. Installing a higher-impedance aftermarket speaker will result in lower volume, which is kind of not the point of adding a new sub!
Remember to test the sub (and the rear pillar speakers) before you go to the trouble of putting the cargo area together again.
Tools needed: Panel tool, 8mm & 10mm sockets, ratchet and extension, Phillips screwdriver, drill with 1/8" bit

This JL Audio Stealthbox is designed for your Explorer
Adding a subwoofer to your Ford Explorer
If you don't have the Sony system (or just want to add even more bass), there are some other aftermarket options.
With the third row seats in the "down" position, you have a 39" W x 17" H x 39" D (top)/48" D (bottom) space for a subwoofer enclosure. With the seats in the "up" position, that becomes a 39" W x 26" H x 15"/15" D space.
There's also a JL Audio Stealthbox that's designed for the Explorer. This sub/enclosure combo contains a 10" JL Audio sub and fits into the passenger-side rear cargo panel. You will need to remove the stock Sony sub to install this one, though, and the Stealthbox won't work with the Explorer's cargo security shade accessory.
Learn more about building a bass system in our Car Subwoofer Buying Guide.
Shop for vehicle-specific subwoofers for your Ford Explorer

Adding Dynamat will make your Explorer an even nicer place to enjoy music
Other options for your Explorer
With a vehicle like the Explorer, there are lots of ways to upgrade your entertainment.
Rear-view cameras
The Explorer is a big vehicle, and maneuvering in a crowded parking lot can be a huge challenge. If you want a better view of what's behind you, we offer rear-view cameras from Kenwood, Alpine, Sony, Pioneer, and more. Some are designed to work with same-brand receivers only, but others come with a composite video connector and will work with almost any video receiver.
Add an amplifier and improve the sound
If you're mostly using your Explorer to haul gear rather than kids, you can still have an amazing system without sacrificing square footage — look for amps with small footprints to fit in the out-of-the-way spaces in your cargo area. Learn more about adding amps to your system in our Car Amplifier Buying Guide.
Sound damping to block noise
Fifth-Gen Explorers are actually kind of quiet for SUVs, but as trucks age, creaks and groans can start to intrude on your driving serenity. A Dynamat Xtreme Door Kit is the perfect way to seal in sound. This heavy-duty insulating material is easy to install, and it really makes a difference. One kit will take care of the front doors in your Explorer. The rear doors and the rear hatch are also good areas to target if you build a serious sound system.
Security
Installing a security system in your Explorer isn't easy (security systems rarely are), but it's definitely a good idea. Our Crutchfield Advisors can help figure out what you need to get the job done, but we usually recommend taking your car and new gear to a professional installer.
Let's get started!
Ready to shop? Use our vehicle selector to find the gear that will fit your car or truck. If you have questions, give us a shout via phone, chat, or email
Comments (2)
Please share your thoughts below.


Derrick
Posted on 8/9/2023
I have a 2013 Ford Explorer xlt with larger screen but NOT the sony system. What is the best way to get the audio signal to an added sub amp? Would I have to lose the rear speakers in order to tap in with speaker level inputs or is there a way to do it without losing sound from any other speakers (extra RCA input in factory head unit maybe)? I'm planning to use all other factory stereo components including factory head unit since it's a touchscreen integrated with other vehicle features.
Jon Paul from Crutchfield
on 8/10/2023
Max Balan from Chicago
Posted on 9/29/2019
Would this fit my 2016 Ford Explorer
Jon Paul from Crutchfield
on 9/30/2019