
Custom instructions
for your 2006 Dodge Ram 2500
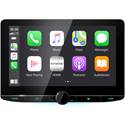
Your new gear

- Steering Wheel Controls
- SWC Made Simpler
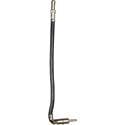
- Amplifier
- Retained Accessory Power (RAP)
- Fade Control
- Parking Brake & Other Connections
- Vehicle Gauges & Other Added Features
Installation process
- Grab your disassembly instructions
- Lay out your gear and review your manuals
- Gather your tools
-
 #2 Phillips screwdriver
 8mm socket
 flat file
 hack saw
 index card
-
- Review these tips and warnings
-
- Set aside plenty of time
- Use your computer to program your new radio's vehicle interface module
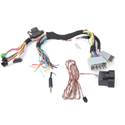
- Connect your wiring harness
- Disassemble your dash
- Follow the steps in your Crutchfield custom instructions for proper dash disassembly
- 2006 Dodge Ram 2500 Pickup Mega Cab Custom Instructions (PDF)
- Route wires for any included accessories through the dash and connect them to your new stereo
- Accessories can include Bluetooth microphones, USB extensions, antenna adapters, and OBD II interface cables
- Plug the wiring harness you connected to your stereo into your vehicle's wiring harness according to harness instructions
- Mount your gear
- Follow mounting kit instructions for proper placement of your stereo and kit in your dash
- Test your new stereo
- Before turning on the vehicle's accessory power, make sure no SRS or airbag components are unplugged
- Make sure you can hear sound, and that all stereo functions work (such as Apple CarPlay or Android Auto, Bluetooth, and your steering wheel remote controls, if applicable)
- Test all vehicle functions
- Make sure vehicle features like climate controls, window switches, and door locks all work
- Common troubleshooting topics
- Reassemble your dash
- Reverse disassembly steps in your custom instructions
Videos relevant to your installation
Crutchfield: iDatalink Maestro setup tips
Troubleshooting FAQs
Unfortunately, the stock images cannot be removed from the slideshow.
To adjust the screen brightness for current lighting conditions, press the "Menu" button and select the "Screen Adjustment" settings to increase or decrease the backlighting.
You'll find a small, plastic "protective cover" that goes over the point where the screen hinge connects to the radio body. When in place, this cover engages a tiny switch that enables the power to turn on. Without this cover, the stereo won't turn on. See page 89 of the stereo's owner's manual.
The 4-pin data cable plugs into the black port on the module, not the red port.
The interface needs to communicate with the stereo before navigation and backup cameras will work. First, check the status LED on the RR module. Then check that the 4-pin data cable is securely connected to the car stereo.
To make sure your factory Bluetooth buttons work with the Bluetooth in your new stereo, do not retain the factory Bluetooth during the Maestro flashing process.
When you install a Bluetooth-equipped aftermarket radio using an iDatalink ADS-MRR, make sure the factory Bluetooth is unchecked during the flashing process. If it is not unchecked, you'll experience intermittent Bluetooth connectivity problems.
We recommend going through the flashing process with the module again, and verifying that the steering wheel control fields in the flashing program are populated with the correct functions.
If you get an error message while trying to flash the MRR module, you'll need to shut down the app, unplug and reload the app, and reconnect the module.
According to iDatalink, you cannot retain use of the factory Bluetooth connectivity if you're going to use your new radio's CarPlay functionality.
If you're having problems with the iDatalink Maestro, most issues are usually resolved by resetting the RR module. First, turn the key to the OFF position, then disconnect all connectors from the module. With the car still off, press and hold the module's programming button while putting all the connectors back in the module in the order listed here. 1. Plug in the 3-pin power connector. 2. Plug in the 18-pin connector. 3. Plug in the 10-pin connector. Wait as the module's LED flashes RED rapidly (this may take up to 10 seconds). Then release the programming button. The LED should turn solid GREEN for 2 seconds to show the reset was successful. If you still have problems, please contact our Tech Support team.
The factory compass display only works with compatible car stereos. Currently, it only works with select iDatalink-ready Kenwood navigation receivers.
You'll find the turn signal reminder option in the OEM settings of your iDatalink-ready car stereo. Turn on the Turn Signal Reminder so it activates the provided speaker.
The MRR only retains the factory microphone for factory options like Onstar, Bluetooth, SYNC, etc. You'll use the aftermarket microphone for features included with your new car stereo, like CarPlay, Android Auto, Bluetooth, or Siri voice control.
Check the Maestro Features in the radio menu. Select "Advanced Camera Features," then turn off "Low Speed Trigger."
The satellite radio feature can only be retained if the satellite radio tuner is not built into the factory radio. If the satellite radio tuner is built into the factory radio, you'll need the aftermarket SiriusXM tuner. When you flash your ADS-MRR, it will tell you whether or not you'll retain this feature.
1. A single, repeating red flash means no firmware is loaded. 2. Two repeating red flashes mean there is an issue with the data cable; it's either not plugged in correctly or not plugged in at all. The problem could also be that the flash was not performed correctly (wrong radio model, wrong radio serial number, etc.).
According to iDatalink, you can leave a USB cable extension plugged into the MRR in case you want to reflash (maybe for steering wheel control functions) later and don't want to take the dash apart again. However, we don't recommend this because you risk causing major damage to your car's computer or your laptop if not done properly. If you want to do this, you MUST disconnect your car's battery before plugging the USB cable into your computer.
We do not flash the iDatalink module. You'll need to do that yourself before installing your new radio and iDatalink module.
The Reverse output on the Maestro "T" harness will not function if the vehicle has a manual transmission. You'll have to connect the stereo's reverse wire directly to the vehicle's reverse light wire.
The iDatalink ADS-MRR does not handle audio processing, so that's not the issue. If the vehicle has a factory amp, make sure you're using the correct adapter harness and have cut out the inline resistors. If there is no factory amp, check your speaker wires for weak spots or damage.
The blue, 4-pin plug is used to retain steering wheel controls with non-iDatalink-ready stereos. If your stereo has a data port for the MRR module, do NOT use the blue plug.
The MRR module presents a "Scan-Tool Header" to the OBDII bus so that it can read gauge information. If there is any other device connected to the bus anywhere in the system (an OBD dongle from your insurance company, for example) that also presents a "Scan Tool Header" to the bus, the MRR will go into "Scan Tool Avoidance Mode" and will not read the gauge information. This bus can only have one "Scan Tool Header" present on it at any given time. That's why the MRR does what it does.
No. The Purple/White wire from the Maestro should never be used to power a backup camera. Trying this shortcut could damage the Maestro module.
If you're installing a radio without an iDatalink port, the MRR module will not retain the factory fader. If you are installing an iDatalink compatible radio, fader/balance control of the factory amp is handled through the 4-pin data cable. If the 4-pin is connected from the Maestro module to your new radio, this problem usually occurs when your vehicle had been misidentified during the programming process regarding the presence of a factory amp. You'll need to reflash the module with the appropriate vehicle options selected.
Try resetting the radio and the MRR interface (reset, not re-flash). Unplug and reconnect both ends of the 4-pin data cable. Check the cable for loose wires or pins.
Many installations do not use this connection. It's for a door chime adapter that's only needed in a few vehicles. If your vehicle needed it, it would be included with the vehicle harness.
Check to see if the stations you're selecting end with an even number. If so, you're in European tuning mode. You may select U.S. standard or European tuning on this Kenwood. To switch to/from European tuning: 1. Hold the source button down to turn the unit completely off (display must be off as well). 2. Hold down preset buttons 1 and 5. 3. Press the SRC button, while holding down preset buttons 1 and 5. 4. After the SRC button is pressed, the unit will turn on and you can release the SRC, preset 1 and preset 5 buttons.
Machine screws for ISO-DIN mounting are not included with this Kenwood radio. Four screws will be needed (size M5 x 8mm), available at any hardware store, or you can use the screws from the original factory radio. If you bought the stereo from Crutchfield, you should have received a screw pack with the order. Check to see if the pack is hiding somewhere in the bottom of the box.
The iHeartLink app for JVC and Kenwood is no longer being supported. You can now enjoy iHeartRadio via Bluetooth connection.
Per Kenwood, here's the best way to organize files in a USB drive for your Kenwood to read it properly: 1st level (root folder) - Maximum 8 folders 2nd level - Maximum of 999 folders 3rd level - Only music tracks, no additional sub folders compatible.
A T-harness is required for installations using the ADS-MRR module.
If you can't scan through radio presets (including SiriusXM) with the normal buttons, try using the Seek and Channel Up buttons instead.
In order to pick from the nine choices listed, you'll need the three-letter code from the front of your factory radio, usually found on the bottom right corner.
1. Verify connections for Accessory Power, Constant Power, and Chassis Ground. 2. Check the fuses in the vehicle, interface, and radio. 3. If you have access to a multimeter, check for voltage on the constant and accessory power wires, using the black chassis ground wire of the radio for your reference point. 4. Power the stereo directly from the battery to test the stereo. Twist the red and yellow wires together, hold them on the positive post of the battery and hold the black wire to the negative post of the battery. 5. In many radios, you'll need press the power button to turn it on. This could be the volume knob, the source button, or an actual power button. 6. If your installation uses an interface module, make sure the module is plugged in and flashed if need be.
Help us improve our installation resources
We're glad the page was helpful.
We're sorry the page wasn't very helpful.
We've received your feedback, thank you!
Was this page helpful?
Need help? We're right here in Virginia, 7 days a week
For installation help by phone from one of our tech specialists, call
1-800-955-9094
Monday-Friday:
9 AM - 8 PM ET
Saturday-Sunday:
10 AM - 7 PM ET
Lunes a viernes:
9 AM - 6 PM este
