How to hide the wires for your speakers and TVs
In-wall wiring guide for home A/V

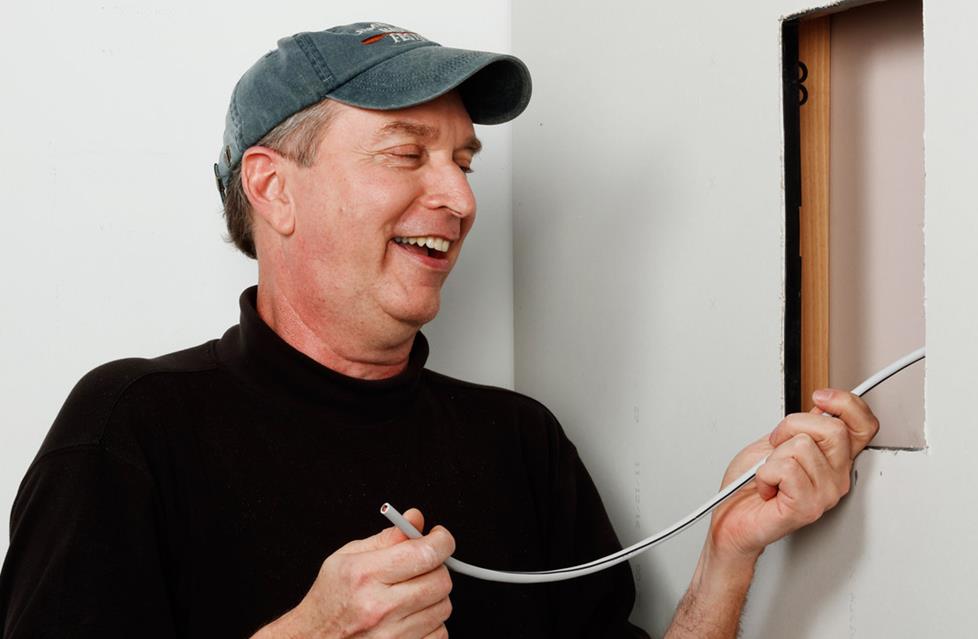
Crutchfield advisor Norm has worked on hundreds of whole-house wiring jobs.
This guide will help you save money by doing your own small-scale in-wall wiring projects in both finished and unfinished rooms. If you decide to hire a professional, the knowledge you gain will help you work through the process with your contractor.
Can you do the in-wall wiring yourself?
Is it legal?
In most locales, a homeowner is allowed to install low-voltage wiring. However, each state has its own code, as do some cities and counties, so check with your local authorities to be sure.
Are you capable?
If you’re new to this sort of work, look to tackle a relatively small project, like hiding the wires going to the rear speakers in your home theater.
The easiest scenarios for a do-it-yourself installer are those in which you can run wires in the attic, unfinished basement, or crawlspace. Use these spaces as much as possible, even if it means longer runs of wire.
Consider wireless options first?
Before you start drilling holes in studs or cutting holes in your walls, consider today’s wireless music solutions. There are a variety of wireless speakers, as well as some receiver/transmitter combos that work with regular amps and speakers. A lot of people ask us about wireless surround sound systems. For years there was no good answer. Now there are several.
Request a system design
Before you begin, you’ll need a plan. Do yourself a favor and submit a system design request to Crutchfield’s A/V Design team. You can upload a floor plan and pictures of your room and then chat with a designer about your goals. You’ll receive a system plan and a link to a shopping cart filled with all the items you need to complete your project.
Things you’ll need
Always use wire that's rated for in-wall installation. Look for speaker wire with a CL2 or CL3 rating. Wire rated CL2P or CL3P is for placement in a plenum-rated airspace above a drop ceiling in a commercial building. You'll want cable rated for direct burial if you're running it through the ground to outdoor speakers.
Speaker wire gauge and conductors
In-wall speaker wire is identified in shorthand that indicates its gauge (thickness) and its number of conductors:
- 16/2 is 16-gauge wire with 2 conductors
- 14/4 is 14-gauge wire with 4 conductors
The lower the gauge number, the thicker the wire. For runs of less than 50 feet, 16-gauge wire will suffice. For longer runs, use thicker 14 gauge wire.
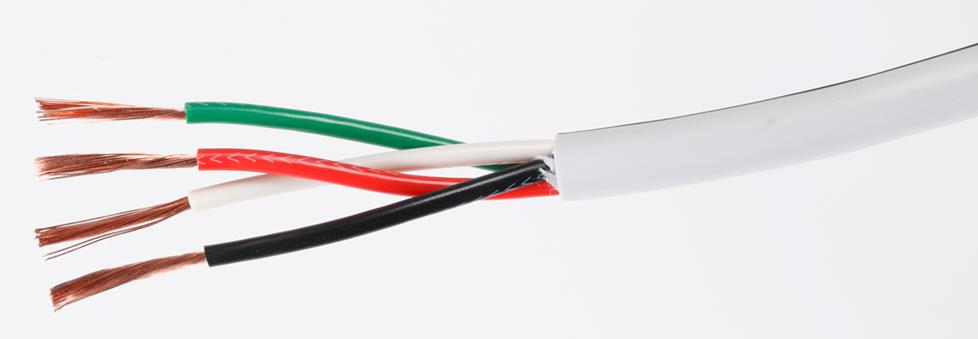
Why pull two wires when you can pull one instead? Four-conductor wire has positive and negative wires for both left and right speakers inside a single jacket. It's often used between an amplifier and an in-wall volume control or a stereo-input speaker.
How much wire should you buy?
After planning where you're going to route your wire, you’ll need to figure out how much you'll need. Ask your system designer for help with this. He or she can provide you with a wiring "map" — a plot that shows what you're installing in each room, including all of the speakers, cables, brackets, and other items you'll be installing.
Your designer can look at your floor plan and give you a solid recommendation of how much wire to buy. If you’re mapping out your own plan, think through where each wire will have to go. Pace off or measure each pathway. Tips:
- Allow extra wire for the connections. For example, if you intend to install ceiling speakers by yourself, allow 2-3 feet of extra wire so you can set the speakers on your ladder while you hook them up.
- Allow 10 to 15 percent extra: Your planned wire route might be thrown off by an unexpected obstacle. To be safe, buy at least 10 percent more wire than you think you need.
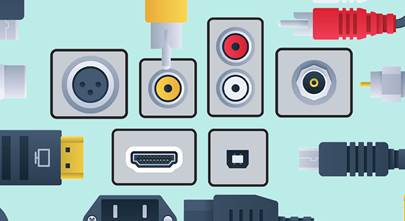
Audio/video cables
Most audio and video patch cables are not suitable for in-wall installation. Some HDMI cables that are rated for in-wall use don’t support 4K or HDR video.
Fortunately there are some clever solutions, such as baluns, that use in-wall-rated network cable, coax cable (RG-6), or even fiber optic cable to pass audio and video signals over long distances.
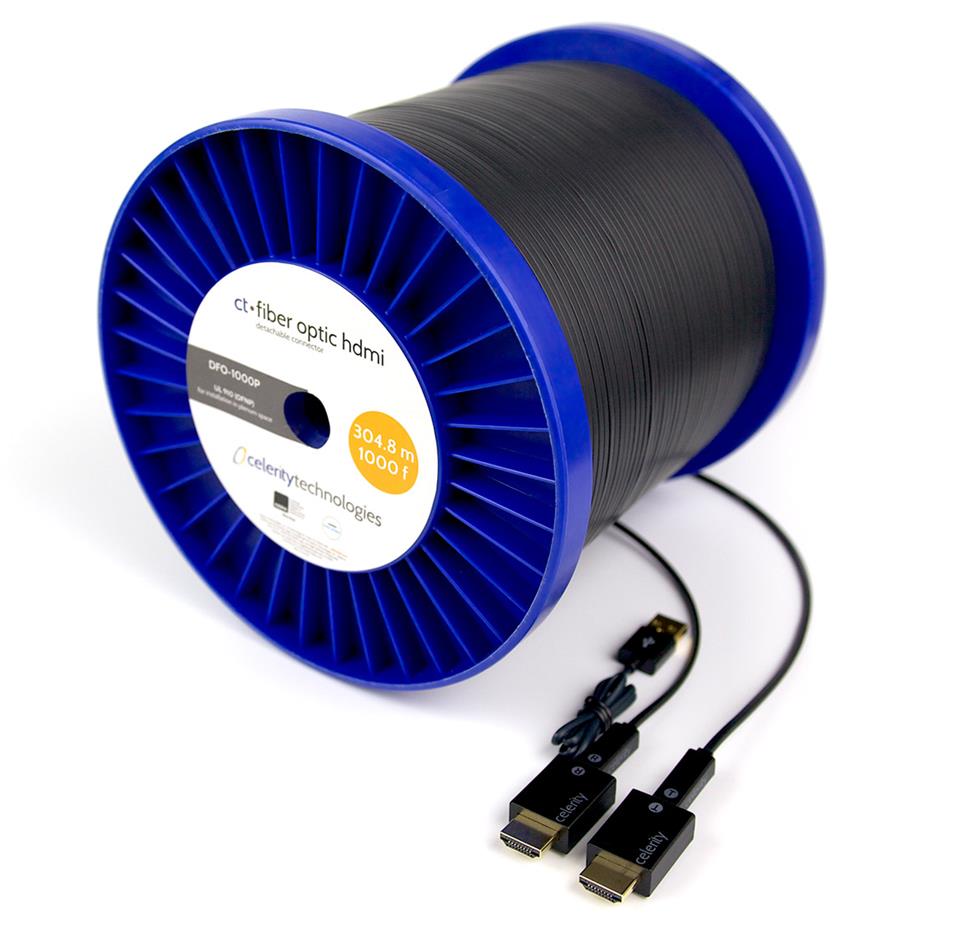
Celerity fiber optic HDMI cables keep the signal strong over long runs, and they’re immune to interference.
Wall plates and brackets
Your system designer can also help you determine how many and what kind of wall-mounted receptacles and in-wall volume controls you’ll need. You’ll also need mounting brackets to support the receptacles and volume controls. Your designer can add all of these parts to your system plan and a pre-filled shopping cart.
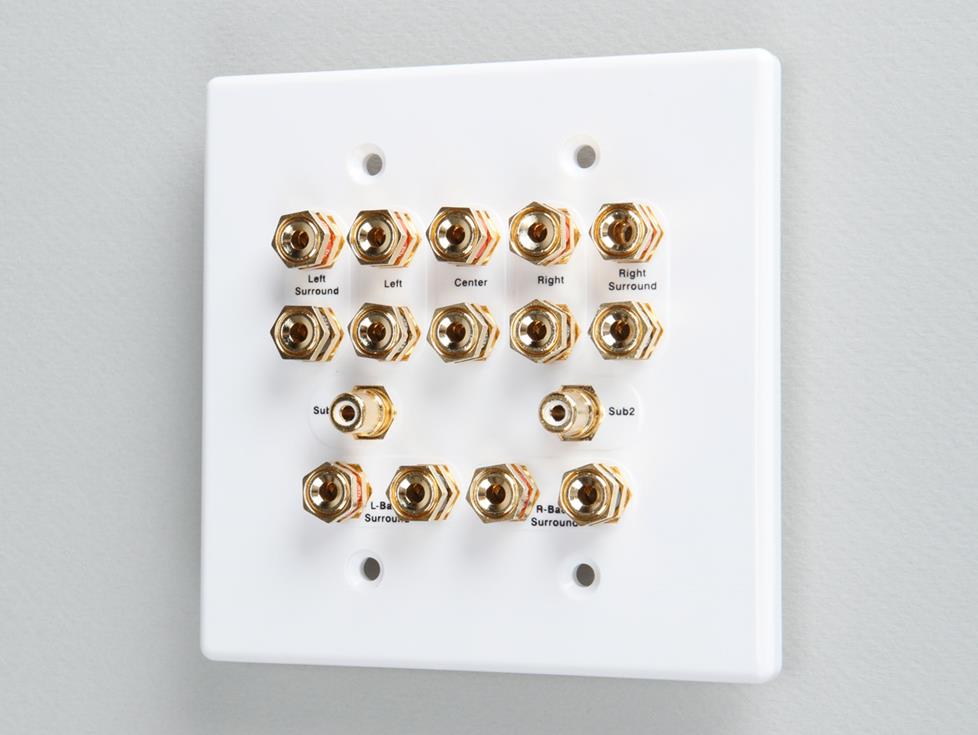
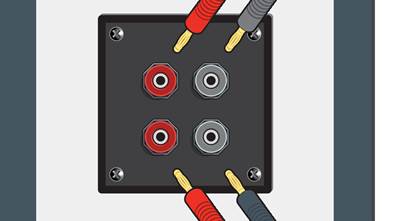
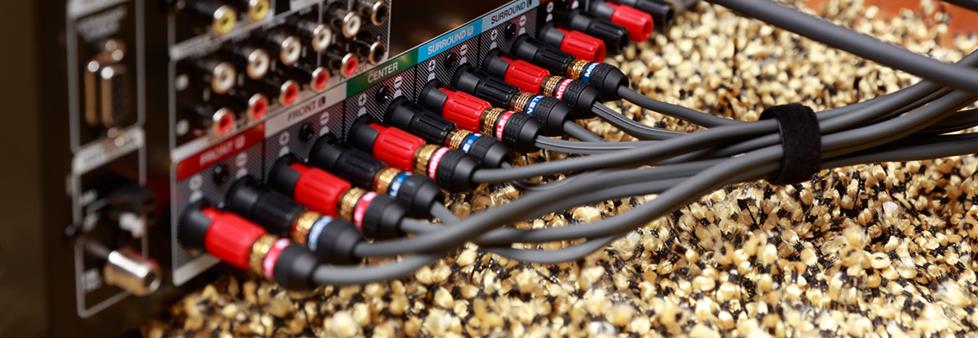
This receptacle accommodates the speaker and subwoofer connections for a surround sound system.

This universal wall plate gives you an entry or exit point for any kind of in-wall wire.
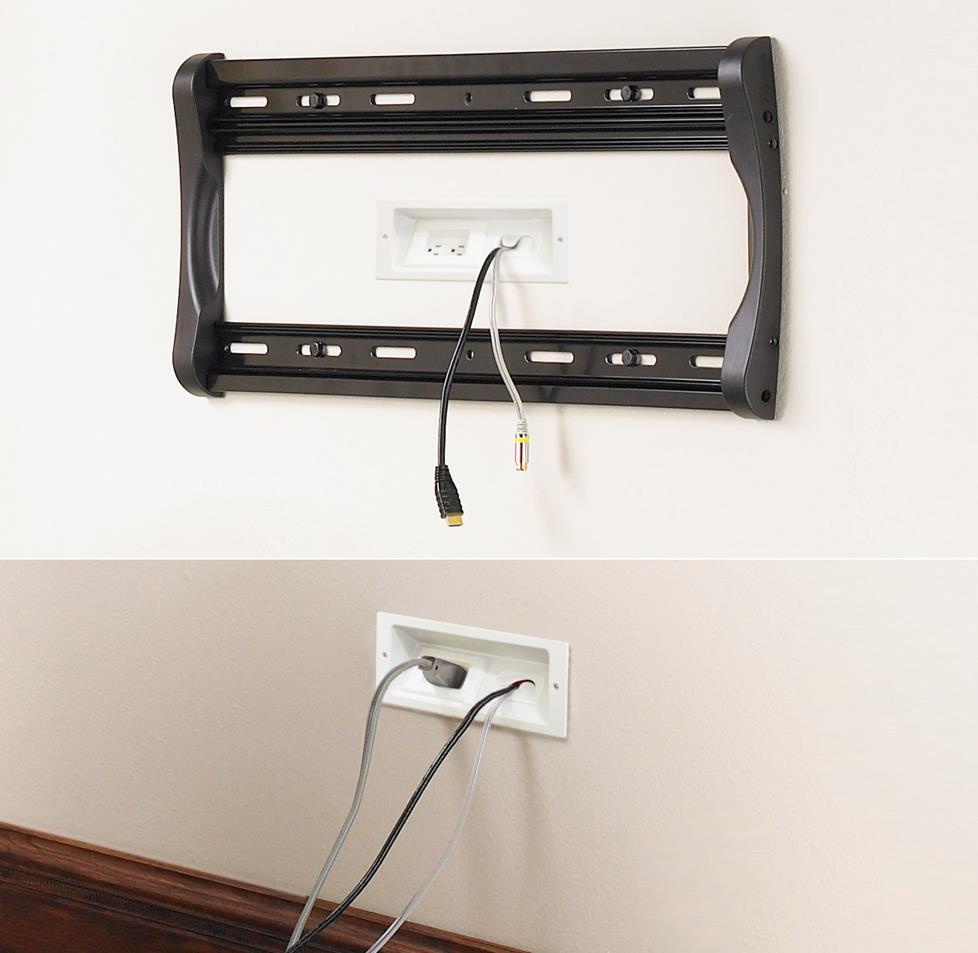
These plates are part of a kit that hides both signal and power connections for a wall-mounted TV.
"Rough-in" or "hole-saving" brackets
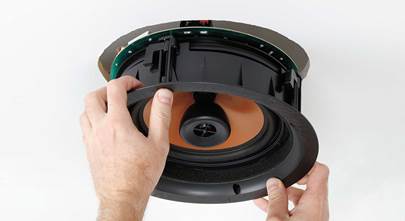
These brackets for in-wall and in-ceiling speakers save a lot of time. The drywall installer will cut holes for the brackets before hanging the drywall (as they do for light switches and electrical sockets). You may have to order these separately — they may not be included with your speakers.
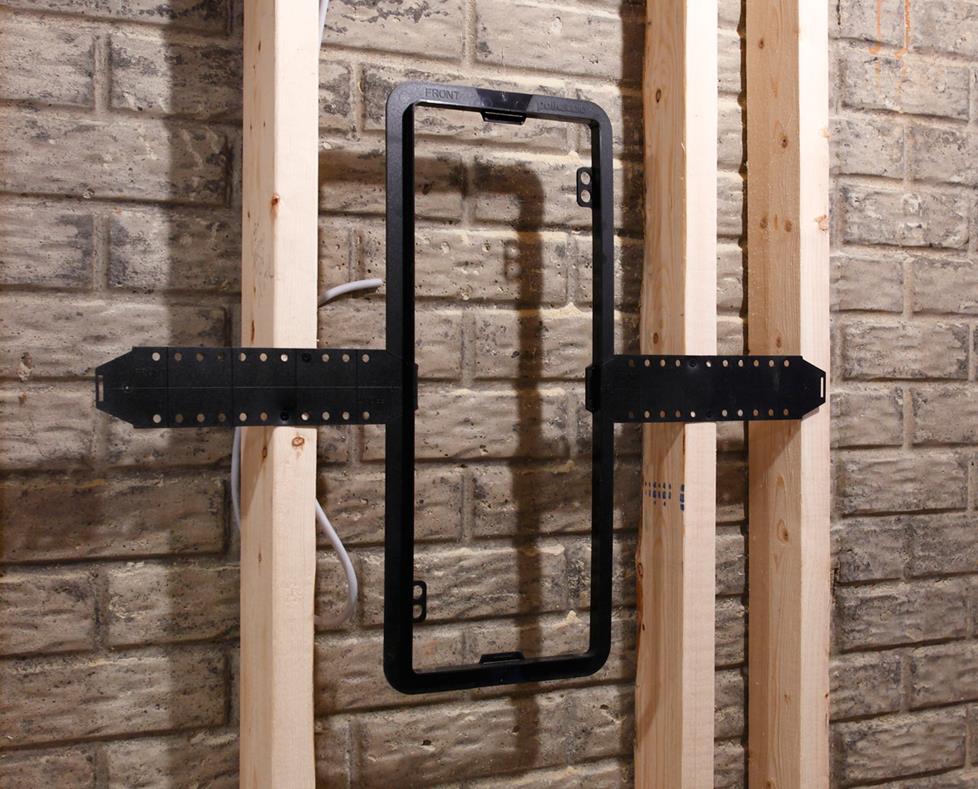
“Hole-saving” or “rough-in” brackets make it easy to install ceiling and in-wall speakers after the drywall is installed.
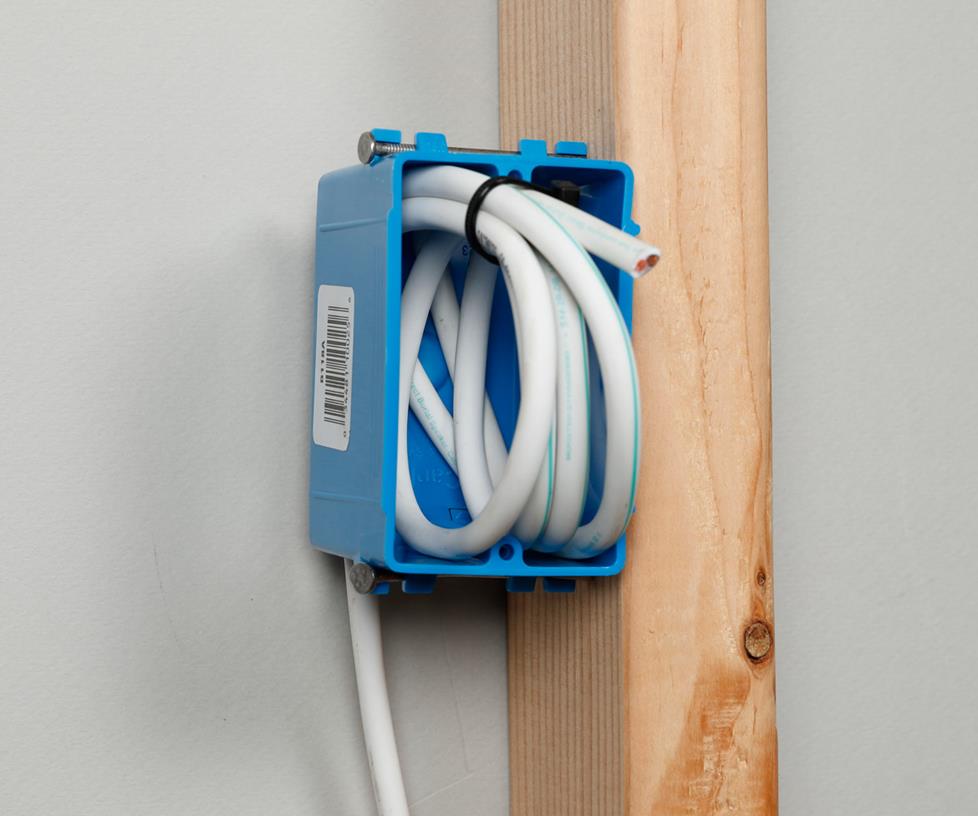
Outlet boxes
The hardware used to mount volume controls, wire outlets, and other in-wall devices are called junction boxes or "J-boxes." Look for a J-box that's deep enough to fit your in-wall devices (usually 2-3/4").
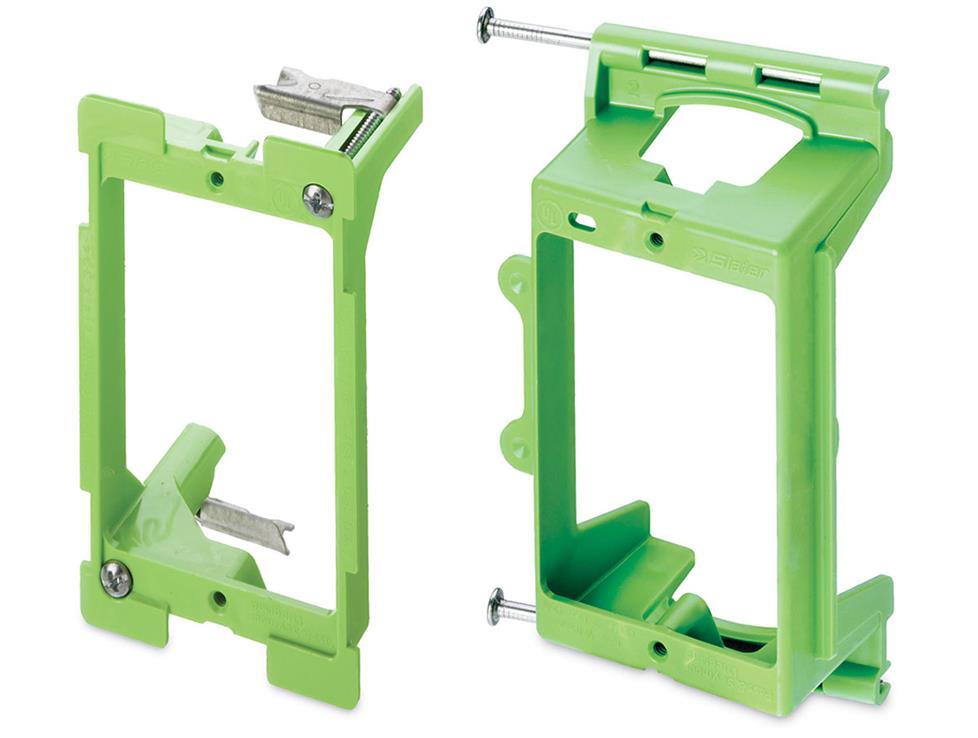
Backless brackets provide the minimum support you'll need to attach a wall plate. The one at left is for a finished wall. It clamps itself to the hole you cut for it. The one at right gets nailed to a stud before your drywall goes up.
For a wall-mounted volume control, you need the structural strength and protection afforded by a standard junction box (available at home improvement stores). When you're simply terminating wires at a wall plate, backless brackets will do.

A standard junction box protects your in-wall volume controls.
Mount your outlets at the same height as AC outlets for a clean, uniform look. In-wall controls look best if you match the height of your light switches (usually located 44-48" off the floor). Don't attach low-voltage boxes to light switch boxes.
Nail plates
Whenever you drill a hole 1-1/4" or less from the surface of any wooden part of your house (a stud, joist, plate, block, or brace), or notch any wooden part, you must protect the cable with a nail plate. The nail plate prevents a nail from ever piercing the cable.

Nail plates protect your wires from nails, screws, and drill bits.
Wire labels
Label both ends of the wire before you start pulling, or before cutting another wire. You can use Crutchfield CableLabels™, or simply use masking tape and a marker.
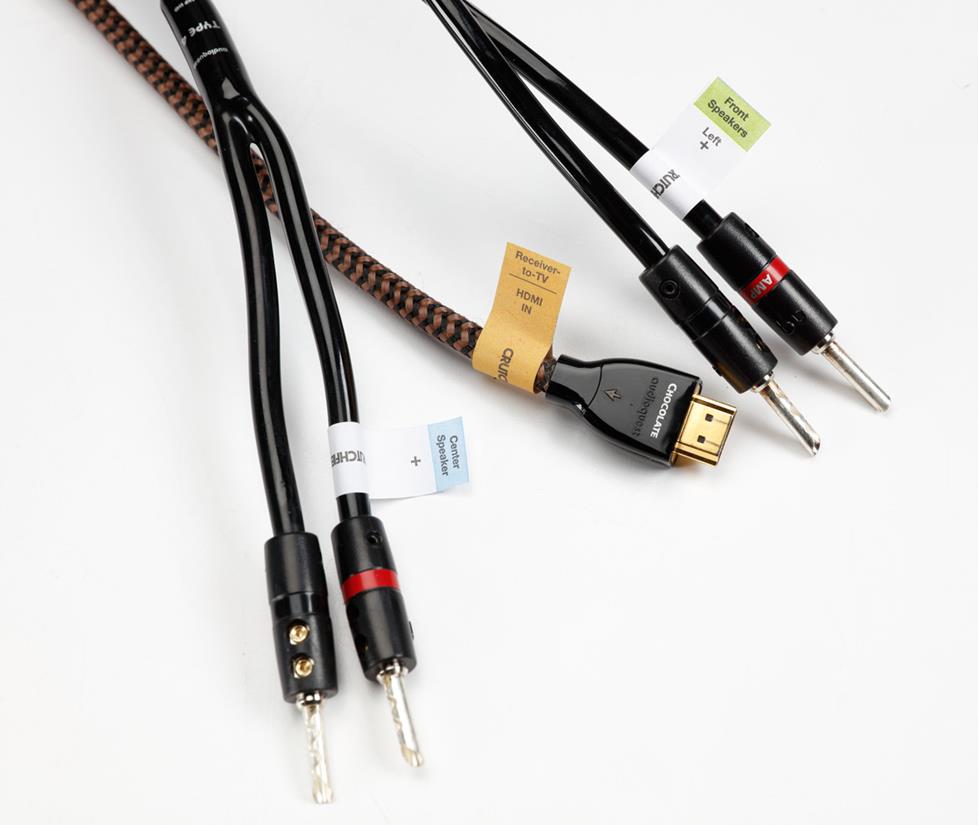
Crutchfield’s self-adhesive, color-coded labels keep your audio, video, and speaker cables clearly marked.
Wire ties and attachments
Wire must be supported every 4-1/2 feet and within 1 foot of a junction box. Use wire ties and wire-tie clamps. The staples electricians use for regular AC wiring may damage low-voltage cables if they're nailed down too tightly.
For bundling cables at the back of a component, a reusable wire wrap comes in handy.
Component racks
If you’re going to hide your speakers in your ceilings or walls, why not hide the components, too? We offer a variety of equipment racks designed for installation in a utility room or closet.
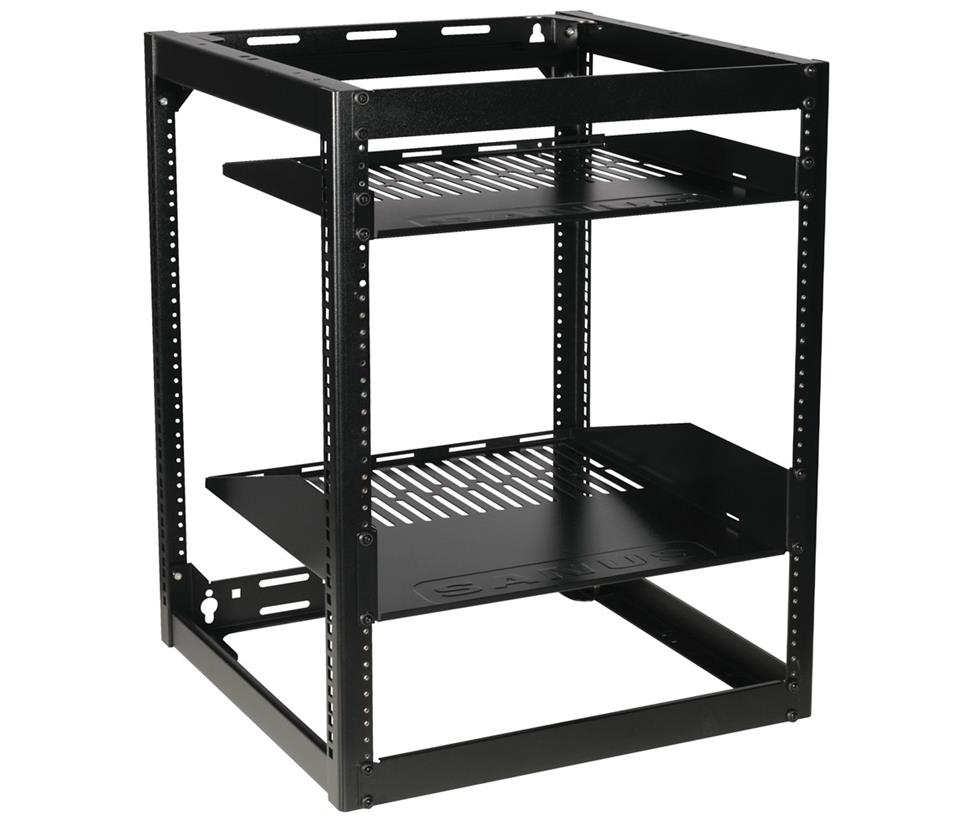
Sanus CFR-series open racks can be wall- or floor-mounted.
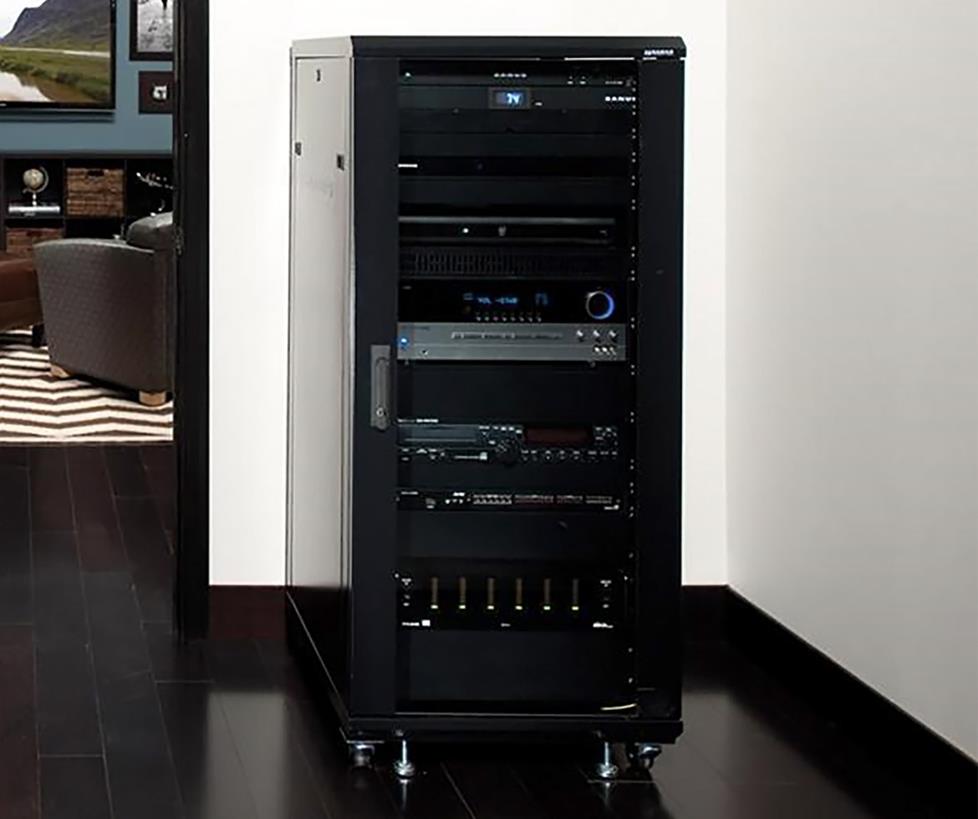
A closed racks usually include casters, so you can roll it out for easy access to your connections.
Tools
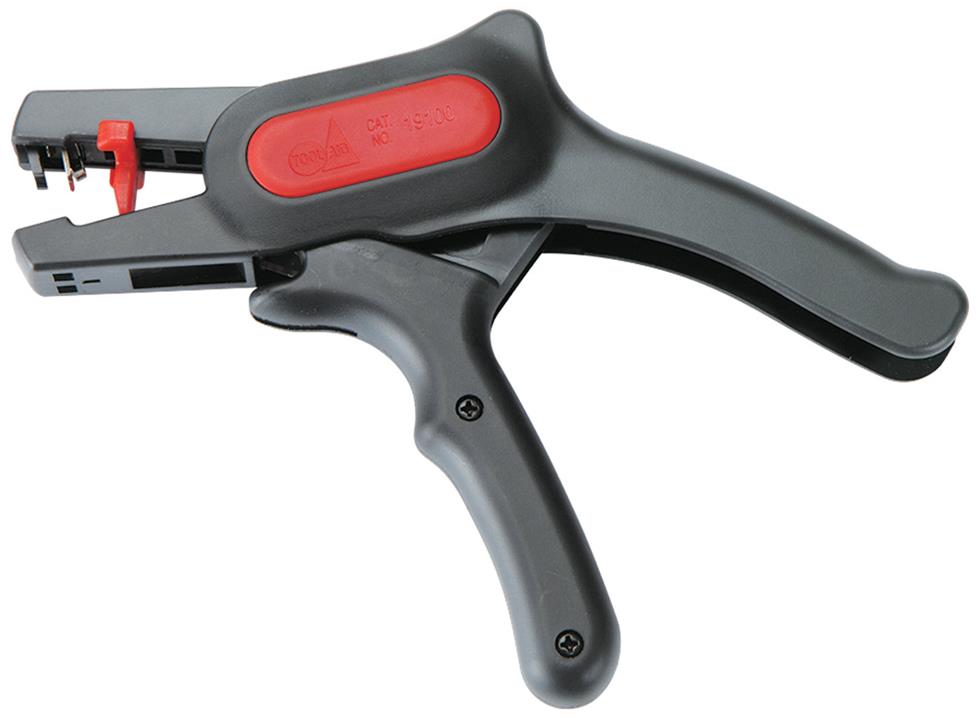
This tool strips 12- to 22-gauge wire with one pull of the trigger. You can adjust it to strip off the exact amount of insulation you want.
Wire cutter/strippers
A good wire stripper is a must if you’re installing a lot of speakers. We also offer a variety of tools for attaching connectors to coax and network cable.
An alternative wiring stripping method requires nothing more than a razor knife. Here's how Crutchfield's Norm Hawes, an experienced installer, does it:
Studfinder
You'll want to invest in a good studfinder before you begin an installation in a finished room. Some studfinders, like this one, can differentiate between metal pipes, AC wires, and other obstacles hidden behind your walls. Here’s a link to some great video tips about how to use a studfinder.
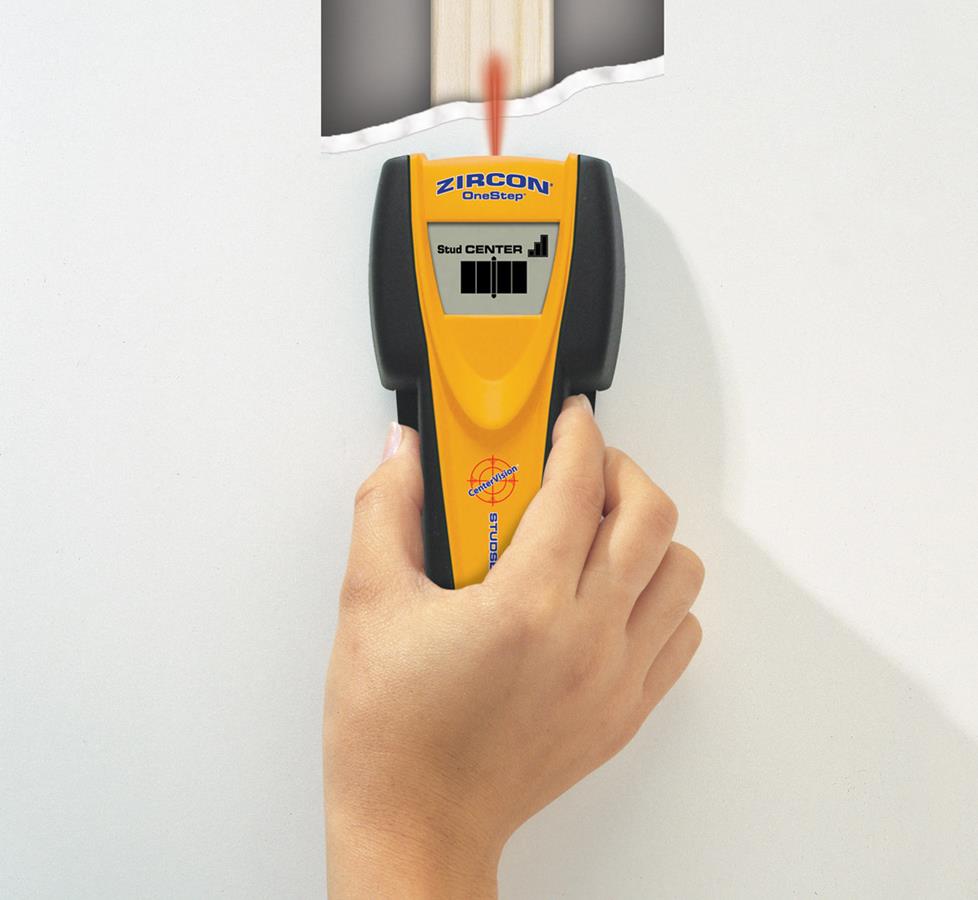
Slide a studfinder along a wall or ceiling to locate studs or joists. (Photo courtesy of Zircon Corp.)
Fish tape or fish sticks
A fish tape is a tool that helps you pull cable behind finished walls, floors, and ceilings. Think of it as a fishing reel spooled with semi-rigid “tape.” The idea is to push or “fish” the tape from one end of the wire pathway through to the other end. Then you attach the wire to the hook at the end of the tape and pull it back through.
Norm likes to use fish sticks:
Miscellaneous tools
- Laser level or chalk line
- 1/2" or larger electric drill. You may want to buy or rent a right-angle drill if you’re doing a lot of work in unfinished rooms.
- A set of spade bits from 1/4" to 1-1/2". (Professional installers use costlier auger and hole-saw bits because they make the job easier.)
- Drywall saw
- Step ladder
- Eye protection, work gloves, and dust masks
- Electrical tape
See how an expert runs wire
In this video, Norm shows you how to run wire and "trim" it for a safe and tidy installation.
Installation tips and techniques
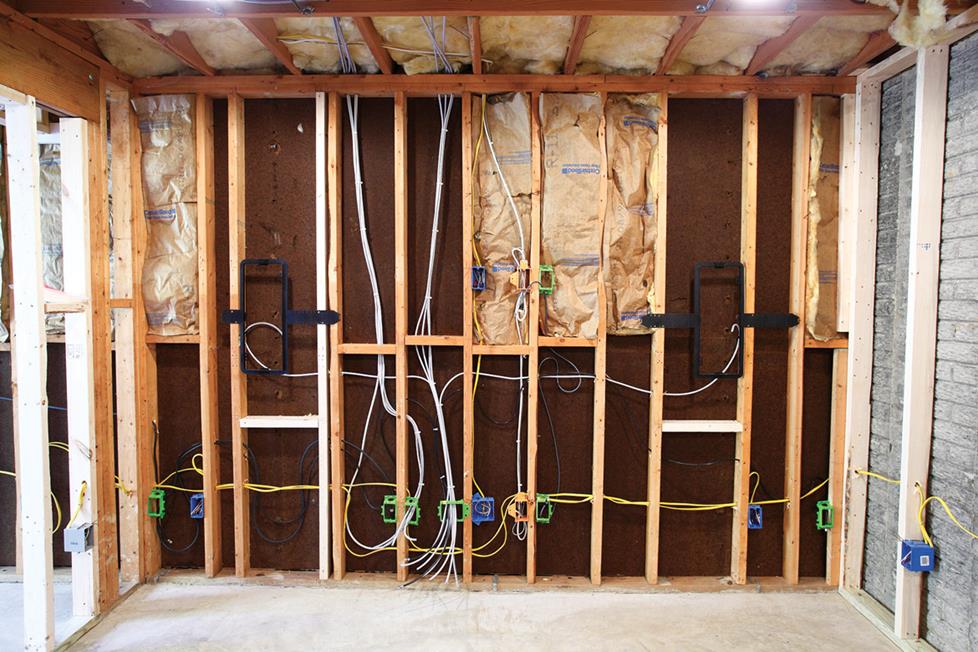
An unfinished room that has been prewired for home theater and is ready for drywall installation.
New construction
Be careful not to bite off more work than you can chew. Most do-it-yourselfers don’t have the tools, skills, or time to wire an entire new home as it’s being built. But say you have an unfinished room you’re converting into a home theater. That’s a project you can have fun with. Here are some guidelines:
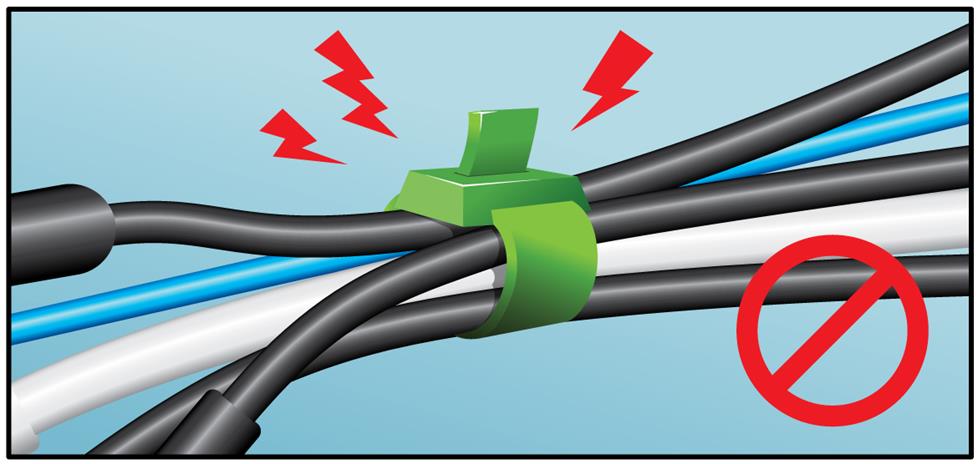
Never use the same holes for both AC wire and low-voltage wire. Try to avoid installing your wires beside AC power lines for more than 5 feet. As much as possible, keep them 1 foot away from the power lines throughout their runs.
You can safely run audio and video in the same bundle as security, phone, data, and other low-voltage wire.
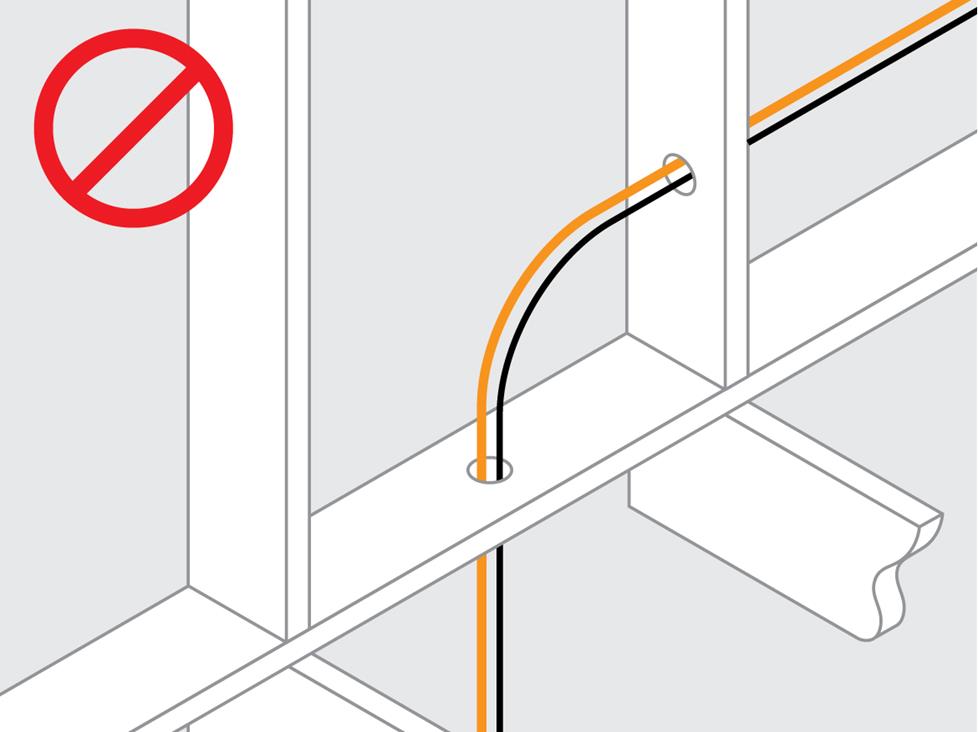
Running low-voltage cables (black) with AC power cable (orange) may result in poor performance or wire damage.
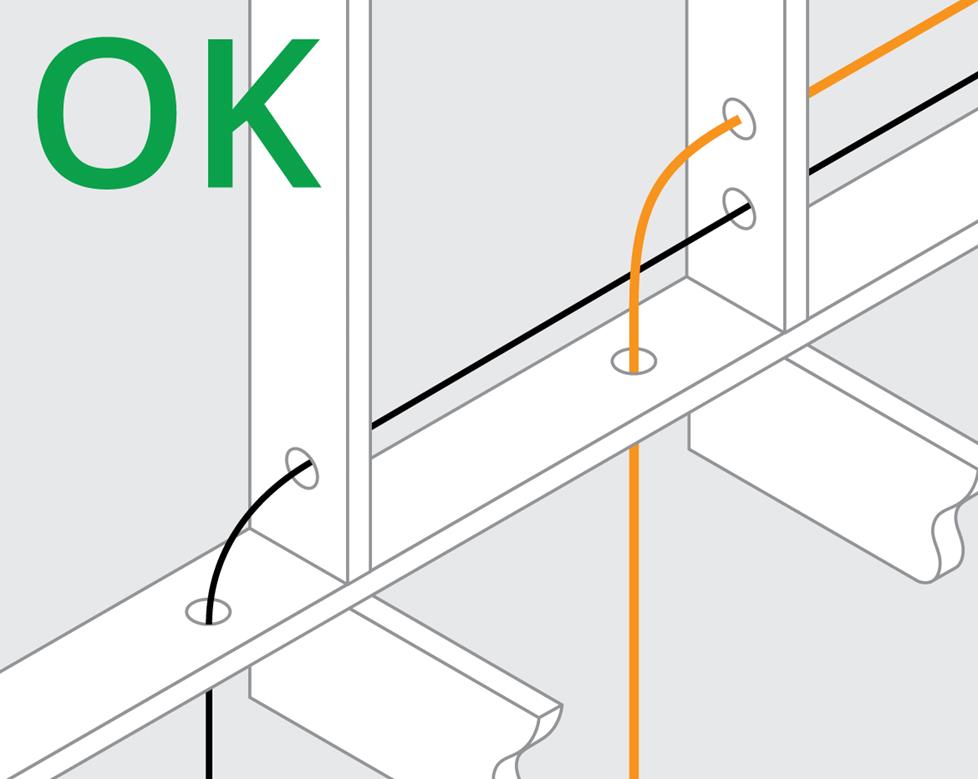
If cables and power cable run parallel, keep them a minimum of 12" apart. If they intersect, keep them at 90-degree angles.
Rules for drilling holes into studs and joists
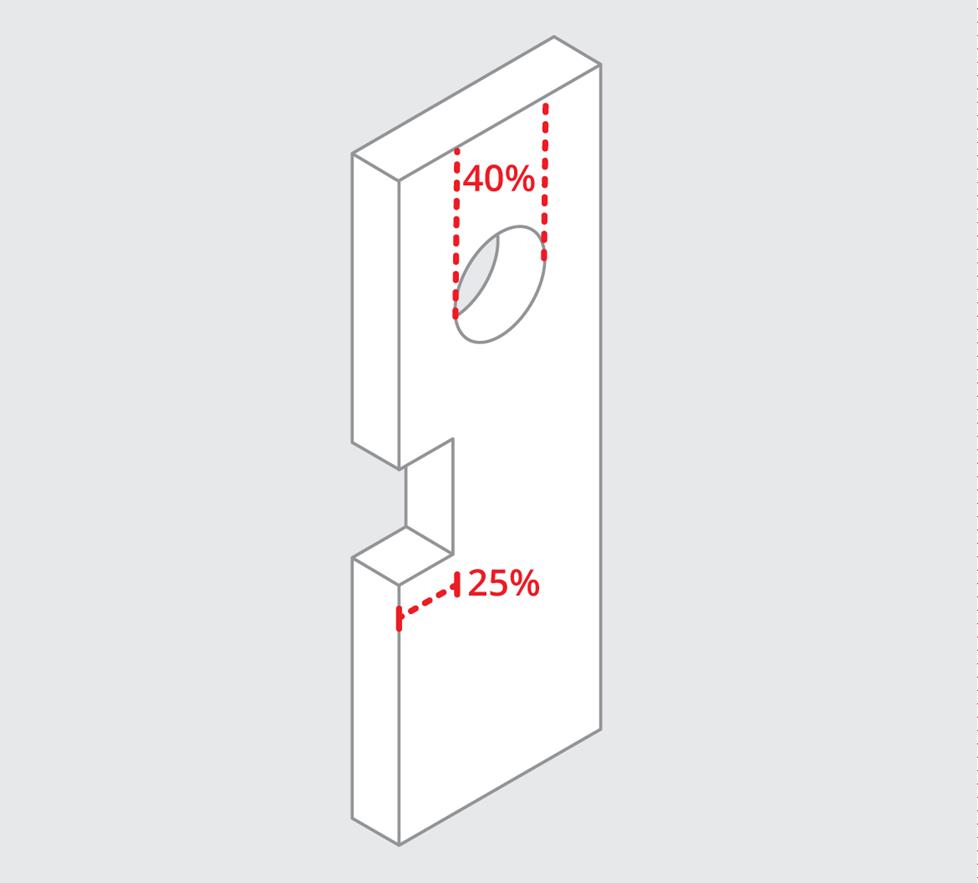
Hole diameter shouldn’t exceed 40% and notches shouldn't exceed 25%.
Drill your holes in the center of each stud. The diameter of the holes shouldn’t exceed 40% of the stud’s width. A standard 2" x 4" stud is actually about 3.5" wide, which means your holes can’t be more than 1-3/8" in diameter.
Keep all holes centered vertically in the joist. Don't drill within 2" of the top or bottom of the joist. The extreme ends and the middle third of the span of the joist carry the load, so avoid making holes there if possible.
You are limited to a hole that is a third of the measured depth of the joist. A 2" x 6" joist actually measures 5-1/2" deep, so you can drill a 1-3/4" hole. You can drill multiple holes rather than one very large hole when many wires need to go one way.
You cannot make any holes in laminated support beams (glue lams) or headers (the supports over doors, windows, or arches).
Tips for pulling wires
For your wires to pull easily, the diameter of a hole should be about twice as big as the total diameter of all the wires you plan to pull through it. Since hole sizes are limited, you may have to use multiple holes. For example, a 1-3/8" hole will accommodate bundle of cables slightly less than 3/4" in diameter.
Dress at least 2 feet of speaker wire in a loop at each J-box or P-ring location, securing it with wire ties.
Dressing wires
Once a wire or bundle of wires has been pulled to its outlet location, you must dress it. That means properly preparing it for the final step (making the connections), which won’t happen until you’re almost ready to move in. You’ll neatly coil the excess wire and temporarily secure it to the junction box.
- Support the wire within 1 foot of a J-box or P-ring. At each bracket, J-box or P-ring, dress at least 2 feet of wire, leaving it looped just inside.
- The drywall will cover up your wire, so photograph or measure the location so that you can find the wire after the drywall is up.
- Wrap the ends of each wire with plastic bags and tape to prevent moisture from entering wires. Wire can rot from paint and plaster moisture. Make sure labels are protected.
Be careful when using plastic wire ties — they should be snug, but not tight enough to pinch the cable.
Running wire through existing walls
Always inspect as much as possible before making a hole. Explore your crawlspace or ceiling in an unfinished segment of your basement. Try to detect which way joists run and where empty wall space between studs might be.
By inspecting from your crawlspace or attic, you can identify which wall locations do not carry water pipes and electrical wires. A high-quality studfinder will help you distinguish between different types of obstacles behind your walls, including studs, AC cables, and pipes.
Of course, you can't know what's behind the wall with absolute certainty. You must be prepared to cut and patch exploratory holes.
To minimize that work, use a studfinder that can locate wood, metal, and live AC wiring. You can also drill small "pilot holes" to explore behind your walls. Use a sturdy piece of wire, like a bent coat hanger, to find nearby obstacles.
Be sure to shut off power in the area where you'll be drilling your pilot hole, and use caution so you don't plunge your bit into a pipe or electrical conduit. Make sure you know where your main water shut-off valve is located, just in case you do puncture a water pipe.
Use a sturdy wire (such as a bent coat hanger) to explore your pilot holes.
Cutting drywall
After you've confirmed that all of your component locations will work, traced the templates, and made any other preparations recommended in the owner's manual for your speakers or brackets, you can begin cutting drywall.
If you're creating a rectangular hole, start by drilling two small holes in opposite corners; if it's round, drill two small holes on opposite sides. Next, using your drywall saw, start from one hole, and work around the outline to the next. Cut the drywall in one piece, on an inward slant, so that it's easier to patch later if necessary. If you don't need to patch the hole, just remove any excess material before installing the speaker.
For more information on choosing and confirming locations for your in-wall gear, see our in-wall speaker installation guide.
Plaster and lath walls
If your house has plaster and lath walls or ceilings, installing your own in-wall wiring will be more complicated. Plaster tends to crack and crumble easily, so you should be prepared to do some touch-up work. We recommend running out-of-wall wire, and using carpets, cabinetry, etc. to hide it. See our article on home A/V cable management for more ideas.
Wiring tips and tricks
You'll probably encounter some in-wall obstacles while routing your cables, such as additional bracing or a fire block. If that happens:
- Remove a rectangular piece of drywall around the obstacle. Cut on an inward slant so that it's easier to patch the drywall when you're done.
- Notch the block or drill a small hole for your wire. If you notch the block, don't forget to cover it with a nail plate.
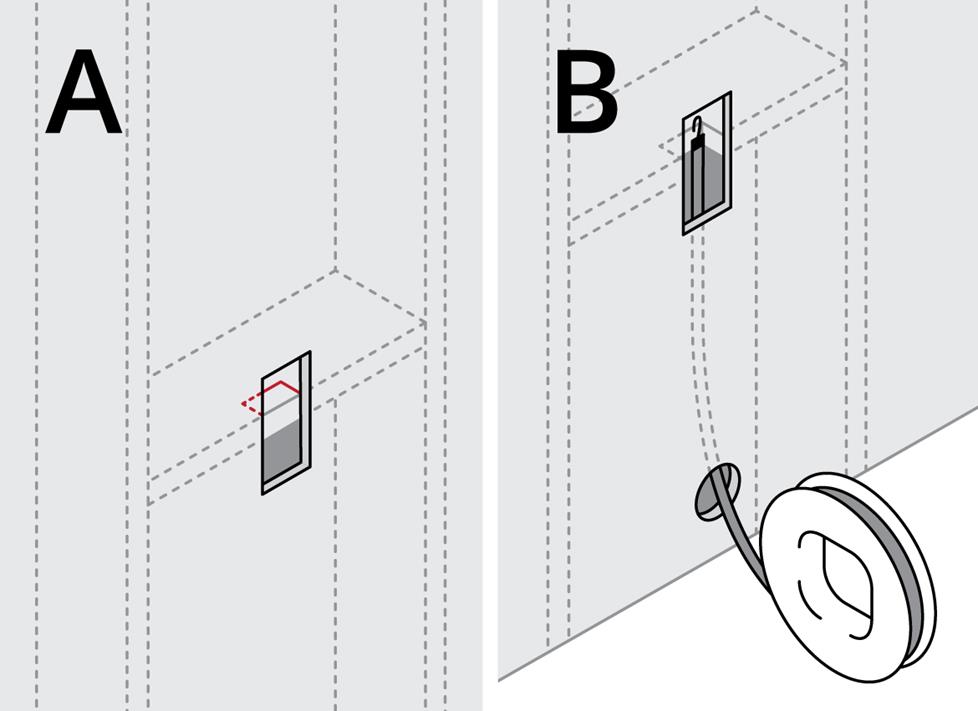
To route wire through a hidden obstruction: (A) Cut a rectangular piece of drywall around the obstacle. (B) Notch the block or drill a hole for the cables. Use your fish tape to route the wire through the hole.
Routing wire through an unfinished basement
In the example shown here, you cut two holes in the wall – one for a wall plate and another for an in-wall speaker. Next, drill two holes in your wall’s bottom plate, which is accessible from the unfinished basement ceiling. One hole goes below the wall plate and the other goes below the in-wall speaker.
How do you know where to drill the bottom plate holes? You can either measure the distance to the wall plate and speaker from an adjoining wall, referencing a copy of your blueprints, or measure the distance from a visible landmark that runs straight through the wall to the floor below, such as a plumbing pipe.
Once the holes are done you can fish the wire from the wall plate hole through to the basement, then up through the other hole to the speaker location.
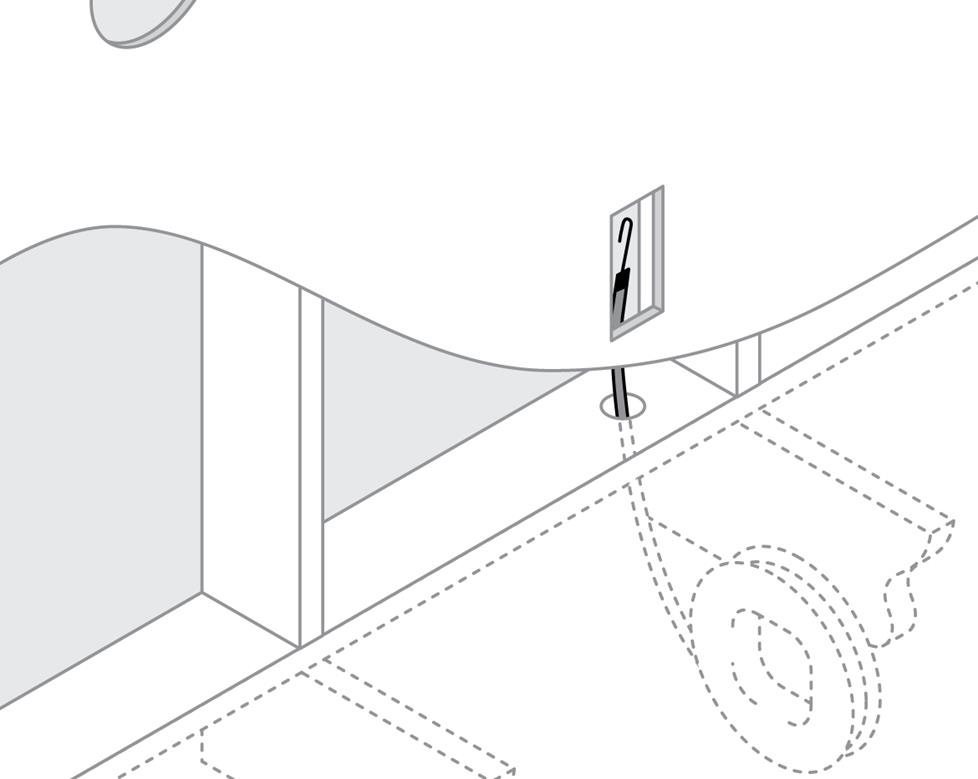
Here’s how you run wire through an unfinished basement.
Routing wire along a baseboard
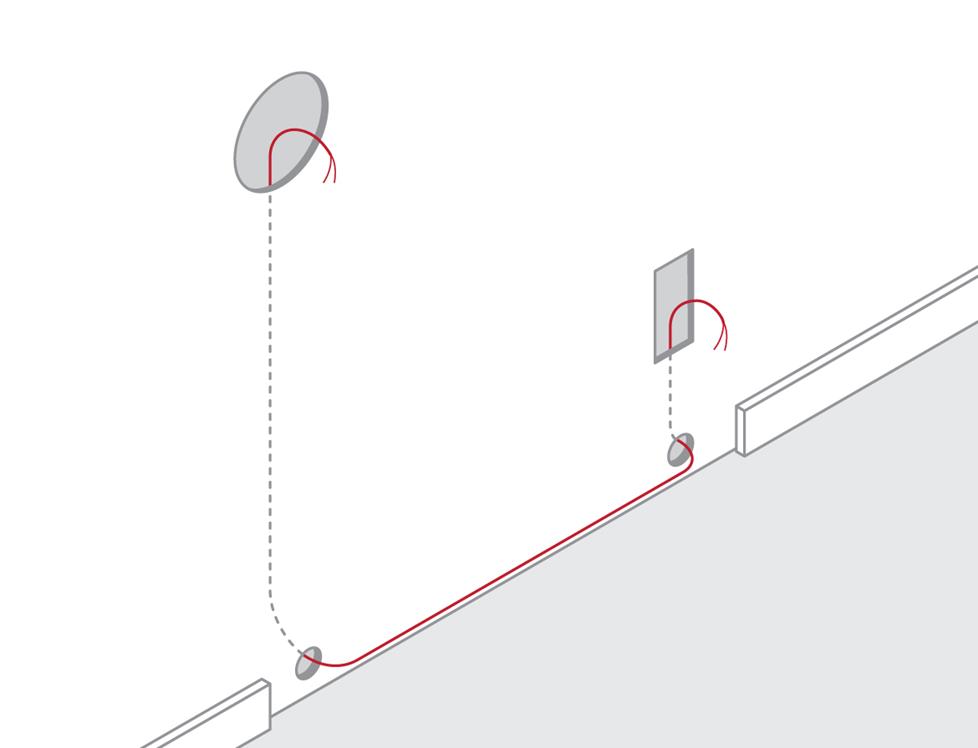
If you don’t have an unfinished basement to run wires through, you can hide wires behind your baseboard.
Pry off the baseboard with a small crowbar. Remove a thin strip of the drywall to expose the studs. Cut a wire channel by scoring and chiseling the studs. Fish your tape from one hole to the other and pull the wire through. Tuck the wire into the channel and install nail plates at each stud. Re-install the baseboard.
Routing wire around a door frame
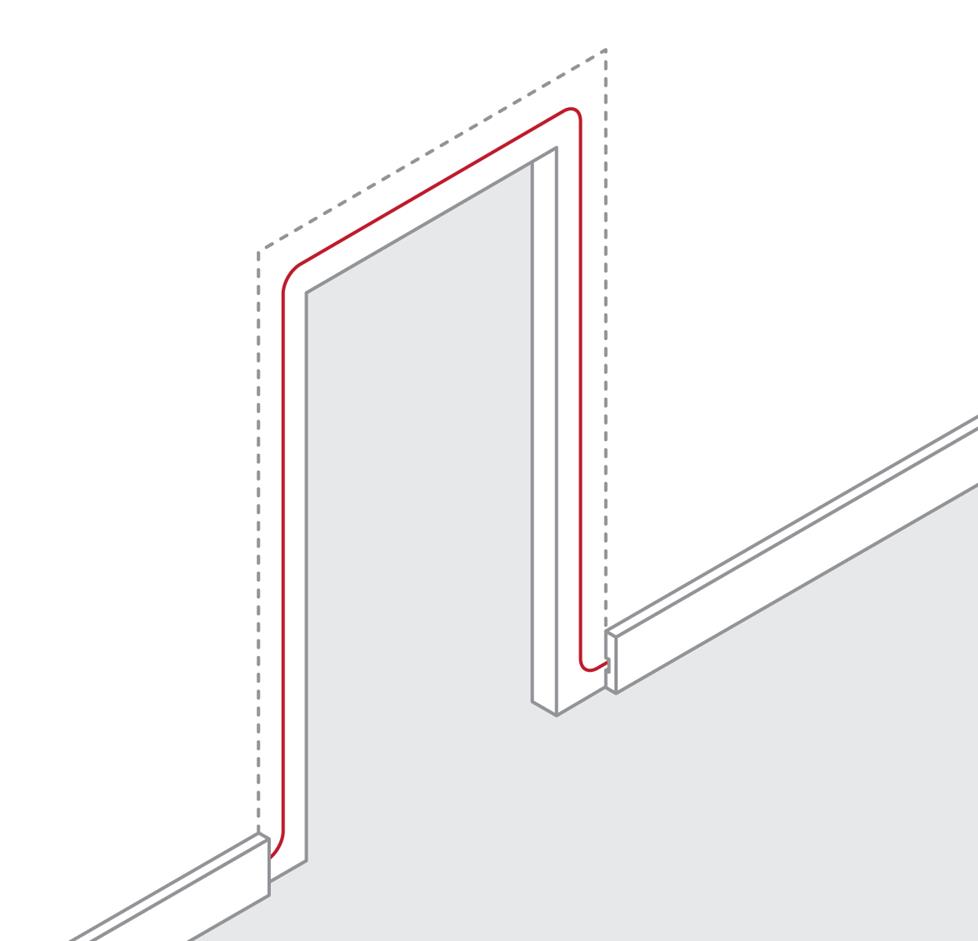
If you’re using your baseboard to conceal a wire pathway, you may have to deal with the door trim, too.
Pry the molding away from the doorway using a chisel, small crowbar, or putty knife. Run the wire between the frame and the jamb. Chisel out channels for the wire in the frame, if necessary. Reattach the molding.
How to attach a wire to a fish tape
In order to pull wire from one location to another, you'll need to attach the wire to the fish tape, as shown here:
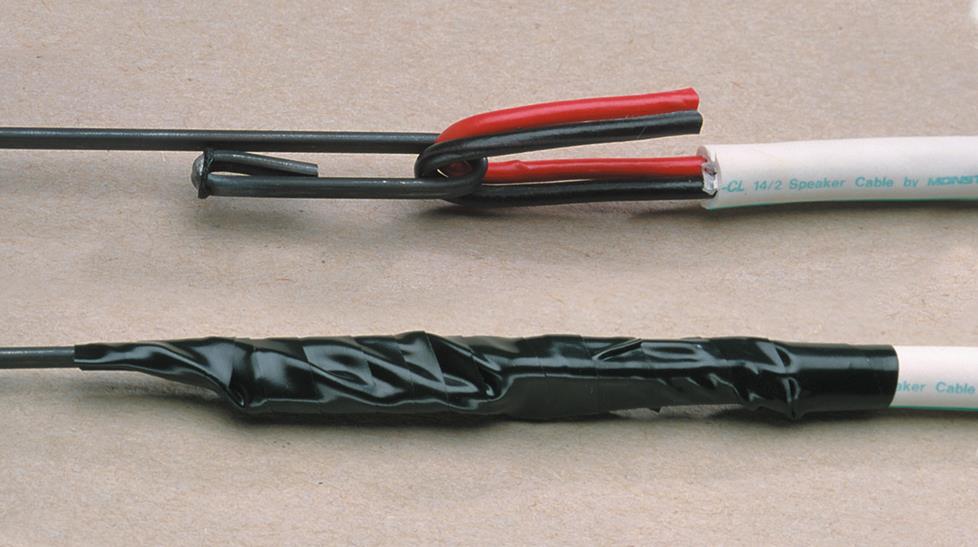
(A) Strip the jacket off the cable. Bend the conductors over the fish hook. (B) Wrap the hook and the cable with electrical tape.
Tip: how to fish wire through insulation
Insulation is most commonly found on exterior walls, but you might run into it when fishing wire through interior walls too. The key here is not to fish the wire through the insulation, but around it.
Many types of insulation will have a paper or plastic covering. Try to fish your wire between that covering and the drywall. Alternatively, fish the wire along a stud, using the stud as your guide. In this case, if you have fish tape that's wound on a spool, keep the tape curved in towards the surface of the stud, so that it's less likely to stray into the insulation.
You can also check your local hardware store for different kinds of fish tape designed to be more effective with difficult runs like these.
Drywall repair and clean-up
If you cut any holes that didn’t work out, you’ll need to patch them. Watch this video to see how it’s done.
To learn some more installation techniques, see our outdoor speaker installation tips.
Get a free system design
We'll help you create the custom A/V system of your dreams. Set up a consultation with a Crutchfield design specialist to get a detailed system plan.
3 easy steps
- Share your info and ideas
- Approve your design
- Install your gear