2005-2010 Volkswagen Jetta
How to upgrade the stereo system in your Jetta


In brief: This Crutchfield Research Garage article gives you an overview of your Jetta's stock stereo system and your aftermarket upgrade options. We'll tell you all about:
- The factory stereo system
- Removing the factory radio
- Removing the factory speakers
- Adding more bass
- Other options for your Jetta
Then, use our vehicle selector to find the gear that will fit your vehicle.
Overview of the Volkswagen Jetta
Way back in the Seventies, Volkswagen introduced the Jetta in hopes of enticing buyers who liked the Rabbit/Golf, but wouldn't be caught dead in a hatchback. Smart idea, as it turned out. Those people (aka your fellow Americans) flocked to the Jetta like moths to an old wool coat and made the Jetta one of VW's most successful models ever.
The fifth-generation Jetta is bigger and more spacious than its predecessors, and there were enough performance and luxury options available to turn a humble Jetta into a reasonable facsimile of an Audi. The styling wasn't revolutionary, but it's still a very handsome sedan and it's definitely aged a lot better than some cars from this era. All in all, the Gen-5 Jetta is a comfortable, entertaining ride that'll make a very nice home for an upgraded audio system.
The Jetta's stock radios are actually pretty easy to remove (Crutchfield Research Photo)
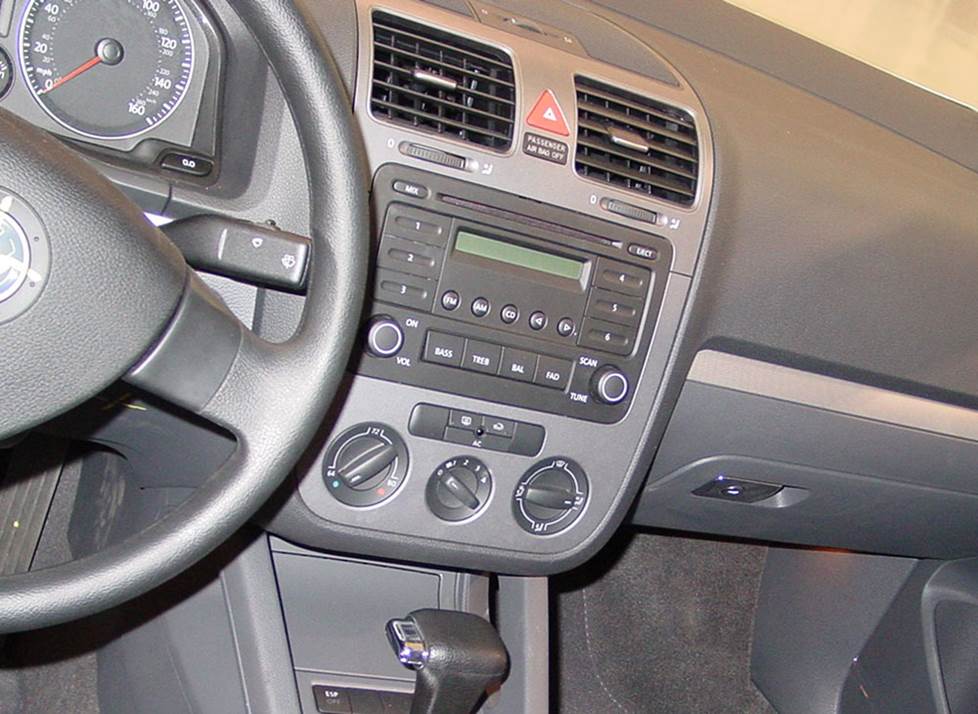
The factory stereo system
The Jetta's base system was actually pretty decent for a stock set-up, with regular and navigation radios, plenty of speakers, and some handy features. The Premium System adds an amplifier, which is located under the driver's seat. The amp powers all 10 speakers and it's triggered by data lines.
Decent though it may be, the stock stuff is getting old and the functionality isn't quite up to modern standards. You can replace the radio with your choice of single-DIN (2" tall) or double-DIN (4" tall) aftermarket receivers.
In some cases (We'll tell you while you're shopping, don't worry…), you'll need to use the factory radio's brackets to install your new receiver. If you don't have the brackets, you can obtain them from your dealership or an online source.
You'll also need a receiver mounting kit and a wiring harness adapter, both of which are available at a discount with your Crutchfield stereo purchase.
When you replace the factory radio, you'll lose factory features like satellite radio, navigation, and the AUX input. All of those things can be found on aftermarket receivers, so it's really no big deal.
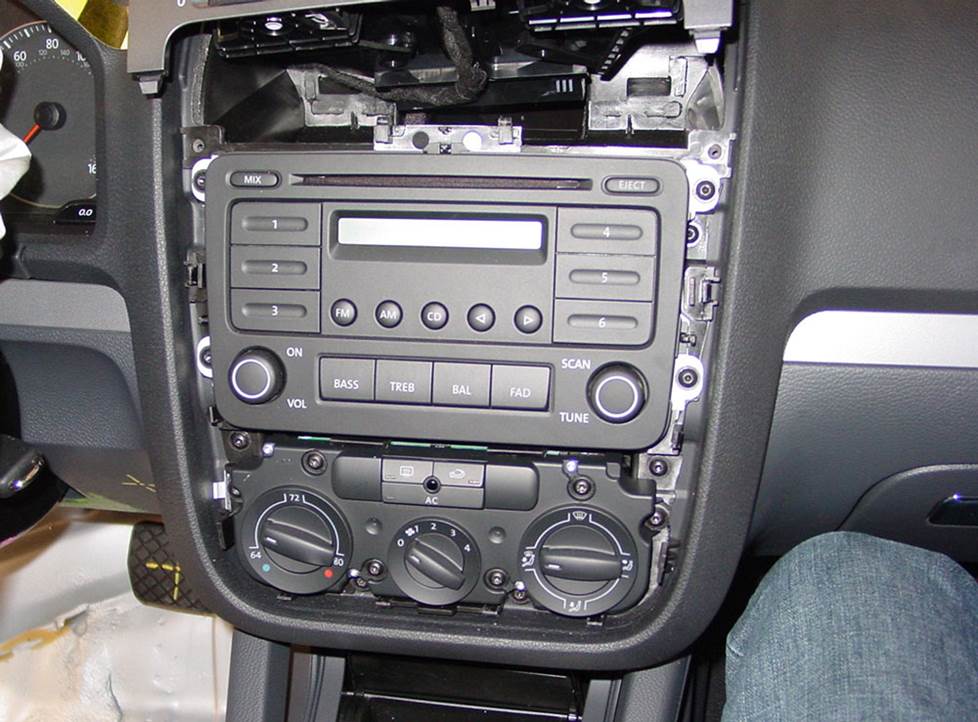
The most challenging aspect of this job is making sure you connect the airbag wiring harnesses (Crutchfield Research Photo)
Removing the factory radio
Before you start working on your Jetta's stereo system, set the parking brake and disconnect the negative battery cable to prevent any electrical short. Once that's done, you're ready to go.
Use a panel tool to pry up the screw cover on the vent trim panel and remove the exposed Torx T20 screw. Next, starting at the sides near the windshield, pry up the vent trim panel, then lift the panel just enough to release the retaining clips.
Remove two exposed Torx T20 screws, then pry out the receiver/climate control trim panel to release those clips, then remove the panel. From there, just remove the four Torx T20 screws securing the factory radio and get it out of there.
Detailed stereo and speaker removal instructions

To connect the new one, follow the instructions included with your dash kit and wiring harness adapter, then slide the receiver into place and secure it. You'll want to test it out to make sure it's working properly, but don't rush. Before you test anything, absolutely positively make sure the airbag wiring harnesses are connected before you switch on the ignition.
If those harnesses are not connected, the airbag light will come on, which will require a reset at your local VW dealership, which will cost money, which will annoy you to no end.
Tools needed: Panel tool, Torx T-20 driver
Read our Car Stereo Buying Guide for shopping tips and advice.
Shop for car stereos that fit your Volkswagen Jetta
Steering wheel audio controls
In most cases, it's reasonably easy to retain your car's steering wheel audio controls when you install a new stereo. When you enter your vehicle information, our database will choose the adapter you need to make your factory steering wheel controls work with a compatible aftermarket receiver.
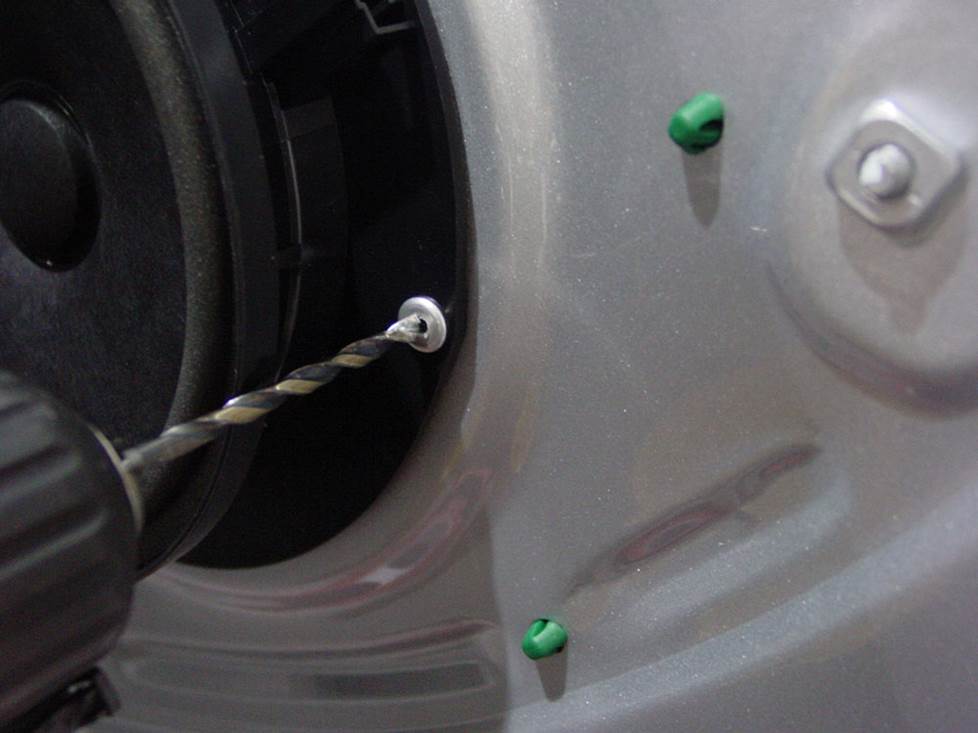
You will have to drill out some rivets to replace the speakers. It's not that hard to do, though. (Crutchfield Research Photo)
Removing the factory speakers
In the Jetta's front doors, the woofers, midranges and tweeters are wired together in parallel, and the same goes for the rear door woofers and tweeters. Some of these speakers are easier to deal with than others, but in general, the Jetta is very DIY-friendly.
Removing the front door speakers
You'll need to remove the door panels to remove the speakers from your Jetta. That process will start with removing one Torx T20 screw from the front edge of the door panel. Next, starting at the front edge, use your panel tool to pry up the power options switch panel. Disconnect the wiring harness and remove that panel.
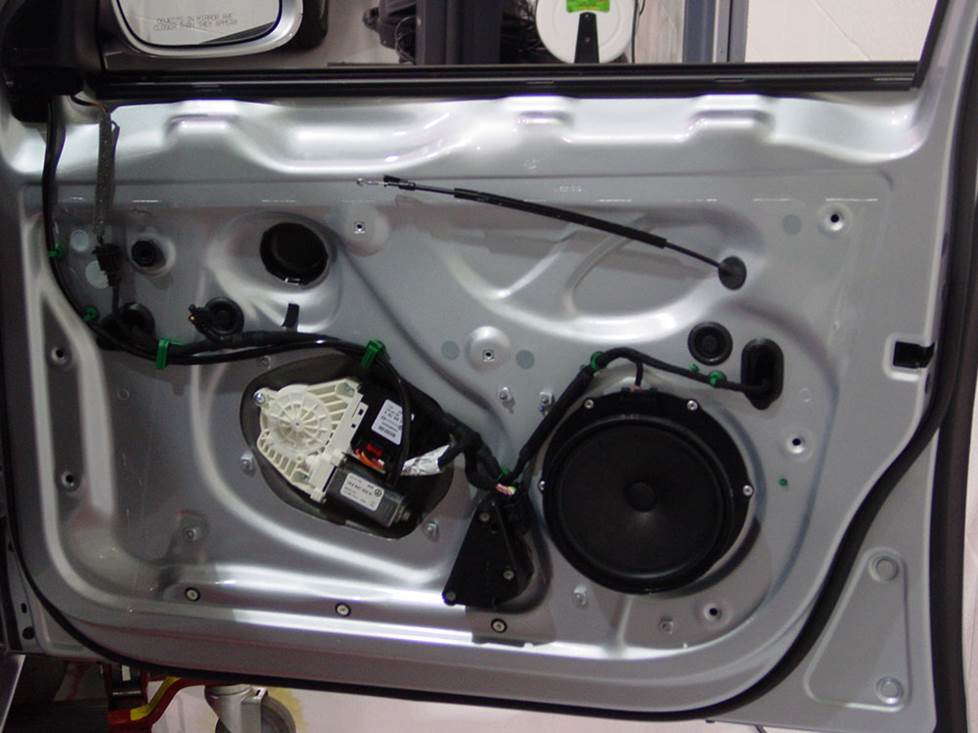
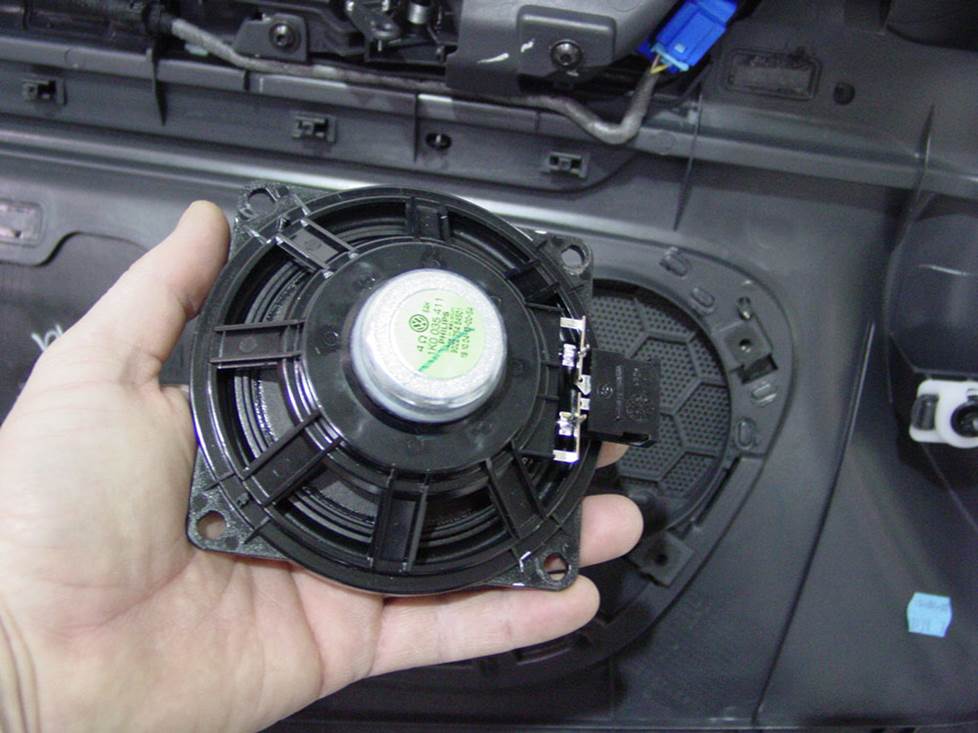
The Jetta's front doors contain woofers, tweeters, and midrange speakers that are wired in parallel (Crutchfield Research Photo)
Doing so will expose two Torx T30 screws. Remove those, then remove the three Torx T20 screws found along the bottom edge of the door panel. With that done, you can pry around the sides and bottom of the door panel to release six clips. Lift the door panel, disconnect the wiring harnesses and door release cable, then remove the panel and set it aside in a clean, dry location.
Tweeters: The factory tweeters measure 1.326" in diameter and they're glued to the door sail panels. Replacing them involves some rather detailed work, but it's a do-able DIY project.
Remove one Torx T20 screw from bottom of the sail panel, then pry the panel out to release the retaining clips. Disconnect the wiring harness and remove the tweeter and panel assembly. To separate the tweeter from the panel, use a rotary tool to cut off the three heat fuse points. This isn't hard, but it's also not something you want to mess up because you were in a hurry. Work carefully, and you'll be fine.
You'll need to fabricate a mounting bracket (or use our universal backstraps, hot glue, or silicone) to secure the new tweeters. And, since there's no wiring harness adapter available, you'll need to use Posi-Products speaker connectors to connect the tweeters to the factory wiring.
The midrange speakers are attached to the door panels (Crutchfield Research Photo)
Midranges: The 4" midrange speakers are located in the upper half of the door. They're not hard to remove once the door panels are out of the way, but remember to keep the factory Torx T20 screws handy, because you'll use them to install the replacements. You'll need more Posi-Products speaker connectors to connect these aftermarket speakers to the factory wiring.
Woofers: The 6-3/4" factory woofers are attached to the door steel. They aren't that hard to remove, but there is some drilling involved, so work carefully, know what's around where you're drilling, and wear eye protection. You'll use an 11/64" bit to drill out the six rivets securing the speaker, then remove the speaker and use your new speaker as a template to mark the new mounting holes. Remove the speaker, then use a 1/8" bit to drill the new holes.
Summary: Once you've replaced all the speakers, test them to make sure they're all working properly. If they are, and if the locks and windows are working as they should, you can start putting the doors back together.
Tools needed: Panel tool, Torx T-20 and T-30 drivers, drill and 11/64" and 1/8" bits
The rear door removal process is basically the same as what you do up front (Crutchfield Research Photo)
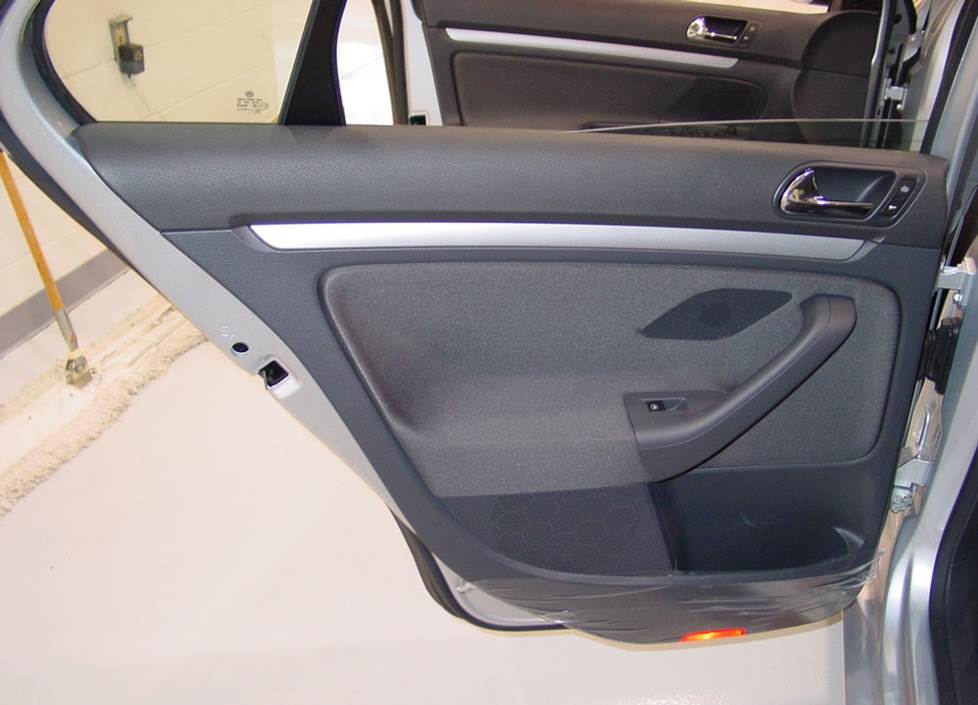
Removing the rear door speakers
The rear door speaker removal process is similar to what goes on up front, so it's not a hard job for the DIY-er. These door panels will also need to be removed, so be sure to store them safely while you keep working.
Tweeters: The factory tweeter is 1.560" in diameter, and it's glued to the factory grille on the door panel. All you need to do is disconnect the wiring and pry it away from the grille. You'll want to be careful while you're doing this, of course.
You'll need universal backstraps (or hot glue or silicone) to attach the new ones, and you'll also need Posi-Products speaker connectors to make the necessary wiring connections.
Woofers: The rear door woofers can be replaced by a wide variety of 5-1/4", 6-1/2". 6-3/4", or even 7" aftermarket speakers. You'll need to do some drilling back here, too, and the process is the same as it is up front. Just remember to work carefully and wear eye protection. Complete step-by-step instructions can be found in your Crutchfield MasterSheet, of course. Your new speakers might not include mounting screws, so check the box before you start and hit the hardware store if you need to.
Once the new speakers are installed, test them out, then check the locks and windows to make sure they're working properly. If everything's functional, start putting the doors back together.
Read our Car Speakers Buying Guide for more information.
Shop for speakers that fit your Volkswagen Jetta

The Jetta's trunk is a pretty big place, so there's plenty of room for a subwoofer enclosure (Crutchfield Research Photo)
Bass in your Volkswagen Jetta
Adding a subwoofer or two in an enclosure will really enhance your music, and the Jetta gives you a thoroughly reasonable 40" W x 20" H x 39"/35" D space to work with in the trunk.
If you value your cargo space, you can always choose a powered subwoofer for your Jetta. These subs are available in various sizes, so you can find one that suits your individual "space versus bass" equation.
Learn more about building a bass system in our Car Subwoofer Buying Guide.

Installing Dynamat will make your Jetta an even better place to listen to music
Other options for your Jetta
Here are some other cool upgrade ideas for your Jetta.
Sound deadening
The Jetta is a pretty solid car, but if you really want to tame road roar and get the most out of your system, add some Dynamat in the doors and (especially if you install a big sub) the trunk. This sound-deadening material will help keep the noise under control and allow you to truly enjoy your music.
Protect your floors
Even ordinary everyday driving can take a toll on your Jetta's factory floor mats and carpeting. WeatherTech floor mats and liners will help protect your floors from dirt and damage.
Security
Installing a security system in your Jetta isn't easy (security systems rarely are), but it's definitely a good idea. Our Crutchfield Advisors can help figure out what you need to get the job done, but we usually recommend taking your car and new gear to a professional installer.
Let's get started!
Ready to shop? Use our vehicle selector to find the gear that will fit your car or truck. If you have questions of your own, give us a shout via phone, chat, or email


Comments (0)