1984-1988 Pontiac Fiero
How to upgrade the stereo system in your Fiero

In brief: This Crutchfield Research Garage article gives you an overview of your Fiero's stock stereo system and your aftermarket upgrade options. We'll tell you all about:
- The factory stereo system
- Removing the factory radio
- Removing the factory speakers
- Adding more bass
- Other options for your Fiero
Then, use our vehicle selector to find the gear that will fit your Fiero.
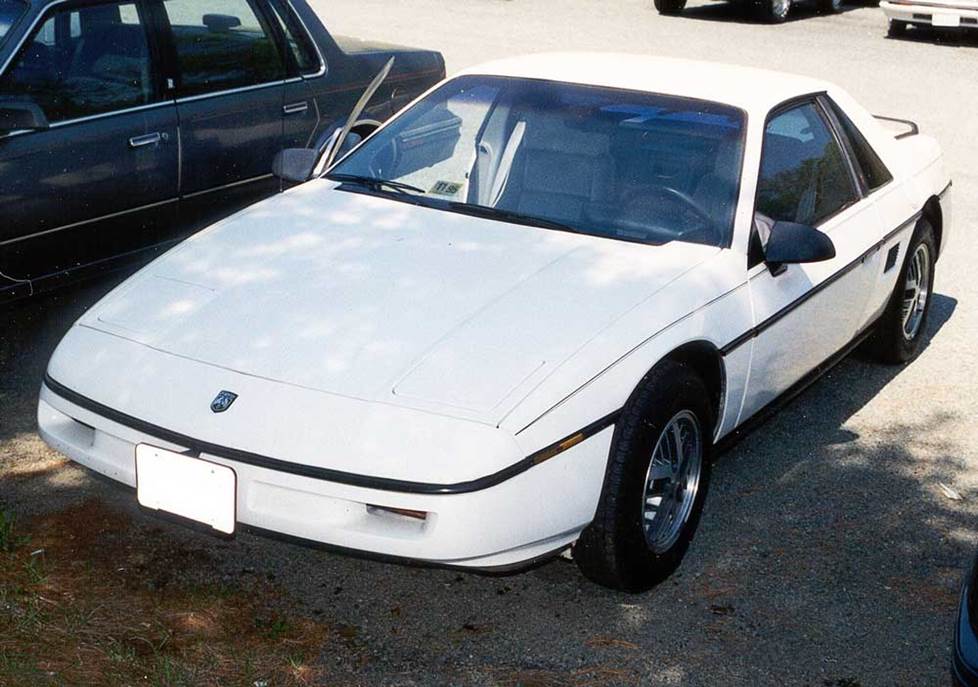
Overview of the Pontiac Fiero
Years ago, while chatting with a mechanic, one of our writers (see above) casually mentioned that he'd always wanted a Fiero. The mechanic stared at him for a long second, then suggested (rather loudly) that should the writer ever acquire such a car, he'd (darned sure better) figure out how to work on it himself. The mechanic then walked away, muttering something about someone possibly being the stupidest person alive.
Okay, so maybe everyone doesn't look back fondly on Pontiac's little mid-engine two-seater. Fair enough. Fieros aren't for everyone, probably because they really aren't that easy to work on and there were some, ahem, "quality issues," early on. But the cars got a lot better towards the end and the ever-evolving wedge-shaped design always looked good, so it's no surprise that some people still like them quite a bit.
Most of those people saw Fieros on the street or in car magazines, and thought, "Someday…." If you're one of them and your someday is now, a good, clean Fiero could be a whole lot of fun. If you have a friend who's a mechanic, that could come in handy, though. Just don't say anything about your plans ahead of time….
Detailed stereo and speaker removal instructions

The factory stereo system
Regardless of model year, the Fiero's factory radios were the standard-average GM products of the time, so everything from dance pop to hair metal sounded equally weak and tinny. Even if your musical tastes haven't changed, the ways you listen to that music certainly have, so a new receiver is the best way to enjoy your old music when you're driving down memory lane.
Considering the Fiero's reputation in some quarters of the automotive repair industry, you'd expect stereo replacement work to be incredibly difficult, too. Not really. It isn't easy, exactly, but any reasonably skilled do-it-yourselfer can handle the work. The interior is cramped, but even the harder parts of the job can be handled with the proper amount of patience and care.

Replacing the factory radio is a good first step towards upgrading your Fiero's stereo system (Crutchfield Research Photo)
Removing the factory radio
Radio replacement, for example, is simply a matter of wedging one's self into the Fiero's rather snug cockpit and getting to work. A variety of single-DIN (2" tall) CD receivers will fit into the factory opening with help from the factory radio brackets and the dash kit that's included at a deep discount with your Crutchfield stereo order.
Dash depth is an issue with the Fiero, so your new receiver will protrude from the dash by either ½" or 1", depending on which stereo/kit combination you're installing. If you're not cool with that, and you've ditched your CD collection, an ultra-compact digital media receiver will fit neatly into the shallow cavity.
If your Fiero is "new to you," which it probably is at this point in time, the factory brackets may have been damaged or gone missing somewhere along the line. If that's the case, you can obtain replacements from a dealership or other aftermarket source.
Removing and replacing the receiver is a pretty painless process that's made easier by the illustrated, step-by-step instructions found in the MasterSheet that's included free with your Crutchfield receiver or speaker purchase.
If your Fiero has a factory subwoofer, it’ll still work when you replace the factory radio. The new receiver’s amplifier turn-on lead must be connected to the power antenna lead on the receiver harness included with your Crutchfield order. You'll need to wire in a relay (available from Crutchfield) between the receiver and the receiver harness. We’ll include the relay with your stereo purchase, and our tech support crew can explain how to install it of you need any help.
Tools needed: 9/32" socket, ratchet, and extension, Torx T-15 driver
Read our Car Stereo Buying Guide for shopping tips and advice.
Shop for car stereos that fit your Pontiac Fiero
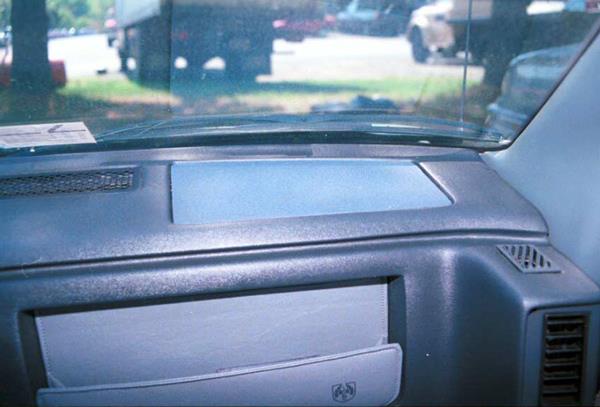
In a car this small, dash speakers matter (Crutchfield Research Photo)
Removing the factory speakers
The Fiero's cockpit isn’t the ideal setting for an awesome car audio system, but a new set of speakers will still sound awesome when compared to the original factory gear.
Here's a close-up view of the dash speaker (Crutchfield Research Photo)
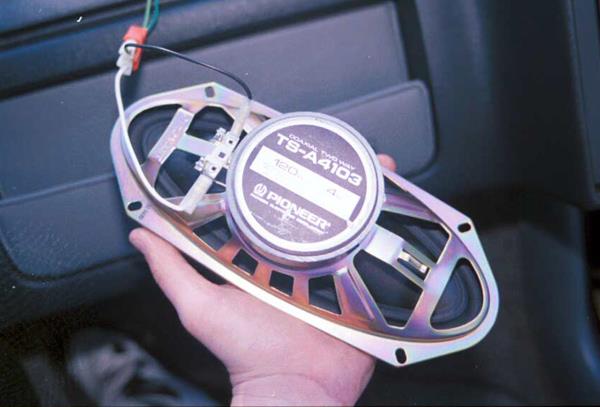
Dash speakers
The factory dash speakers are 4" x10" models that are easy to reach and remove. To remove these oval-shaped speakers, pry up the factory grille, remove four 9/32" screws, then remove and disconnect the speaker.
Same-size replacements are available for the factory speakers, though you should be mindful of mounting height restrictions on some of the early Fieros. The speakers we list will fit right in. If you decide you want to do the heavy-duty fabrication work required to install some small, round speakers in this space, make sure you measure before you order.
Tools needed: 9/32" socket, ratchet, and extension, Torx T-15 driver, panel tool
Headrest speakers
On early Fieros, the rear speakers were located in the seat headrests. This probably seemed like a clever, futuristic packaging idea at the time, but Pontiac eventually moved the speakers into the rear pillars, so maybe it wasn't.
Regardless of how you feel about having speakers pointed directly at the back of your skull, these little guys have endured years of sun, sweat, hair mousse, and headbanging music, so they're probably not sounding too great these days.
Alas, replacing them isn't easy; since same-size models are not available and removing (and reinstalling) the fabric from the seats can be a massive challenge. We've seen this swap done, but it's really not a job for the average do-it-yourselfer. We suggest consulting your local car audio installation shop.
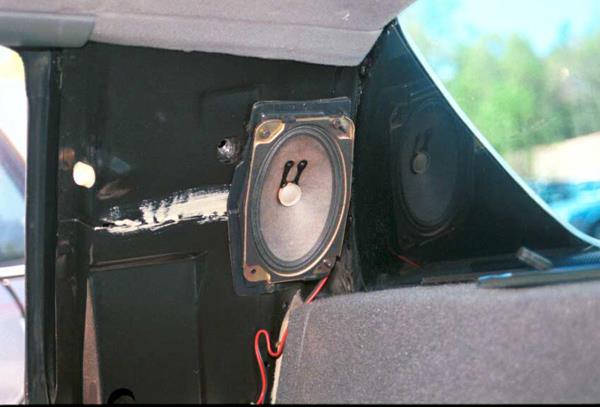
The rear side speakers aren't hard to reach and replace (Crutchfield Research Photo)
Rear pillar speakers
The 4" x 6" rear pillar speakers found in 1986-up Fieros are a lot easier to deal with. There's still some work involved, but it's well within the range of the average DIY car audio enthusiast.
You'll need a mounting bracket to install an aftermarket speaker in this location, and it's included free with your purchase from Crutchfield. If you install anything larger than 4" round or 4" x 6" oval speakers, you'll need to do some cutting and fabricating to make them fit in this location.
If space permits (and if you stick close to factory-size speakers, it should), you'll want to install a foam speaker baffle behind each new rear speaker. These inexpensive baffles will help with sound quality, but they'll also provide extra protection for the speakers.
Be sure to test the speaker to make sure it's working before you start putting it all back together. Take special care to make sure the seat belt anchors are secured properly.
Tools needed: 9/32" socket, ratchet, and extension, Torx T-47 driver, panel tool, Phillips screwdriver
Read our Car Speakers Buying Guide for more information.
Shop for speakers that fit your Pontiac Fiero
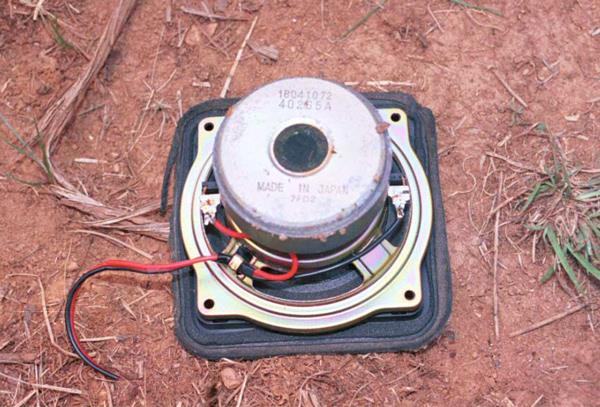
The Fiero's subwoofer enjoys attending outdoor music festivals (Crutchfield Research Photo)
Bass in your Pontiac Fiero
The 1987 and 1988 Fieros are generally regarded as the best of the breed in a lot of ways, but for our purposes, the most important thing is the factory subwoofer that showed up for the Fiero's final two years.
The Fiero's 5-1/4" mono sub was mounted beneath the passenger's side of the dashboard. Replacing it isn't easy, because 5-1/4" subs tends to be hard to find and rather pricey. The stock sub receives only bass frequencies from its amplifier, so your best bet is to install a normal coaxial speaker or the woofer from a set of components.
There’s no wiring harness available for this location, so if you do decide to install an aftermarket speaker in this location, you'll either have to cut off the factory connectors and splice the vehicle's speaker wires to your new speaker wires, or use Posi-Products connectors. Considering all the other work you'll be doing, the second option is the quickest and best.
For bigger bass, there's a wee bit of space behind the seats for a (very) compact sub box or powered subwoofer – 18" W x 24" H x 4" D behind each seat, to be exact. In case you're curious, those measurements were taken with the seat fully rearward and reclined three notches.
If the car has a subwoofer, it also has a subwoofer amplifier, which is located on the passenger's side of the center console. This mono amp accepts floating or common ground speaker-level input, and the inputs are wired in parallel with the Fiero's four full-range speakers. If you’re replacing the factory sub, the new speaker will be powered by this amp and, as we mentioned above, only receive bass frequencies.
Other options for your Fiero
There are plenty of other ways to improve your Fiero. Here are some of the ways Crutchfield can help.
Add some noise damping
Like a lot of mid-engine cars, the Fiero can be a noisy, rattly place — especially if it's been driven with, er, enthusiasm in the past. If you're looking to seal in your sound and seal out road noise and rattles, install Dynamat in the doors, side pillars, and rear bulkhead.
Connect a sound processor
If you choose to keep the stock radio, install a sound processor to send a clear, clean signal to your speakers. Sound processors remove any limitations on the signal imposed by the factory radio. The better the signal, the better the sound. Read our article explaining factory sound processors to learn more.
Improve your security
Installing a security system in your Fiero isn't extremely complicated as these things go, but if you don't have experience with these things, it's still a job best left to professionals.
Let's get started!
Ready to shop? Use our vehicle selector to find the gear that will fit your car or truck. If you have questions, give us a shout via phone, chat, or email


Billy carroll from Radcliff
Posted on 2/28/2022
Where is a good spot to ground the amplifier
Crutchfield Writing Team from Crutchfield
on 3/2/2022