1995-2001 Geo/Chevrolet Metro and Suzuki Swift
How to upgrade the stereo system in your Metro or Swift


In brief: This Crutchfield Research Garage article gives you an overview of your car's stock stereo system and your aftermarket upgrade options. We'll tell you all about:
- The factory stereo system
- Removing the factory radio
- Removing the factory speakers
- Adding more bass
- Other options for your Metro or Swift
Then, use our vehicle selector to find the gear that will fit your car.
Overview of the Geo/Chevrolet Metro
Before smart cars, there were small cars. And back in the day, they didn’t come much smaller than the Geo/Chevy Metro. Powered by a rip-snorting (kidding!) 3-cylinder engine and wrapped in clean, curvy bodywork, the Metro was, as the name suggests, a pretty handy little city car.*
The interesting thing about the Metro is that, for cars that were considered cheap and disposable even when new, they've developed a bit of a cult following in recent years. Whether that's because they're good cars or because a decent examples can cost less than a new recliner is debatable, but hey, it seems to be a thing. We see still plenty of Metros around here, and to be honest, they're starting to acquire a certain Bug-like charm.
If you're looking for a cheap, thrifty, amusing little car for your in-town adventures, a Metro or Swift might be the car for you. And, since you'll definitely want something to drown out the sound of the buzzy little three-banger engine, we'd highly suggest an upgraded stereo.
*The name thing doesn't work as well for the Suzuki Swift, which is not. Everything discussed here also applies to the Swift, but they're pretty rare, so we'll refer to the Metro throughout this article.
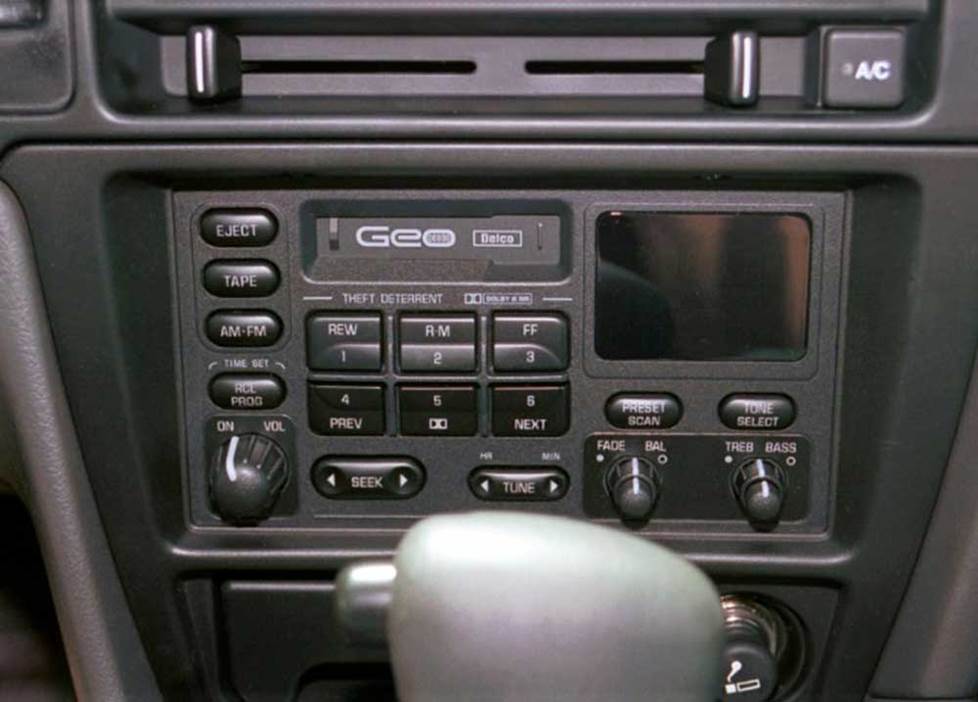
The radio's appearance changed a bit over the years, but the removal steps remain the same (Crutchfield Research Photo)
The factory stereo system
The Metro was designed to serve as basic transportation, so there's nothing complicated or remarkable about the stock stereo system. It's an AM/FM/cassette receiver that's connected to four weak speakers that weren't much to begin with and are vastly worse now. Pretty much anything shy of a boom box plugged into the cigarette lighter will sound better than the stock gear, so you can get a lot of bang out of your car stereo buck.
A healthy variety of single-DIN (2" tall) and double-DIN (4" tall) receivers will fit, and there are plenty of nice-sounding and reasonably priced speakers that will fit this car. Better still, the Metro is a very easy car to work on, so it's a great project for anyone who's just getting into car audio DIY.

Here's another Metro radio (Crutchfield Research Photo)
Removing the factory radio
Before you remove the old receiver, be sure to set the parking brake and disconnect the negative battery cable to prevent any electrical shorts.
Once that's settled, grab your tools (see below) and get to work. Remove two Phillips screws from the receiver trim panel (just above receiver opening), then remove the ashtray and two Phillips screws in the ashtray cavity.
Pull the receiver trim panel away from the dash. If the lighter harness needs a little more slack, reach around to the right side of the console and disconnect the black T-connector. Remove the trim panel and set it aside.
Detailed stereo and speaker removal instructions

Working through the ashtray cavity, remove one Phillips screw just below the rear of the radio. Remove two Phillips screws on each side of the radio, then pull it out, disconnect it, and remove it. If you need some more slack on this harness, reach around the right side of the console and press the clip-on harness to disconnect it.
Your Crutchfield stereo purchase gives you a big discount on the mounting hardware and wiring harness adapter you'll need to install your new receiver. Follow the instructions included with each, then install the new receiver and secure it with the screws you removed earlier. Test it out to make sure it's working, and if it is, start putting things back together.
Tools needed: Phillips screwdriver
Read our Car Stereo Buying Guide for shopping tips and advice.
Shop for car stereos that fit your Chevrolet Metro
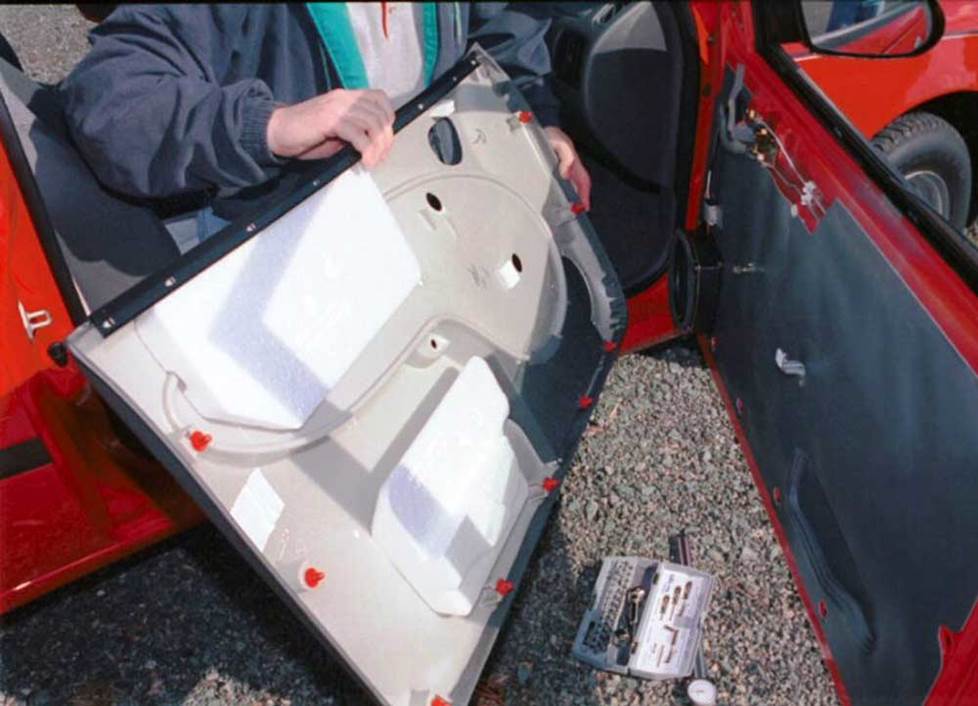
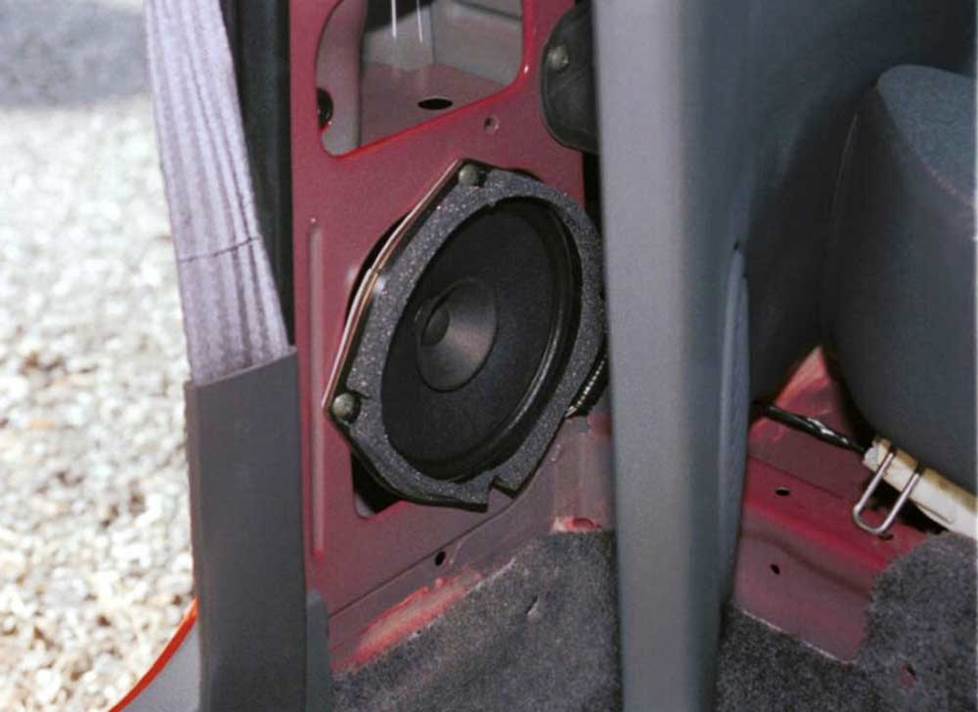
You'll need to remove the door panels to replace the Metro's front speakers (Crutchfield Research Photo)
Removing the factory speakers
The Metro's four stock speakers can be found in the front doors and, depending on body style, the rear side panels or rear doors. They're pretty easy to remove and replace — well, if your car has factory speakers, that is.
Radio-delete was a thing with these cars, mostly for fleet sales, and that can complicate your installation because you'll need to do your own speaker wiring. This is not an easy job, so be aware. The good news is that buying from Crutchfield means you get free tech support for the life of your gear. If you run into trouble, just give us a call.
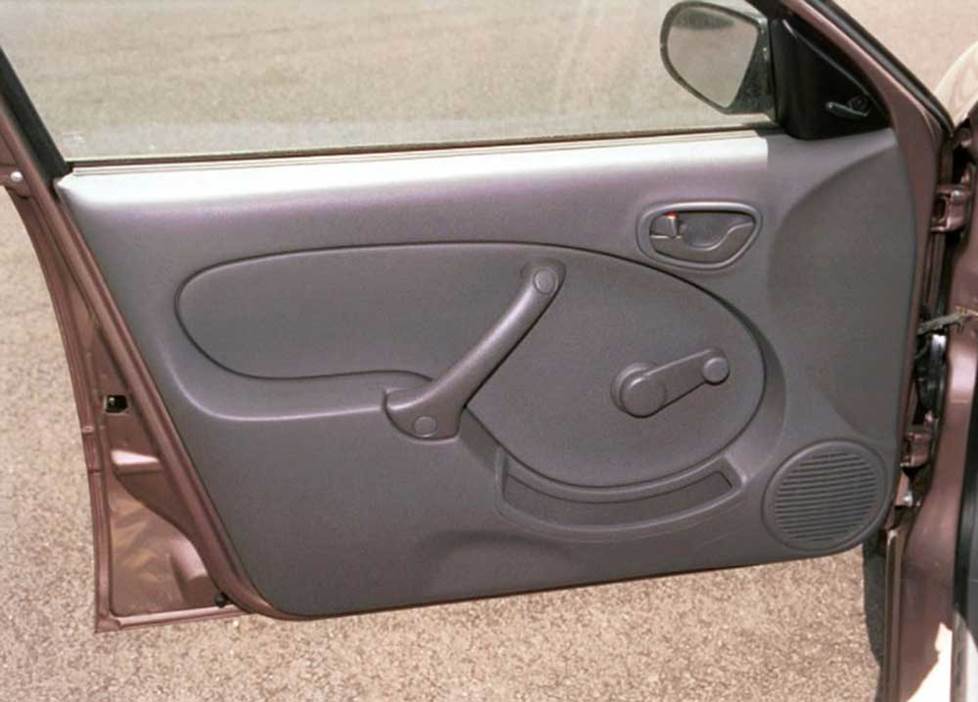
New speakers will make a big difference in your stereo sound (Crutchfield Research Photo)
Front speakers
The Metro's stock speakers are, to put it mildly, unimpressive. Replacing them will really bring out the best in your new receiver. Or even your old receiver, if you decide to replace the speakers first. You can choose from a nice selection of 6-3/4", 6-1/2", or 5-1/4" aftermarket models, and the removal/replacement process is pretty simple.
If you're just removing and replacing the old one, life is easier. You'll start by rolling down the window and using a panel tool to pry off the sail panel. Remove one Phillips screw from the door release trim, then slide the trim slightly toward the rear of the door and remove the trim piece. Next, pry out the two screw covers in the door pull handle and remove the screws and the handle.
If you have good, old-fashioned, manual windows, use a clean shop rag in a back-and-forth motion to release the C-clip on the rear of the window crank, then remove the crank.
Pry around the bottom and sides of the door panel to release the retaining clips. Lift the panel off the window channel, disconnect the electrical wiring harnesses (if equipped) and remove the door panel.
Remove the four Phillips screws securing the speaker to the door and four Phillips screws securing the speaker bracket. Disconnect speaker, remove it, and get ready to install the new speakers. Once you're done, test them out, make sure they're working, and if so, put the door back together. Pay close attention to the windows and locks to make sure they're working before you finish everything up.
If you install 6-1/2" or 5-1/4" speakers, you'll probably need to cut the back of the plastic cup or mounting bracket to make room for the new speakers. This is not hard, but work carefully anyway.
Tools needed: Phillips screwdriver, flat blade screwdriver, panel tool
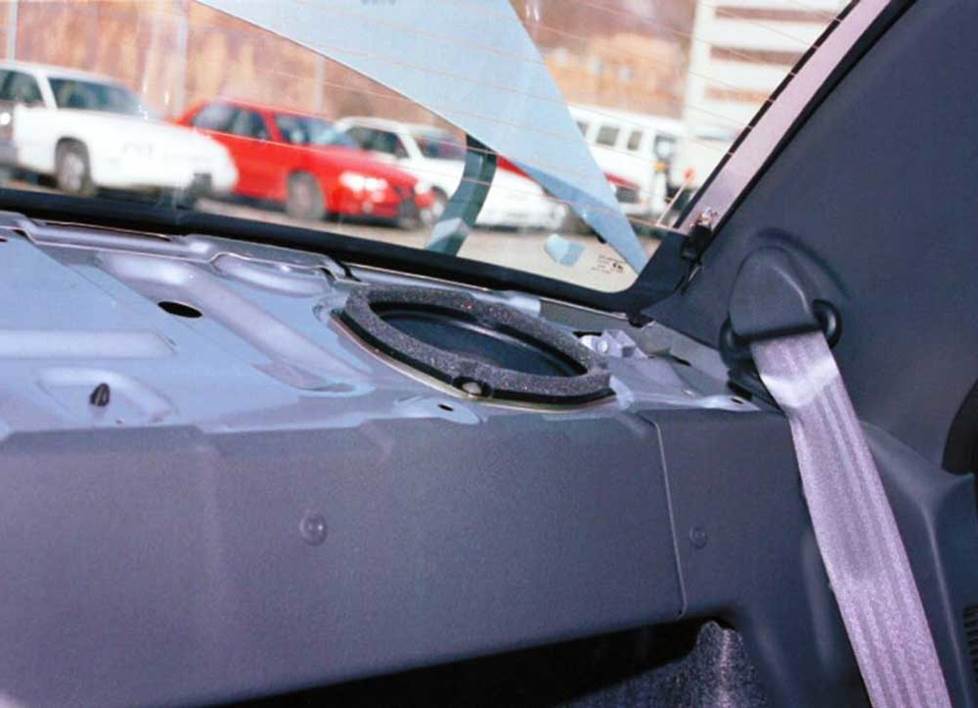
Replacing the sun-baked rear deck speakers is a great way to upgrade your audio (Crutchfield Research Photo)
Rear deck speakers (Sedan)
The sedan's rear deck can house a set of 6-3/4" or 5-1/4" aftermarket speakers, and the job is pretty simple. You'll start by folding the rear seats forward, then prying out two press-clips from the top of the rear deck panel.
Remove two Phillips screws from the brake light assembly, then go around to the back of the car and crawl into the trunk a bit to disconnect the brake light assembly's wiring connector. Next, go back inside the car and remove the assembly.
Pry up the rear deck panel to release the retaining clips along the front and rear edges. Lift the panel over the brake light assembly brackets and remove the whole panel. That'll expose the speakers and the four Phillips screws that secure each one. Remove those, remove the speakers, disconnect the harnesses, and get the old speakers out of there.
You'll secure the replacement speakers with the screws you just removed, then you'll just need to connect the speaker wiring adapter to the car's wiring. Test them out and if they work, start reassembling things.
The speaker adapters are included with your Crutchfield speaker purchase, as are the mounting brackets you'll need for smaller speakers.
Tools needed: Phillips screwdriver, stubby Phillips screwdriver, flat blade screwdriver, panel tool
Installing a new set of 6-3/4" speakers is an easy job that will pay big dividends (Crutchfield Research Photo)
Rear side speakers (Hatchback)
In the hatchback, you're limited to 6-3/4" aftermarket speakers, which is not necessarily a bad thing. They're also pretty easy to work with, which is definitely a good thing. You'll need to remove a few panels, but it's a totally do-able thing.
Start by removing one press-in type retaining clip from the front kick panel. Remove the plastic nut at the top of the kick panel and remove the panel. Next, remove the press-in clip from the front edge of the scuff plate, then pull it up, unclip it from rear side base trim, and remove the plate.
Remove four press-in clips from the rear side base trim, then lift the rear seat bottom and remove the base trim piece. Pry the front edge of the rear side panel just enough to release the retaining clip, then fold back the side panel to access the speaker.
From here, just remove the four Phillips screws securing the speaker, get it out of there, and install your new speakers.
Tools needed: Phillips screwdriver, stubby Phillips screwdriver, flat blade screwdriver
Read our Car Speakers Buying Guide for more information.
Shop for speakers that fit your Chevrolet Metro
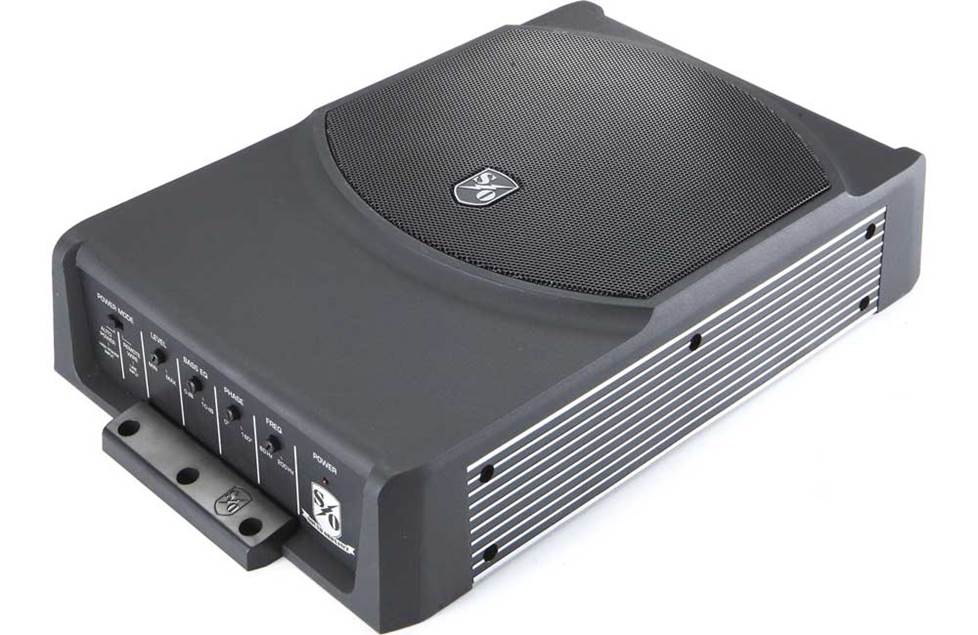
The Sound Ordnance B-8PTD will add a lot of bass to your Metro
Bass in your Metro
Considering the size of the Metro, you won't need a lot of subwoofer to get lots of bass. That said, you can add as much bass as you want, as long as it fits.
In the sedan, you'll have a 35" W x 15" H x 32"/26" D space to work with, as measured between the rear shock towers. In the hatch, there's a 34" W x 15" H x 11"/19" D space. So yes, there's some room for a sub box, but not a ton of it.
If you still value cargo space over low-end thump, you can choose from a nice selection of powered subwoofers.
Learn more about building a bass system in our Car Subwoofer Buying Guide.

Dynamat can really help reduce road noise
Other options for your Metro
Here are a few other ways Crutchfield can help you make your Metro a better place to be:
Sound deadening
The Metro isn't exactly a Lexus when it comes to peace and quiet. To minimize road noise and maximize sound, we recommend installing Dynamat inside the door panels. If you've installed a sub, you should also put some in the cargo area to keep rattling to a minimum.
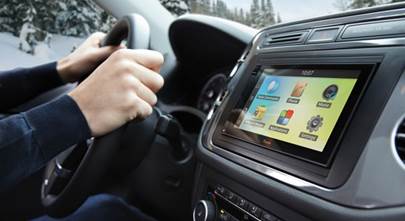
Navigation
You don't have to spring for a navigation receiver to get in-car directions. A portable GPS can mount on your dash and give you turn-by-turn directions, traffic updates, and everything you need to make your drive go smoothly. Plus, when you get where you're going, you can put your GPS in your pocket and use it to find points of interest around town.
Security
Installing a security system in the Metro isn't easy (security systems rarely are), but it's definitely a good idea if you're worried about someone helping themselves to your stuff and your stereo. Our Crutchfield Advisors can help figure out what you need to get the job done, but we usually recommend taking your car and new gear to a professional installer.
Let's get started!
Ready to shop? Use our vehicle selector to find the gear that will fit your car or truck. If you have questions of your own, give us a shout via phone, chat, or email


Comments (0)