2002-2009 GMC Envoy
How to upgrade the stereo system in your Envoy

In brief: This Crutchfield Research Garage article gives you an overview of your Envoy's stock stereo system and your aftermarket upgrade options. We'll tell you all about:
- The factory stereo system
- Removing the factory radio
- Removing the factory speakers
- Adding more bass
- Other options for your Envoy
Then, use our vehicle selector to find the gear that will fit your GMC.
Overview of the GMC Envoy
While this Envoy is not skilled in the art of shuttle diplomacy, it is quite good at shuttling your family from home to school to soccer practice and back. Big enough for people and gear, yet small enough to park without a team of dockworkers, this mid-sized SUV is a comfortable, practical, and ideal for everyday driving.
Of course, if the regular Envoy isn't quite enough truck for you, you can always look for an extended-wheelbase Envoy EXT. And if you're looking for a truck that combines practicality and performance, start searching for the rare, Corvette-engined Envoy SS. Or, if you want to be different, you can find a good used Izusu Ascender, which is for all intents and purposes, the same truck.
Replacing the factory stereo system is a great way to make your Envoy (or Ascender) feel new again. A wide variety of receivers will fit in the dash (with a bit of modification, which we'll discuss below), and you also have a lot of great speaker options. Need even more sound? The joy of an SUV is that you have plenty of space to work with if you want to add subwoofers and the amplifiers you'll need to power your awesome new system.
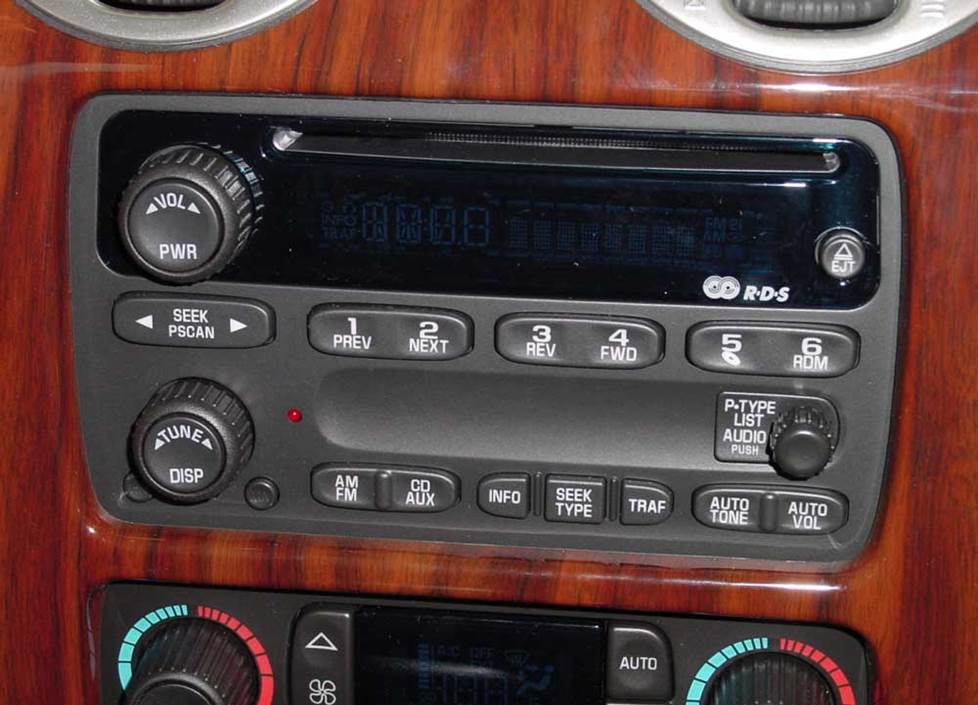
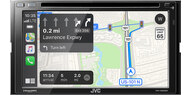
You can replace the factory radio with a variety of single-DIN or double-DIN models (Crutchfield Research Photo)
The factory stereo system
Regardless of model or size, the Envoy's stereo options were the same. Factory systems ranged from a standard AM/FM/CD (or CD/cassette) receiver to an optional Bose® system to, in later years, a factory navigation system. You'll lose the factory nav and (if present) factory satellite radio when you install a new receiver, but you can retain OnStar with the right adapter.
Speaking of adapters, your truck's warning chimes are built into the factory radio. You'll need to purchase an adapter that retains those safety warnings and provides a switched 12-volt power source for your new stereo.
Crutchfield strongly recommends that you use the recommended adapter with your new stereo — so much so, in fact, that we will not provide technical support for your installation if you don't use the adapter. So yeah, you'll want the adapter. There are several of these adapters available, like the Crux SOOGM-15 interface. Our website and advisors can help you choose the best one for you.
A variety of single-DIN (2" tall) or double-DIN (4" tall) will work in the Envoy, but you'll need to cut out the plastic rear support bracket to make room for your new stereo in the dash cavity. This isn't nearly as hard as it sounds (it's rather thin plastic), but you will need a small saw or a rotary tool to get it out of the way.
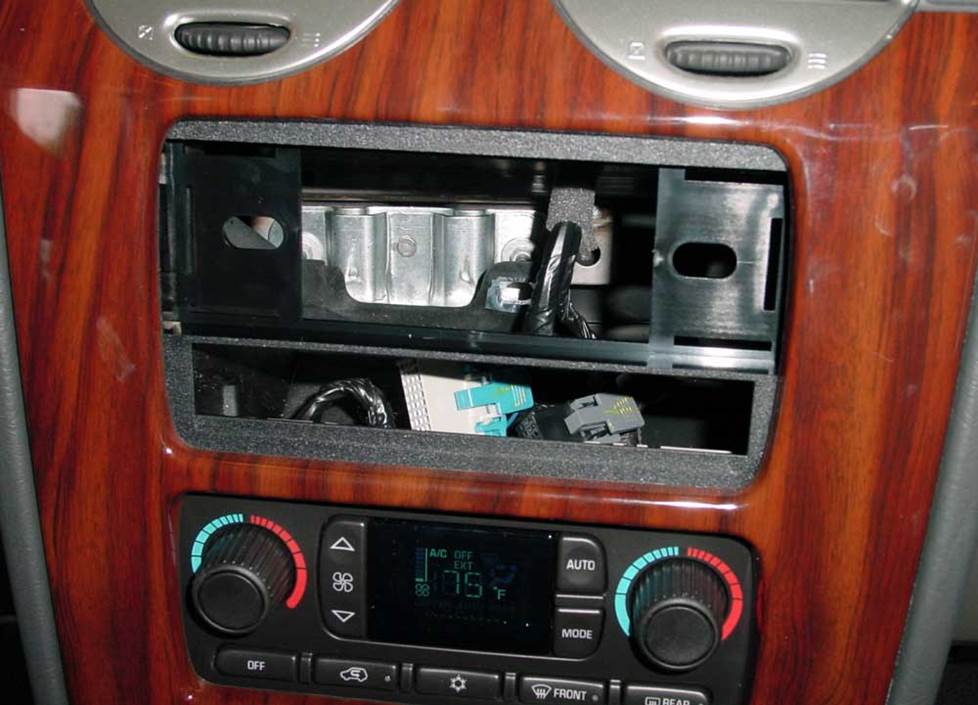
The mounting kit you'll need is available at a deep discount with your Crutchfield order (Crutchfield Research Photo)
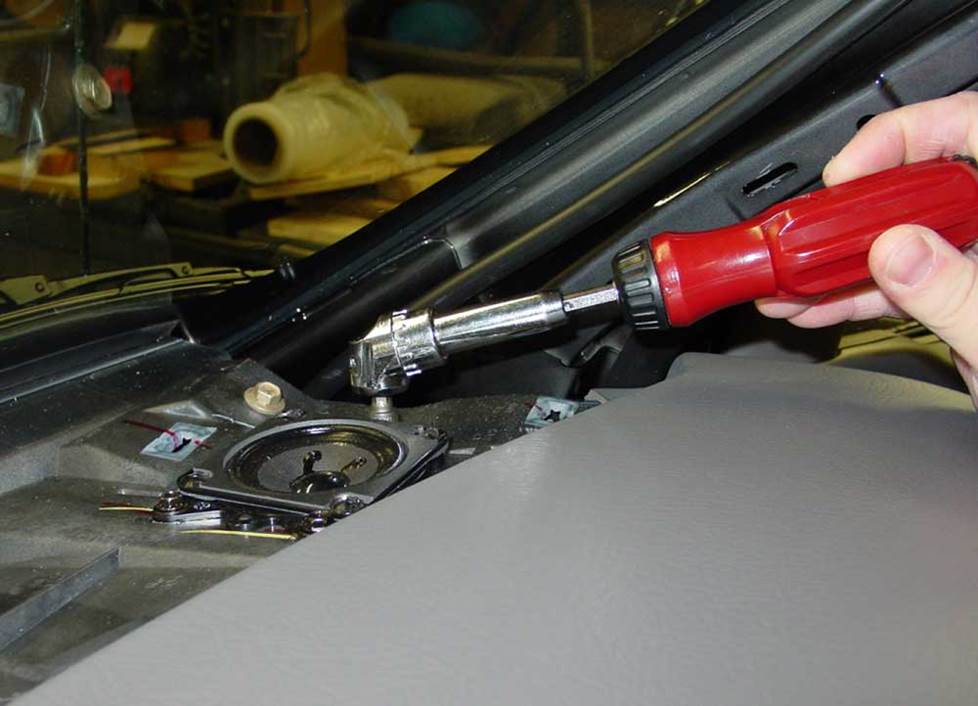
Removing the factory radio
Getting the factory radio out of there starts at the center console, which needs to be pulled back just a tad. Open the console storage compartment lid and remove two Phillips screws from the top front edge. Remove the rubber coin cup in the rear of the compartment, then remove the two Phillips screws below.
Next, reach into the bottom, pull up the screw cover, remove the two exposed Phillips screws, and lift the storage compartment out of the cavity. The final step is pulling the rubber liner out of the front drink cup holder and removing the exposed 7mm screw. Now that everything's loosened up, lift the rear of the console and pull it back slightly to give yourself the room you need to get to work on the receiver.
Once the console's been dealt with, removing the radio is reasonably simple. All you need to do is remove some screws, carefully pry away the trim panel, disconnect the harnesses, and remove the radio.
Detailed stereo and speaker removal instructions

To install your new receiver, you'll need to secure it to the mounting bracket, following the instructions included with the installation kit. Make the necessary wiring connections by following the instructions supplied with the wiring harness you purchased from Crutchfield.
Once that's straight, connect the receiver harness to the factory wiring harness, plug the antenna lead into the back of the receiver, and carefully slide the entire assembly into the dash. Secure it using the three 7mm screws you removed earlier, then test to make sure it’s working properly. If it is, start putting the dash and console back together.
Tools needed: Phillips screwdriver, panel tool, 7mm socket, ratchet & extension
Read our Car Stereo Buying Guide for shopping tips and advice.
Shop for car stereos that fit your GMC Envoy
Steering wheel audio controls
Some Envoys were equipped with steering wheel audio controls, and we'll make sure you get the gear you need to retain this convenient feature when you install a new stereo. When you enter your vehicle information, our Outfit My Car tool will create a package that includes the adapter you need to make your factory steering wheel controls work with your new receiver.
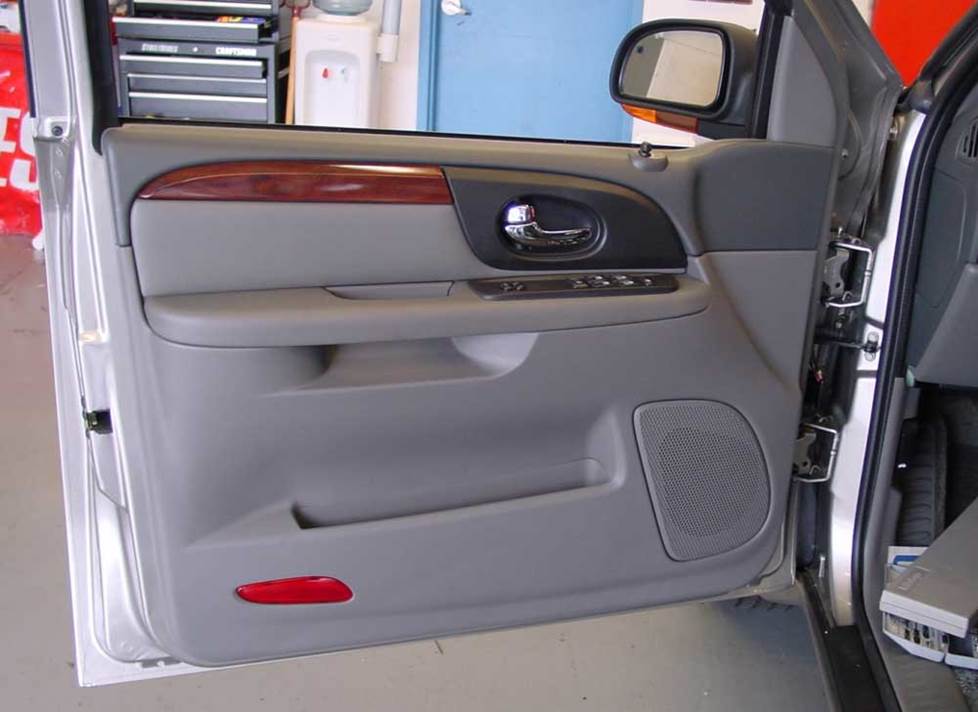
The front door speakers can be replaced with a wide variety of aftermarket models (Crutchfield Research Photo)
Removing the factory speakers
Depending on the option package ordered, your Envoy will have factory speakers in the front doors, the rear doors and, in the case of those trucks equipped with the Bose system, the dash.
The Bose® system includes speakers in the dash corners (Crutchfield Research Photo)
Dash speakers
Bose® equipped trucks feature tweeters underneath grilles on the far left and right sides of the dash. If you want to replace these tweeters, you'll need to remove the A-pillars and the top dash panel.
This isn't hard to do, but you'll be removing a lot of large plastic panels, so work carefully to avoid damaging them. There are no mounting brackets or wiring harnesses available for these speakers, so you'll need to use our universal backstrap to hold them in place and Posi-Products connectors to connect your new tweeters to the factory wiring.
Your new speakers might not include mounting screws, so check the box before you start. If you have to make a run to the hardware store, it's obviously best to do so before you take your dashboard apart.
Tools needed: Phillips screwdriver, flat blade screwdriver, panel tool, 7mm socket, ratchet & extension
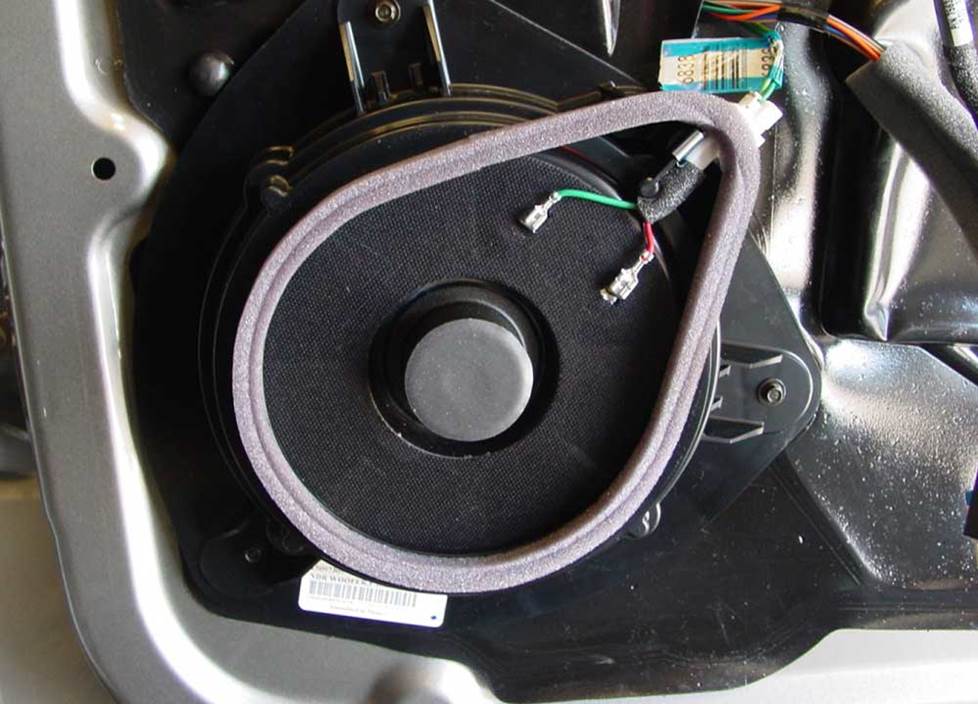
Here's a close-up view of a Bose® door speaker (Crutchfield Research Photo)
Front door speakers
The Envoy's standard front speakers are 4-ohm 6-3/4" units, while the Bose® equipped models contain 8" 2-ohm speakers. Both varieties can be replaced with a wide variety of aftermarket speakers, though you will need mounting brackets to install smaller speakers in bigger cavities. They're included with your speaker purchase. You'll need to remove the door panel to access these speakers, but that's a straightforward process, and it's all explained in the Crutchfield MasterSheet included free with your stereo or speaker purchase.
The standard 6-3/4" woofer is a component with a tweeter just above it. The woofer receives a full-range signal, so you can ignore the tweeter and swap in a new full-range speaker if you want to. This is also a good vehicle for installing component speakers if you want even better sound quality.
The factory brackets and grilles will work with your new speakers, but you may need to grind off some material to get a perfect fit. You'll also have to remove the locating tabs from the factory speaker bracket before mounting a new speaker or bracket. This modification won't affect the bracket's structural integrity.
Front door speakers in the Bose® system
In the Bose® system, the factory front door speaker is a woofer that receives a low-pass signal from the factory amp. When you install an aftermarket speaker, you'll only get bass unless you bypass the factory amp, which is located in the right rear cargo area.
Another issue that comes up for Envoy's with the Bose system is that a wiring harness is not available for the front door speakers, so you'll need to make other arrangements. You can splice or solder your new speaker's wires to the factory wiring, or use a set of Posi-Products speaker connectors. We recommend the latter option, because it's faster, easier, and the connection is much stronger. This is not a problem for the non-Bose option. We have wiring adapters so that you can plug in your new speakers without any trouble.
Once you're done installing your speakers, test them out to make sure they're working properly. Before you reinstall the door panel, make sure the wires aren't interfering with the windows and test the door lock and release operation.
Tools needed: Phillips screwdriver, panel tool, 10mm socket, ratchet & extension, Torx T15 driver, pliers
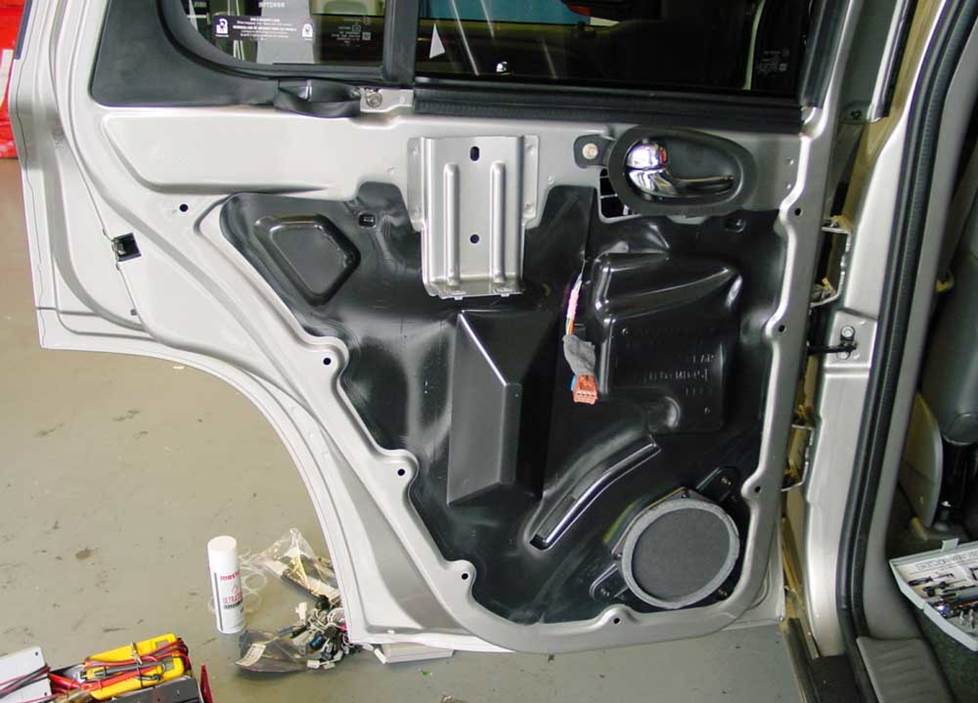
Replacing the rear door speakers is a reasonably uncomplicated procedure (Crutchfield Research Photo)
Rear door speakers
Replacing the rear speakers in your Envoy is a lot like replacing the ones up front. You'll need to remove the door panels, of course, being careful not to damage the sometimes-snug plastic retaining clips. As with the front speakers, you'll need to break off the line-up tabs on the factory speaker bracket to allow your new speaker to fit flush against the bracket. You may also need to break off the three square mounting tabs on the speaker/bracket assembly.
Depending on your Envoy's year and factory equipment, everything from 5-1/4" to 6-3/4" aftermarket speakers will fit in the rear doors. Once you've entered your vehicle information into our Outfit My Car tool, you'll see a full list of what's available for your truck.
Tools needed: small flat blade, screwdriver, panel tool, 7mm socket, ratchet & extension, Torx T15 driver, pliers
Read our Car Speakers Buying Guide for more information.
Shop for speakers that fit your GMC Envoy
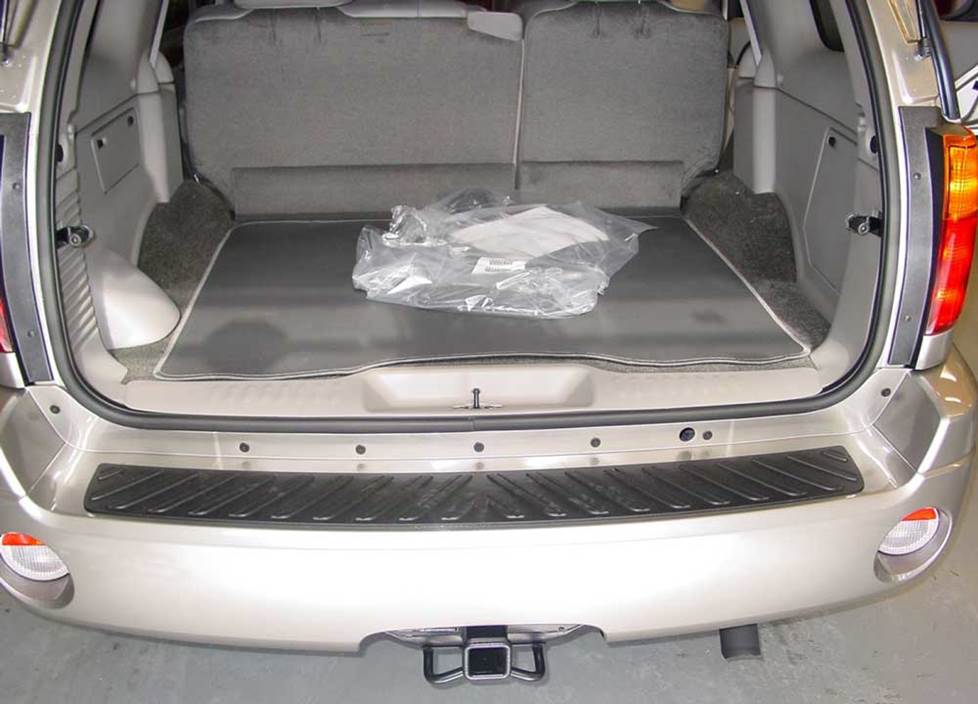
You'll have plenty of space for bass in the Envoy — and plenty of options, too (Crutchfield Research Photo)
Bass in your Envoy
Like most SUVs, "mid-size" or otherwise, the Envoy has room for just about anything you want to toss in there, including subwoofers. You might not have a ton of space left for anything else after you indulge your taste for bass, but there's really nothing wrong with that. If you want to install a subwoofer box stuffed with great big subs (and the amps to power them), you have a 45" W x 14" H x 34" D space to work with. Those are just our basic box measurements, though. Feel free to amaze us with something bigger, better, and wilder. We'll add it to our Custom Car Showroom.
If you're planning to use your Envoy as more than a speaker holder (which, let's face it, most people are), there are plenty of powered subwoofers available. These subs, available in a variety of sizes, deliver an impressive amount of thump without taking up all of your valuable cargo space.
Learn more about building a bass system in our Car Subwoofer Buying Guide.

These speaker baffles give you improved performance while also protecting your speakers
Other options for your Envoy
There are plenty of other ways to improve your Envoy. Here are some of the ways Crutchfield can help.
Add an amplifier for better sound
No matter what else you do to your audio system, to further improve the sound quality, consider installing a 4-channel amplifier for your speakers. That will let you get the best sound from your music and really fill up the Envoy's spacious cabin. And if you install a new subwoofer, you'll also need to install an amplifier to power it as well. Learn more about adding amps to your system in our Car Amplifier Buying Guide.
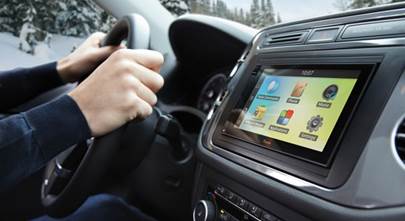
Rear-view camera
With a vehicle this large, it's important to be aware of your surroundings. A rear-view camera is a big help when you're backing up in a crowded parking lot. Connect it to your new nav or DVD receiver for increased awareness and safety.
Speaker baffles
We frequently suggest foam speaker baffles for other vehicles, but for an SUV like the Envoy, we strongly recommend them. Those big doors can waste a lot of great sound, and these rubber baffles are an inexpensive way to rein it back in. They're easy to install, and they'll give you improved performance while also protecting your speakers.
Kick panel speakers
Q-Forms Kick Panel Pods can be installed, well, where the front kick panels are now. This is not an easy installation for the average DIY-er, but the improvement to your vehicle's sound staging is dramatic because the pods point the 6-1/2" speakers of your choice (they're unloaded) right up towards your ears. They're available in colors that match your Envoy's interior, too, so they'll look great.
Security
Installing a security system in your Envoy isn't easy (security systems usually aren't), but it's definitely a good idea. Our Crutchfield Advisors can help figure out what you need to get the job done, but we usually recommend taking your car and new gear to a professional installer.
Let's get started!
Ready to shop? Use our vehicle selector to find the gear that will fit your car or truck. If you have questions of your own, give us a shout via phone, chat, or email


Jim Leahy from Plymouth
Posted on 10/1/2023
After resurching replacement of the Factory Bose system its become an issue with the Fader and or Balance controls. Is there away around this without getting new amps? Ideally I'd like to add a Aux port on the original Radio, does Crutchfield have any suggestions on how?
Jon Paul from Crutchfield
on 10/2/2023
Justin
Posted on 6/28/2023
i cant find my amp in my 2007 Envoy, is it possible my model doesnt have one?
Jon Paul from Crutchfield
on 6/30/2023
Ivan J Torres from BROOKLYN
Posted on 10/8/2020
They replaced my front radio. I have a 2008 GMC envoy SLT, we installed a Pioneer DVD radio. The front portion sounds amazing. The subwoofers boom and the speakers on the dash are loud, but, the rear speakers are playing at low levels. The installer at the shop said I needed to install a newer and stronger amplifier, but I dont beleive him. I feel like they half assed it and now they want me to pay more. How can I correct it myself?
Jon Paul from Crutchfield
on 10/8/2020
Bobby from Richmond, Texas
Posted on 5/11/2020
Hello! I have a 2006 GMC envoy SLT and I installed a pioneer single din stereo with the Crutchfield recommended adapters along with Polk audio speakers in the front and rear. Everything is powering up and I am getting sound but I have to turn the volume all the way to max in order to hear it. Any ideas? Maybe I need an amplifier? Please help.... lol
Jon Paul from Crutchfield
on 5/12/2020
Karen from Churubusco
Posted on 3/30/2020
I have a 2008 Envoy with the Bose system in it. I'm a newbie to all of this. If I just want to add subs to the existing stereo and speakers, is it worth buying a nice set of subs and amp (like $900 worth) or do I need a better receiver in order to justify buying that expensive of subs?
Jon Paul from Crutchfield
on 3/30/2020
Jon Paul from Crutchfield
Posted on 11/5/2019
Jeff, If you purchased your new tweeters from Crutchfield, check out our vehicle-specific instructions included free with your order. All the info you need is in that document. You can also purchase one separately for just $10.
Jeff from Phenix City
Posted on 11/4/2019
I have 03 GMC envoy and bought new dash tweeters. Just trying to figure out the process for getting to the speakers?
Gilbert A. Levy from Gainesville
Posted on 10/26/2019
Do you have any installation tips for the rearview camera for a 2008 GMC Envoy? I purchased a Crux-CUL-03A while back and just now working up the guts to install it. Was looking at placing it above the license plate in a space between the license plate lights. Thanks
Jon Paul from Crutchfield
on 10/28/2019
Jon Paul from Crutchfield
Posted on 3/4/2019
Machelle, If you don't want to replace the factory radio, you can add Bluetooth with the help of an aftermarket Bluetooth adapter. You can also upgrade the old receiver to get Bluetooth connectivity and more. Give us a call and talk to one of our advisors. We can help you choose the right gear and give you the right advice on how to install it.
Machelle from Fort Wayne
Posted on 3/1/2019
I have a 2002 gmc envoy with the factory stereo in it....My question is can you bluetooth your phone to it?