2003-up Chevrolet Express and GMC Savana
Upgrading the stereo system in your Express or Savana

In brief: This Crutchfield Research Garage article gives you an overview of your van's stock stereo system and your aftermarket upgrade options. We'll tell you all about:
- The factory stereo system
- Removing the factory radio
- Removing the factory speakers
- Adding more bass
- Other options for your Express or Savana
Then, use our vehicle selector to find the gear that will fit your van.
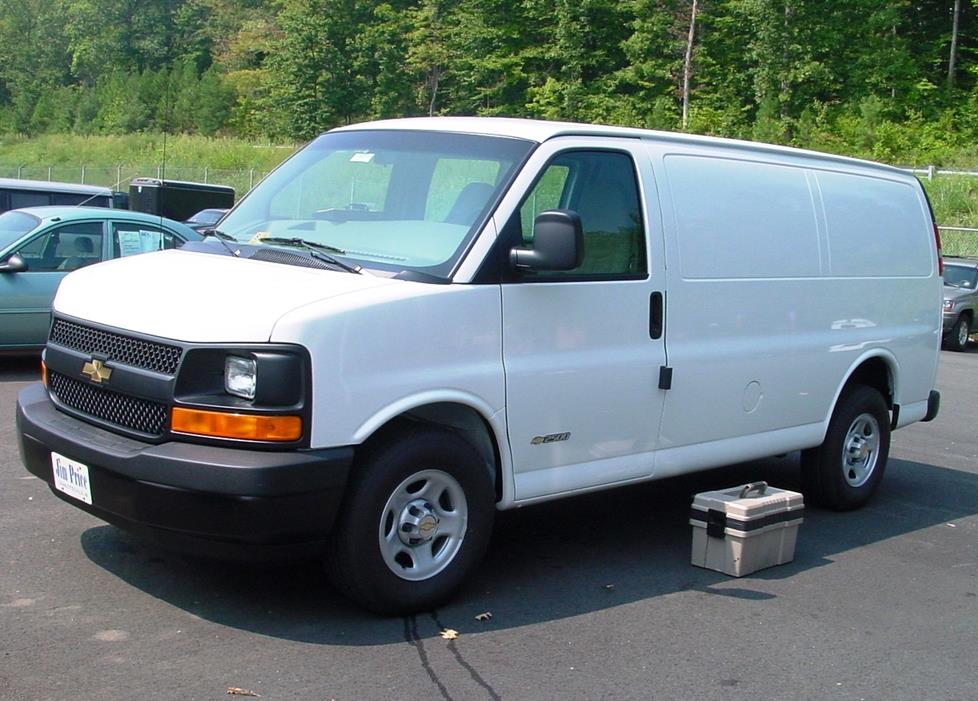
Overview of the Chevrolet Express and GMC Savana
There's a lot to be said for the traditional, old-school American van. They're not as compact and suburban-friendly as a minivan and they're not as comfy and sleek as the newest transit vans, but plenty of people still rely on vans like the Chevy Express and GMC Savana.
Makes perfect sense to us. These vans are reasonably cheap (used ones, anyway), simple as rope, and about as good as they can be at doing what needs to be done. Whether you need to haul tools or transport a team, GM's big vans are ready for work. And if you want to party like it's 1979, all you need is a van, a dream, and probably some wood paneling.
Note: The Express and Savana (which are identical, save for trim pieces) have been around in this basic form for quite a few years now, and aftermarket outfitters have done a brisk business converting and customizing these vans for various purposes. If your van is a conversion of some sort, your stereo and speaker situation might not resemble what's described here. If you have an Express-based RV, the receiver instructions should work nicely, and we can help you design a system for the rest of the vehicle. If you have questions, our highly trained Crutchfield Advisors will be happy to help in any way they can.

This factory radio, from a 2005 model, includes a cassette deck (Crutchfield Research Photo)
The factory stereo system
The Express/Savana twins have always been available in a variety of configurations and with a variety of options. From a simple, basic cargo van to a posh multi-passenger people mover, the van you needed was just an order sheet away.
Factory radio options included the base AM/FM radio and a navigation receiver. Sound, such as it was, emanated from either two, four, or six not-very-impressive speakers. On the upside, cool features like Bluetooth® connectivity, SiriusXM satellite radio, and OnStar made travel easier for any driver, as did the available rear park assist backup sensor and rear vision camera.
Broadly speaking, these vans will accept either single-DIN (2" tall) or double-DIN (4" tall) aftermarket stereos. Video receivers with retractable screens won't work in any of them, though. Enter your vehicle information in our Outfit My Car tool to find the receiver that's right for your specific year and model before you order anything.
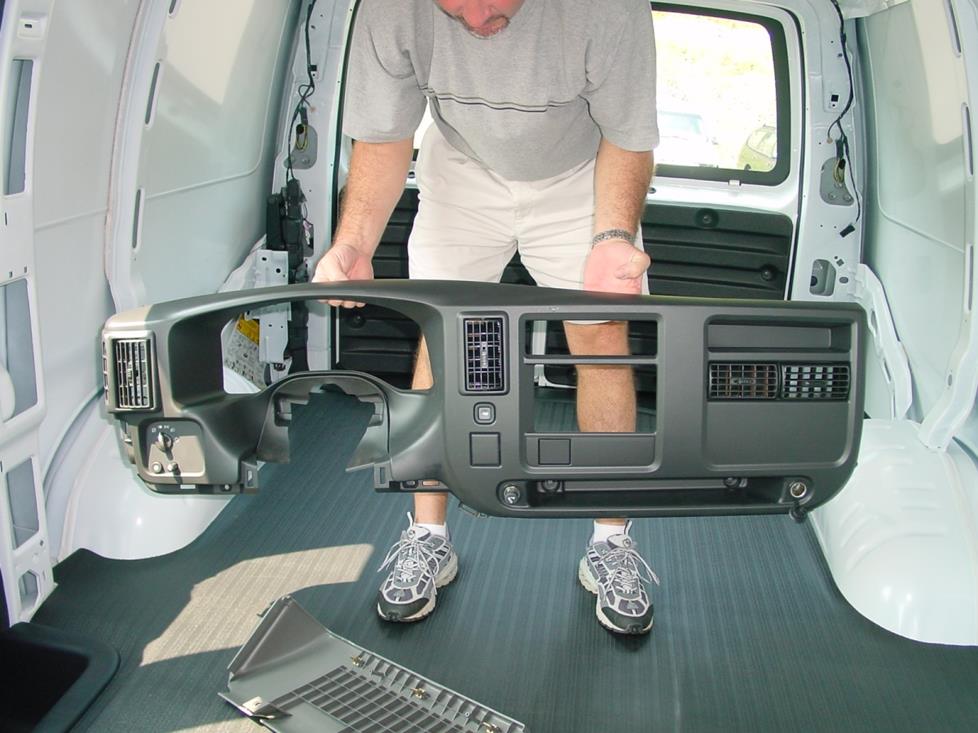
Try THIS in one of those "compact" vans! (Crutchfield Research Photo)
Removing the factory radio
As noted above, this basic van design has been around for a long time and the changes have been evolutionary, not revolutionary. Many of the mechanical bits have been improved, of course, and the styling has been updated, but this still looks, acts, and performs like, well, a GM van.
Replacing the radio itself isn't hard at all, but getting to it can be somewhat challenging. The challenges vary a bit, depending on whether you have a 2003-2007 or 2008-up van, but you'll have to remove the entire dash trim panel in either case.
That's one long piece of plastic to wrestle with, and getting it away from the dash safely involves a lot of work and probably some help from a friend. It's always good to be careful when removing plastic trim panels, but you really don't want to break this one.
Detailed stereo and speaker removal instructions

If you're an experienced automotive do-it-yourselfer, you'll probably be okay, especially with help from the disassembly instructions found in the Crutchfield MasterSheet that's included free with all stereo and speaker orders. On the other hand, if you haven't done this sort of thing enough to feel comfortable doing it, you might want to hand the job over to your friendly neighborhood car audio installation professionals.
Replacing the factory radio requires a dash kit and a wiring harness adapter. Because your vehicle's warning chime is built into the factory radio, you'll need to purchase an adapter that retains the factory warning chime and provides a switched 12-volt power source for your new radio. Crutchfield strongly recommends that you don't replace your factory radio without using the recommended adapter, and we'll give you a deep discount with your Crutchfield stereo purchase.
Tools needed: Panel tool, 7mm and deep 10mm socket, ratchet and extension (add 15mm socket for '08-up vans)
Read our Car Stereo Buying Guide for shopping tips and advice.
Shop for car stereos that fit your Chevrolet Express
Steering wheel audio controls
In most cases, it's reasonably easy to retain your van's steering wheel audio controls when you install a new stereo. When you enter your vehicle information, our database will choose the adapter you need to make your factory steering wheel controls work with a compatible aftermarket receiver.
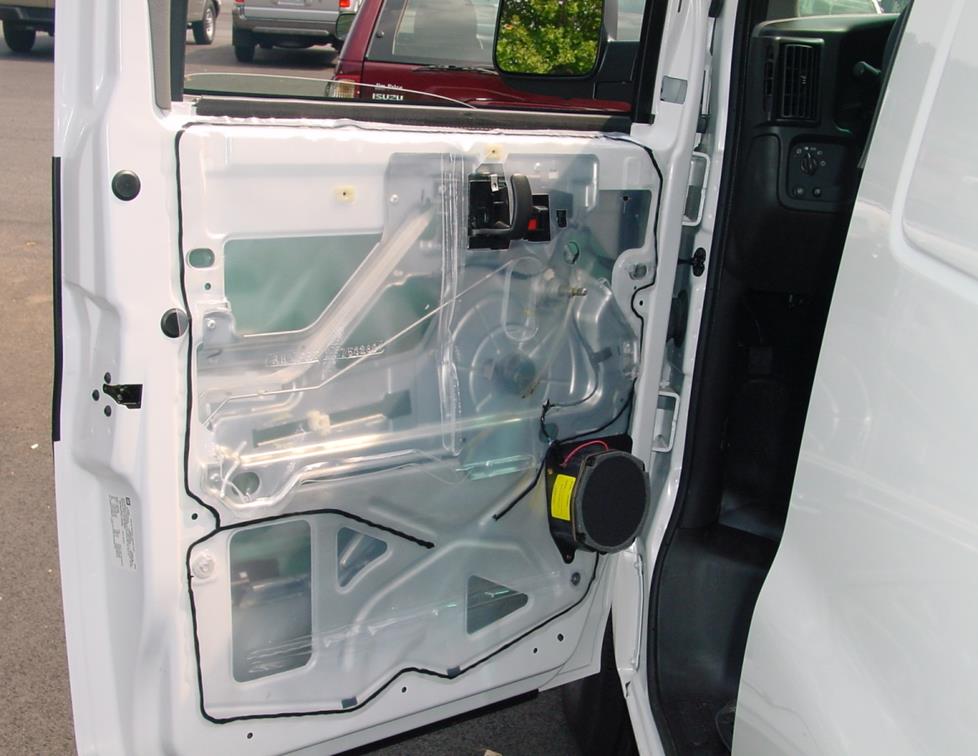
The door speakers are comparitively easy to reach and replace (Crutchfield Research Photo)
Removing the factory speakers
Your Express or Savana will have speakers in the front doors and, if so equipped from the factory, the rear cargo doors. Some models will also have a couple of speakers housed inside a rear roof trim panel.
Front door speakers
The standard speakers are 6-3/4" models that can be replaced by same size, 5-1/4", or 6-1/2" aftermarket models. If you go with the smaller models, you'll need a speaker adapter bracket.
The Chevy/GMC van is a big, tall vehicle with big, tall front doors. The speakers are located toward the bottom of the door, and you'll have to remove the door panel to get at them. This is actually a reasonably simple job, especially when compared to the receiver replacement process.
You'll need some basic tools and some time and patience, but this is a totally do-able job for the average DIY-er. If you're spending money on the receiver installation, you can save some by handling this job yourself. The door panels have plenty of surface area, so you can always invest in a set of component speakers and surface mount the tweeters on the sail panels.
Tools needed: Phillips screwdriver, small flat blade screwdriver, 1/4" socket, ratchet and extension, panel tool, 7mm socket, shop rag
The rear speakers are also easy to access (Crutchfield Research Photo)
Cargo door speakers
The same is true for the cargo door speakers, but only if your van already has speakers back there. If not, you'll probably have to create a place to mount them. That's not easy at all, so it could be another job for your local installer.
The speakers you'll be replacing (if they're there) are 6"x9" speakers. You can go with same-size aftermarket speakers, or choose from a variety of 5-1/4" or 6-1/2" models. Getting to the factory speakers is just a matter of removing the door panels and removing the speakers.
Tools needed: Phillips screwdriver, small flat blade screwdriver, panel tool
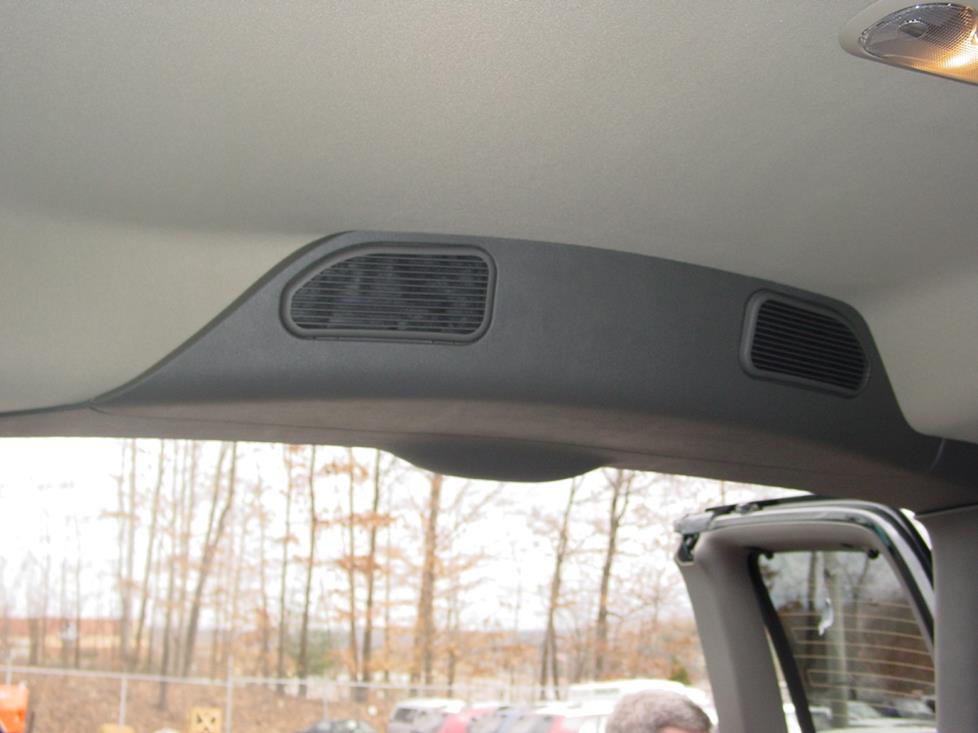
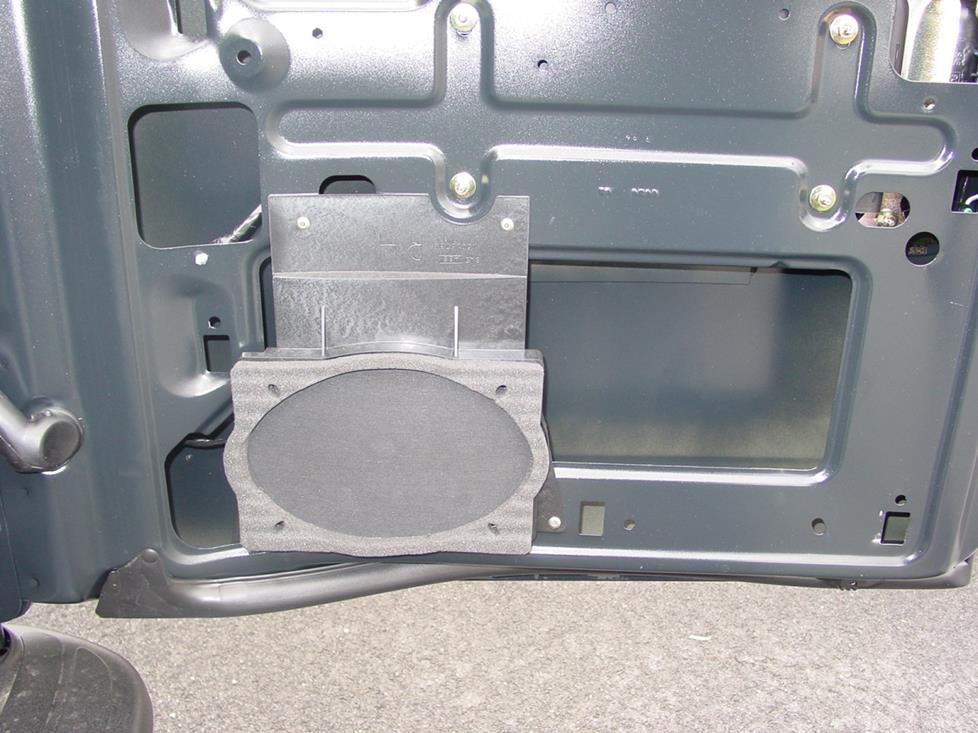
Here's a good look at the optional rear roof speakers (Crutchfield Research Photo)
Rear roof speakers
Those aren't HVAC vents, they're speaker grilles. And if your van is equipped with these 4"x6" speakers, you can replace them with a decent variety of same-size aftermarket versions. If you want to go larger or smaller, you'll need to do some pretty intense fabrication work, but the stock-size swap is easy enough. You'll stay busy removing panels for a bit, but that's really the hardest part of the thing. Work carefully and slowly to avoid damaging the panels, and you'll be fine.
Tools needed: Phillips screwdriver, deep 10mm socket, ratchet and extension, panel tool
Read our Car Speakers Buying Guide for more information.
Shop for speakers that fit your Chevrolet Express
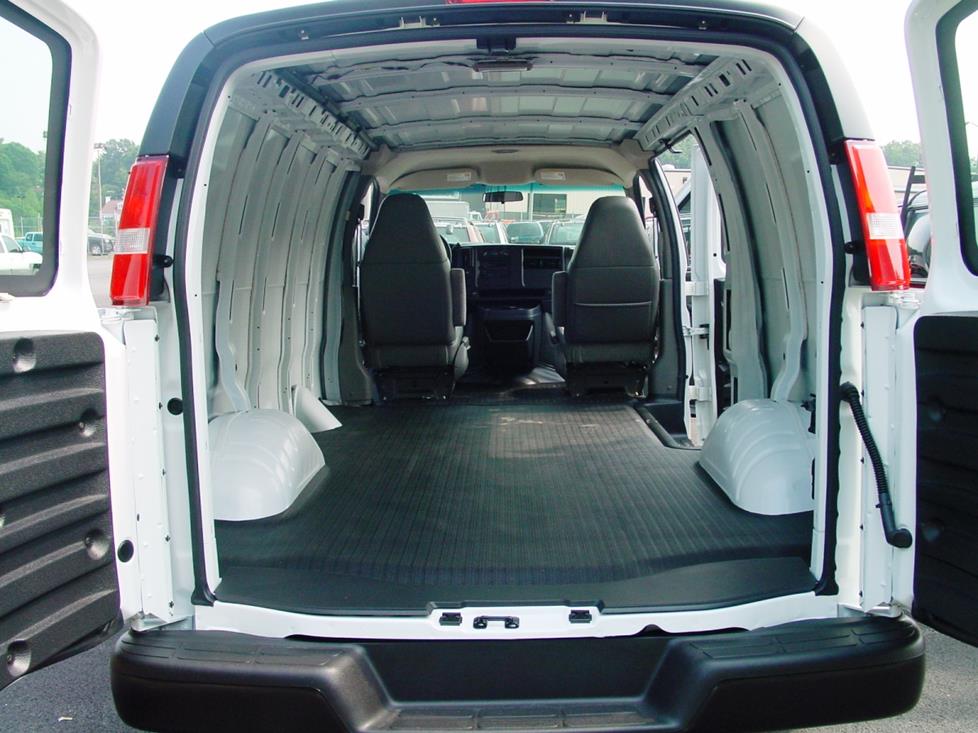
Plenty of room for bass. Or a bass quartet. (Crutchfield Research Photo)
Bass in your Express or Savana
In a vehicle that can easily swallow a living room suite, the question of "How much room do I have for subwoofers" is kind of beside the point. Technically speaking, you'll have a 52" W x 48" H x 104"/100" D space to work with in the cargo van, which should hold enough bass to loosen any fault lines in the area. The passenger van can vary depending on how many seats are in place, but with all of 'em in there, you have a 52" W x 25" H x 16"/12" D space.
Of course, not everyone wants to cause natural disasters or necessitate dental work every time they crank up the music. If your van is still used to haul people or stuff, you'll want to combine great sound with everyday utility. There are plenty of powered subwoofers that will sound great in your van, or you can fill one of our enclosures with a perfectly sane, thunderously powerful pair of subs. You'll also have plenty of room for the amplifiers you'll need, too.
You can also grab some enclosures to hold a set of 6"x9" speakers, too.
Learn more about building a bass system in our Car Subwoofer Buying Guide.
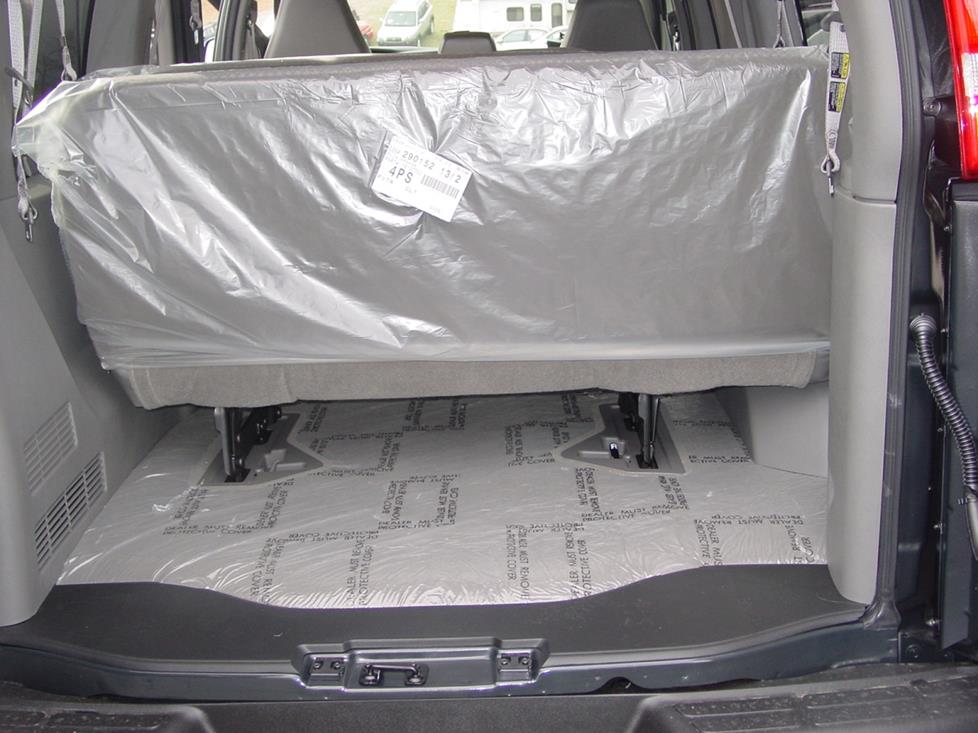
For passenger vans, a powered subwoofer is a good idea (Crutchfield Research Photo)
Other options for your van
As noted above, "other upgrade options" for a van is a pretty vast concept. Depending on what you're starting with and what you're trying to do, we could be talking about almost anything. Build a bed, put in a microwave, install a fountain, whatever. We'll stick to car audio-related things you can actually buy at Crutchfield, but not without reminding you that we stock a huge selection of home audio gear, too.
Add an amplifier for better sound
Replacing the factory radio will make a big difference in your van. But to further improve the sound quality, consider installing a 4-channel amplifier for your speakers. And if you install a new subwoofer, you'll also need to install an amplifier to power it, as well. Talk to one of our advisors to get some ideas for how to economically and easily build your system. Learn more about adding amps to your system in our Car Amplifier Buying Guide.
Noise damping
The Express/Savana is about as big a box as you can drive without getting a CDL. As you might expect, there are acoustical challenges in a vehicle like this one, whether you're upgrading a cargo van or a passenger van. Installing Dynamat in the front and rear doors when you're replacing the speakers can really help enhance the sound quality.
You can also install a set of foam speaker baffles behind your new speakers. In addition to helping with performance, they'll also provide extra protection against moisture and dust.
Rear-view cameras
When you're driving a big van, narrow streets and crowded parking lots can get scary. A factory rear-view camera was available as an option on these vans, but if yours doesn't have one, we offer rear-view cameras from Kenwood, Alpine, Sony, Pioneer, and more. Some are designed to work with same-brand DVD/nav receivers only, but others come with a composite video connector and will work with almost any video receiver.
Security
Installing a security system in your van isn't easy (security systems rarely are), but it's less complicated than it could be. Our Crutchfield Advisors can help figure out what you need to get the job done, but we usually recommend taking your van and new gear to a professional installer when it comes to security systems.
Let's get started!
Ready to shop? Use our vehicle selector to find the gear that will fit your car or truck. If you have questions of your own, give us a shout via phone, chat, or email


Eddie
Posted on 6/28/2023
My reado comes on but has no sound at all and it is so hot on the left side of the reado that it burn my fingers!
Crutchfield Writing Team from Crutchfield
on 6/30/2023
Taylor from Charleston
Posted on 3/5/2023
2019 Chevy express 2500 OEM alternator doesn't seem to hold up well to 2,800w 2ohm dvc 15inch sub, 4,000 watt mono amp with external capacitor. Will a d3 wiring upgrade help or you think I need to also upgrade the alternator too. Two different amps 4g pure wires I go into protect mode a lot of music turn up and I push the amps a little hard
Jon Paul from Crutchfield
on 3/6/2023
William Shephard from Billings
Posted on 7/22/2022
Some models you have to remove rivits to replace front door speakers. Make sure to drive out the steel anvil out of the center of the rivit with a pin punch before drilling out the rivit. If not the drill bit will hit the steel anvil and walk into the softer aluminum and possibly the door. Which can enlarge the hole.
Crutchfield Writing Team from Crutchfield
on 7/25/2022
Juan c from Chicago
Posted on 7/10/2022
Installed a Boss BE7ACP aftermarket radio myself. The screen works good, turn on and off properly, thing is, there's no sound, checked all wires and they seems correct. Wondering if I'm missing something or if there's something I should do that DIYers wouldn't typically know about ?
Jon Paul from Crutchfield
on 7/11/2022