2005-2010 Chevrolet Cobalt and Pontiac G5/Pursuit
How to upgrade the stereo system in your Cobalt or G5/Pursuit

In brief: This Crutchfield Research Garage article gives you an overview of your car's stock stereo system and your aftermarket upgrade options. We'll tell you all about:
- The factory stereo system
- Removing the factory radio
- Removing the factory speakers
- Adding more bass
- Other options for your Chevy or Pontiac
Then, use our vehicle selector to find the gear that will fit your car.
Overview of the Chevy Cobalt
The Chevrolet Cobalt rolled out in 2005 as the all (or mostly) new successor to the venerable Cavalier. After nearly 22 years of the staid Cavalier, it was clearly time for a change, and the Cobalt was exactly that. The Cobalt boasts upgraded ‘everything,’ including a complete suspension and chassis re-design, plus a host of new standard amenities. As a result, the Cobalt did a pretty good job of holding its own in the small-car market.
The car was available as either a coupe or sedan, with the 4-door offering both LS and LT variants. The LS was the standard 4-door version of the coupe, while the LT offered all kinds of luxury interior appointments, including leather seats and an upgraded sound system. The upgraded stereo was also found in the Supercharged SS coupe.
Note: This info also applies to the "same, but different" Pontiac G5 and Pursuit. We'll refer to the Cobalt throughout, but all the info is just as relevant to the Pontiac.
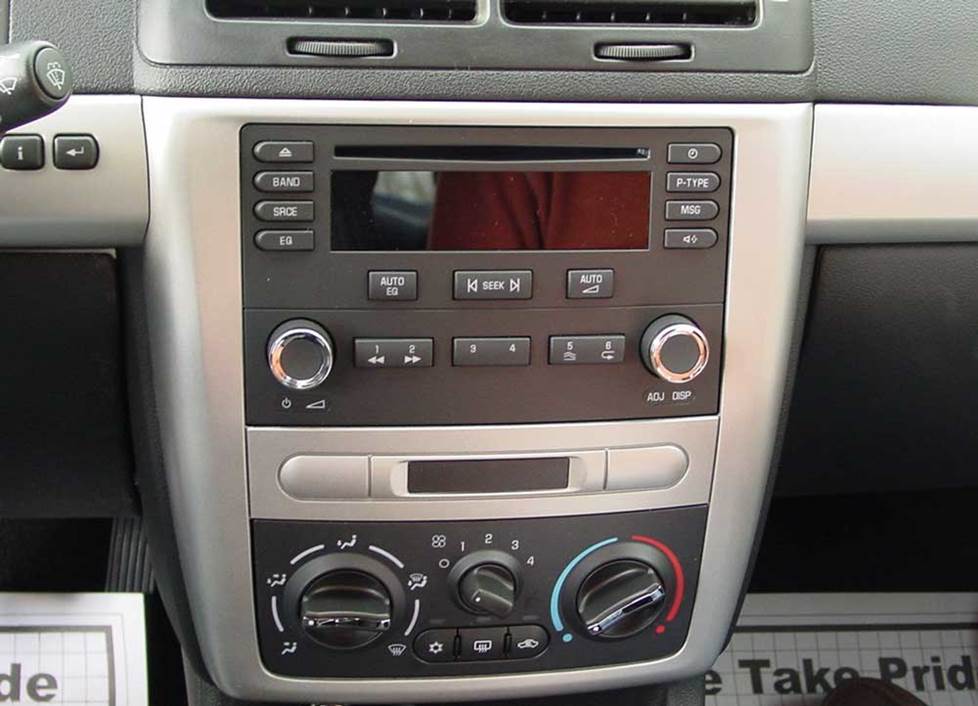
The Cobalt's factory 2006-2006 radio (Crutchfield Research Photo)
The factory stereo system
The coupe and the LS sedan were equipped with the standard sound system: an AM/FM/CD receiver plus a 4-speaker array. The LT sedan featured an upgraded 7-speaker Pioneer sound system with the same stereo, in addition to the other luxury upgrades. Both body styles also had an OnStar® option.
The Pioneer system added tweeters to the front doors and a subwoofer in the trunk of the car. The system was powered by a Pioneer amplifier located above the driver's kick panel.
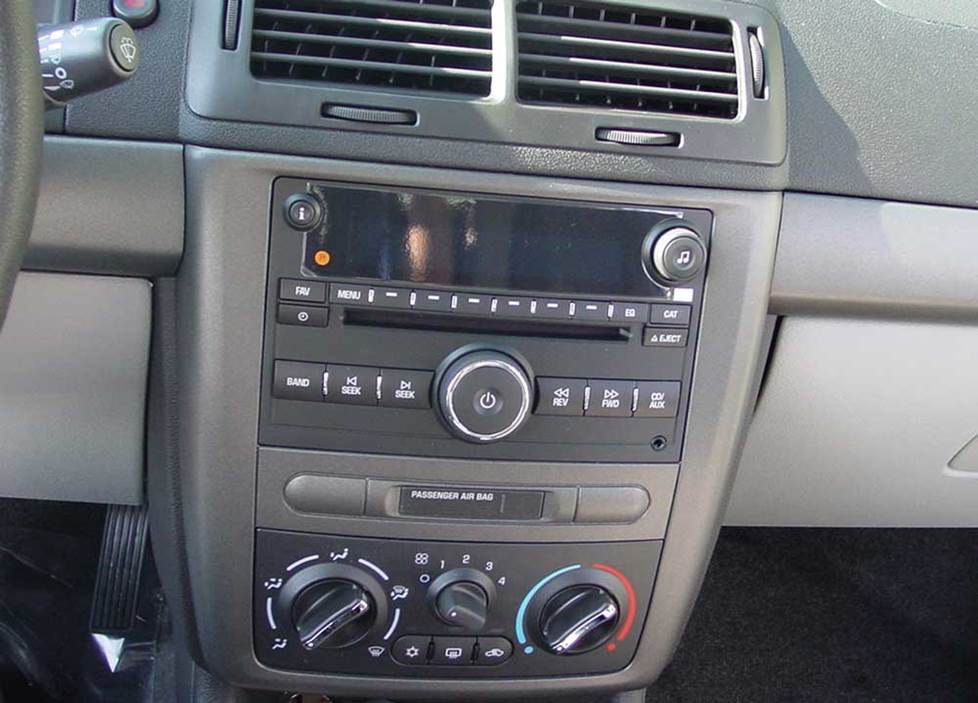
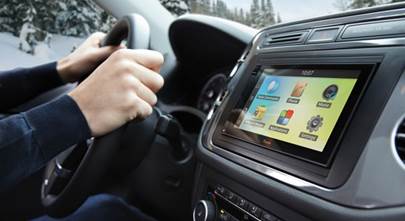
The 2007-up radio looks different, but the removal instructions are the same. (Crutchfield Research Photo)
Removing the factory radio
The factory radio is entirely enclosed by plastic trim, and located above the climate controls. As a result, getting to the receiver to remove it and replace it with a new unit can be a delicate process. Before you choose a new receiver, there are some ‘gotchas’ you need to know about.
- When replacing your factory radio, you'll need a special integration adapter in order for the new stereo to work with the car's electronics system.
- Next, if you want to retain the Driver Info Center, your new stereo has to be single-DIN size and you'll need a second integration adapter.
- If you don't care about retaining the Driver Info Center, then you can choose either a single-DIN or double-DIN receiver.
- Finally, if you want a double-DIN receiver, make sure it doesn't have a fold-down face. That style won't work in this dash.
All of this might sound confusing, but if you purchase your new receiver from Crutchfield, you don't have to worry. Your Crutchfield advisor will make sure you get the right parts, and you'll get a deep discount on the price. We'll also include our one-of-a-kind Crutchfield MasterSheet™ to guide you through the disassembly process.
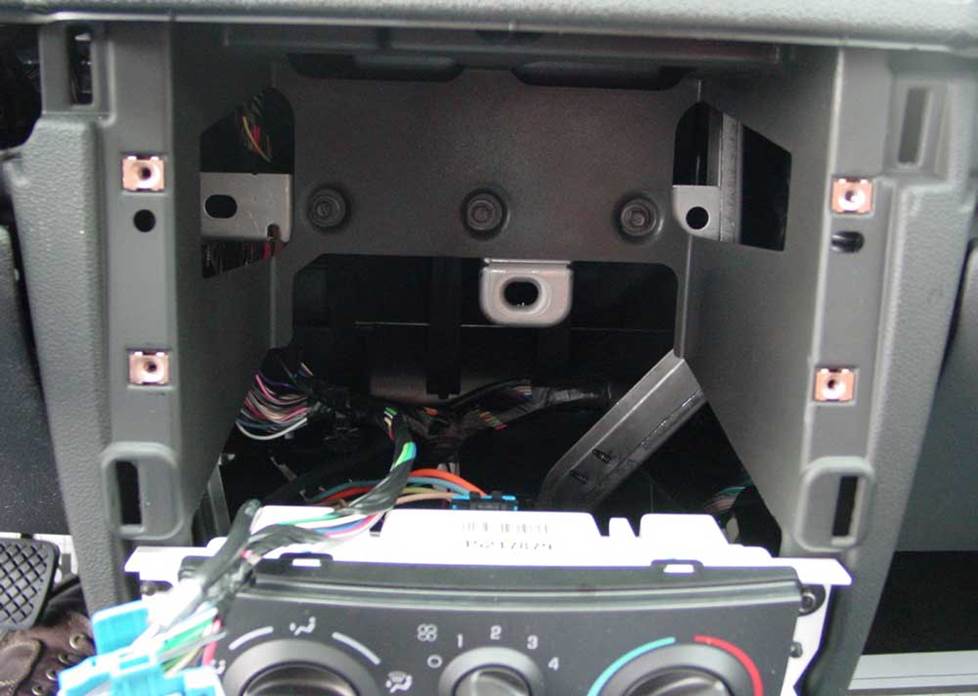
The rear panel in this opening might need to be removed when you install a new stereo (Crutchfield Research Photo)
To get to the receiver, first pry off the trip meter switch panel, disconnect the wire harness, and set it aside. Once that’s done, go the glove box and carefully pry the trim away from above the accessory space and remove it. Next, pry off the trim surrounding the receiver/climate control panel.
Once you have all the trim panels off, remove four 7mm retaining screws, and pull the receiver assembly out of the enclosure. Disconnect the receiver from the wire harness, and then take the receiver out of the assembly.
Detailed stereo and speaker removal instructions

Some new receivers will be too deep to fit into the dash. In these cases, you'll have to use a hacksaw to remove the rear structure that supported the factory radio. The Crutchfield website will alert you if the stereo you're looking at is too deep, but specifically, this situation applies to any stereo more than 6-5/8" deep.
Tools needed: Small flat-blade screwdriver, panel tool, 7mm and 8mm sockets, plus a ratchet and extension, hacksaw blade (for stereos requiring a depth of more than 6-5/8")
Read our Car Stereo Buying Guide for shopping tips and advice.
Shop for car stereos that fit your Chevrolet Cobalt
Steering wheel audio controls
In most cases, it's reasonably easy to retain your car's steering wheel audio controls when you install a new stereo. When you enter your vehicle information, our database will choose the adapter you need to make your factory steering wheel controls work with a compatible aftermarket receiver.
Removing the factory speakers
New speakers will add a lot of life to your Cobalt's stereo system.

The Cobalt's factory door speaker (Crutchfield Research Photo)
Front doors
In both the standard and upgraded stereo systems, the Cobalt’s factory front speaker is a 6-3/4" model placed in the lower front portion of the door panel. Most 6-3/4" speakers will fit the Cobalt's doors. You can also install 6-1/2" or 5-1/4" speakers with the help of a mounting bracket, which is supplied by Crutchfield with your speaker order. There are no wiring harnesses available for the Cobalt, so you'll have to cut off the factory plugs and connect the wires to the speaker terminals using quick slides.
To replace the speakers, you have to remove the door panel. Begin at the top of the door by prying the sail-panel away from its retaining clips. From there, move to the door latch assembly and remove the single 7mm screw, which is hidden by a round cover. Next, lift up the plastic cover from the door pull well and remove two more 7mm screws hidden there.
Pull up the control panel, starting at the rear edge, and unplug the harness. If you have manual windows, remove the window crank before pulling off the panel. After that, go to the door panel edge and remove the two plastic retaining plugs, then disconnect the door latch cable from its assembly. Finally, lift the panel off the door and set it aside. To remove the speaker, simply remove four 7mm screws and lift the unit off its bracket.
To install a new speaker, all you'll usually need to do is remove the old one and mount the new one using a mounting bracket. But on some Cobalts, you'll have to drill new screw holes in the door. It's an extra step, but not that hard. Hold the speaker in place, mark the holes, then use a 1/8" bit to drill the new screw holes. Always wear eye protection when drilling, and be careful not to drill into any wiring.
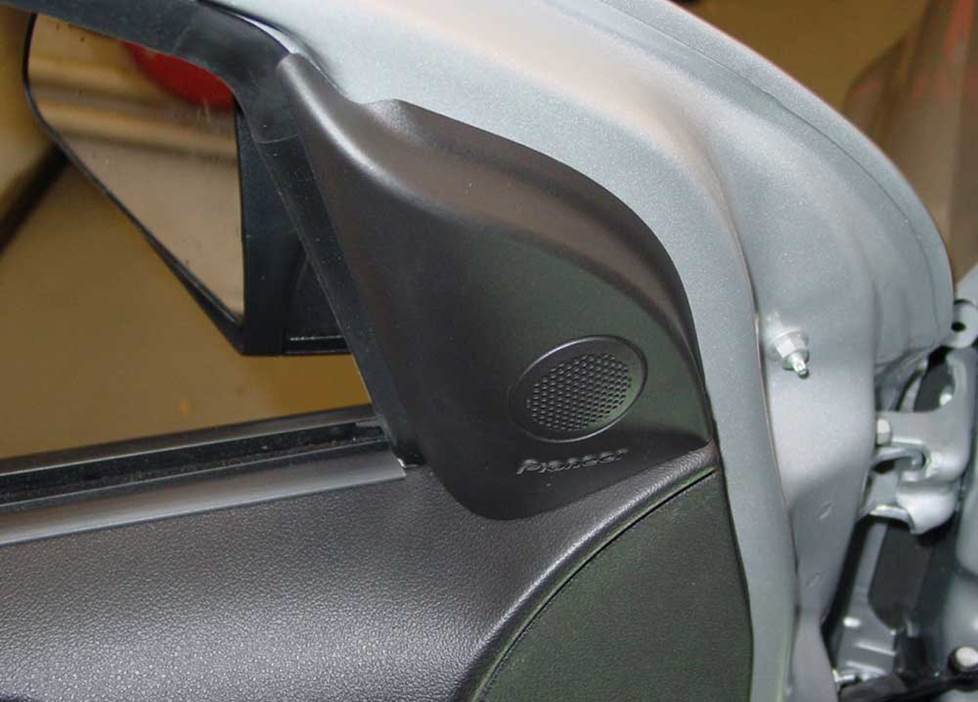
The factory tweeter (Crutchfield Research Photo)
Tweeters
In the case of the upgraded Pioneer system, the tweeter is located in the sail panel. Remove the sail panel from its retaining clips, then disconnect the tweeter from the car’s wiring harness.
To install a new tweeter in this location, you'll have to fabricate a mounting bracket to hold the tweeter in place. Our inexpensive universal backstrap works very well for this. As with the speakers, there are no wiring adapters available, so you'll have to cut off the factory connector and attach the wires to the tweeter.
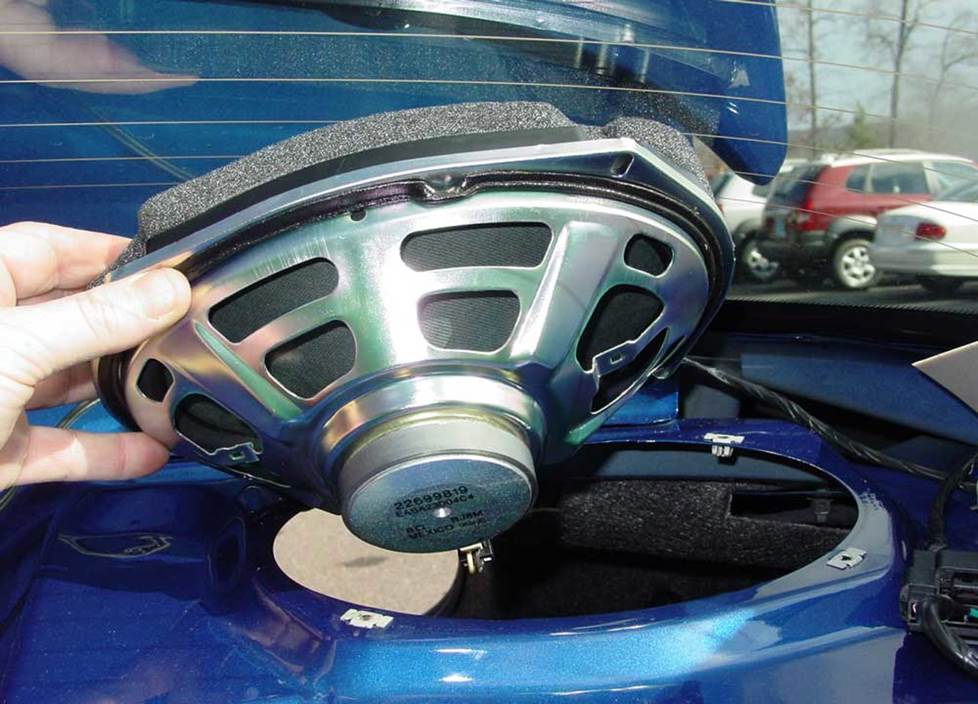
Rear speaker as seen from the trunk (Crutchfield Research Photo)
Rear deck
The Cobalt's rear speakers consist of a pair of 6"x9" speakers located in the rear deck. There's plenty of room to mount new 6x9's, or you can install 6-1/2" or 5-1/4" speakers with an adapter plate. As with the front speakers, the adapter is free from Crutchfield with your speaker order. And also like the front speakers, there aren't any wiring adapters available, so cut off the factory connectors and attach the speaker wires to the speaker terminals using quick slides.
Removal and replacement are pretty straightforward. First, lay the rear seat down to expose the rear storage area, then pry up the rear headrest covers and remove them. Next unscrew the mounting bolts, followed by the headrests themselves. In the sedan, you have to remove a screw from the side pillar, then pull off the trim panel. There's no screw in the coupe, so the trim panel can be pried off.
Once the trim panels are free, pull the edges of the rear-deck batting away and lift up the rear deck. Once you have the deck up, simply unscrew the four screws securing the speaker, lift the speaker off its bracket, and unplug the speaker harness.
Tools needed: Phillips screwdriver, small flat-blade screwdriver, panel tool, 7mm, 8mm, and 1/2" sockets, ratchet and extension, Torx T15 driver, plus a drill and 1/8" bit
Read our Car Speakers Buying Guide for more information
Shop for speakers that fit your Chevrolet Cobalt
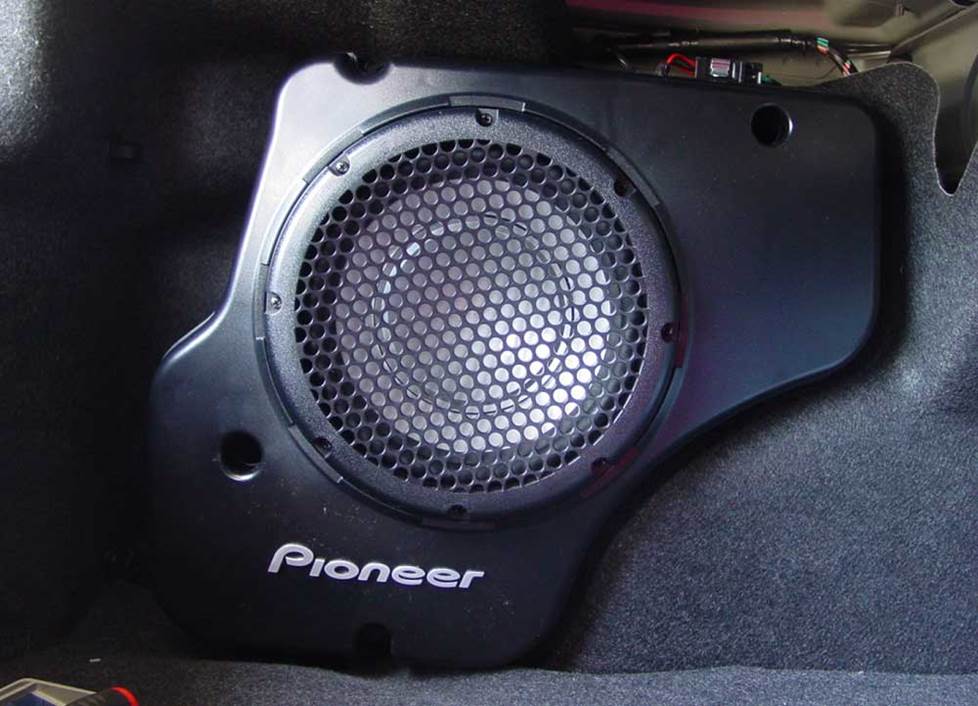
This subwoofer is part of the Cobalt's Pioneer system (Crutchfield Research Photo)
More bass in your Cobalt
The Cobalt’s upgraded Pioneer stereo system includes a 10" dual-voice coil subwoofer mounted in a plastic enclosure in the trunk. Replacing this sub will likely require some modification of the enclosure, and you'll probably need to add a new aftermarket amp because the factory model isn't all that powerful. You'll also need to splice, solder, or use Posi-Products speaker connectors back here.
With or without the Pioneer option, there's plenty of room in the rear of the car for a subwoofer box. You can fit most enclosures for 12" or smaller subwoofers. Or if you want to conserve your cargo space, you could install a powered subwoofer.
Learn more about building a bass system in our Car Subwoofer Buying Guide.
Other options for your Cobalt
Here are some other ideas to improve your Cobalt.
iPod® and Bluetooth® adapters
There are no adapters that will allow you to control your iPod or iPhone® from the Cobalt's factory stereo. You'll have to rely on a basic FM transmitter to play your music through the stereo. A better option would be get a Bluetooth adapter that integrates with your stereo so you can stream music from your device to the stereo. And of course, this would also give you hands-free calling capability.
Remote start and security systems
Adding remote start capability to your vehicle lets you warm it up in the winter or cool it down in the summer. The iDatastart system is incredibly convenient and makes it easier than ever to install a remote start system, so we highly recommend it. The module requires a vehicle-specific T-harness (sold separately) to connect with your vehicle's computer, security, and ignition systems, so we ask that you call to order so that we can make sure you get the right harness for your ride.
You can also talk to your Crutchfield Advisor about a security system. They’re not as easy to install (we usually suggest letting a professional do the job), but we can help you choose a system that’ll work in your vehicle.
Let's get started!
Ready to shop? Use our vehicle selector to find the gear that will fit your car or truck. If you have questions of your own, give us a shout via phone, chat, or email


tony
Posted on 9/16/2023
Can the factory amp drive aftermarket speakers "door and rear deck" well enough to sound good? Thanks
Jon Paul from Crutchfield
on 9/18/2023
Chris from Pow hatan
Posted on 1/14/2023
Can I use pioneer components which is 4ohm in 2010 chevy cobalt with pioneer 7 speaker system
Jon Paul from Crutchfield
on 1/16/2023
Amy Miller from El Dorado Springs
Posted on 3/12/2022
I have a 2007 chevy colbalt that I am trying to put the factory subwoofer from my 2009 pontiac G5 into. I need to know what the wattage would be because I am putting it with an aftermarket 300 W. Amp . Or if it's even possible to do so. Also, I can't find a wiring harness that fits my 2007 colbalt.
Jon Paul from Crutchfield
on 3/14/2022
Brian from Baltimore
Posted on 6/18/2019
Any chance the specs for the speakers, as far as power, are listed somewhere? I'm currently shopping on Amazon for new front speakers for a 2007 Cobalt LS (stock speakers are blown), and don't really know what to get as far as wattage or 2-way vs. 3-way. I don't wanna pay extra for great speakers if the system can't handle it and/or I won't notice a difference between those and cheaper speakers, due to the limitations of the stock radio. If that makes sense. Basically, I don't wanna be buying a Blu-Ray player to hook up to an old CRT TV, because it'd be a waste of money.
Jon Paul from Crutchfield
on 6/19/2019
Jeremy Jensen from Wellsville
Posted on 5/28/2019
What model pioneer subwoofer is in the Cobalt SS?
Jon Paul from Crutchfield
on 5/28/2019
Jake from Ellington
Posted on 5/18/2019
Forgot to mention that if it has manuel windows there's a ring that has to be removed before the crank comes off. If not the door panel wont come off.
Jon Paulette from Crutchfield
Posted on 5/25/2018
Joe, It's hard to give a solid "yes or no" to questions about OEM-for-OEM swaps like that one. These cars were around a long time and things changed from year to year, so it might not be as easy as it seems. Your best bet is to check out an owners' forum online and lay out the project you have in mind. Chances are, someone out there has done it or knows whether or not it can be done. Good luck!
Joe from Wyandotte
Posted on 5/23/2018
Can you install the pioneer system, stereo sub woofer and amp in a car that does not have it from the factory have a parts car that has it and would like to swap it to another
Jon Paulette from Crutchfield
Posted on 4/23/2018
Jeana, If you bought your gear from Crutchfield, you can call Tech Support for free help troubleshooting your system. If you purchased your equipment elsewhere, you can still get expert Crutchfield Tech Support - 90 days-worth for only $30. Check out our tech support page for details.
Jeana from SHASTA LAKE
Posted on 4/23/2018
Hi i have a 2009 coblat and iam replacing the stock stereo i bought the interface wirehardness and matched the wires and its not coming on ..the stereo is brand new so i know its not that ami doing something wrong