2006-2013 Chevrolet Impala
How to upgrade the stereo system in your Impala


In brief: This Crutchfield Research Garage article gives you an overview of your Impala's stock stereo system and your aftermarket upgrade options. We'll tell you all about:
- The factory stereo system
- Removing the factory radio
- Removing the factory speakers
- Adding more bass
- Other options for your Impala
Then, use our vehicle selector to find the gear that will fit your Chevy.
Overview of the Chevy Impala
You know this car. You've seen it on the road, you've seen it at the mall, and you've seen it in the rental lot at the airport. You may have even seen it in your rear-view mirror, blue lights a-flashing, the last time you got caught driving with, ummmm, "excessive enthusiasm." What we're trying to say is that Chevy sold a ton of these cars over the years.
Considering its stylish looks, roomy interior and decent road manners, we're not a bit surprised. In its basic form, the Impala is a solid family car. If you can find one equipped with the high-performance SS package, you'll have an Impala that's impressively fast and almost totally invisible. No matter what you're starting with, your Impala will be an even better ride once you add a better audio system.
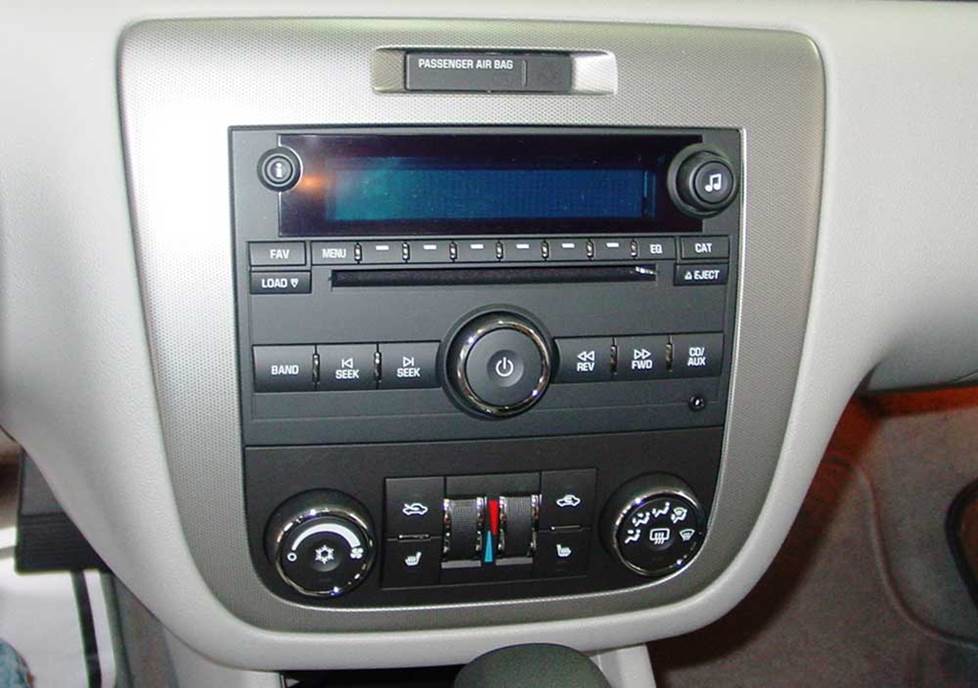
The Impala's factory radio (Crutchfield Research Photo)
The factory stereo system
The 2006-2012 Chevrolet Impala was offered with a choice of two factory stereo systems:
- The standard system, with an AM/FM/CD/MP3 receiver and six speakers
- An optional Bose® system, with all of the above, plus two more speakers
Both of these systems offer about what you'd expect from a factory-installed stereo package. If you're reading this, you're probably a person who expects a lot more from a car stereo.
The healthy amount of available in-dash space ensures that you'll have a wide range of aftermarket single-DIN (2" tall) or double-DIN (4" tall) receivers to choose from.
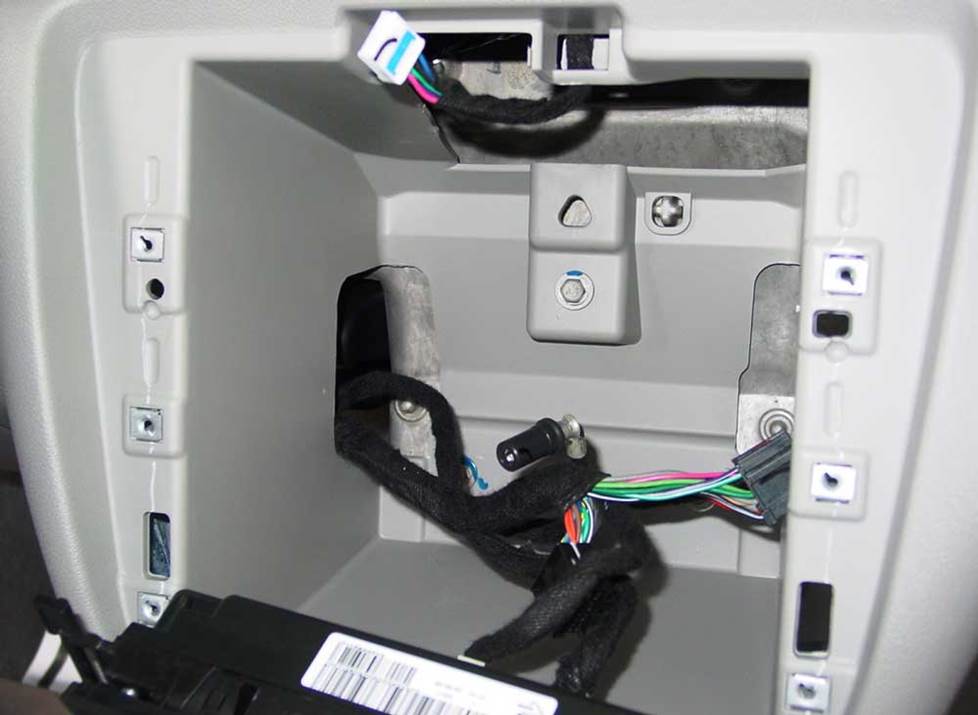
With the factory unit removed, there's plenty of space for your new receiver. (Crutchfield Research Photo)
Removing the factory radio
While today's Impala is much smaller than the leviathan machines that wore the nameplate back in the 1970's, it's not exactly a Geo Metro. It's still a good-sized car and there's plenty of room to work when you're installing a new radio.
Removing the Impala's factory system isn't terribly difficult, but it requires some skill and a reasonable amount of patience--especially when prying off the trim piece that surrounds the unit. The combination of the hard plastic trim and the softer plastic dash material can make the job seem easier than it actually is. Don't be fooled. And don't be too hasty. Use a clean panel tool (to prevent dash stains and scratches) and pry the trim off slowly (to avoid breaking the plastic) until the retaining clips release.
Pull out the trim panel, disconnect the wiring harness, and remove the panel. Then, remove the two Phillips screws that hold the climate control unit in place. Feel free to let that unit dangle while you undo the four Phillips screws securing the radio. Pull it out, unhook the harness, and put it aside.
It's important to note that the warning chimes and audible turn signals are built into the factory radio unit. Whether you have the standard system or the Bose system, you'll need to purchase an adapter to retain the warning chimes – even if you don't use OnStar. The adapter will keep the audible safety warnings functioning properly, while also providing a switched 12-volt power source for your new radio. Depending on the adapter, it might even integrate the steering wheel audio controls.
Crutchfield strongly recommends that you use one of these adapters when you replace the factory radio. The specific adapter that's right for your car depends on the car's model year whether or not it has a Bose system, but you'll definitely need one. We'll give you a deep discount on the adapter's price when you purchase it along with your new stereo.
Your new system from Crutchfield also qualifies for discounts on a mounting kit to trim out the new radio and an adapter that connects the Impala's stock antenna to your new radio. You'll also get our free step-by-step installation instructions.
Tools required: Phillips screwdriver, panel tool
Detailed stereo and speaker removal instructions

Read our Car Stereo Buying Guide for shopping tips and advice.
Shop for car stereos that fit your Chevrolet ImpalaSteering wheel audio controls
In most cases, it's reasonably easy to retain your Impala's steering wheel audio controls when you install a new stereo. When you enter your vehicle information, our database will choose the adapter you need to make your factory steering wheel controls work with a compatible aftermarket receiver.
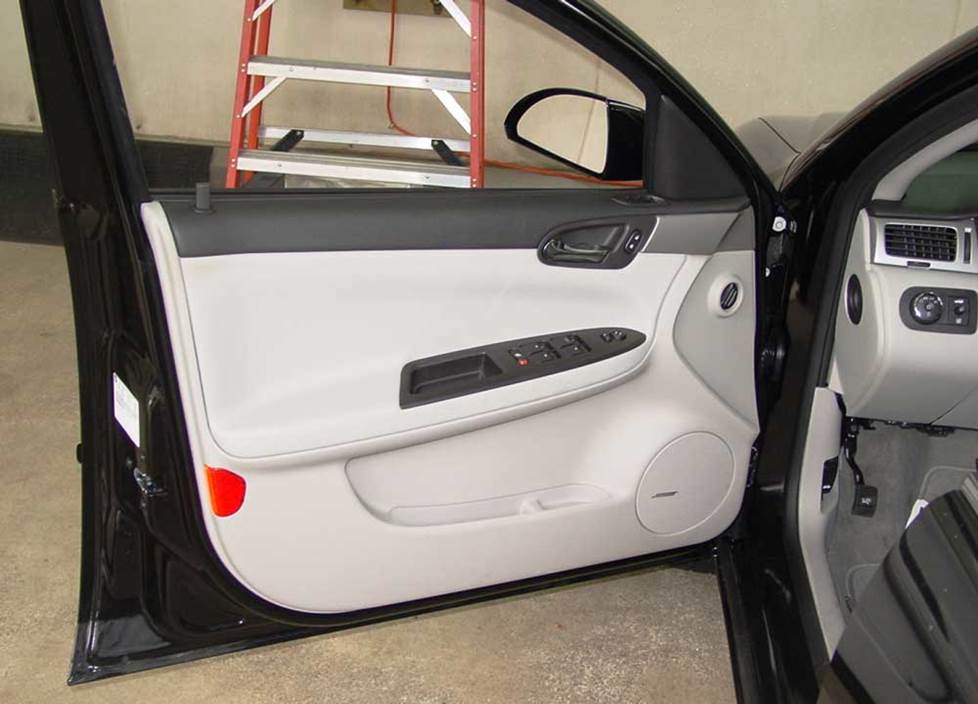
Replacing the front door speakers can be a bit challenging (Crutchfield Research Photo)
Removing the factory speakers
Replacing the factory stereo system in your 2006-2012 Impala is a relatively straightforward process. Replacing the speakers, however, is not. You can do the job yourself, but you'll need a fair amount of time, tools, and patience.
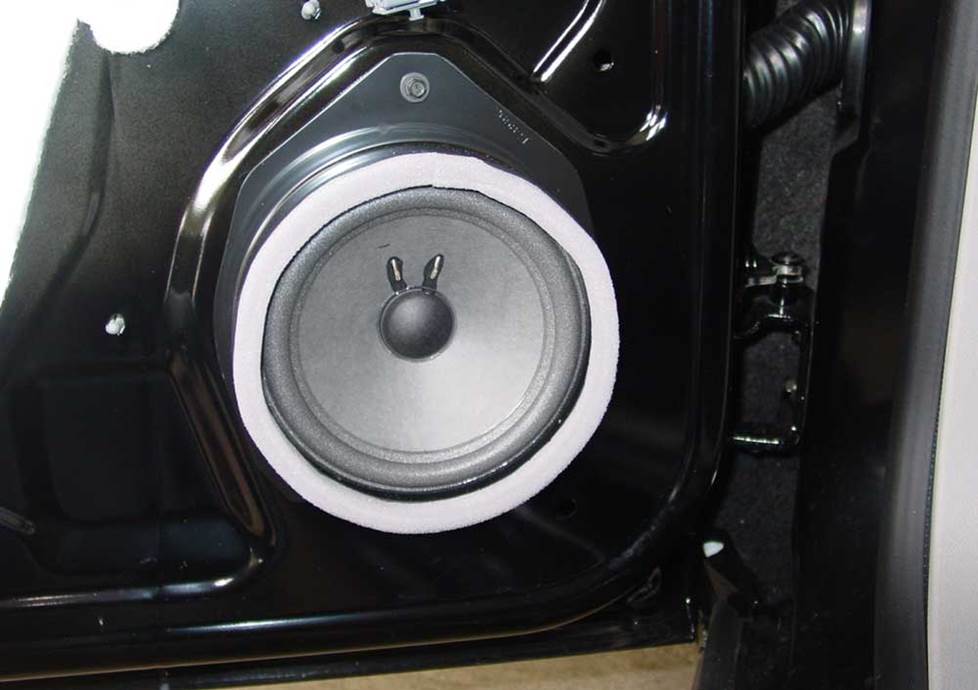
A close-up of a front door speaker (Crutchfield Research Photo)
Front door speakers
The Impala's front door speaker area can accommodate 5-1/4", 6-1/2", or even 6-3/4" speakers, but mounting depth is limited to 2.9" and this is not a simple, "plug and play" job.
First, the door panel must be removed to access the speakers. This process starts by removing the sail panel and continues through several more steps involving hidden star screws camouflaged (rather cleverly, we must say) by plastic trim pieces. You'll need Torx T30 and T15 bits to remove the screws. Take your time and be careful not to damage the plastic trim during the removal process.
Once you've removed the factory speakers, you'll need mounting brackets to fit the new speakers to the openings (these brackets are included free with your Crutchfield speaker purchase). mount the adapter bracket, and secure the speakers. The factory speaker grilles on the door panel will fit perfectly over your new speakers.
Unfortunately, there isn't a wiring harness available for the speakers, so you’ll have to cut the factory speaker wire and splice in. Our Crutchfield MasterSheet contains detailed wiring instructions that will make the job easier.
Tools needed: Panel tool, small flat blade, Torx T30 and T15 star bits, 7mm ratchet and extension, wire cutters
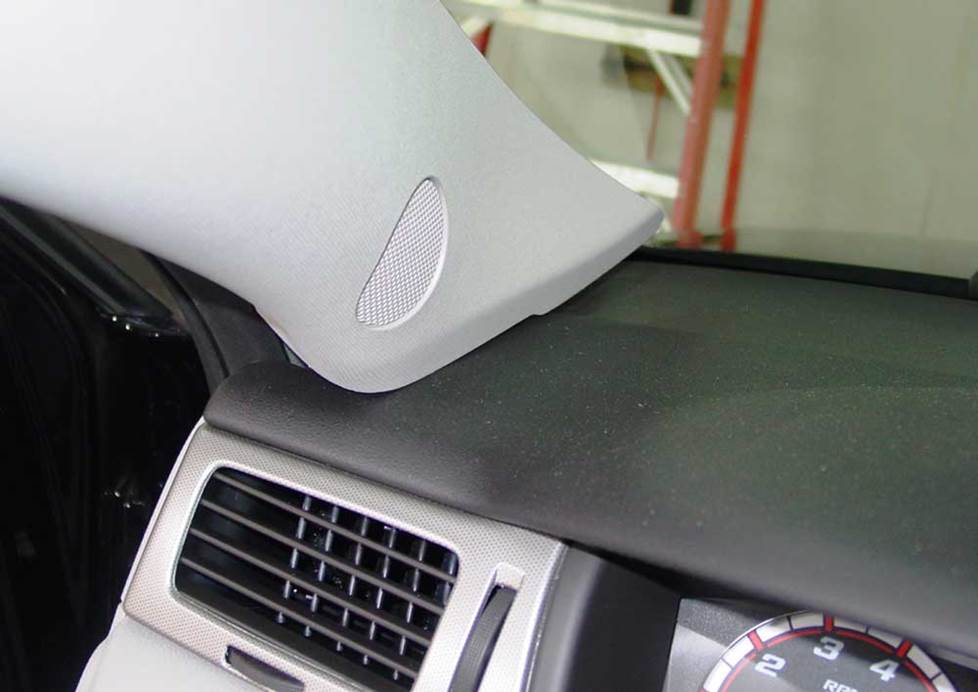
The tweeters are located at the base of the Impala's "A" pillars. These speakers are hard to reach and harder to replace. (Crutchfield Research Photo)
Front tweeters
The factory tweeters are located in the windshield "A" pillars. This is an admirably slick bit of design, but the GM styling studio clearly wasn't thinking about potential aftermarket upgrades when they came up with this idea. The size and location of the tweeters (the pillar space is a mere 0.8 inches deep) makes it very hard to replace them, much less upgrade them. Tweeter depth is the real issue here, so your shopping choices are somewhat limited.
The wiring harness is located deep in the dash, so you'll need to cut off the factory connectors and splice the vehicle's speaker wires to your new speaker wires. You'll also need to fabricate a mounting bracket. In all honesty, this might be a job for a car stereo installation professional. To avoid all that hassle and expense, we suggest mounting aftermarket tweeters on the Impala's door panels.
Tools needed: Phillips screwdriver, panel tool, small flat blade, 7mm ratchet and extension, wire cutters.
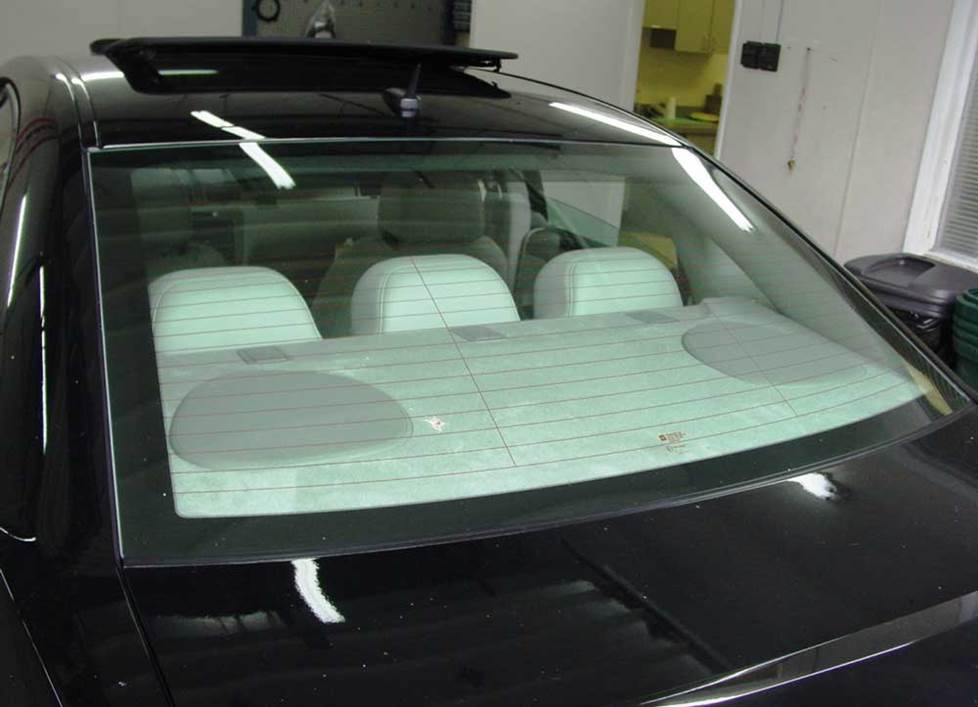
The Impala's rear deck speakers. (Crutchfield Research Photo)
Rear deck speakers
Replacing the rear deck speakers is a relatively uncomplicated process – once you get to them. The toughest part or the job is removing the rear seat (top and bottom), the interior sail panels and the deck panel in order to access the speaker location. This is a very labor-intensive process. If you're going to do it yourself, we recommend that you clear out a full afternoon and some empty garage space.
A wide variety of 6" x 9", 5-1/4", or 6-1/2" speaker sets will fit the space nicely, plus the factory brackets and grilles work perfectly and a wiring harness is available.
Top mounting height is limited to 0.8 inches, but that still leaves plenty of great speakers to choose from. A speaker adapter bracket is required for the 5-1/4" or 6-1/2" speakers, and it's included free, along with the wiring harness, with your Crutchfield speaker order.
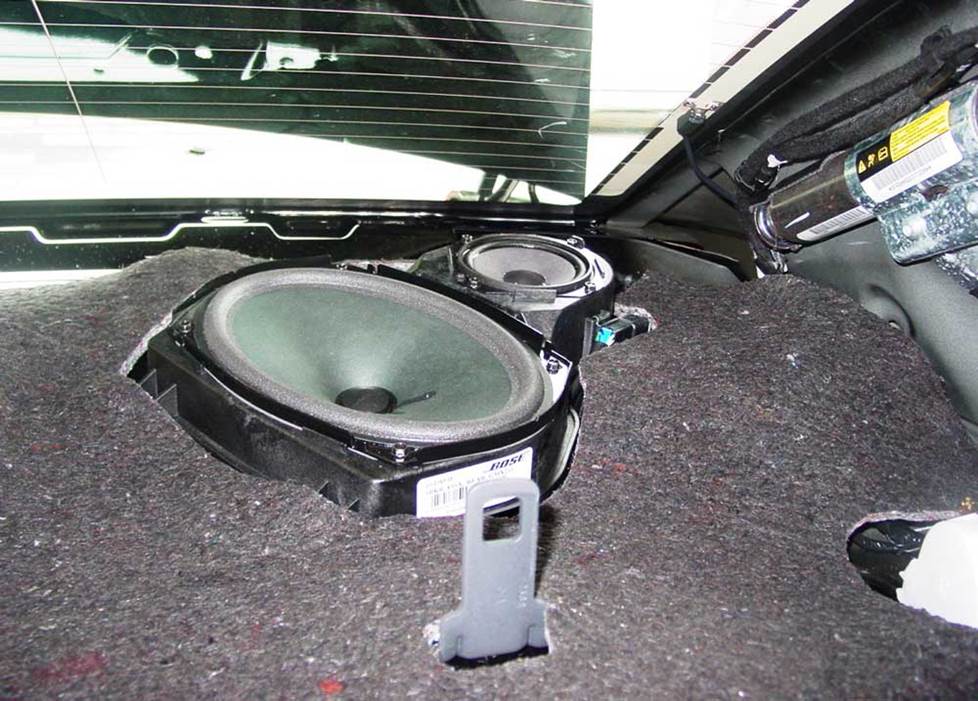
Bose-equipped Impalas feature rear deck tweeters (Crutchfield Research Photo)
If your car came equipped with a Bose system, you’ll also find a set of tweeters in the factory mounting bracket. There are a few 3-1/2" speakers that will fit in this space, but your options are severely limited by the rather tight 0.33 inches of mounting height.
The factory woofers receive only bass frequencies from the amplifier, so if you replace them, the aftermarket speakers will only reproduce bass.
Tools required: Panel tool, 7mm socket, 1/4" ratchet and extension. If your car has a fixed rear seat, you'll need a 10mm socket. If it has a folding rear seat, you'll need an 18mm socket.
Read our Car Speakers Buying Guide for more information.
Shop for speakers that fit your Chevrolet Impala
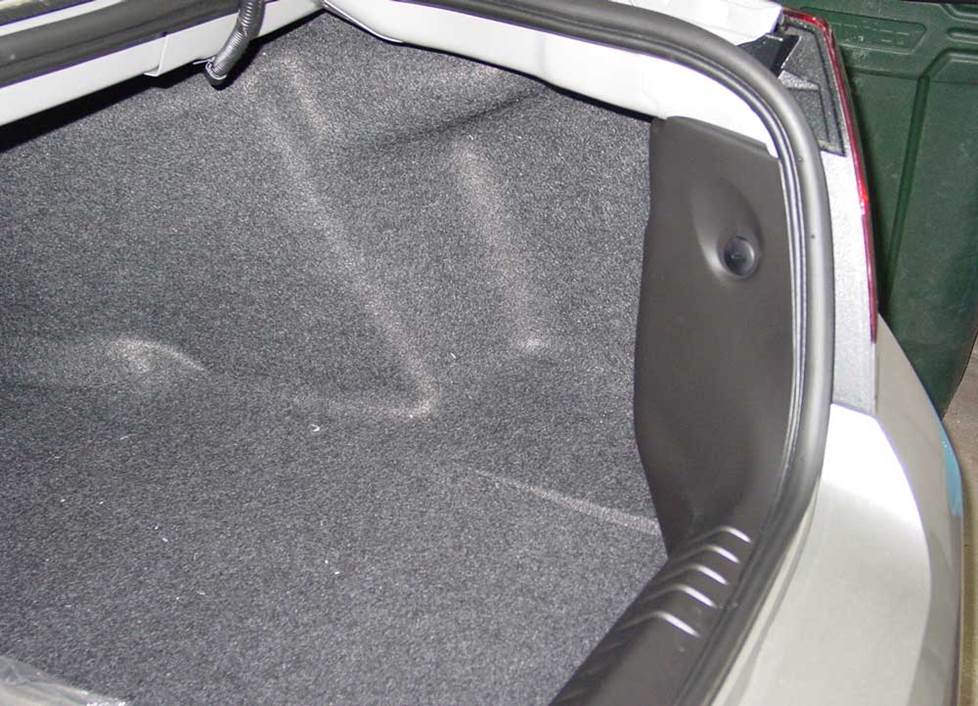
There's a decent amount of room for a sub box back here.... (Crutchfield Research Photo)
Bass in your Impala
If you're planning to add maximum bass to your Impala, there's plenty of room for a subwoofer box in the trunk. The available area for sub-box mounting is: Width (side to side) = 36", Height = 17", Depth (front to rear) = 40" at bottom, 40" at top. There are currently no custom enclosures available for the Impala.
Learn more about building a bass system in our Car Subwoofer Buying Guide.
Other options for your Impala
There are plenty of other ways to improve your Impala. Here are some of the ways Crutchfield can help.
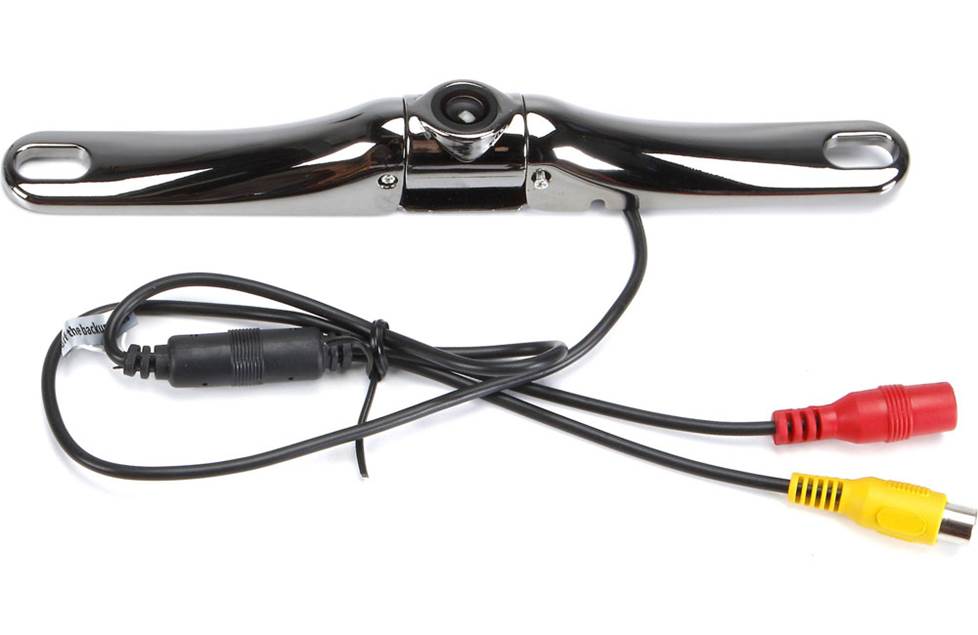
This license plate camera can really help with rear visibility
Rear-view camera
The Impala isn't as big as an SUV, but it's still a good-sized vehicle to wrestle with in a crowded parking lot. If you're looking for a way to improve your vision and safety, we offer rear-view cameras from Kenwood, Alpine, Sony, Pioneer, and more. Some are designed to work with same-brand receivers only, but others come with a composite video connector and will work with almost any video receiver.
Add an amp (or two)
A new 4-channel amplifier will help you get the most out of your new speakers. You'll get cleaner power (and a lot more of it), which will result in much, much better sound. A mono amp can provide the juice you need for your new rear deck subwoofer, too. Learn more about adding amps to your system in our Car Amplifier Buying Guide.
Remote start and security systems
Adding remote start capability to your vehicle lets you warm it up in the winter or cool it down in the summer. The iDatastart system is incredibly convenient and makes it easier than ever to install a remote start system, so we highly recommend it. The module requires a vehicle-specific T-harness (sold separately) to connect with your vehicle's computer, security, and ignition systems, so we ask that you call to order so that we can make sure you get the right harness for your ride.
You can also talk to your Crutchfield Advisor about a security system. They’re not as easy to install (we usually suggest letting a professional do the job), but we can help you choose a system that’ll work in your vehicle.
Let's get started!
Ready to shop? Use our vehicle selector to find the gear that will fit your car or truck. If you have questions of your own, give us a shout via phone, chat, or email


John from Lancaster
Posted on 9/27/2023
Is there a stock amplifier in the non Bose impala? And location? Thanks
Crutchfield Writing Team from Crutchfield
on 9/28/2023
Richard from Willis
Posted on 8/24/2023
Can the JL Audio HO112R-W7AE fit into the trunk of the 2012 Impala. It looks like based on your dimensions it could, but getting the box into position appears it could be a challenge.
Jon Paul from Crutchfield
on 8/25/2023
Ely
Posted on 4/29/2023
Can you put a amp and sub into a stock stereo
Crutchfield Writing Team from Crutchfield
on 5/2/2023
Craig patterson from Martinsburg
Posted on 1/1/2023
I own a 2013 chevy impala ltz with the bose system I replaced the headunit with a kenwood dmxbt120 and replaced all door speakers other then the tweeters im trying to set my Amp gains on my 4 channel and my subwoofer amp and it only goes up to 6 volts with the gain all the way up on both amps any ideas why it isn't going up like other amps?
Jon Paul from Crutchfield
on 1/3/2023
Nate Lindahl from Farmington
Posted on 11/30/2022
I'm adding 2 amps and a sub box in my trunk. I was wondering where you ran your wiring? Like the power coming through the firewall and the speaker wires?
Jon Paul from Crutchfield
on 12/1/2022
Anson Merriman from Athens
Posted on 9/26/2022
I purchased new speakers all around from you guys. I installed them perfectly but they sound like crap. sounds destorts when I even only get to 1/2 volume and it has nothing for any base sound. I have a 2007 impala SS with Bose factory amp. I replaced head unit with a pioneer touch screen.
Crutchfield Writing Team from Crutchfield
on 9/27/2022
Oscar vela from South Bend
Posted on 4/26/2022
Where is the connector that connects to the chime
Jon Paul from Crutchfield
on 4/27/2022
Darrell Hobbs from Bradenton
Posted on 4/12/2021
this really helped a lot, thanks.
kipkirui hezron from Montrose
Posted on 2/3/2021
I have 2008 Chevy, I replaced my stereo and I connected LC -GMRC-LAN 01 harness to retain my chime function but my steering wheel functions are not working.
Jon Paul from Crutchfield
on 2/4/2021
Jason Edwards from Bangor
Posted on 1/23/2021
I have a 2007 impala (non-Bose system). I purchased everything for the install from Crutchfield. All wiring is connected properly and running through the interface. Volume is very weak at Max level. Suggestions?
Jon Paul from Crutchfield
on 1/25/2021