2008-2016 Nissan Rogue
How to upgrade the stereo system in your Rogue


In brief: This Crutchfield Research Garage article gives you an overview of your Rogue's stock stereo system and your aftermarket upgrade options. We'll tell you all about:
- The factory stereo system
- Removing the factory radio
- Removing the factory speakers
- Adding more bass
- Other options for your Rogue
Then, use our vehicle selector to find the gear that will fit your vehicle.
Overview of the Nissan Rogue
Rogues aren’t usually known for their honesty, but this one is, and we appreciate that. There are too many small SUVs out there that are styled to look like they’re just a brush guard and a set of knobby tires away from a weekend of climbing mountains. Most of them are more likely to spend the weekend antiquing or going to the mall, and Nissan knows it. And they know that you know that, too.
That’s why the 2008-2016 Rogue looks more like a Murano than a mud-bogger. It’s a good-looking machine, quite frankly, and it’s thoroughly capable of doing all the things a modern compact SUV will ever be asked to do. It also does those things rather quietly, especially for an SUV, so it’ll make a very nice home for an upgraded audio system. This article will tell you more about what you can do and how you’ll do it.

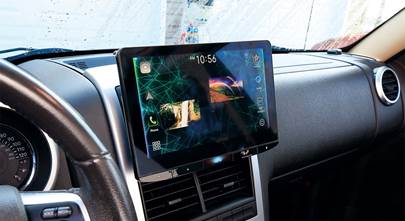
The Rogue's dash redesign in 2011 means that the radio removal process for this receiver is a bit different from what you'd do in 2008-2010 models. (Crutchfield Research Photo)
The factory stereo system
The Rogue was available with three factory sound systems — a 4-speaker base system, a 6-speaker system, and an 8-speaker Bose® audio system.
Detailed stereo and speaker removal instructions

If you’re replacing the base speakers or replacing speakers and bypassing the Bose system’s factory amp, we recommend replacing the low-impedance factory speakers with standard 4-ohm aftermarket models (or adding an aftermarket amp) to prevent overheating and other damage to your new radio.

Getting here is half the fun! Seriously, it's not nearly as bad as it might look, and you can totally do this. (Crutchfield Research Photo)
Removing the factory radio
Replacing the stock stereos isn’t all that hard in the Rogue, but the process does vary a bit depending on the model year and the specific stock radio.
For the 2008-2010 models, the base and Bose radios have a small variation in how the dash is disassembled. It’s not a huge variation (two more steps, neither of them hard), but it’s important. We’ll detail both processes in the Crutchfield MasterSheet included free with your Crutchfield stereo purchase.
The Rogue’s 2011 refresh included some changes to the dash design, so there’s a different set of dash disassembly instructions for the 2011-2016 models. It’s still a reasonably easy process, though, and Crutchfield will give you a nifty discount on the wiring harness adapter and dash kit you’ll need to install your new car stereo.
To see the aftermarket radio options for your particular Rogue, enter your vehicle information.
Tools needed: Panel tool, Phillips screwdriver
Read our Car Stereo Buying Guide for shopping tips and advice.
Shop for car stereos that fit your Nissan Rogue
Steering wheel audio controls
In most cases, it's reasonably easy to retain your Rogue's steering wheel audio controls when you install a new stereo. When you enter your vehicle information, our database will choose the adapter you need to make your factory steering wheel controls work with a compatible aftermarket receiver.

Upgrading the speakers is a great way to get the most out of your aftermarket receiver. Or your stock receiver, for that matter. (Crutchfield Research Photo)
Removing the factory speakers
This Rogue’s speaker array stayed consistent throughout its run, so the same disassembly instructions apply for all listed model years and stereo packages.

The Bose-only center dash speaker is reasonably easy to reach and replace (Crutchfield Research Photo)
Removing the Bose® center dash speakers
In some Rogues equipped with the Bose system, there’s a speaker in the center of the dash. Removal and replacement is pretty simple, for this speaker.
Use a panel tool to pry up the center dash grille to release three clips, then remove the grille. Remove the four Phillips screws securing the speaker to the dash, then disconnect the wiring harness and remove the speaker.
An aftermarket wiring harness is not available for this location, so you’ll need to splice, solder, or use Posi-Products speaker connectors to connect the new speaker to the Rogue’s wiring. You'll also need to fabricate a mounting bracket for the speaker.
Tools needed: Panel tool, Phillips screwdriver, 8mm socket, ratchet, and extension (2014-up)

You'll find these 2" speakers in Rogues equipped with the Bose audio system (Crutchfield Research Photo)
Removing the Bose® corner dash speakers
The Bose system also boasts a pair of speakers in the dash corners. This removal/replacement process is a little trickier, but not by much.
Starting at the rear edge, use your panel tool to pry up the corner dash grille and release two clips, then pull the grille toward the rear of vehicle and remove it. Remove the three 8mm screws securing the speaker to the dash, then disconnect the harness and remove the speaker.
A wiring harness is not available for this location, so you’ll need to splice, solder, or use Posi-Products speaker connectors to connect the new speakers.
Tools needed: Panel tool, 8mm wrench

There are plenty of great-sounding options when you upgrade the front door speakers (Crutchfield Research Photo)
Removing the front door speakers
The Rogue’s factory front door speakers are 6"x9" or 6-3/4" models that can be replaced by a variety of aftermarket speakers. Removal and replacement is basically the same for all of these Rogue models.
You’ll need mounting brackets with 6-1/2" or 6-3/4" aftermarket speakers, and we’ll include them with your Crutchfield speaker purchase. To install certain 6-3/4" models, you'll need to remove the inner tabs on the aftermarket speaker brackets. And in some cases, you’ll need to cut out the back of the plastic cup or mounting bracket.
Replacing the speakers means removing the door panels, a process that begins with prying out the screw cover behind the door release handle and removing one 10mm screw. Next, starting at the lower pry point, pry off the door pull handle cover and remove two exposed 10mm screws.
Once that’s done, pry out the sides and bottom of the door panel to release nine clips, then disconnect the harnesses and the door lock and release cables. Remove the door panel and store it someplace safe while you continue working.
Remove the four Phillips screws securing the speaker to the factory bracket, then disconnect the harness and remove the speaker.
As noted earlier, you'll hear a loss of volume if you replace the low-impedance factory speakers with standard 4-ohm replacement speakers. We recommend using aftermarket 2-ohm speakers for the front doors.
Tools needed: Panel tool, small flat blade screwdriver, 10mm socket, ratchet and extension, Phillips screwdriver
(2014-up) Panel tool, Phillips screwdriver

The rear door speakers are pretty easy to deal with, and there are plenty of aftermarket options that fit (Crutchfield Research Photo)
Removing the rear door speakers
The 6-3/4" rear door speakers can be replaced by a nice variety of aftermarket models. You’ll need mounting brackets to install the new ones, and they’ll be included with your Crutchfield speaker purchase.
In some cases, you’ll need to remove the aftermarket bracket’s inner tabs to get the speaker to fit properly, but that’s not a big deal.
To remove the old ones, you’ll start by using your panel tool to pry out the screw cover behind the door release handle, then removing one 10mm screw. Pry out the screw cover inside the door pull cup and remove one Torx T-20 screw, then start at the rear edge and pry up the door pull cup/power switch panel to release those clips. Disconnect the harness and remove.
Pry out the sides and bottom of the door panel to release nine clips, disconnect the harnesses and door lock and release cables, then remove the door panel and store it someplace safe. Remove the three Phillips screws securing the speaker to the factory bracket, then disconnect the harness and remove the speaker.
As you’ve probably guessed, we recommend using aftermarket 2-ohm speakers for these doors, too.
Tools needed: Panel tool, small flat blade screwdriver, 10mm socket, ratchet and extension, Torx T-20 driver, Phillips screwdriver

The Bose sub is housed in this enclosure, which fits into the spare tire rim (Crutchfield Research Photo)
Removing the Bose® subwoofer
The Bose system’s 5-1/4" subwoofer is housed in a polymer enclosure located inside the spare tire, which you’ll find under the cargo floor. It’s reasonably easy to reach and replace.
Pull up both side trim panels to release the retaining clips, then remove the panels. Open the rear cargo compartment lid and turn four thumbscrews to remove the compartment assembly, then unscrew the spare tire nut to remove. Pry out the harness clip, then disconnect the harness and remove the subwoofer enclosure.
With the enclosure out, remove the eight Phillips screws securing the top cover to the enclosure, then remove the cover. Remove the four Phillips screws securing the speaker to the enclosure, then disconnect the harness and remove the speaker.
And yes, we do recommend using an aftermarket 2-ohm speaker when you replace this subwoofer.
Tools needed: Phillips screwdriver, 8mm socket, ratchet and extension, panel tool
Read our Car Speakers Buying Guide for more information.
Shop for speakers that fit your Nissan Rogue

There's plenty of space for bass in the Rogue's cargo area (Crutchfield Research Photo)
More bass in your Rogue
The Rogue isn’t the largest SUV out there, but it’s still an SUV, so there’s plenty of room for luggage, outdoor gear, cases of paper towels, and yes, a subwoofer box. The actual space measures 40" W x 16" H x 21"/29" D, so you can go big on bass if you want to.
If you want better bass, but still want to save room for the aforementioned luggage, outdoor gear, cases of paper towels, etc., we suggest a more compact powered subwoofer.
Learn more about building a bass system in our Car Subwoofer Buying Guide. And check out our Best Powered Subwoofers article.

A set of custom-fit WeatherTech floor liners will protect your carpets from dirt and damage
Other options for your Rogue
Here are some more cool ideas for your Nissan Rogue.
Add an amplifier for better sound
If you install new speakers, consider installing a 4-channel amplifier to further improve the sound. That will let you get the best sound from your music and really fill up the Rogue's spacious cabin. And if you install subwoofers, you'll also need to install an amplifier to power them as well. You can learn more about adding amps to your system in our Car Amplifier Buying Guide.
Floor mats
Daily driving can take a toll on your Rogue's carpeting. WeatherTech floor mats and liners will help protect your floors from dirt and damage.
Security
Installing a security system in your Rogue isn't easy (security systems rarely are), but it's definitely a good idea. Our Crutchfield Advisors can help figure out what you need to get the job done, but we usually recommend taking your car and new gear to a professional installer.
Let's get started!
Ready to shop? Use our vehicle selector to find the gear that will fit your car or truck. If you have questions, give us a shout via phone or chat.


Comments (0)