2011-2014 Toyota Sienna
How to upgrade the stereo system in your Sienna

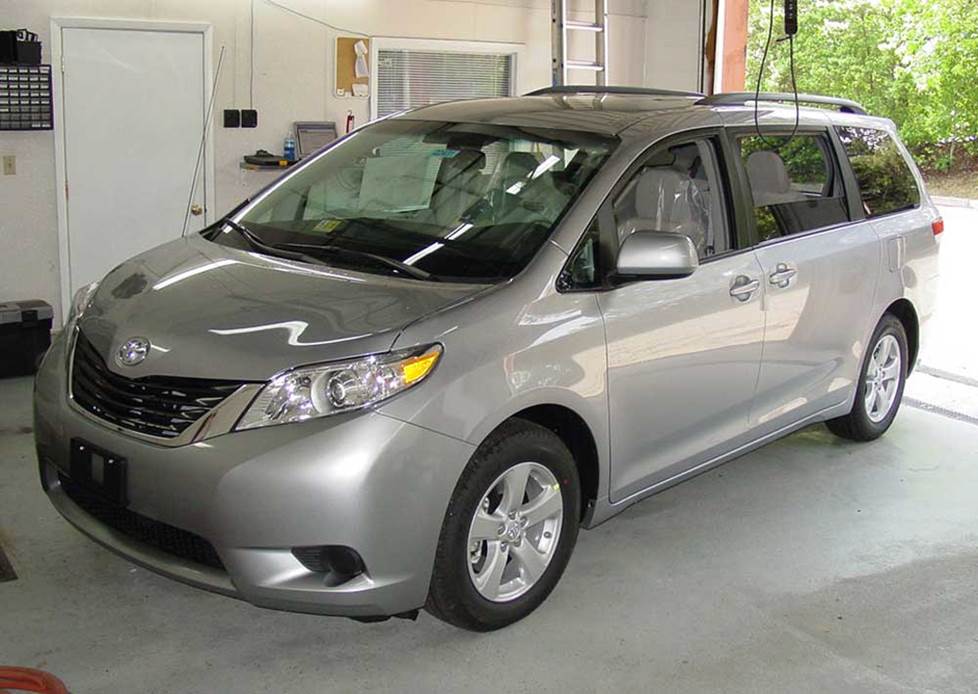
In brief: This Crutchfield Research Garage article gives you an overview of your Sienna's stock stereo system and your aftermarket upgrade options. We'll tell you all about:
- The factory stereo system
- Removing the factory radio
- Removing the factory speakers
- Adding more bass
- Other options for your Sienna
Then, use our vehicle selector to find the gear that will fit your vehicle.
Overview of the Toyota Sienna
Who wants a minivan? Well, lots of people, obviously, but it’s not just families with kids and dogs and places to go anymore. We know several touring musicians who swear by their minivans, and who’s cooler than touring musicians?
Whether you’re carrying guitars and amps or kids going to camp, a minivan is one of the handiest vehicles you can own. They’re designed to ferry people and things in car-like comfort and at this point in the history of the genre, almost every minivan does those things so well that no one even stops to think how remarkable these vehicles really are. Great design ideas have a way of achieving ubiquity, and the minivan is definitely one of those.
The Sienna is an excellent example of all the things a modern minivan can be. It’s practical, comfortable, nice-looking, and while it won’t remind anyone of the Supra they drove in high school, it’s really not that boring to drive, either. So yeah, if you want a minivan, consider a Sienna. And if you want to enjoy some music while you’re driving around, consider upgrading the stereo system. Here’s a look at what you can do and how to do it.
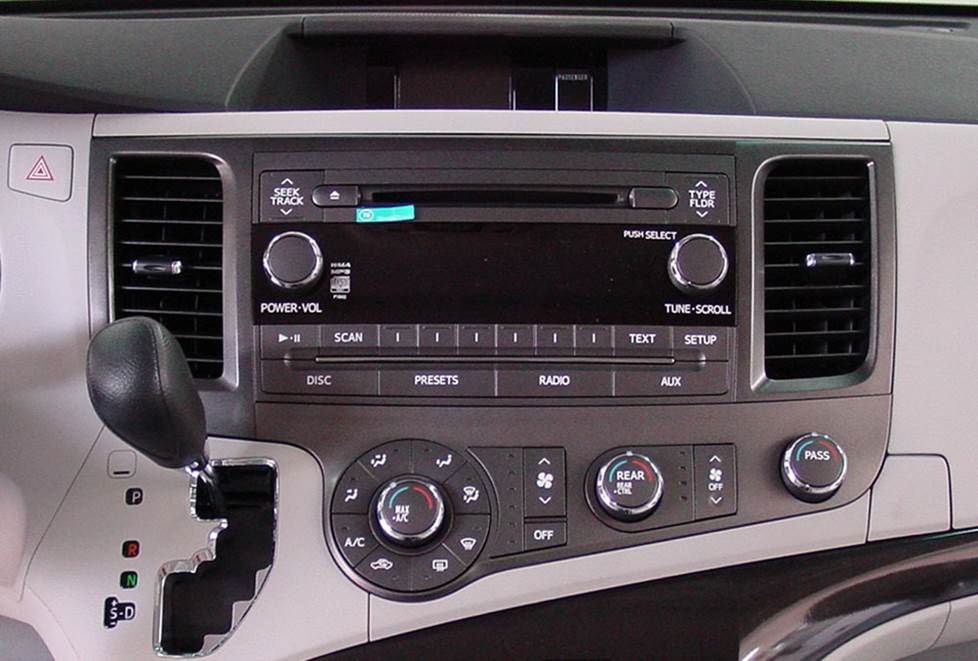
The base systems include a backup camera with a display above the factory radio. You'll be able to keep that feature when you install a new receiver. (Crutchfield Research Photo)
The factory stereo system
The Sienna’s factory systems include a base system with four speakers, a slightly nicer system with six speakers, and a very nice 10-speaker JBL system with DVD navigation and a rear seat Dual-View video system with DVD player.
When you replace any of the stock radios, you’ll lose your factory satellite radio capability and the factory navigation system, if present. Both of those things can obviously be replicated with a new receiver. As for your backseat passengers, the factory DVD player will still work when you replace the stock radio, but the audio will only be available through the factory headphones.
The base systems include a backup camera with a display above the factory radio, and you’ll be able to retain that when you replace the factory radio. The 6.1" and 7" LCD receivers also have a camera, and you’ll be able to use it with your new receiver with help from the right aftermarket wiring harness adapter. We’ll make sure you get what you need, and if you have questions, our experts are here to answer them.
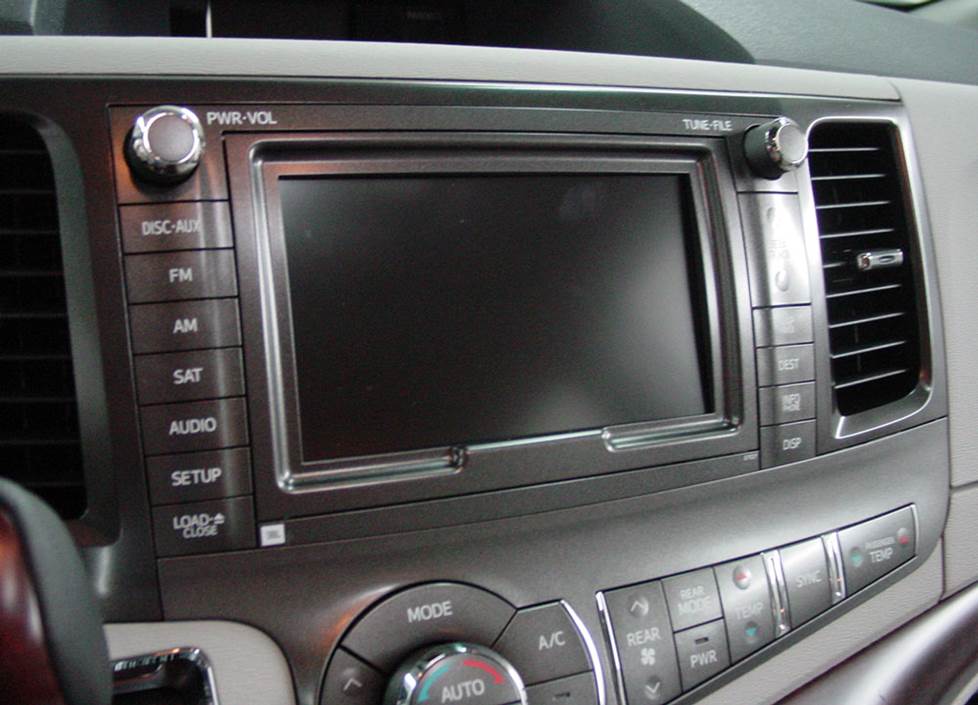
The DVD receiver is also reasonably easy to remove and replace. We'll make sure you get the wiring harness adapter you need for your installation. (Crutchfield Research Photo)
If you’re upgrading the JBL/navigation stereo system and you bypass the factory amp (located under the passenger’s seat, BTW), we recommend replacing the low-impedance factory speakers with standard 4-ohm aftermarket speakers to prevent overheating and other damage to the new radio. You can also add an aftermarket amplifier, of course, which will eliminate that issue while also bringing a lot more out of your new receiver and speakers.
When you enter your Sienna’s info into our vehicle selector, our database will show you the receivers (and speakers, too!) that fit, plus the correct dash kit and wiring harness adapter. And when you purchase your new stereo at Crutchfield, you’ll get a very nice discount on both.
That said, sometimes there isn't a dash kit. Installing a single-DIN receiver in vehicles equipped with factory navigation and the 6.1" screen requires fabricating a dash kit from scratch. This isn't the easiest DIY project, so if this is what you really want to do, you might want to outsource the work to a local car audio professional. Or, you could just choose a double-DIN receiver and make your installation (and your life, really) a lot easier.
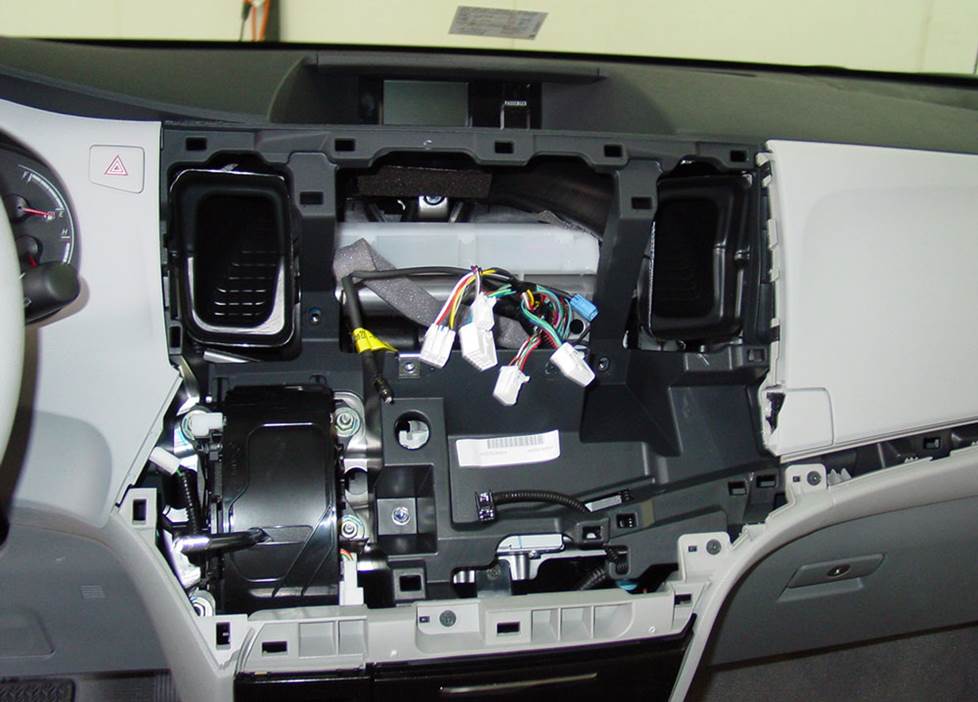
This is what your Sienna's dash looks like after you remove the stock radio. Our vehicle-specific instructions will show you how to do this yourself. (Crutchfield Research Photo)
Removing the factory radio
The radio removal process is the same for base and LCD receivers. Before you do anything else, make sure you didn’t leave a CD in the factory receiver, then set the van’s parking brake and disconnect the negative battery cable to prevent any electrical short. Once all that important stuff is done, it’s time to start removing that old radio.
Using the shift lock release, place the gear shift in its lowest position, then unscrew the shifter knob and remove it. Next, starting at the driver’s side, use a panel tool to pry out the dash trim strip and release nine retaining clips. Disconnect the wiring harness and remove the trim strip.
Pry out the gear shift trim to release four clips, then disconnect the wiring harness and remove the trim. Pry out the climate control panel to release six clips, then disconnect the wiring harness and remove that panel. That’ll expose four 10mm screws, which you’ll need to remove.
Detailed stereo and speaker removal instructions
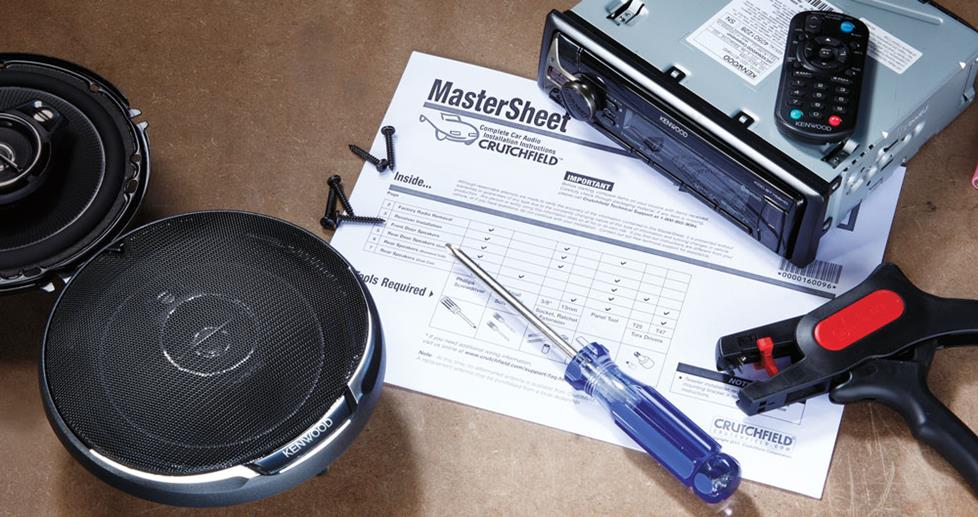
Pull the factory radio toward the rear of the vehicle to release nine clips, then disconnect the wiring harnesses and remove the radio/vent assembly. Remove the four Phillips screws securing the radio to the vent assembly, then set the old radio aside.
Please note that in some cases you'll need to use the factory radio's brackets to install your new receiver, so don’t toss them. If you don't have the brackets, you can obtain them from your dealership. Enter your vehicle information to see if this applies to your Sienna.
To install the new stereo, follow the instructions that come with the dash kit and wiring harness adapter, then reconnect all wiring harnesses – including the airbag – before reconnecting the battery. Test the radio to make sure it’s working properly. If it is, you can start reassembling the dash by reversing the removal steps.
Tools needed: Panel tool, small flat blade screwdriver, 10mm socket, ratchet and extension, Phillips screwdriver
Read our Car Stereo Buying Guide for shopping tips and advice.
Shop for car stereos that fit your Toyota Sienna
Steering wheel audio controls
In most cases, it's reasonably easy to retain your Sienna's steering wheel audio controls when you install a new stereo. When you enter your vehicle information, our database will choose the adapter you need to make your factory steering wheel controls work with a compatible aftermarket receiver.
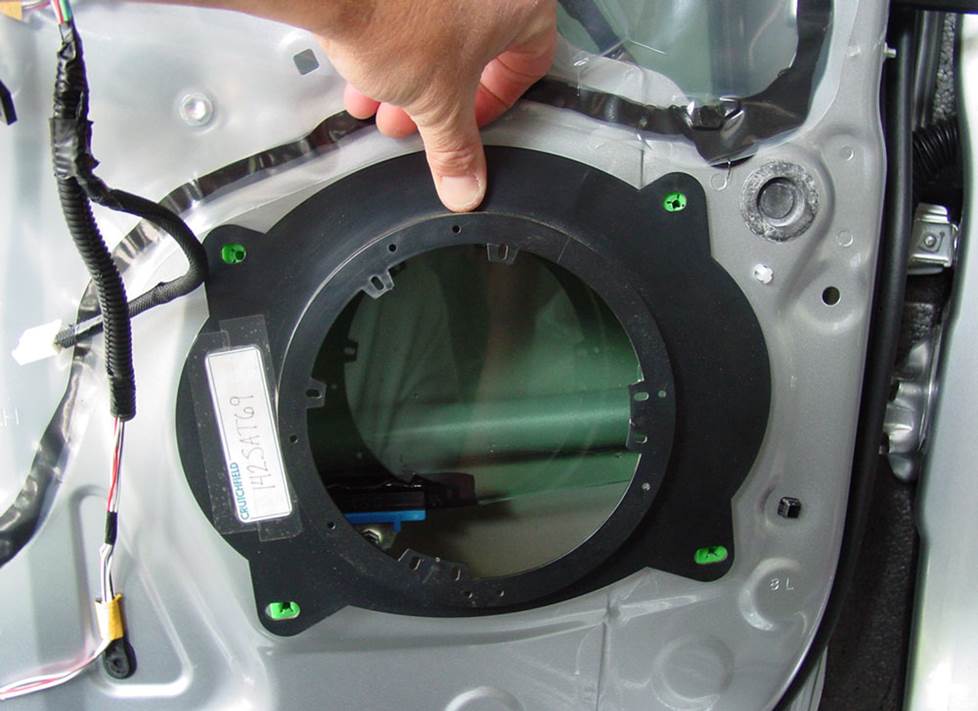
If you need speaker mounting brackets to install your new speakers, Crutchfield will include them with your purchase (Crutchfield Research Photo)
Removing the factory speakers
Generally-speaking, the Sienna's stock speakers aren't that hard to deal with, so this is a good project for the car audio DIY-er. There are some things you'll need to know before you get started, though, so read on to learn more.
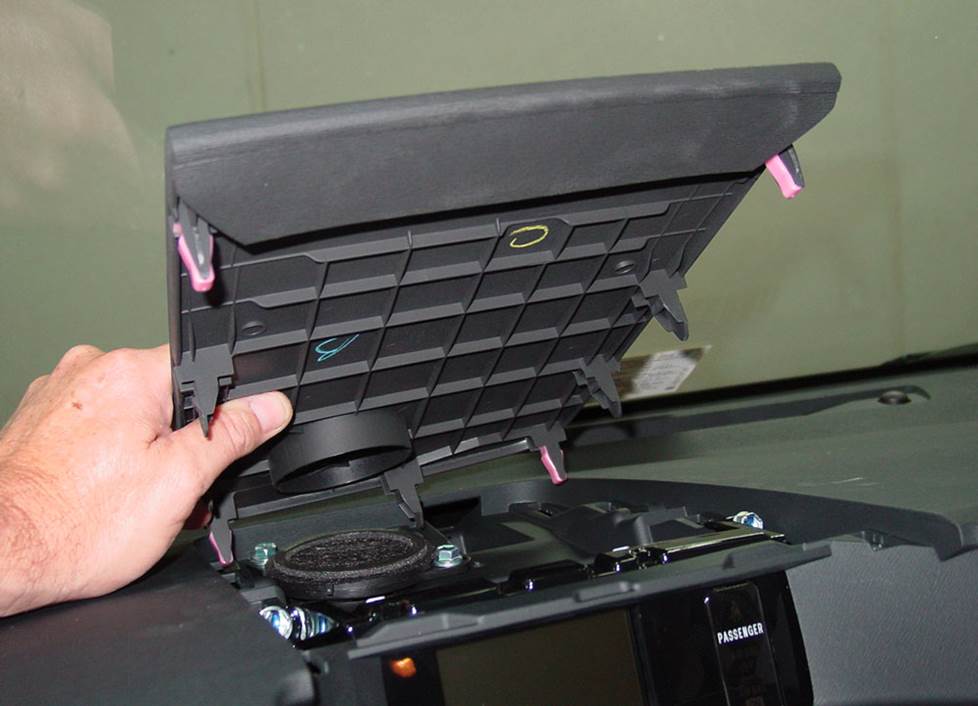
The JBL center dash speaker is a pretty easy swap (Crutchfield Research Photo)
Removing the center dash speaker (JBL only)
The JBL-only center dash speaker is a 2-3/4" model that’s reasonably easy to deal with. To remove it, you’ll start by using your panel tool to pry up the center dash grille to release ten retaining clips. Disconnect the wiring harness and remove the grille, then remove the two 10mm screws securing the speaker.
There’s no wiring harness available for this speaker, so you'll have to splice or solder the vehicle's speaker wires to the new speaker wires, or (easier option) you can use Posi-Products speaker connectors. Be sure to test the speaker before putting everything back together.
Tools needed: Panel tool, 10mm socket, ratchet and extension
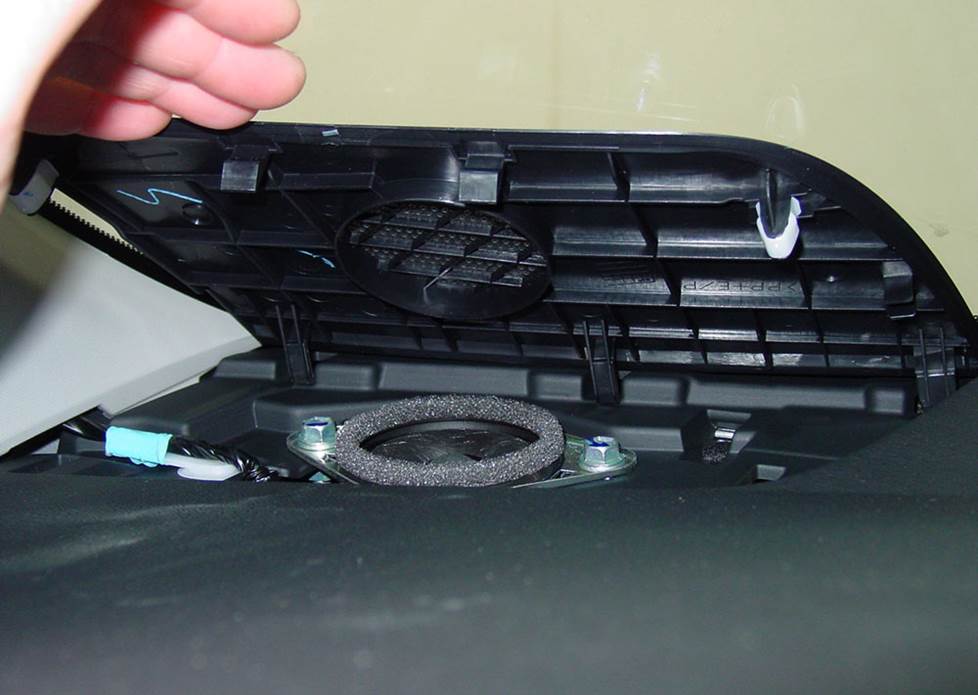
The corner dash speakers are easy to find and also pretty easy to remove and replace (Crutchfield Research Photo)
Removing the corner dash speakers
In all levels above the base 4-speaker system, you’ll find 2-3/4" speakers in the dash corners. To remove each speaker, you’ll start by prying up the corner speaker grille to release four clips, then removing the grille. Remove the two 10mm screws securing the speaker. Pull out the speaker, disconnect it and remove it.
Crutchfield carries a selection of 2-3/4" replacement speakers that will fit your dash corners. If you want to install smaller tweeters here (perhaps as part of a component system), you'll need a mounting bracket to house the tweeters. You can fabricate your own or use our brackets.
2013-up Siennas
Do note that in the 2013-up version of this system, the front tweeters and door woofers are wired together at each tweeter location, so when the tweeters are replaced or removed, the input and output wires must be spliced together to keep the woofers operating.
Replacing the low-impedance JBL corner dash speakers with 4-ohm aftermarket models will result in lower volume levels, so shop accordingly. Also, since these tweeters are wired to the door woofers, you'll have to splice the input and output wires together to keep the woofers working.
Installing a set of component speakers here and in the front doors is probably the best option for an upgrade, but it’s not the only one. If you want to install separate tweeters, you'll need a hole-saw drill bit, which will help you flush-mount the tweeter into the bracket included with your order. Questions? Give us a call or chat.
Tools needed: Panel tool, 10mm socket, ratchet and extension
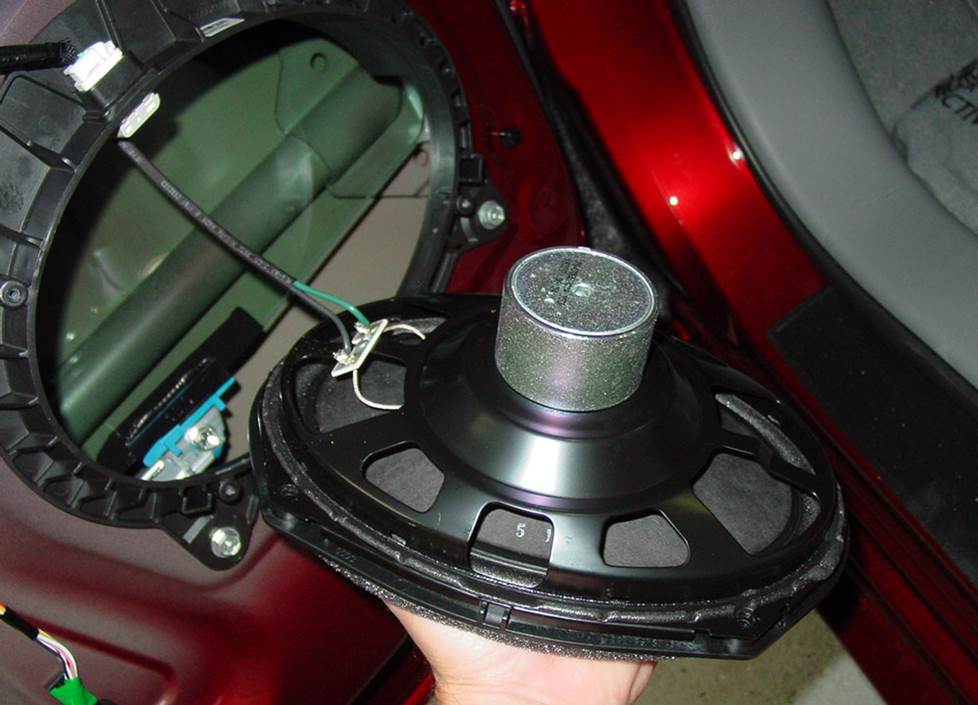
There are plenty of great upgrade options for the Sienna's stock front door speakers (Crutchfield Research Photo)
Removing the front door speakers
The stock front door speakers can be replaced by a variety of 6"x9", 6-1/2", or 6-3/4" aftermarket speakers. The process isn’t that hard, but there are some things you’ll need to pay close attention to while you’re doing the job.
Starting at the top edge, use your panel tool to pry off the sail panel and release one clip, then lift and remove the panel. Next, pry out the screw cover behind the door release handle and remove the exposed Phillips screw.
Starting at the rear edge, pry up the power switch panel to release five clips, then disconnect the harnesses, remove the panel, and remove the now-exposed Phillips screw. Next, remove the Phillips screw securing the bumper along the rear edge of the door panel, then remove the bumper.
From here, you’ll pry out the sides and bottom of the door panel to release ten clips, disconnect the lock and release cables, and remove the door panel.
For the base-level speakers, you’ll need to remove the four 10mm screws securing the speaker to door steel, then disconnect the harness and remove the speaker. For JBL speakers, you’ll remove the four Torx T-20 screws securing the speaker to the factory bracket before disconnecting the harness and removing the speaker.
In most cases, you’ll need mounting brackets to install your new speakers, and we’ll include those with your Crutchfield speaker purchase. With some 6-3/4" models, you might need to remove the inner tabs on the aftermarket speaker bracket.
Once your new speakers are installed, test them to make sure they’re working properly. If they are, you’re ready to start putting the doors back together. Before you do that, be sure the door locks and releases are working properly and that the wiring isn’t interfering with the windows.
Tools needed: Panel tool, Phillips screwdriver, Torx T-20 driver or 10mm socket, ratchet and extension
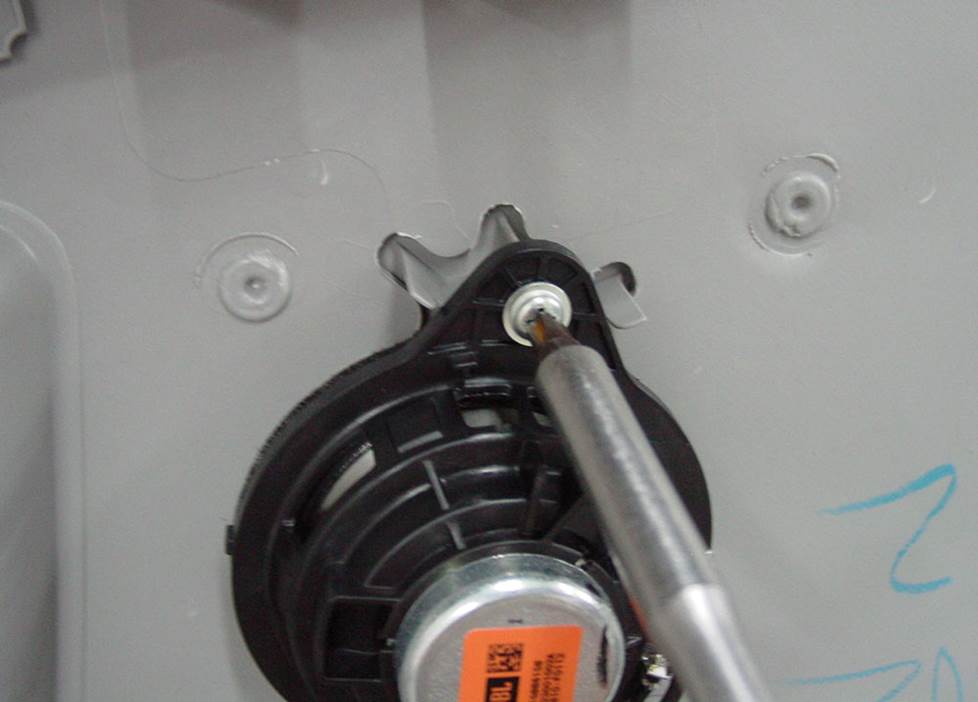
The JBL-only rear door speakers are attached directly to the door panels (Crutchfield Research Photo)
Removing the rear door speakers (JBL only)
The Sienna’s JBL system includes 2-3/4" speakers in the rear door panels. If you want to replace them, you’ll need to remove the panels first. Space is an issue here, so you might want to leave these speakers in place and focus your energies elsewhere.
Tools needed: Panel tool, Torx T-25 driver, small flat blade screwdriver, Phillips screwdriver
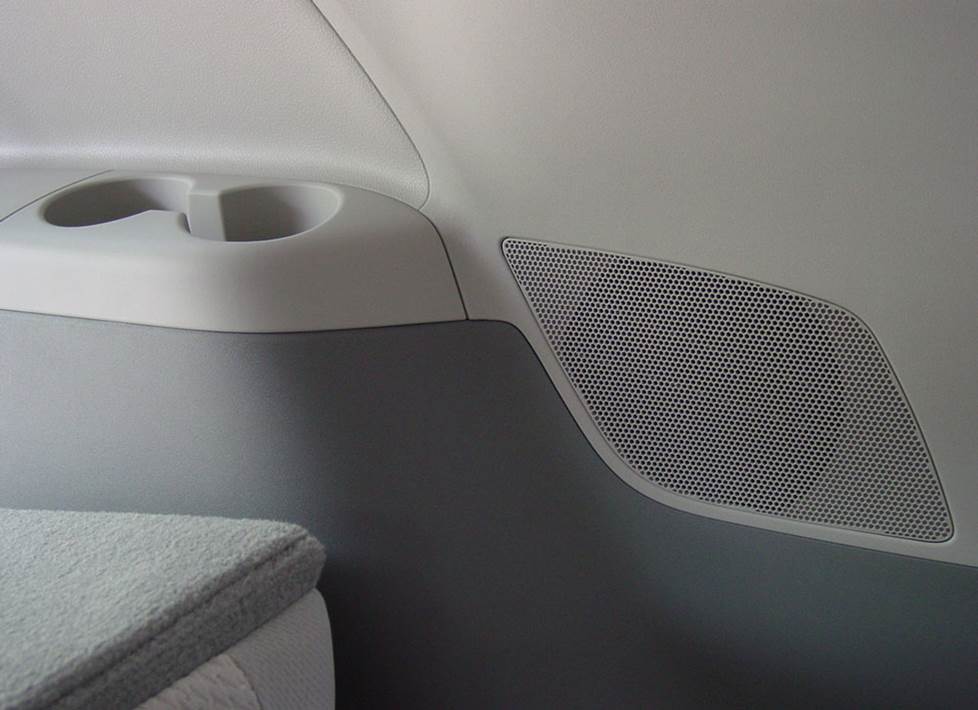
The mid-rear side panel speakers are kind of odd and rather hard to replace. Just leave them there and upgrade the rest of the speakers. (Crutchfield Research Photo)
Not removing the mid-rear side panel speakers (Base system)
The 6-3/4" mid-rear side panel speakers in the non-JBL systems are literally irreplaceable. Not in the "OMG, they’re so awesome" way, though. These speakers are kind of an odd shape, plus they’re mounted on the top of the side wall with only a small hole for a speaker magnet.
As a result, there are no aftermarket speakers that’ll fit here without a lot more custom work than most DIY-ers can (or would want to) handle. We’d recommend leaving these speakers where they are and focusing on upgrading all the other ones.
Tools not needed at all: Panel tool, 10mm socket, 14mm socket, ratchet and extension
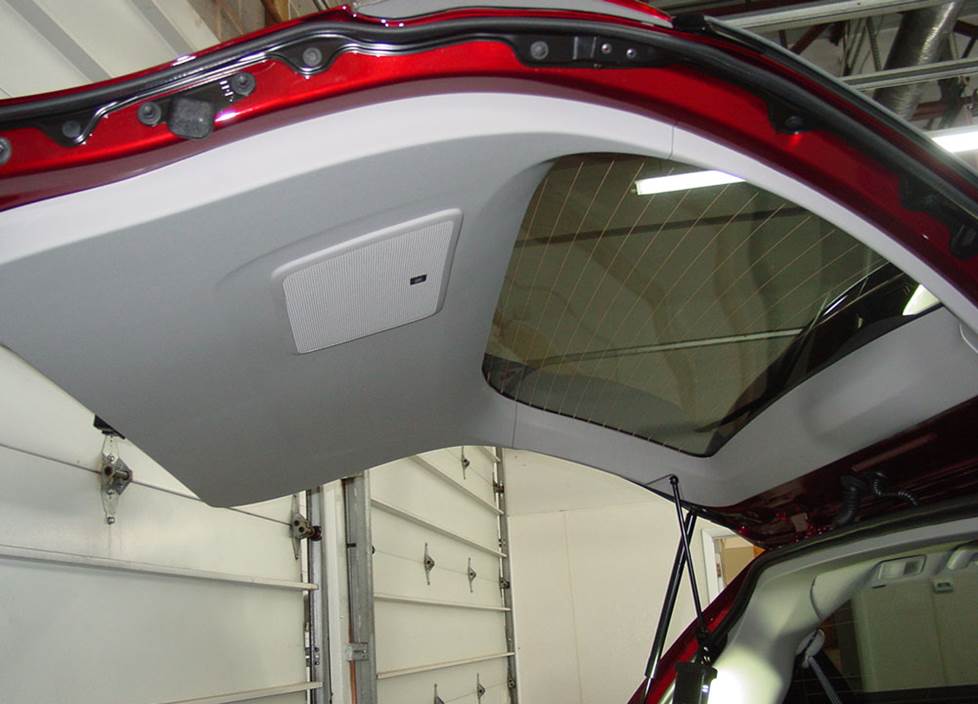
Replacing the JBL cargo door sub isn't all that hard, but unless you're a gymnast, you might want to stretch a bit before you start (Crutchfield Research Photo)
Removing the cargo door sub (JBL only)
The JBL cargo door subwoofer is a beefy 6"x9"-ish model with a rather non-standard oval shape. You’ll need to fabricate a bracket to install a 6-3/4" woofer in the factory location, and for best results, you’ll want to offset it to the passenger's side of the van when you secure it.
To get the old sub out of there, start at lower edge and pry out the back door trim panel to release fifteen clips, then remove the panel. Remove four 10mm screws and pry out the two clips securing the sub to the door, then disconnect the harness and remove the subwoofer/bracket assembly.
As with the other JBL speakers in this system, it’s a 2-ohm, dual-voice-coil model, so replacing it with a 4-ohm aftermarket speaker will result in lower volume levels. Look for 2-ohm subs or plan on installing a new amp.
Tools needed: Panel tool, 10mm socket, ratchet and extension
Read our Car Speakers Buying Guide for more information.
Shop for speakers that fit your Toyota Sienna
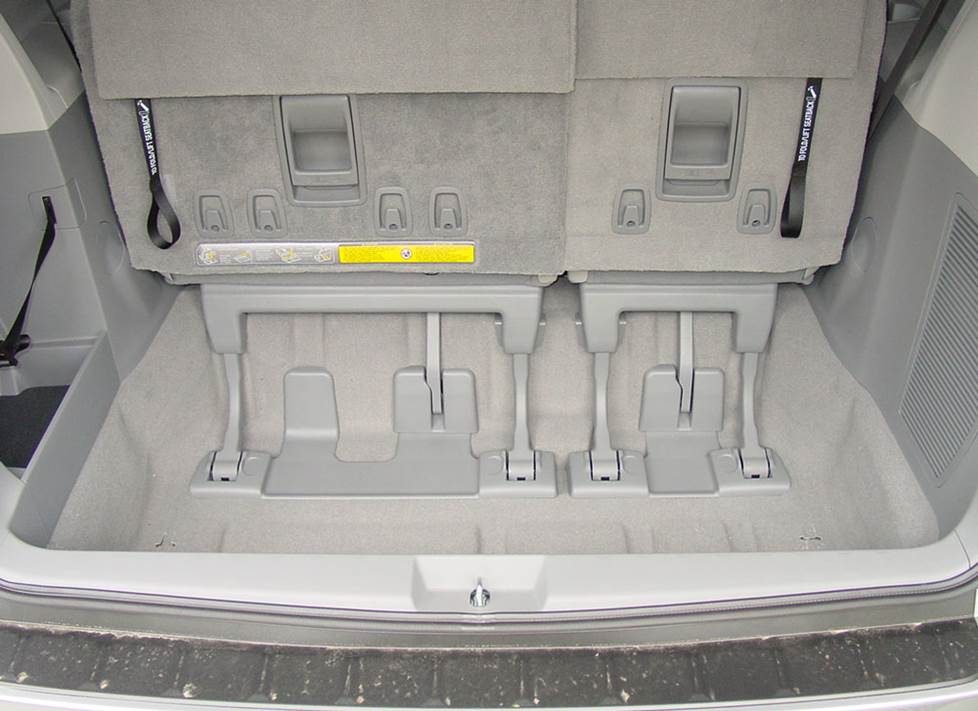
This is probably not the best space for a subwoofer box, especially if you still use your Sienna to haul cargo and people. A powered sub might be a better idea for this van. (Crutchfield Research Photo)
More bass in your Sienna
The Sienna’s interior is designed for hauling people and the cargo area is designed for holding their stuff. Fans of big, booming bass were not consulted, alas.
The rearmost seats fold down into the floor to increase cargo capacity, but unless you’re planning to leave them down permanently, there’s not a ton of space back here. Numbers-wise, you’ll have a 48" W x 8" H x 23" D space to work with when the rear seats are in the “up” position. You can’t fold the seats into the floor if there’s a subwoofer box in place, either, so there’s a choice to be made.
If you want to retain more of the versatility that inspired you to buy a minivan in the first place, you can still boost your bass with a more compact powered subwoofer. Give us a call and talk to one of our advisors if you have questions about the best way to do this.
Learn more about building a bass system in our Car Subwoofer Buying Guide.
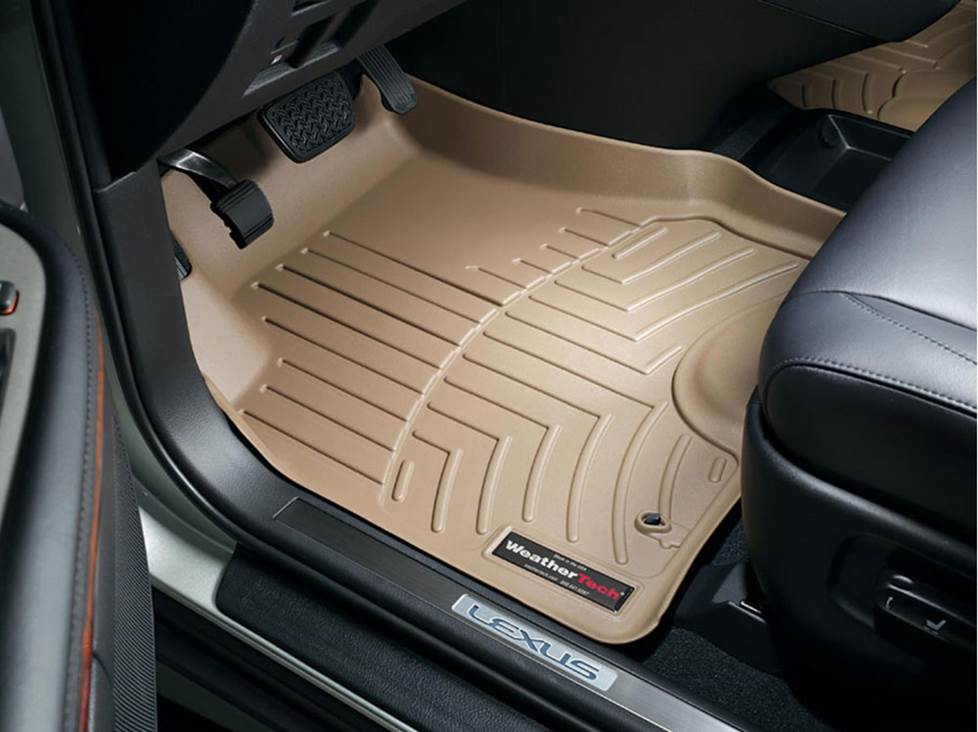
You can protect your Sienna's carpeting with a set of WeatherTech floor liners
Other options for your Sienna
There are plenty of other ways to improve your Toyota Sienna. Here are some of the ways Crutchfield can help.
Add an amplifier and improve the sound
If you use your Sienna to haul gear rather than kids, you can still build an amazing system without sacrificing storage space. There are plenty of compact amplifiers that will fit into out-of-the-way spaces in your cargo area. You can learn more about adding amps to your system in our Car Amplifier Buying Guide.
Floor mats
If you’ve ever owned a minivan of any kind, you don’t need us to remind you of what can happen when you hit the road carrying any combination of adults, kids, pets, and food. WeatherTech floor liners will help protect your floors from dirt, damage and discarded juice boxes.
Remote start and security systems
Adding remote start capability to your vehicle lets you warm it up in the winter or cool it down in the summer. Call to order so that we can make sure you get everything you need to add this really cool feature to your Sienna. To learn more, you can also check out our article, Installing a remote start system in a Toyota Sienna.
You can also talk to your Crutchfield Advisor about a security system. They’re not as easy to install (we usually suggest letting a professional do the job), but we can help you choose a system that’ll work in your vehicle.
Let's get started!
Ready to shop? Use our vehicle selector to find the gear that will fit your car or truck. If you have questions, give us a shout via phone or chat.

Comments (0)