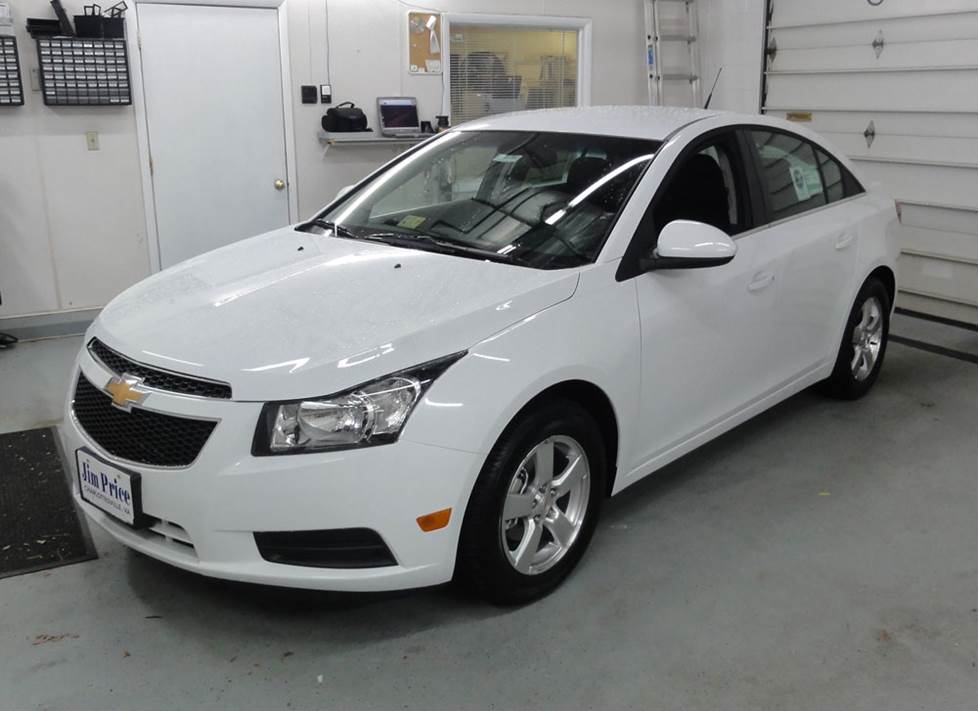
2011-2015 Chevrolet Cruze and 2016 Cruze Limited
How to upgrade the stereo system in your Cruze

In brief: This Crutchfield Research Garage article gives you an overview of your car's stock stereo system and your aftermarket upgrade options. We'll tell you all about:
- The factory stereo system
- Removing the factory radio
- Removing the factory speakers
- Adding more bass
- Other options for your Cruze
Then, use our vehicle selector to find the gear that will fit your Cruze.
Overview of the Chevy Cruze
When people think about late-model compact sedans, the Cruze might not come to mind immediately. After all, there are flashier cars, faster cars, and even flakier cars out there, so the Cruze tends to fade into the background. But a closer look at this compact reveals an awful lot to like.
For one thing, the styling, while subtle, has just enough Volt-age (It looks a wee bit like the high-tech Chevy Volt, we mean...) to please the eyes without attracting unwanted attention. The handling is better than you might expect from a compact Chevy, too, so you can actually have some low-speed fun on a back road if you're in the mood.
But most importantly for car audio buffs like us (and you), GM spent some money on soundproofing this car. The comfortable interior is remarkably quiet for a sedan in this class, which is nice for daily driving, but really nice for enjoying music while you're driving. If you're ready to crank up your Cruze, read on. This article will tell you a little more about what you can do and how to do it.
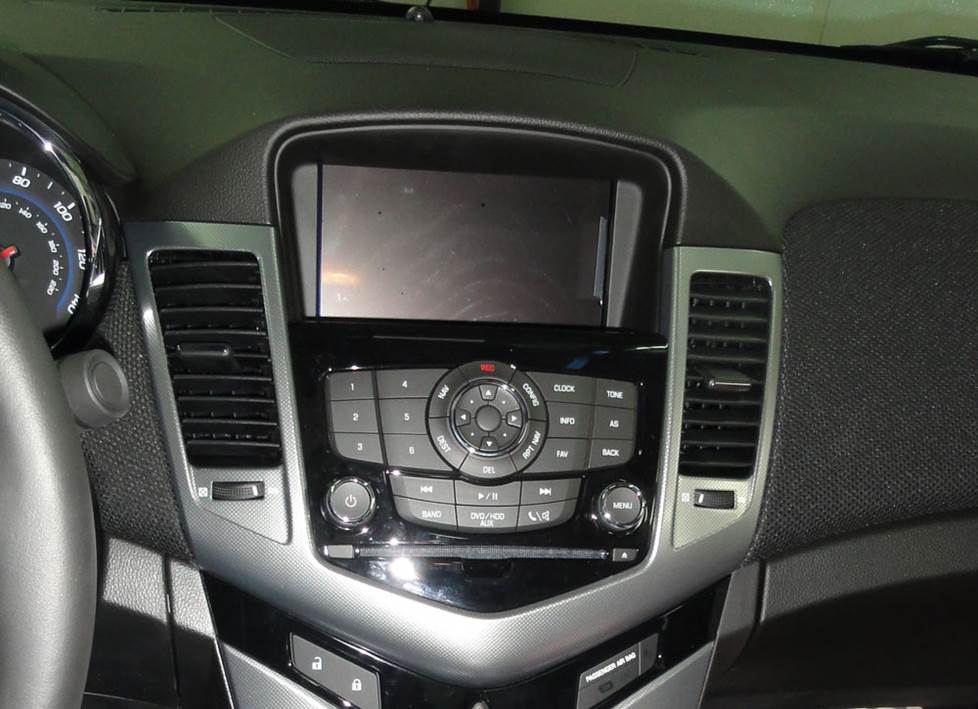
This navigation receiver was available with or without the Pioneer audio system. (Crutchfield Research Photo)
The factory stereo system
The base stereo was an AM/FM/XM/CD/MP3 receiver playing through six speakers, while the upgrade was a 9-speaker Pioneer system that added a center channel speaker, two rear deck subwoofers, and an amplifier in the trunk (behind the passenger’s side trim panel). The top-shelf option simply added a navigation receiver to the Pioneer system.
When you replace your car’s stock receiver, you’ll get better sound and functionality, but you’ll lose some factory features, too. Depending on the receiver you’re replacing, you’ll lose the information center display, the factory satellite radio capability, and the factory navigation feature. On the upside, the factory backup camera (if equipped) will still work with its dedicated display.
Detailed stereo and speaker removal instructions

The warning chime is built into the factory radio. When you replace it, you'll also need to purchase an adapter that retains the factory warning chime needed to keep audible safety warnings functioning and provides a switched 12-volt power source for the new radio. Crutchfield strongly recommends that you don't replace your factory radio without using the recommended adapter. So much so, in fact, that we can't offer technical support on an installation undertaken without it.
To further encourage that very smart choice, we’ll give you a nice discount on the adapter and the dash kit you’ll need to install your new DIN (2" tall) or double-DIN (4" tall) aftermarket stereo.
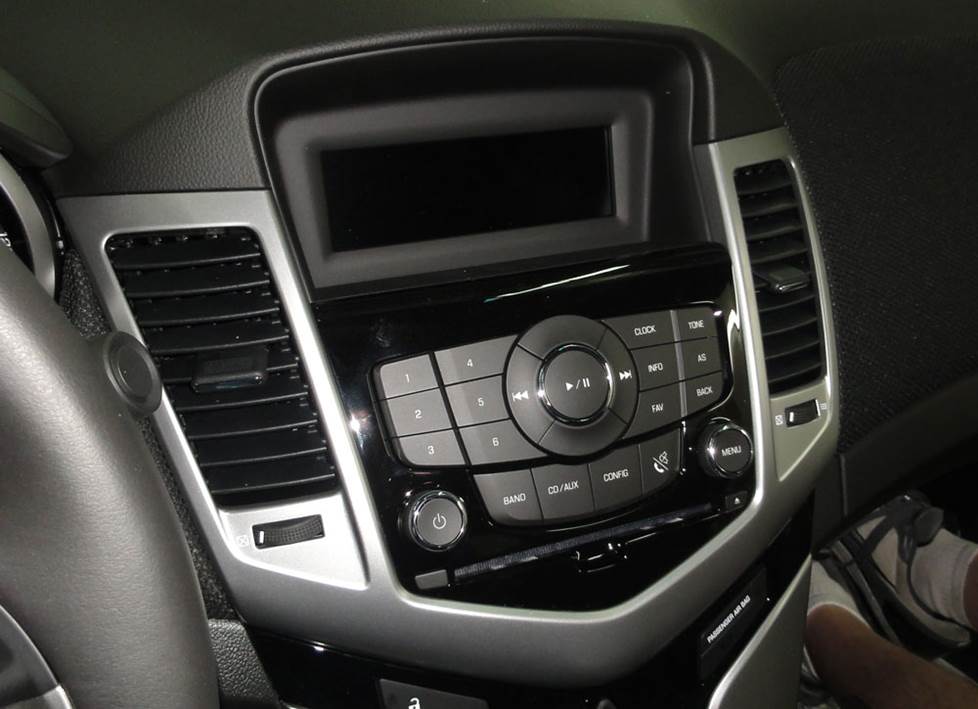
You'll use the same tools and techniques to remove the base (shown) or nav radios. (Crutchfield Research Photo)
Removing the factory radio
Regardless of which factory radio you’re upgrading, the process is reasonably easy. Before you start, first check to make sure there isn’t a forgotten disc in the receiver. Once that’s done, set the parking brake and disconnect the negative battery cable to prevent any electrical short. Safety first, and all that.
Use your panel tool to pry out the receiver trim panel to release seven retaining clips, then remove the trim panel. Next, starting at the rear edge, pry up the gear shift trim panel to release eight clips, then disconnect the wiring harnesses and remove the trim panel. Pry off the shift lock release cover, then, using the shift lock release, place the car’s gear shift in the lowest position.
Remove the two 7mm screws securing the lower dash pocket, then remove the pocket. Remove the four 7mm screws securing the climate control panel, then place the control panel on the center console. Use a clean cloth to protect the finish while you keep working.
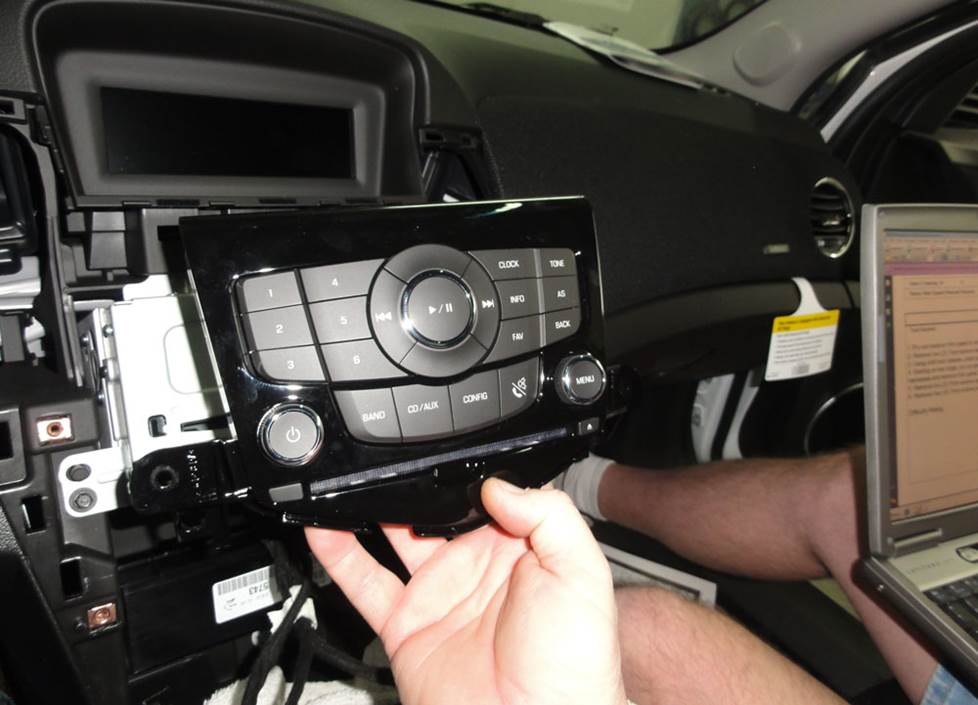
The radio removal process is actually pretty simple in this car, so it's a good DIY project. (Crutchfield Research Photo)
Remove the two 7mm screws securing the receiver faceplate to the dash, then disconnect the wiring harness and remove the faceplate. Remove two 7mm screws securing the lower receiver chassis brackets to the dash, then remove the two 7mm screws securing the display assembly to the dash.
Disconnect the wiring harness and remove the display assembly, then remove the two 7mm screws securing the upper receiver chassis brackets to the dash. Disconnect those wiring harnesses, then remove the chassis. Return the gear shift to the “park” position.
To install the new stereo, follow the instructions included with the dash kit and wiring harness, then do the disassembly process backward to put everything back together. Be sure to test the receiver to make sure it’s working before you finish buttoning everything up again.
Tools needed: Panel tool, 7mm socket, ratchet and extension, small flat blade screwdriver
Read our Car Stereo Buying Guide for shopping tips and advice.
Shop for car stereos that fit your Chevrolet Cruze
Steering wheel audio controls
In most cases, it's reasonably easy to retain your car's steering wheel audio controls when you install a new stereo. When you enter your vehicle information, our database will choose the adapter you need to make your factory steering wheel controls work with a compatible aftermarket receiver.
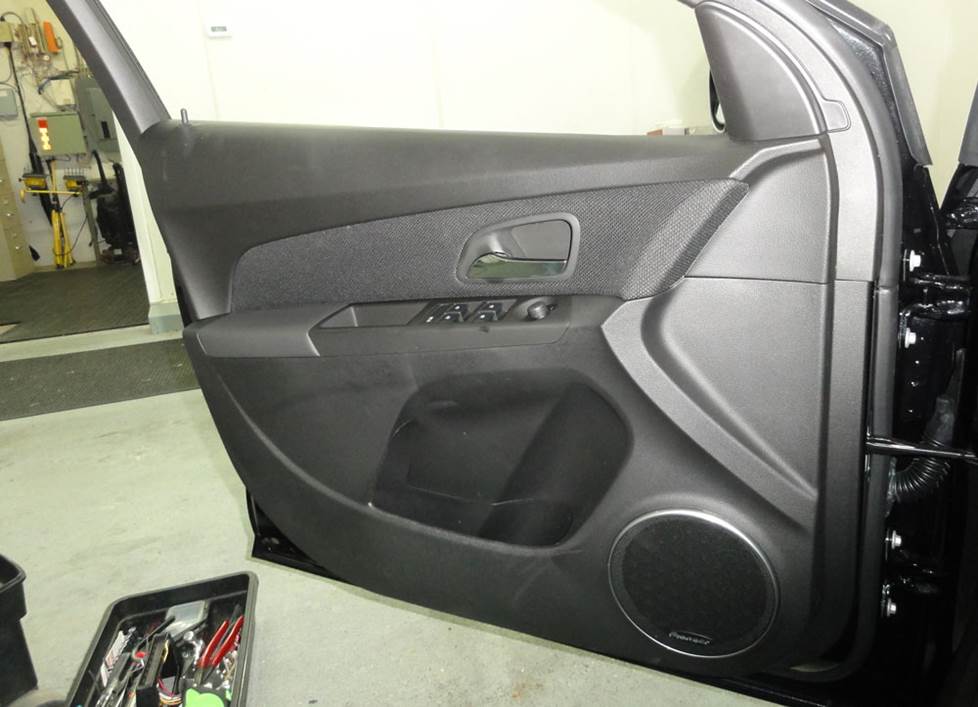
Want better sound in your Cruze? Remove and replace the factory speakers. (Crutchfield Research Photo)
Removing the factory speakers
Whether you're upgrading the base stereo system or the Pioneer system, new speakers will make a big difference in how music sounds in your Cruze. the work is pretty basic, for the most part, so it's a do-able DIY project, even for first-timers. And our Crutchfield experts are here to offer help and advice if you need us.

Alas, there aren't many replacement models available for the center dash location. (Crutchfield Research Photo)
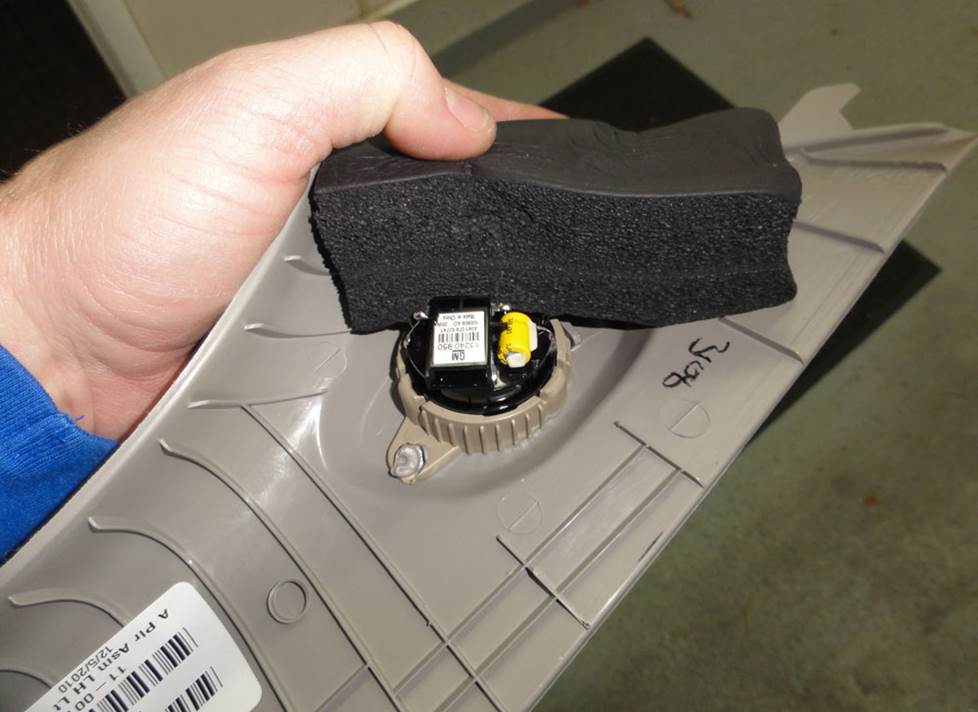
Removing the center dash speaker
The Pioneer-only center dash speaker is a 3-1/2" model that’s bottom-mounted to the center dash grille. There aren’t many aftermarket speakers that fit right into this location, but if you do find one, you’ll need to splice, solder, or use Posi-Products speaker connectors to connect the new speaker to the car’s wiring.
The speaker is easy to remove, though, and all the step-by-step details can be found in the Crutchfield MasterSheet that’s included free with your stereo or speaker purchase.
Tools needed: Panel tool, 7mm socket, ratchet and extension, paper
The pillar tweeters are mounted on the back of the trim panel. (Crutchfield Research Photo)
Removing the front pillar tweeters
The front pillars house 1.600" tweeters, so a set of component speakers will be a great choice for your Cruze. These speakers are mounted on the back of the pillar trim panels, so they’re pretty easy to get to.
On the other hand, there’s no wiring harness available for this location, so you’ll need to splice, solder, or use Posi-Products speaker connectors when you install your new tweeters. You’ll also need to find a way to secure them, since there are no brackets available. For this part of the job, you can use hot glue, silicone, or our universal backstraps.
With these and all the other speakers you replace, be sure to test them out before you put everything back together. Just because this is a reasonably simple process doesn’t mean you want to do it multiple times!
Tools needed: panel tool, small flat blade screwdriver
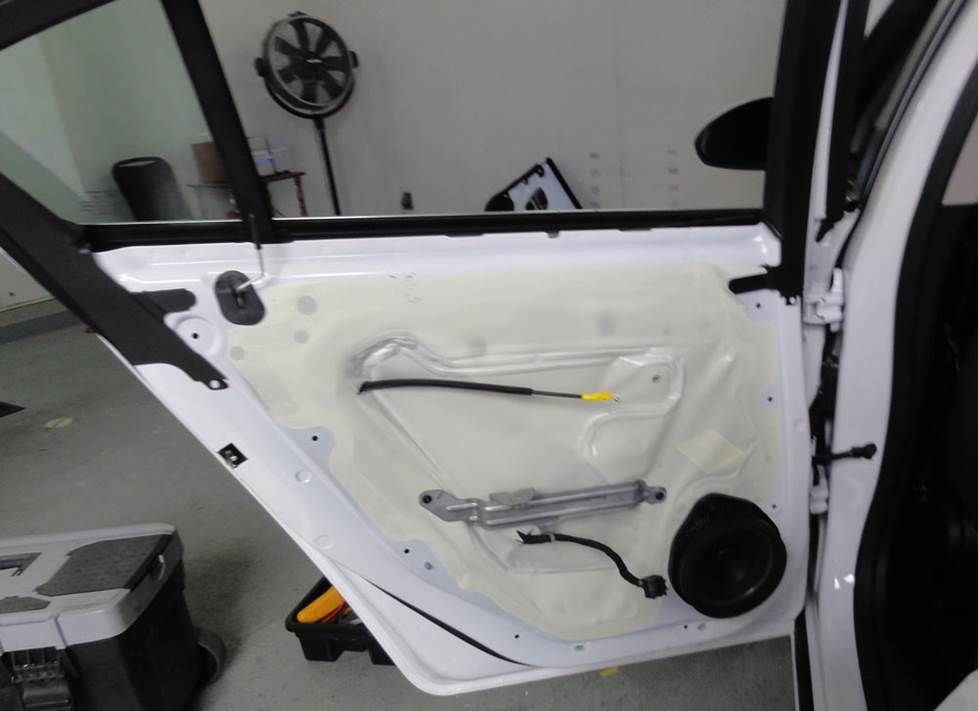
You'll need to remove the door panels to replace the factory speakers. (Crutchfield Research Photo)
Removing the front door speakers
The 6-3/4" front door speakers can be replaced by a nice variety of same-size and 6-1/2" aftermarket models. The job’s not that hard, and you’ll no doubt be impressed with the results.
Starting at the top edge, pry off the sail panel to release two clips, then remove the panel. Next, pry out the screw cover behind the door release and remove the exposed Torx T20 screw. Pry out the rubber mat inside the door pull cup and remove the Torx T20 screw you see there.
Pry out the sides and bottom of the door panel to release eight retaining clips, then disconnect the door release cable and wiring harnesses before removing the door panel. Store it someplace clean and safe while you continue working.
Remove the 7mm screw securing the top of the speaker, then pry the speaker out, lift it up a bit, and disconnect the harness.
You’ll need adapter brackets to install your new speakers, and we’ll include them free with your Crutchfield speaker purchase. Once the speaker is secured to the bracket and connected to the car’s wiring, mount it to the door using the screw you just removed.
Test the speaker before you put the door back together. Be sure to check that the wires aren’t interfering with anything and that the door lock and release mechanisms are working properly.
Tools needed: panel tool, Torx T-20 driver, 7mm socket, ratchet and extension, small flat blade screwdriver
The rear door removal/replacement process is quite similar to what you'll do up front. (Crutchfield Research Photo)
Removing the rear door speakers
The situation is largely the same in the rear doors. There’s a 6-3/4" speaker in each door and you can replace the stock stuff with same-size or 6-1/2" aftermarket models. You’ll need adapter brackets to install these speakers, too, and we’ll include them free with your Crutchfield speaker purchase.
The disassembly process is quite similar to what goes on with the front doors, and complete, step-by-step instructions will be found in your Crutchfield MasterSheet.
Tools needed: panel tool, Torx T-20 driver, 7mm socket, ratchet and extension, small flat blade screwdriver

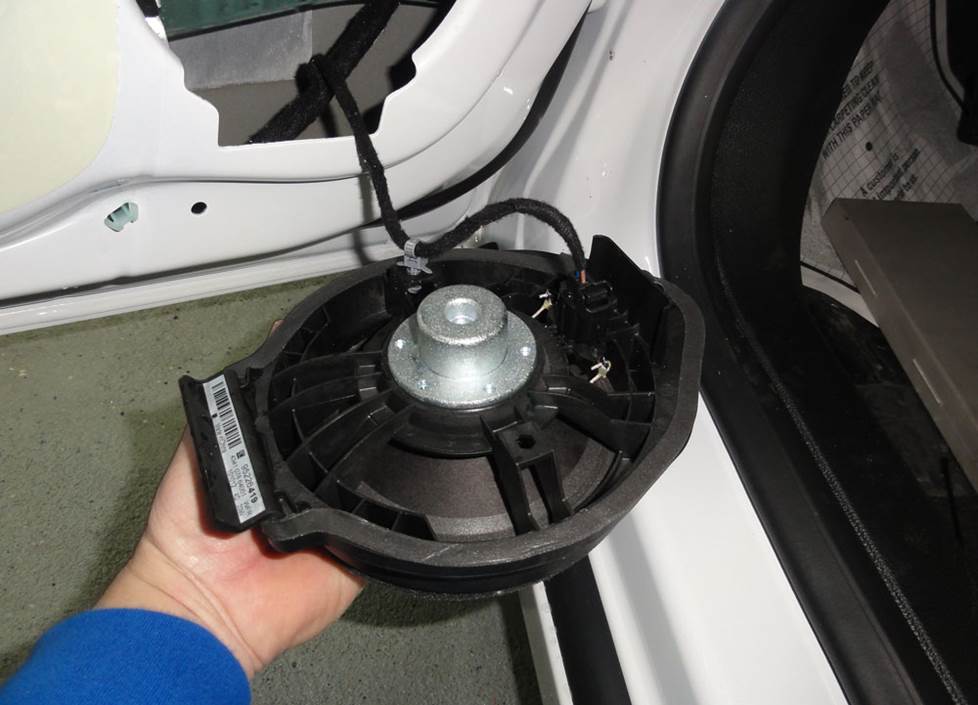
The Pioneer-only rear deck subs take a bit of work to get to, but it's nothing a determined DIY-er can't handle. (Crutchfield Research Photo)
Removing the rear deck subwoofers
The optional Pioneer system includes a pair of 6"x9" subwoofers in the rear deck. The disassembly process isn’t hard, exactly, but there are quite a few steps involved. You can totally do this, but it’ll really help to stay organized, stay patient, and maybe even enlist an assistant to help with the job.
All the disassembly details can be found in your Crutchfield MasterSheet, of course, and if you run into any snags, remember that your Crutchfield speaker purchase includes free tech support for the life of your gear.
You’ll need mounting brackets to install your replacement speakers, and they’ll be included with your order. You’ll need to drill new mounting screw holes for the new speakers, and while that’s really not a tough task, you are drilling holes into your car, soooo…. Work carefully, pay attention to what you’re drilling into, and always wear eye protection.
Once the new speakers are installed, you’ll definitely want to test them before you put it all back together again. As you do that, make sure the seats and seatbelts are secured to manufacturer’s specifications and also check to see if the third brake light is working properly.
Tools needed: Panel tool, 7mm socket, ratchet and extension, Phillips screwdriver, small flat blade screwdriver
Read our Car Speakers Buying Guide for more information.
Shop for speakers that fit your Chevrolet Cruze
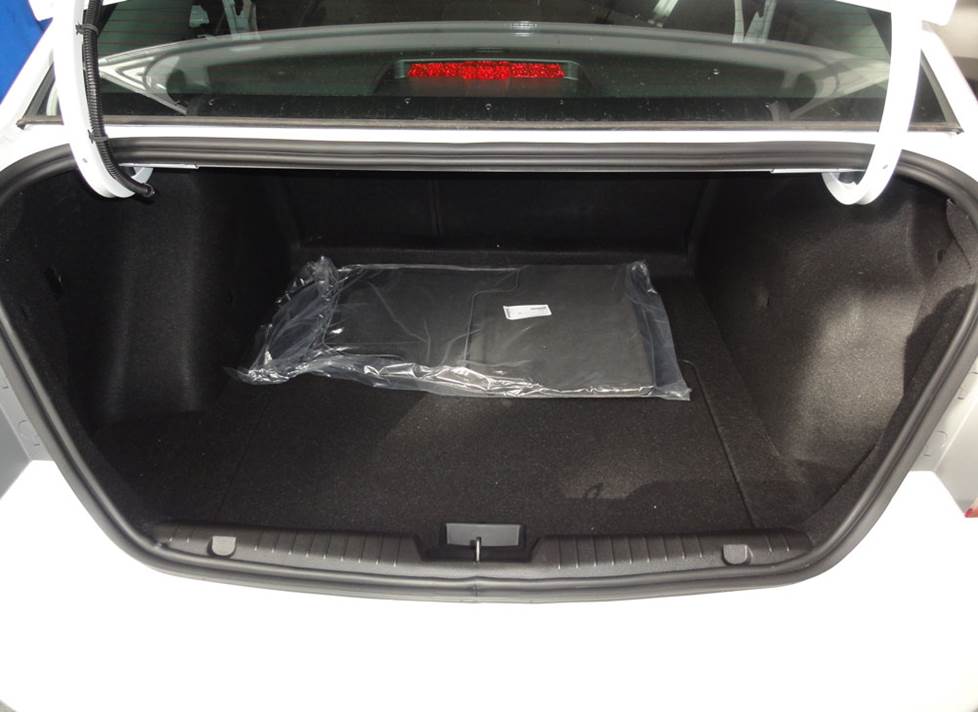
There's a good bit of room for a subwoofer enclosure in the Cruze's trunk. (Crutchfield Research Photo)
More bass in your Cruze
Like most modern compact cars, the Cruze offers a spacious, thoroughly usable amount of trunk space. This comes in handy for everyday duties, of course, but it also gives you some room to work with if you want to add a subwoofer enclosure. The space measures 40" W x 17"H x 31"/36"D, so a nice-sized box is an option if you want one.
In the event that those everyday duties take precedence over booming bass, you can still enhance your music with a more compact powered subwoofer.
Learn more about building a bass system in our Car Subwoofer Buying Guide.
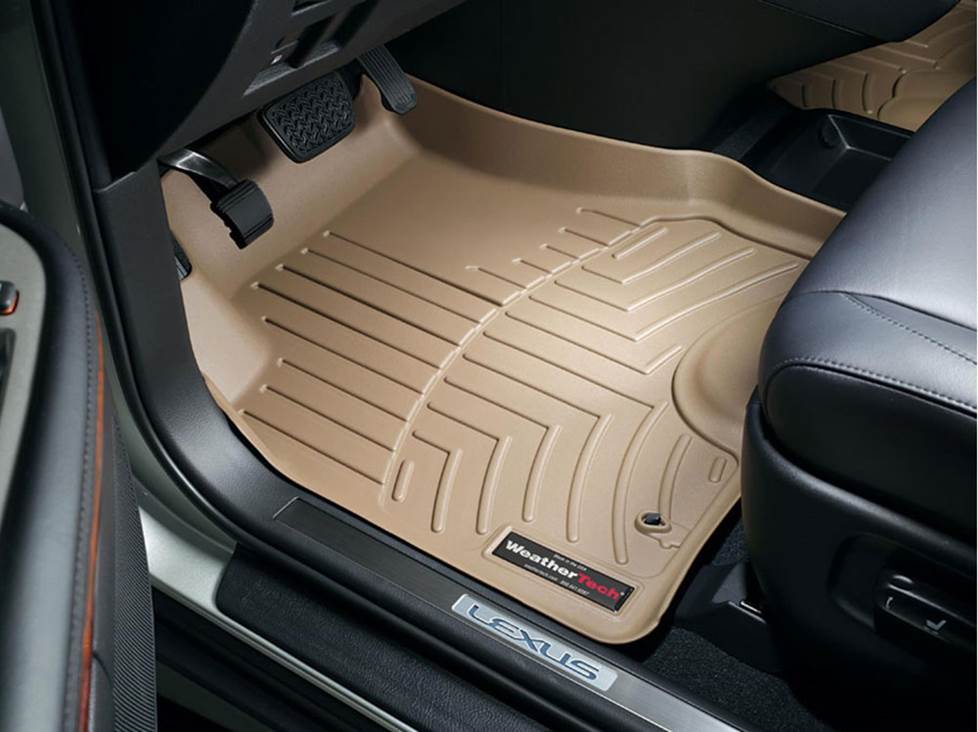
Keep your car's carpeting looking sharp with custom-fit WeatherTech FloorLiners
Other options for your Cruze
There are plenty of other ways to improve the sound, safety, and comfort of your Cruze. Here are some of the ways Crutchfield can help.
Protect your car's interior
The Cruze is a pretty nifty little car, but the factory floor mats are...just regular old factory floor mats. A set of custom floor liners from WeatherTech will help protect your car's carpeting from dirt and damage.
Add an amplifier for better sound
If you install new speakers in your Cruze, consider installing a 4-channel amplifier to further improve the sound. That will let you get the best sound from your music. And if you install subwoofers, you'll also need to install a mono amplifier to power them as well. Talk to one of our advisors to get some ideas for how to easily and economically build your system.
Remote start and security systems
Adding remote start capability to your vehicle lets you warm it up in the winter or cool it down in the summer. Ask a Crutchfield Advisor about adding remote start to your Cruze.
You can also talk to your Crutchfield Advisor about a security system. They’re not as easy to install (we suggest letting a professional do the job), but we can help you shop for a system that’ll work in your vehicle.
Find the audio gear that fits your car or truck
Visit our Outfit My Car page and enter your vehicle information to see stereos, speakers, subs, and other audio accessories that will work in your vehicle.


Comments (0)