2011-2019 Mitsubishi Outlander Sport
How to upgrade the stereo system in your Outlander Sport

In brief: This Crutchfield Research Garage article gives you an overview of your Outlander Sport's stock stereo system and your aftermarket upgrade options. We'll tell you all about:
- The factory stereo system
- Removing the factory radio
- Removing the factory speakers
- Adding more bass
- Other options for your Outlander Sport
Then, use our vehicle selector to find the gear that will fit your Mitsubishi.
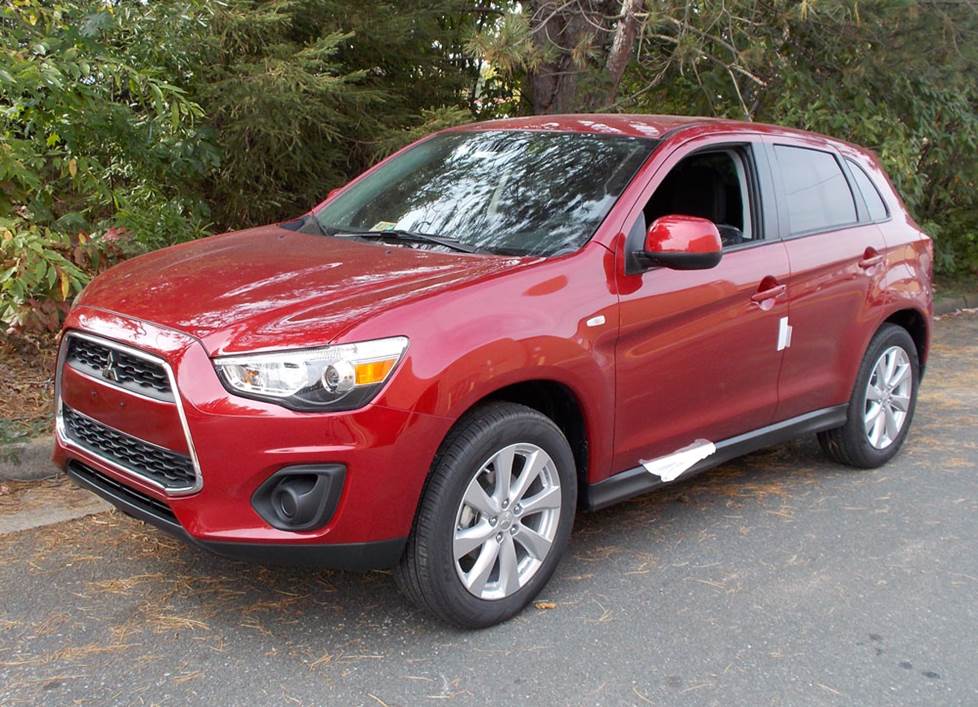
Overview of the Mitsubishi Outlander Sport
Like a mysterious, roving stranger in a fantasy adventure novel, Mitsubishi’s compact crossover goes by many names. In some parts of the world, it’s the ASX. In Japan and Canada, it’s the RVR. And here in the U.S., it’s called the Outlander Sport.
They could've gone with "Outlander Short", too, since this SUV is in fact a couple feet or so shorter than the larger Outlander with which it shares a chassis and half a name. Alas, "Outlander Short" doesn’t sound very cool, rugged, or adventurous, so here we are.
Nomenclatural absurdity aside, the Sport is a pretty nifty example of the tall boxy things everyone wants to drive now. The styling is distinctive, the interiors are decent, and while there’s no third row of seats, there’s still plenty of room for luggage and other stuff. It even gets decent fuel mileage if you drive like a normal person.
The stock stereos range from okay-ish to decent, as such things go, but an aftermarket upgrade will make your stereo system a whole lot sportier. Read on to see what you can do and how you’ll do it.
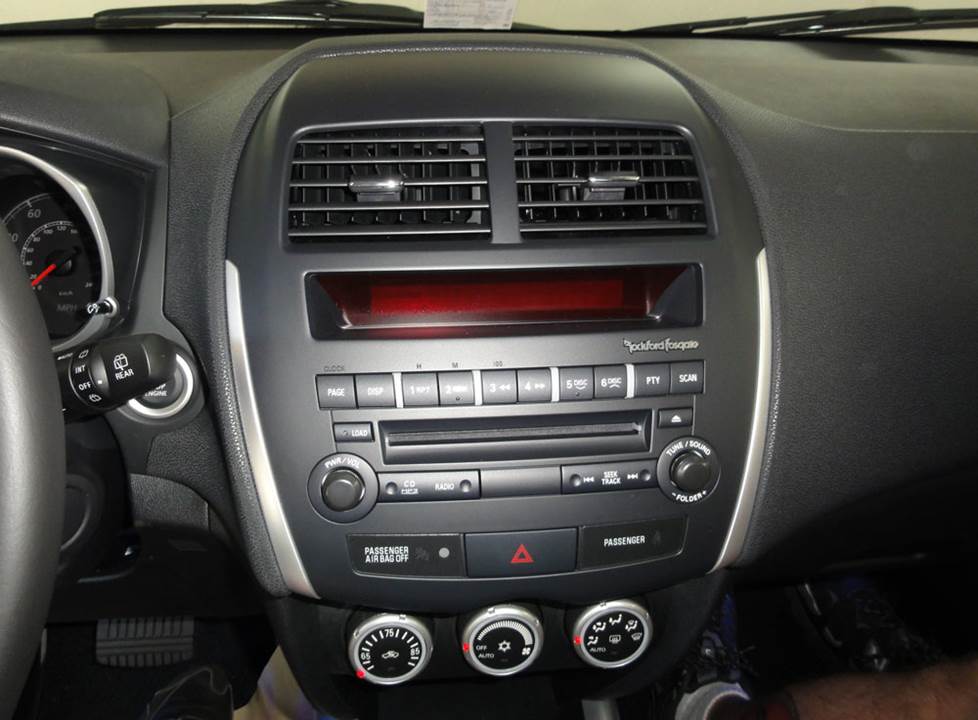
This is an early Rockford Fosgate factory radio (Crutchfield Research Photo)
The Outlander Sport's factory stereo system
The factory stereo systems have changed a bit over the years, but basically, there’s a standard radio, a navigation radio, a 4-speaker base system, a 6-speaker medium system, and a 9-speaker premium Rockford Fosgate system with a subwoofer.
Replacing the stock stereo isn't all that hard to do. Depending on what you're starting with, you will lose a few factory features, like the AUX and USB connections, satellite radio, and the stock nav system. This isn’t a problem, really, because all of those features can be regained and, frankly, upgraded with a new aftermarket receiver.
When you order that new receiver from Crutchfield, you’ll save money on the dash kit and wiring harness you’ll need to install it in your Outlander Sport.
If you’re replacing a Rockford Fosgate system, there are a couple of things to keep in mind when you order. In order to retain the factory amplifier, the package contains a wiring harness that connects to your new receiver's front and rear preamp outputs. If you've chosen a receiver without those outputs, our installation package will include the line converter you'll need to retain use of the amp. But we'll definitely recommend getting a receiver with preamps.
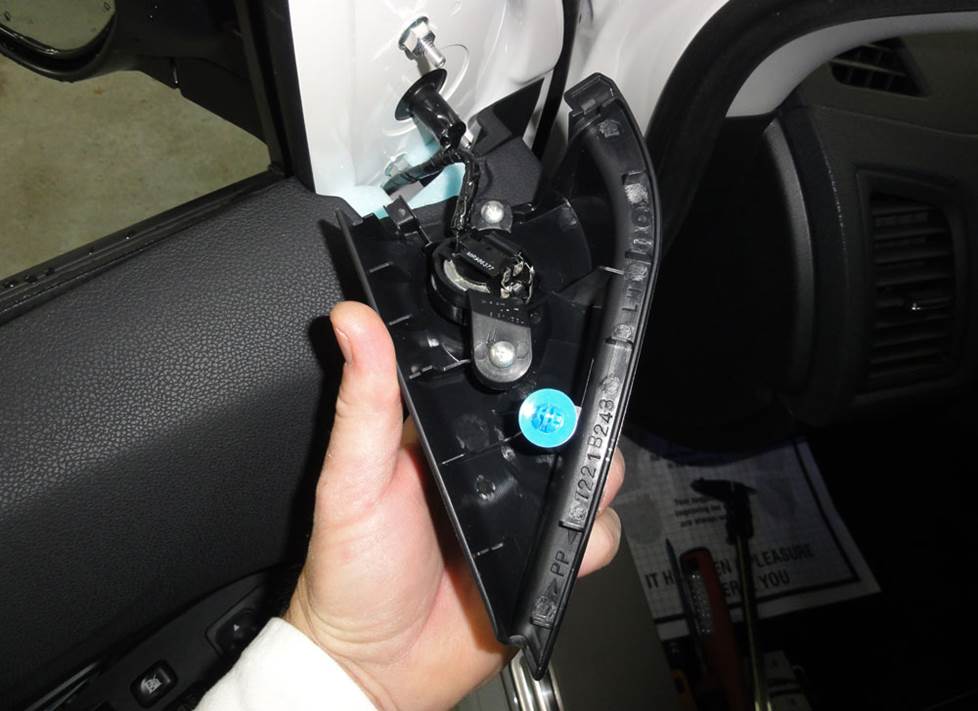
The navigation radio looks a little different, but it comes out in basically the same way (Crutchfield Research Photo)
Removing your Outlander Sport's factory radio
Despite the variety of available radios, the removal and replacement process is pretty simple in 2011-2017 Outlander Sport models. Before you get started, you’ll need to disconnect the negative battery cable to prevent any electrical short, then set the parking brake to prevent your SUV from rolling away unexpectedly. Oh, and you did remove the last CD you played, didn’t you? Better check….
For the non-nav radio, you’ll start by placing a clean shop rag on the console to protect the surface. Once that’s done, start at the pry points on the lower edge and use a panel tool to pry out the receiver trim panel to release the retaining clips. Pull the trim panel out, but don’t disconnect the wiring harness. Place the trim panel on the towel before you move on to the next steps.
Detailed stereo and speaker removal instructions

In 2011-2013 models, you’ll remove the four Phillips screws securing the factory radio chassis. Once that’s done, pull the radio out, disconnect everything, and remove it. In 2014-up models, those four Phillips screws secure the radio itself, but everything else is the same.
And everything’s the same for the navigation radio, too. Shop rag, panel tools, Phillips screwdriver, disconnect, remove.
To install the new one, just follow the instructions included with your dash kit and wiring harness, then do all the disassembly steps in reverse. To avoid having to reset the airbag system (which would entail an expensive trip to the dealership), make sure the wiring harness from the dash kit is connected before you reconnect the battery. One the battery is connected, test the new receiver before you button everything up for good, though.

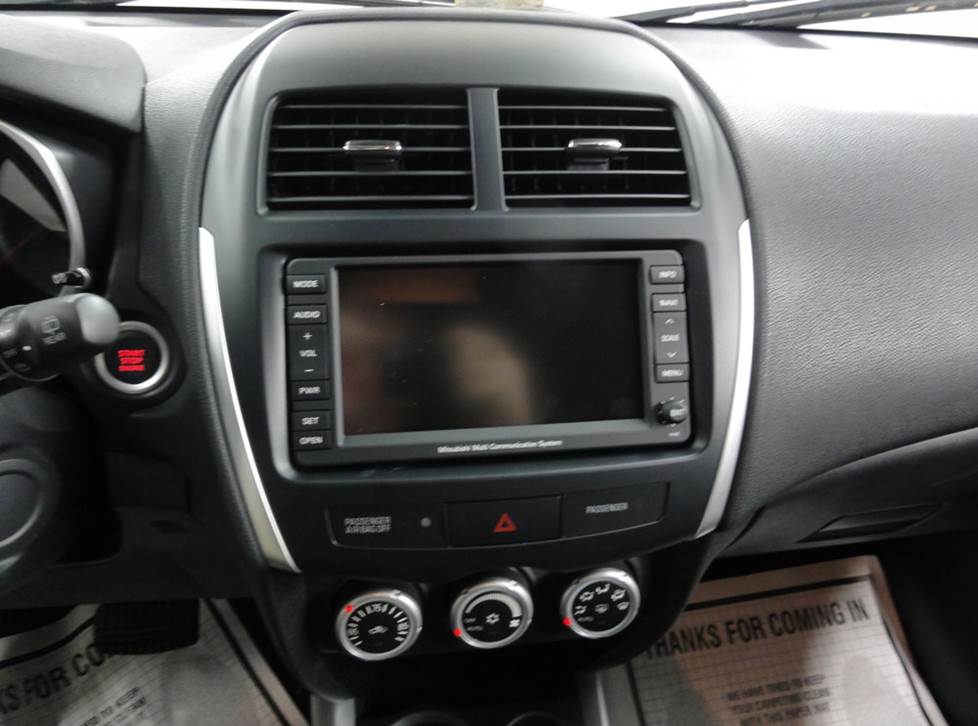
The 2014-up radio is a bit of a change, but the removal process stays the same (Crutchfield Research Photo)
Removing and replacing the radio in this SUV is a great project for the beginning car audio DIY-er. And your Crutchfield purchase includes free tech support for the life of your gear, so even if you run into trouble, our Virginia-based experts are here to help you.
Tools needed: Panel tool, Phillips screwdriver, shop rag
Read our Car Stereo Buying Guide for shopping tips and advice.
Shop for car stereos that fit your Mitsubishi Outlander Sport
Steering wheel audio controls
It's relatively easy to retain your Outlander Sport's steering wheel audio controls when you install a new stereo. When you enter your vehicle information, our database will choose the adapter you need to make your factory steering wheel controls work with your new receiver.
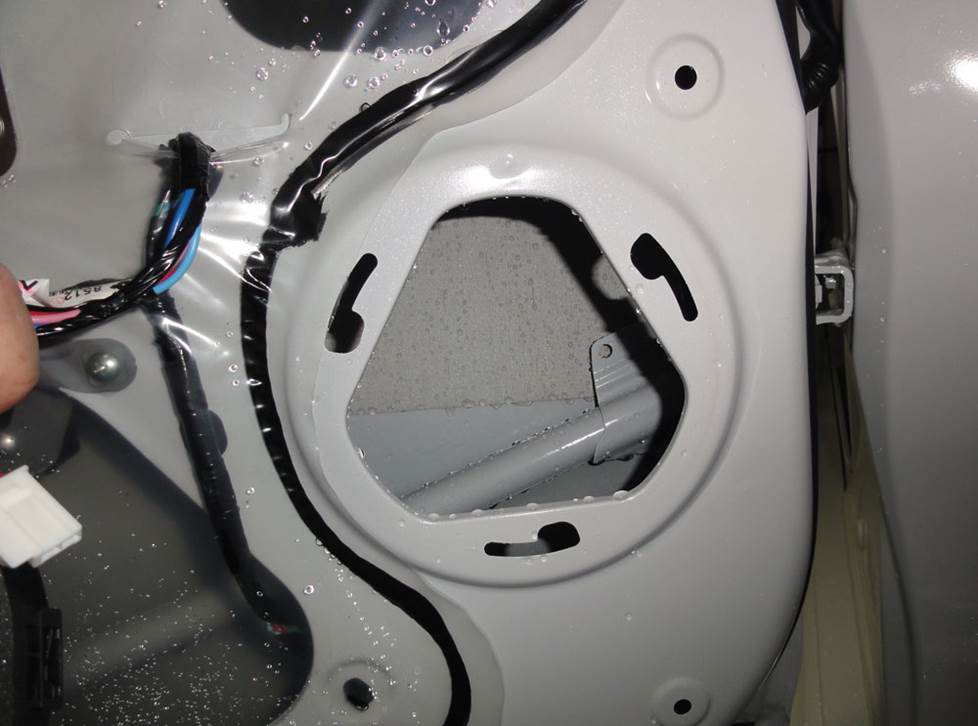
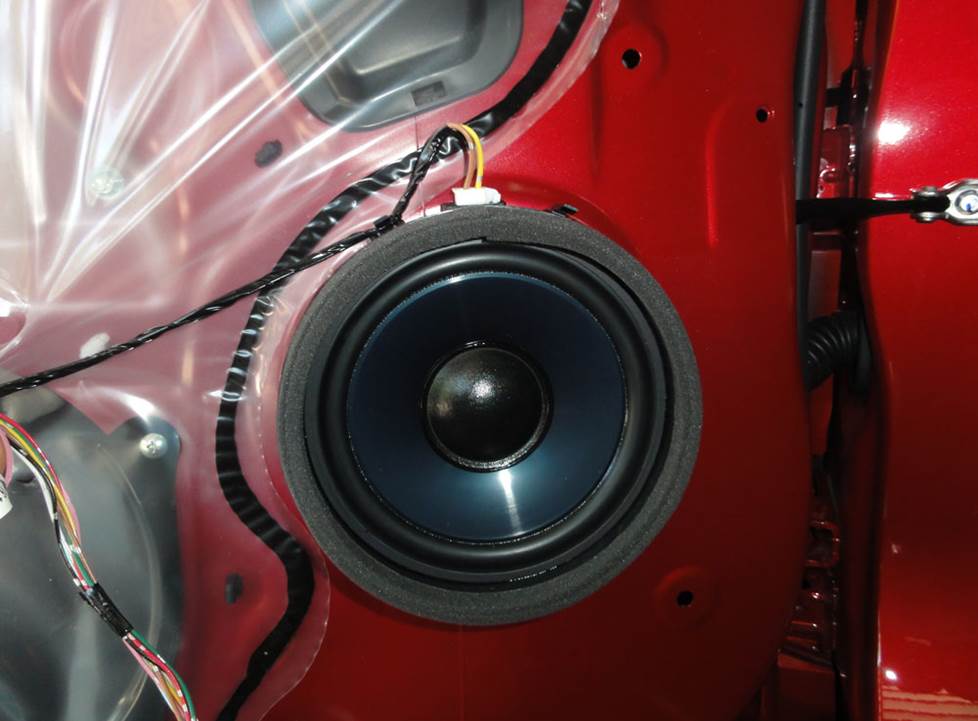
The stock woofers are attached to the door with keyhole slots (Crutchfield Research Photo)
Replacing your Outlander Sport's factory speakers
The speaker removal and replacement process is basically the same for all three systems. You’ll need mounting brackets to install your new speakers, and they’re included with your speaker purchase.
The Outlander Sport's tweeters are very easy to remove and replace (Crutchfield Research Photo)
Removing the front door speakers
The Outlander’s front doors are home to component speakers in both the base and Rockford Fosgate systems. You’ll need to remove the door panels to access the 6-3/4" woofers and 1.539" tweeters, but that’s a very do-able DIY project.
Starting at the top corner, pry off the sail panel to release the retaining clip, then disconnect the wiring harness and remove the sail panel.
Moving down the door, pry out the screw cover behind the door release and remove one exposed Phillips screw. Pry out the screw cover in the door pull cup and that exposed Phillips screw. Next, pry out the sides and bottom of the door panel to release nine clips, then disconnect the wiring harnesses and door lock and release cables. Remove the panel, then store it someplace safe until it’s time to reinstall them.
To remove the tweeter (6-speaker and 9-speaker systems only), you just need to remove two Phillips screws from the rear of the sail panel. There’s no speaker adapter for this location, so you’ll either need to fabricate a bracket yourself or use our universal backstraps to secure the new tweeter. There’s also no wiring adapter, so you can splice, solder, or use Posi-Products speaker connectors to connect the tweeter to the factory wiring.
Tools needed: Panel tool, Phillips screwdriver
You'll need to remove the door panels to replace the woofers (Crutchfield Research Photo)
The stock woofers are attached to the door with keyhole slots, so you’ll need to rotate the speaker counter-clockwise to remove it, then disconnect the wiring harness.
Once the speakers are connected and secure, test them out to make sure they’re working properly. If they are, and if the windows and locks are also working properly, you’re ready to re-install the door panels.
Tools needed: Panel tool, small flat blade screwdriver, Phillips screwdriver, drill with 1/8" bit
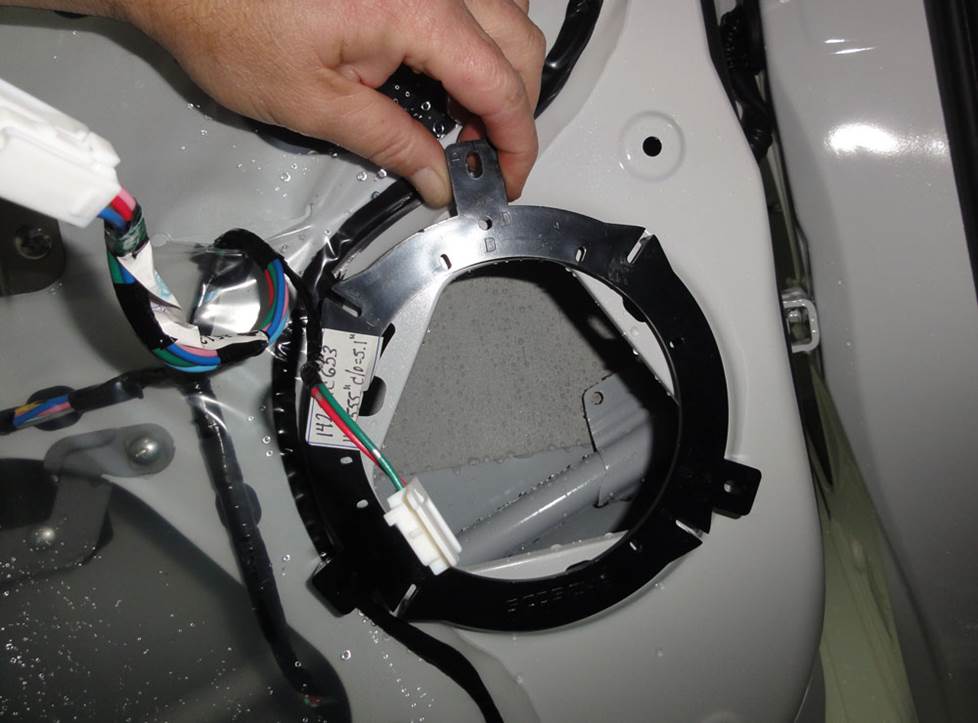
When you order your speakers from Crutchfield, we'll include the mounting brackets you need to install them (Crutchfield Research Photo)
Removing the rear door speakers
Removing and replacing the rear doors speakers is remarkably similar to the process used on the front doors, so we’ll save us some keystrokes and you some time here. The complete, step-by-step instructions can be found in your Crutchfield custom disassembly instructions, so you’ll be good to go.
The same assortment of 5-1/4", 6-1/2", or 6-3/4" speakers will fit in these locations.
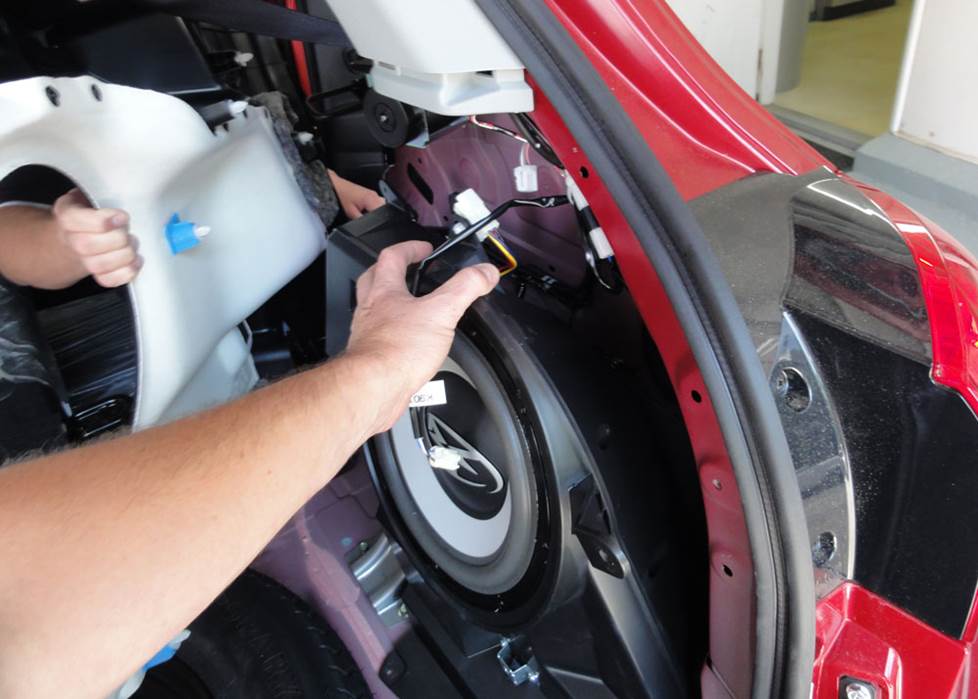
Getting to the Rockford Fosgate subwoofer isn't easy, but there are plenty of great sounding 10" aftermarket subs that will work in your Outlander Sport (Crutchfield Research Photo)
Removing the rear subwoofer
The Rockford Fosgate system’s 10" subwoofer can be found in the passenger’s side of the cargo area. Getting to it isn’t exactly hard, but there are a lot of disassembly/reassembly steps involved, so the job will require patience, organization, and a fair chunk of time.
Once you’re ready to install your new aftermarket sub, you’ll need to cut off two locator pins to allow the new sub to mount flush. You’ll also need to drill new screw holes to mount the subwoofer in the enclosure. On the upside, though, you won’t need an additional wiring harness for this location!
Tools needed: Panel tool, #2 and #3 Phillips screwdriver, 10mm and 14mm socket, ratchet and extension, drill with 1/8" bit
Read our Car Speakers Buying Guide for more information.
Shop for speakers that fit your Mitsubishi Outlander Sport
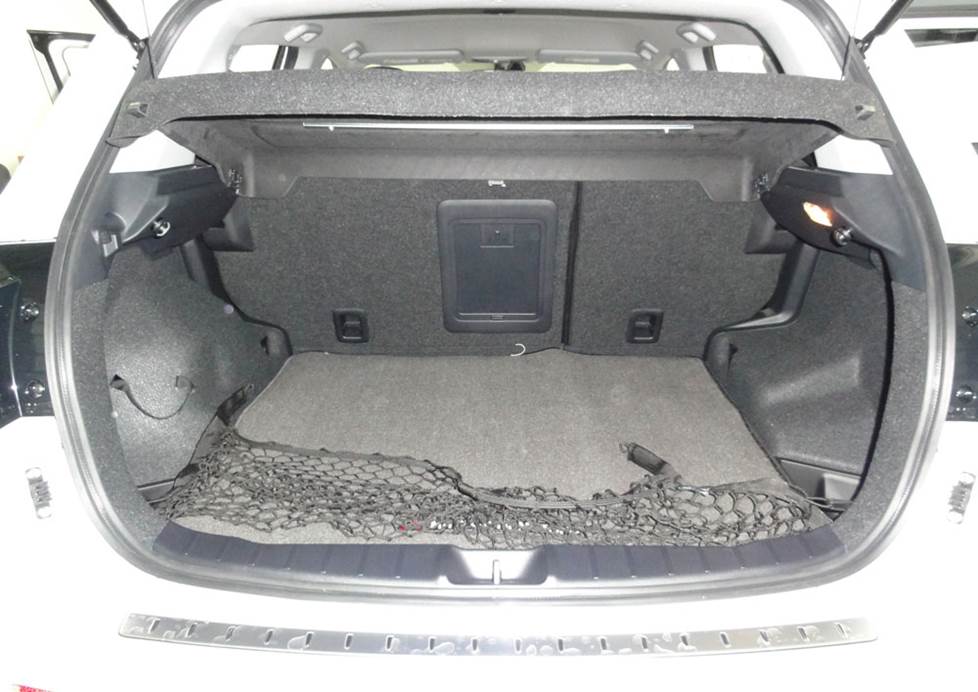
Want more bass? The Outlander Sport has plenty of space (Crutchfield Research Photo)
Bass in your Outlander Sport
If you want maximum bass, the Outlander Sport offers a 39" W x 17" H x 22"/31" D space for a subwoofer and a subwoofer box in the cargo area. If you’re more concerned with balancing bottom-end thump with real-world practicality, you can go with a powered subwoofer and improve your sound without taking up too much cargo space.
Learn more about building a bass system in our Car Subwoofer Buying Guide.
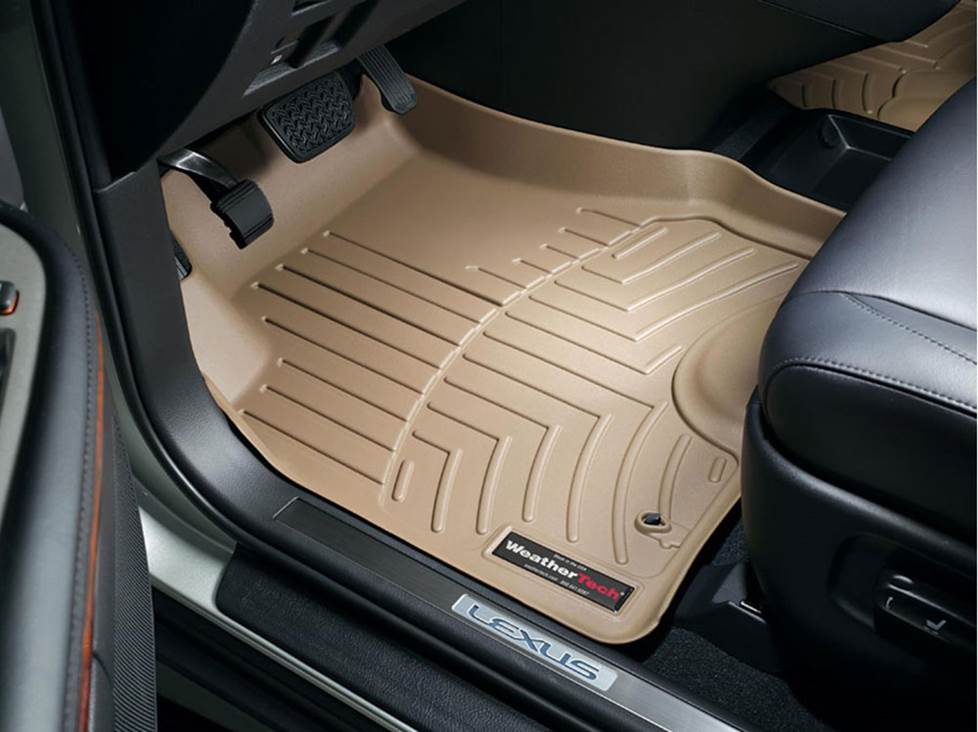
A set of WeatherTech floor liners in your Outlander Sport will protect your carpets from dirt and spills
Other options for your Outlander Sport
Here are some other cool upgrade ideas for your crossover.
Dynamat to reduce road noise
Like most compact (-ish) crossovers, the Outlander Sport can get a little loud sometimes. While vault-like silence is probably unattainable, there are some things you can do to hear more music and less exterior noise. Lining the doors with Dynamat when you install your new speakers can really help you hear the sounds you want to hear.
Add an amp (or two) for better sound
A new amplifier will help you get the most out of your new speaker system. You'll get cleaner power (and a lot more of it), which will result in much, much better sound. A mono amp can provide the juice you need for your new subwoofer, too. You can learn more about adding amps to your system in our Car Amplifier Buying Guide.
Floor liners to preserve the carpet
Quality mats and liners from WeatherTech will help protect your vehicle from dirt, damage, dog hair, and discarded coffee cups. At this point in the car's life, the factory mats are probably trashed anyway, so an upgrade will look better and work a lot better.
A security system to protect your valuables
Installing a security system in your Outlander Sport isn't easy (security systems rarely are), but it's less complicated than it could be and it's definitely a good idea. Our Crutchfield Advisors can help figure out what you need to get the job done, but we usually recommend taking your car and new gear to a professional installer.
Let's get started!
Ready to shop? Use our vehicle selector to find the gear that will fit your car or truck. If you have questions, give us a shout via phone, chat, or email


Jason Folkerts from Urbana
Posted on 1/18/2023
For those of us with 2 USB ports on a 2018-19 model, what is the reason for the recommendation to not install an aftermarket head-unit? Can you provide more information about any loss of functionally, installation challenges, etc?
Crutchfield Writing Team from Crutchfield
on 2/10/2023
Jeff from Maypearl, TX
Posted on 1/19/2022
This is a great article to get you started on your quest for awesome sound. My thoughts on the 2018 model: Changing out the speakers isn't all that difficult and it's the same process from 2011-2019 (if I'm not mistaken) and the door speaker harness adaptors are actually the same as as the Metra 72-8104 speaker connector for select Toyota vehicles. It should be noted that the factory tweeter location for the base model stereo (4 speaker) actually has signal going to the tweeter harness connection (I was told that it most likely runs with the front door speakers and has an in line capacitor to filter out the mid and low frequencies, so adding a standalone tweeter there is always an option to and extra sound staging - it's what I did). Adding an aftermarket head unit is a bit challenging and there are adaptor harnesses and interfaces that will allow you to retain factory options like steering wheel controls, backup camera and even the factory USB locations. Adding an amp(s) and sub(s) is somewhat challenging, but it can be done and the Crutchfield advisors will be more than helpful in assisting you there.
Jon Paul from Crutchfield
on 1/20/2022