2011-up Chrysler 300
How to upgrade the stereo system in your 300

In brief: This Crutchfield Research Garage article gives you an overview of your Chrysler's stock stereo system and your aftermarket upgrade options. We'll tell you all about:
- The factory stereo system
- Removing the factory radio
- Removing the factory speakers
- Adding more bass
- Other options for your 300
Then, use our vehicle selector to find the gear that will fit your vehicle.
Overview of the Chrysler 300
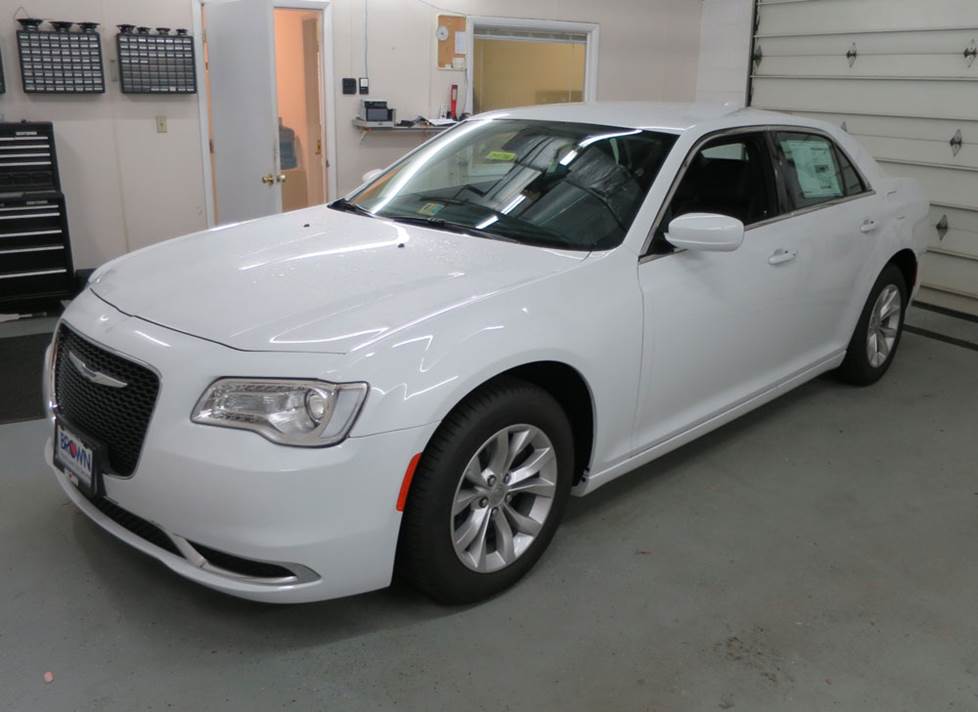
The classics never seem to go out of style, they say, and the Chrysler 300 is definitely a classic example of what a V8-powered, rear-wheel drive American luxury car is supposed to be. It’s big, it’s comfortable, it’s stylish, and it devours highway miles with effortless ease. Plus, it has all the "presence" you could ask for in a car, which is an increasingly rare commodity. They will see you coming in a 300. And they’ll probably hear you coming, too.
Not much of that Hemi rumble makes it into the well-insulated cockpit, though, so the 300 is an excellent home for aftermarket stereo gear. There are some limitations to what you can do with the factory radio, but no matter which stock system you’re starting with, there are plenty of ways to take your sound from okay to awesome.
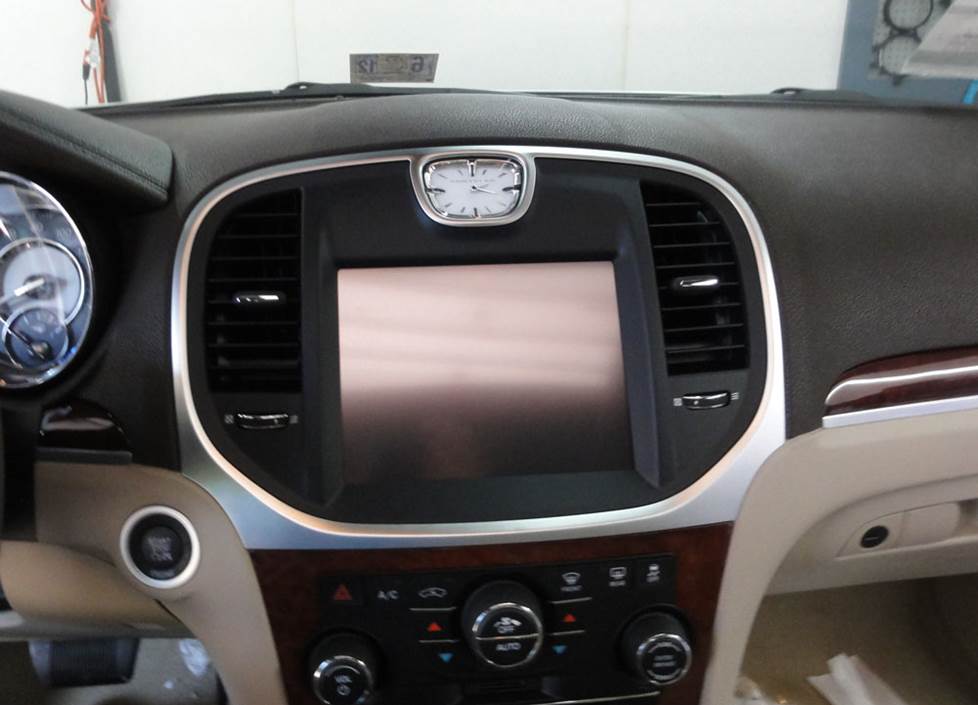
The degree of difficulty for radio replacement in the 300 depends on which factory model you’re replacing (Crutchfield Research Photo)
The factory stereo system
Over the years, the 300 has been offered with a variety of stock stereo systems from Alpine, Beats, and Harman Kardon, plus a base system. You’ll have either 6 or 10 speakers to work with, and while there are some fiddly bits to pay attention to, speaker replacement is generally very do-able for the DIY-er.
The degree of difficulty for radio replacement depends on which one you’re replacing. The 2011-14 models have an 8" LCD receiver that’s not at all hard to reach and replace. A healthy variety of single-DIN (2" tall) and double-DIN (4" tall) aftermarket radios will work in the 300, so you’ve got plenty of cool stereos to choose from.
Detailed stereo and speaker removal instructions

There are dash kits available to match your 300’s interior, and when you buy your new stereo at Crutchfield, you’ll save money on both the kit you choose and the wiring harness adapter you need.
For 2015-up models, the car’s climate controls are thoroughly integrated into the factory radio panel, but there is a iDatalink dash and wiring kit that will allow radio replacement.
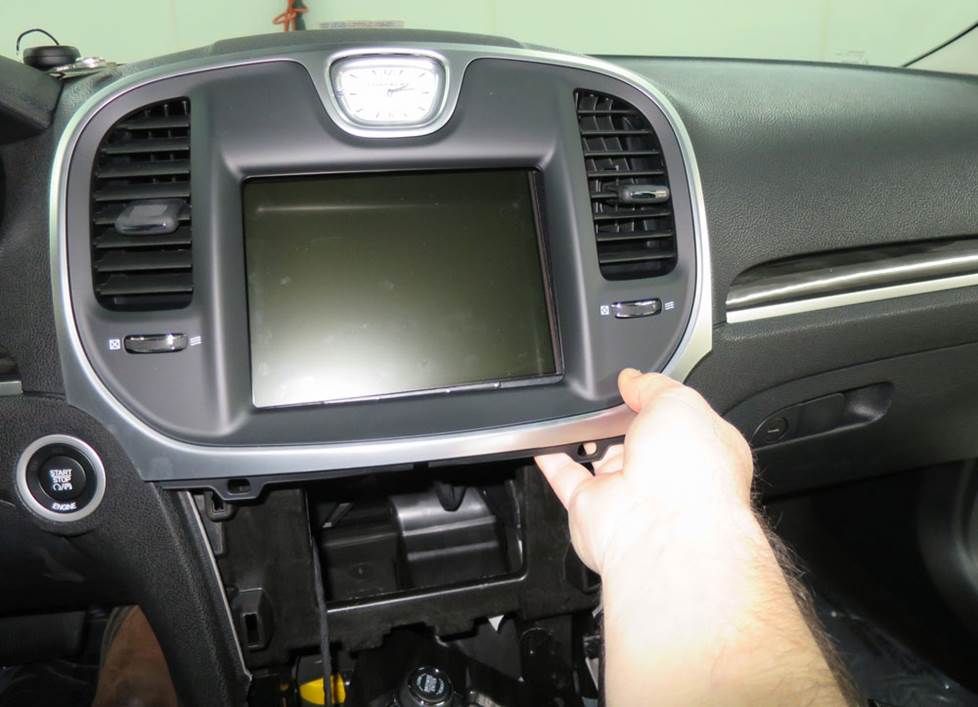
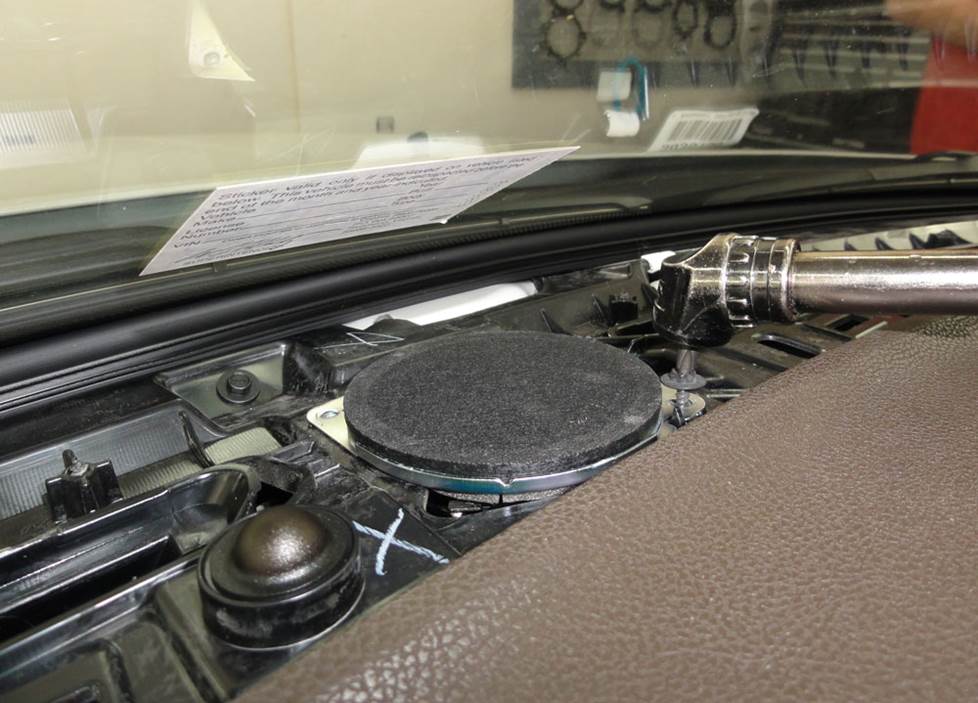
Our custom instructions will show you how to remove the factory receiver (Crutchfield Research Photo)
Removing the factory radio
Before you do anything towards removing and replacing your car’s factory audio gear, set the parking brake and disconnect the negative battery cable. Once that’s done, you’re ready to get to work.
The exact removal process depends on the radio you're removing. We'll include the relevant dash disassembly instructions in the Crutchfield MasterSheet™ that's included free with your Crutchfield car audio purchase.
Tools needed (2011-14): Panel tool, small flat blade screwdriver, Phillips screwdriver
Tools needed (2015-up): Panel tool, Phillips screwdriver
Read our Car Stereo Buying Guide for shopping tips and advice.
[SHOPCARSTEREOS]
Steering wheel audio controls
It's relatively easy to retain your 300's steering wheel audio controls when you install a new stereo. When you enter your vehicle information, our database will choose the adapter you need to make your factory steering wheel controls work with a compatible aftermarket receiver.
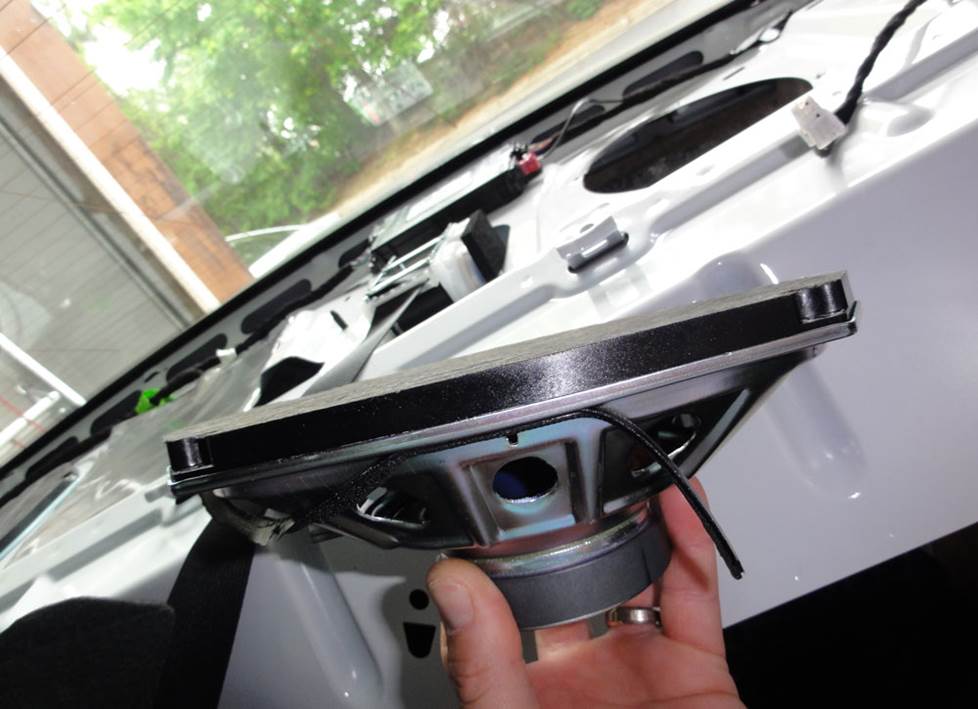
Upgrading the speakers in your 300 will improve your sound — even if you can't upgrade the radio (Crutchfield Research Photo)
Removing the factory speakers
Whether you replace the radio or not, a speaker upgrade will bring better volume and clarity to any kind of music. Here's a quick overview of what's involved in the upgrade process.
The corner and center (shown) speakers are all located under the same dash panel (Crutchfield Research Photo)
Removing the corner/center dash speakers
All 300 factory systems include 3-1/2" speakers in the dash corners, while the 10-speaker systems add another 3-1/2" in the center of the dash. All of them are located under the same dash panel, so removal and replacement is the same either way.
Pull the door gasket away from the body along the front pillar. Next, starting at the top edge, pry the pillar trim panel out to release one retaining clip, then release the retainer tether. Pry out two more clips on the pillar trim panel, then lift and remove. Repeat these steps on the opposite side of the car.
Starting at either side edge, pry out the dash grille panel to release six clips, then pull the panel towards you and remove it. Each stock speaker is secure by two Phillips screws, so remove them, then disconnect the harness and remove the speaker. Keep those screws handy, since you’ll use them to secure the new speakers. Be sure to test the new speakers before you put everything back together.
In vehicles equipped with the Alpine system, replacing the 1- or 2-ohm factory speaker with a higher-impedance aftermarket speaker will result in lower volume levels. Keep that in mind while you’re shopping. If you have questions, give us a call or chat.
Tools needed: Panel tool, right-angle Phillips screwdriver, small flat blade screwdriver
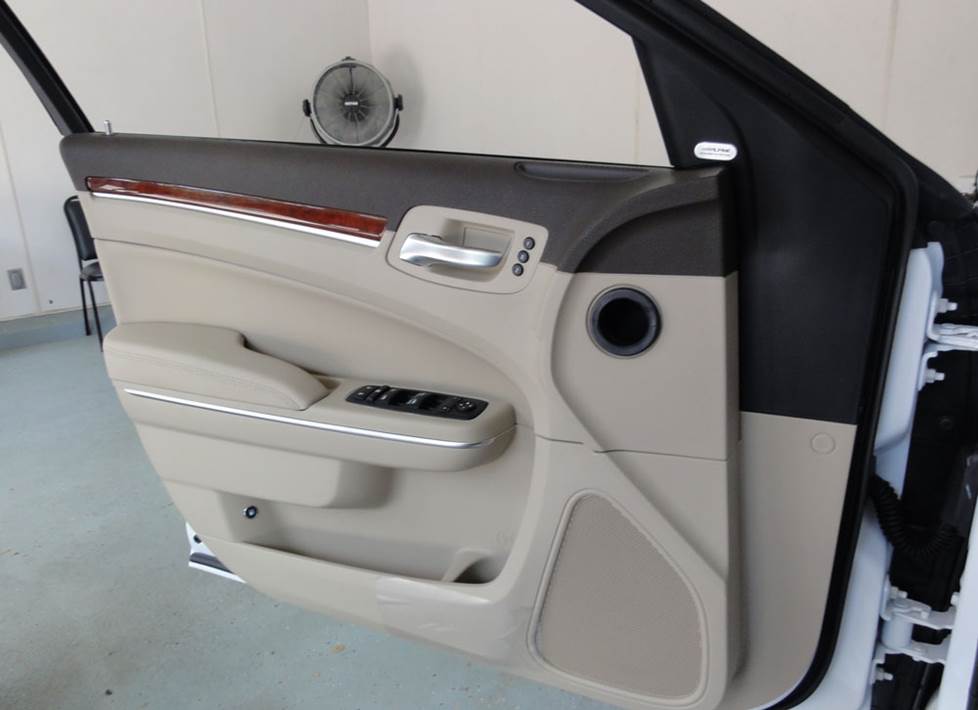
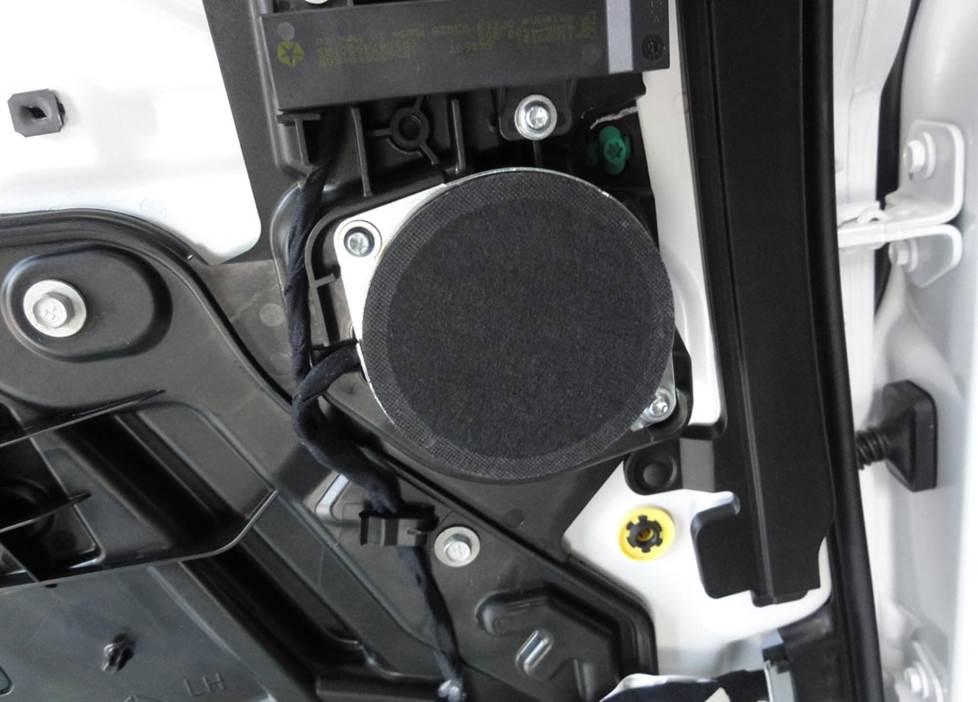
You'll have plenty of options when you decide to upgrade the front door speakers (Crutchfield Research Photo)
Removing the front door speakers
The 300’s front door speakers are 6"x9" units that can be replaced by a variety of same-size or smaller aftermarket models. You’ll need mounting brackets for the smaller ones, and we’ll include them with your Crutchfield speaker order.
Removal and replacement isn’t hard, but there are some fiddly bits to the process. This is still a thoroughly do-able DIY project, though, so grab your tools and get to it.
Use your panel tool to pry out the screw cover behind the door release handle and remove one Phillips screw. Pry out the screw cover behind the door pull handle and remove that Phillips screw.
Remove the Phillips screw and bumper on the rear edge of the door panel. Next, remove the center pushpin clip from the front edge of the door panel by pressing in the center, then prying out the entire clip. Pry up the power options switch panel, then disconnect the harness and remove the switch panel.
Now you’ll pry out the sides and bottom of the door panel releasing ten clips. Lift up the door panel to remove it and disconnect the harnesses and door release cable. Be sure to store these panels someplace safe and dry while you remove four Torx T-25 screws securing the speaker to door. Disconnect the harness and remove the speaker.
The same caveats about the Alpine system apply to these speakers, too, so shop wisely and ask questions if you have them.
Installation Tip: When you’re re-installing the door panel, carefully pry off the window weatherstrip and insert it into the window track in the door. The door panel will then snap onto clips in the weatherstrip. It’s a very nice little time-saver.
Tools needed: Panel tool, small flat blade screwdriver, Phillips screwdriver, Torx T-25 driver, needle-nose pliers
The rear speaker replacement process is quite similar to what goes on up front (Crutchfield Research Photo)
Removing the rear door speakers
The rear doors also sport 6"x9" factory speakers, and these can also be replaced by a variety of same-size or smaller aftermarket models. Mounting brackets are required for the smaller ones, and we’ll include them with your Crutchfield speaker order.
The speaker removal/replacement process is basically the same for the front and rear doors, so we’ll skip the details here since they’re all included in your Crutchfield MasterSheet anyway.
Be sure to test your new door speakers to make sure they’re working before you put the doors back together. Make sure the wires aren’t interfering with the window operation and also test the door lock and release operation.
Tools needed: Panel tool, small flat blade screwdriver, Phillips screwdriver, Torx T-25 driver, needle-nose pliers
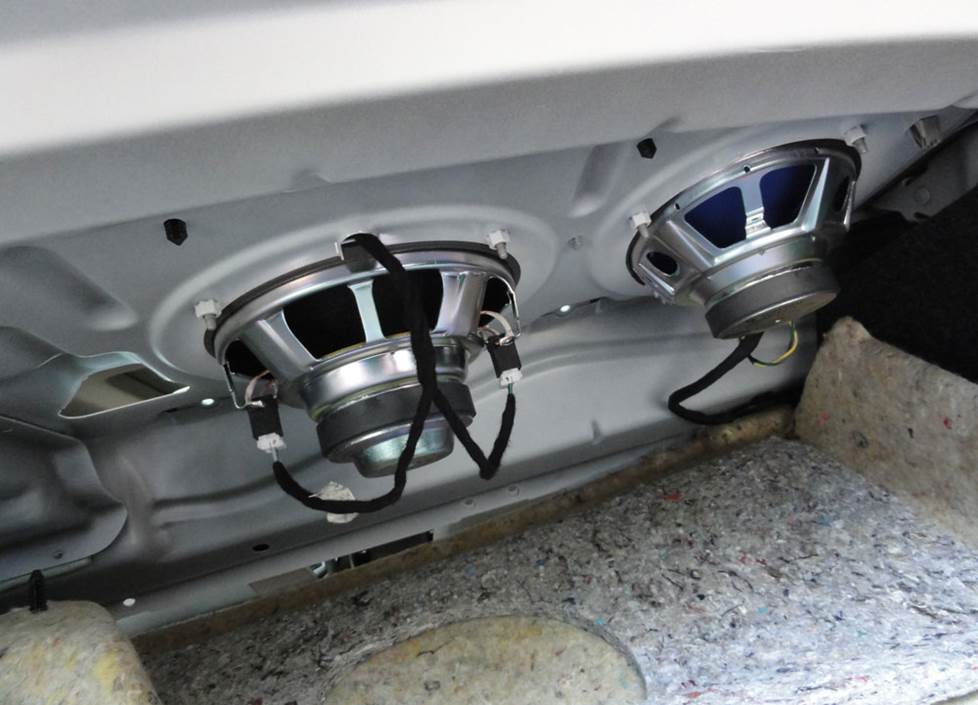
The rear deck will have two speakers and, in some cases, an 8" subwoofer (Crutchfield Research Photo)
Removing the rear deck speakers
Depending on the factory system, your 300’s rear deck will house a pair of 6"x9" speakers and, in the case of the 10-speaker Alpine system, an 8" subwoofer.
In many cars, rear deck subwoofers are a challenge to reach and replace. In the 300, it’s really not that bad. You’ll want to work carefully and you’ll need to stay organized, but you can very much do this.
First off, you’ll fold down the rear seat back and remove one 10mm screw from the side bolster. Pry out the top of the bolster to release one large metal clip, then remove the bolster. Repeat those steps for opposite side, then pry out the two clips along the front edge of the rear deck panel.
Next, starting at the driver's side edge, pull the rear deck panel toward the front of vehicle, bowing the panel slightly in the center to remove. The panel will be tethered to the center seat belt, BTW.
Remove the four 8mm screws securing the speaker to the rear deck, then pry up the speaker, disconnect the harness and remove the speaker.
Depending on the aftermarket speaker (or sub) you choose, you may need mounting brackets to secure it. If so, we’ll include them with your order.
And yes, if your 300 has the 10-speaker Alpine system, replacing the 1- or 2-ohm factory speaker with a higher-impedance aftermarket speaker will result in lower volume levels.
Note: These instructions are for cars without the rear deck power sunshade.
Tools Needed: Panel tool, 8mm and 10mm sockets, ratchet and extension
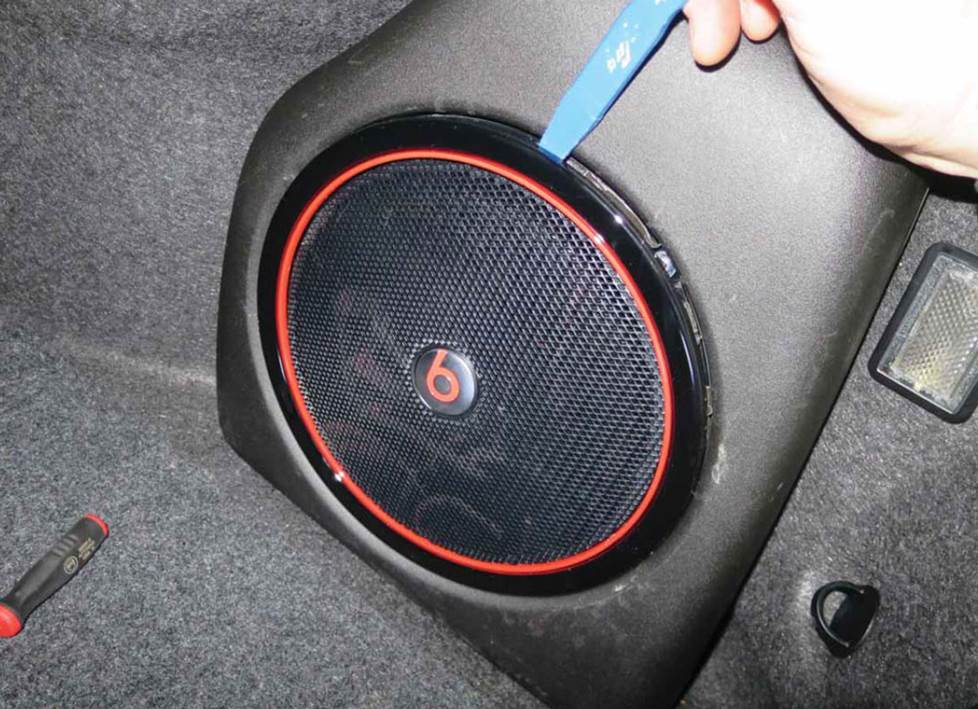
The Beats system includes this 8" trunk-mounted subwoofer (Crutchfield Research Photo)
Removing the trunk subwoofer
In some of the larger systems, an 8" trunk-mounted sub is part of the package. It’s a dual voice coil subwoofer and each voice coil is 2 ohms. This sub isn’t hard to get to, but because it has a 6-hole bolt pattern, you’ll need to drill new screw holes in order to mount a standard 8" aftermarket subwoofer.
That job’s not hard, but any time you’re drilling new holes anywhere in a car, you’ll want to work carefully, know what you’re drilling into, and wear eye protection.
This is a low-impedance subwoofer, so you’ll want to choose a low-impedance aftermarket sub. Installing a standard 4-ohm aftermarket sub will result in lower volume levels, and that’s not what anybody wants out of a new sub, is it?
Complete disassembly info can be found in the vehicle-specific instructions included with your Crutchfield purchase.
Tools needed: Panel tool, Drill & 1/8" bit, Torx T25 driver
Read our Car Speakers Buying Guide for more information.
[SHOPCARSPEAKERS]
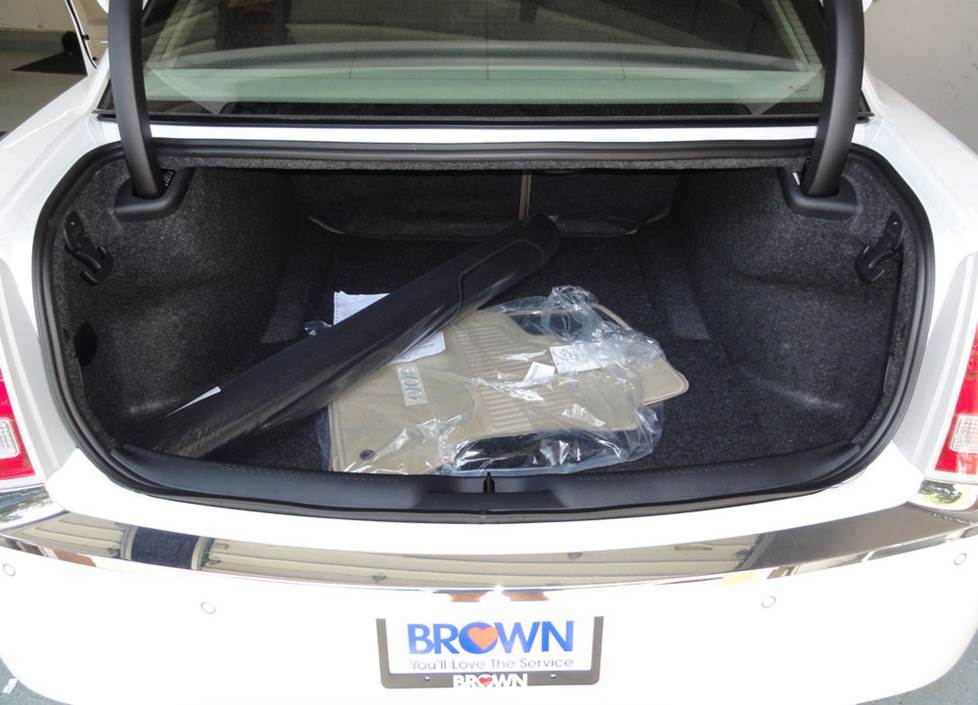
There's plenty of room for a subwoofer box in the 300's spacious trunk (Crutchfield Research Photo)
More bass in your 300
Want even more bass in your 300? There’s plenty of room for a subwoofer box in the trunk. The space available measures 39"W x 16"H x 36"/43"D, so you can stuff something pretty impressive back here.
If you want better sound without trunklid-rattling force or space-eating size, a more compact powered subwoofer will be a nice choice for your 300.
Learn more about building a bass system in our Car Subwoofer Buying Guide.
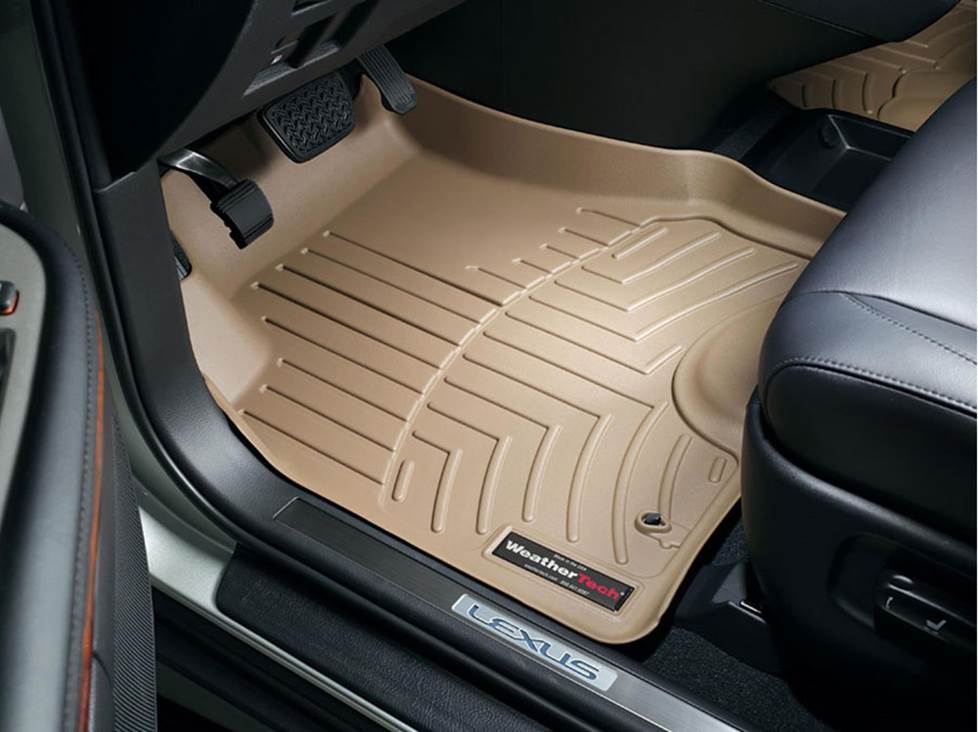
Protect your car's carpeting with a set of custom-fit WeatherTech FloorLiners
Other options for your 300
There are plenty of other ways to improve your Chrysler 300. Here are just a few of them:
Protect the carpets with WeatherTech floor liners
It's easier than you think to mess up your 300's comfy interior while you're going about your daily business. Floor mats and liners from WeatherTech will help protect your floors from dirt and damage.
Dynamat
The Dynamat 10435 Xtreme Door Kit is the perfect way to seal in sound. This heavy-duty insulating material is easy to install, and it really makes a difference. One kit will take care of the front doors. If you install a big sub in your 300, you might want to line the trunk lid as well.
Remote start and security systems
You can also talk to your Crutchfield Advisor about a security system. They’re not as easy to install (we usually suggest letting a professional do the job), but we can help you choose a system that’ll work in your vehicle.
Let's get started!
Ready to shop? Use our vehicle selector to find the gear that will fit your car or truck. If you have questions of your own, give us a shout via phone or chat.


Comments (0)