2012-2018 Ford Focus
How to upgrade the stereo system in your Focus

In brief: This Crutchfield Research Garage article gives you an overview of your car's stock stereo system and your aftermarket upgrade options. We'll tell you all about:
- The factory stereo system
- Removing the factory radio
- Removing the factory speakers
- Adding more bass
- Other options for your Focus
Then, use our vehicle selector to find the gear that will fit your vehicle.
Overview of the Ford Focus
The third-generation (or Mk III, if you prefer) Focus was a big step forward for Ford’s popular compact. For one thing, it’s on the same platform as the Focuses (Focii?) sold internationally, which saved some money and also produced a very good car. These two outcomes are not often mentioned in the same sentence, so that’s remarkable by itself.
When the Focus debuted in 2012, the new compact contender got glowing reviews from the press and, once some early quality issues were ironed out, the buying public seemed to like them, too. And judging by the sheer number of them still on the road, they still do. Makes sense to us, especially since there are several of these sharp-looking, practical cars in our parking lots.

The stock stereo systems were okay, but some of them are getting on in years and if you want to enjoy your Focus for a few more years, an audio upgrade might be a good idea. Whether you have the sedan or the hatchback, the job’s not that hard and you can do it yourself. Read on to learn more about what you can do and how to do it.
EV note: We haven’t had a chance to research the Focus Electric, which is not all that surprising, since it’s a limited-production car. Heck, some of you have probably never heard of the thing. But if you own one and you might be interested in doing your own research and sharing it with us, we should talk. Until we learn more, let’s just say that upgrading the stereo gear can get complicated in an electric vehicle. Here are a couple of things to keep in mind:
- Electric vehicles contain very sensitive electronics. Be sure to only use a multi-meter when testing wires. NEVER test wires in this vehicle with a test light. Doing so could cause serious damage to the vehicle.
- An EV is not the car to choose if you want to build a massively powerful audio system. We do not recommend installing any amplifiers in electric vehicles due to the current draw that they will introduce to the system.

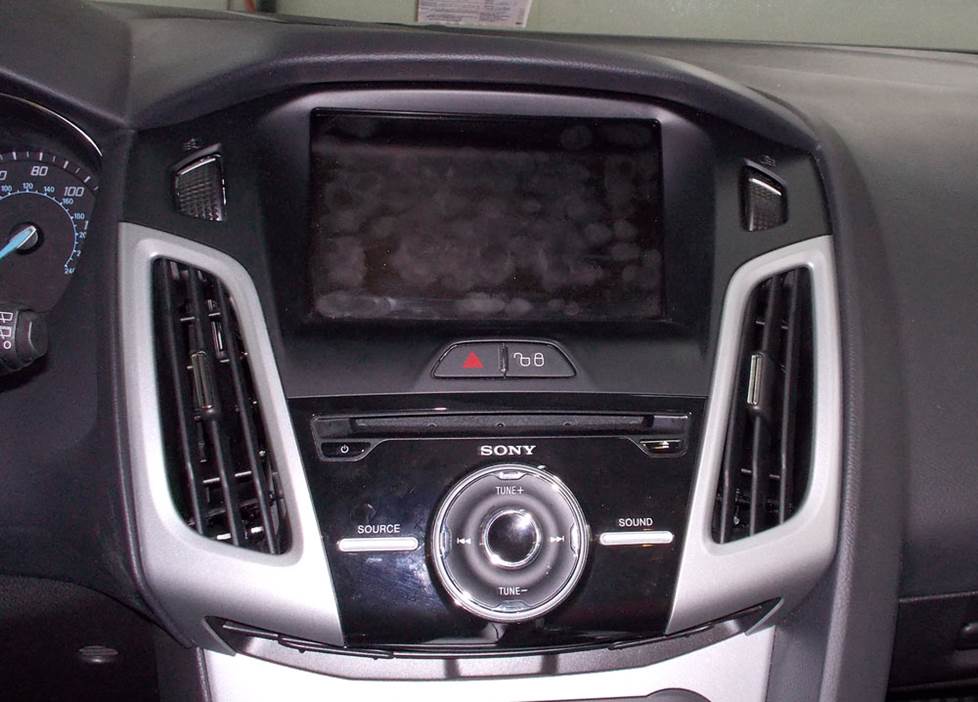
The early (2012-14) radios have a very definite "alien invader from the future" look to them. But yes, there is a dash kit that'll work here. (Crutchfield Research Photo)
The factory stereo system
A mid-cycle refresh in 2015 updated the Focus in both style and substance, but the stock stereo array stayed basically the same throughout. There’s a 4-speaker base model, a 6-speaker upgrade, and a top-shelf 10-speaker Sony system.
You’ll need the right wiring harness adapter to keep factory features like SYNC when you replace the stock radio, and our vehicle selector will make sure you get what you need. We’ll get a bit more into the weeds on that topic below.
If you’re planning to bypass the factory amplifier, we recommend either adding an aftermarket amp or replacing the low-impedance factory speakers with standard 4-ohm aftermarket speakers. Either step will prevent overheating and other damage to your new radio.
Questions? Give us a call or chat.
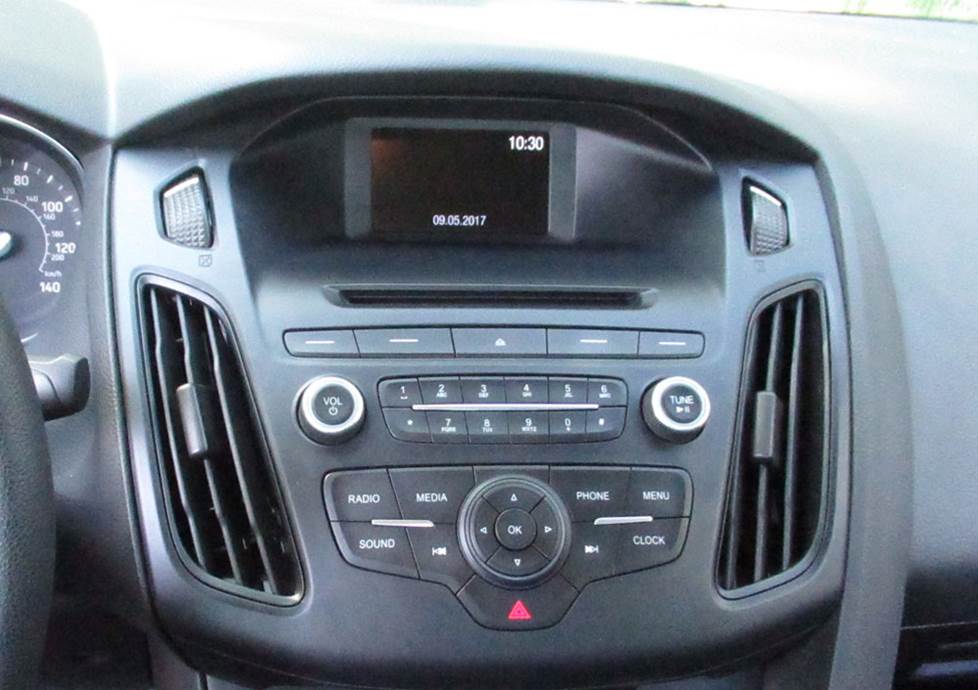
The 2015 refresh produced a more normal-looking center dash, regardless of which receiver is present. (Crutchfield Research Photo)
Removing the factory radio
Before you do anything else, set the parking brake and disconnect the negative battery cable to prevent any electrical shorts. Better safe than sorry, as they say. And by "they," we mean "we."
2012-2014 Focus
In 2012-14 models, the factory radio removal and replacement process is the same for all factory audio systems. When you replace the factory radio, you'll lose the factory AUX and USB input connections, but those things are pretty easy to find in most modern aftermarket stereos. You'll lose the factory SYNC, Bluetooth, and satellite radio tuner (if present) unless you install an iDatalink-compatible receiver and use the correct wiring harness adapter.
Here's a somewhat smudgy view of the 2013 Sony nav receiver. Hey, we were trying it out.... (Crutchfield Research Photo)
If this sounds like it could be a bit confusing, don’t worry. When you enter your vehicle information, you’ll see the radios (and speakers) that fit your Focus, plus the harnesses that work and the dash kit you’ll need to install your new stereo. And we’ll even give you a nice break on the price of this installation hardware.
To remove the old radio, you’ll start by using a panel tool to pry out the screw cover above the climate controls, removing the cover, then removing the two exposed Torx T-25 screws. Next, starting at the bottom edge, pry out the receiver control panel to release six clips, then disconnect the harness and remove the panel. From here, just remove the two Torx T-20 screws securing the receiver chassis to the dash, disconnect the harnesses, and remove the radio chassis.
Tools needed: Panel tool, Torx T-20 & T-25 drivers
2015-2018 Focus
Removing the 2015-18 model's 4.2" LCD or 8" LCD factory radio involves a bit more work, but it’s still well within the capabilities of the average car audio DIY-er. And if you hit a snag, every Crutchfield car audio purchase includes free tech support for the life of the gear.
To remove the radio, use a panel tool to pry down the passenger airbag light panel to release four clips, then disconnect the harness and remove the panel. This will expose two Torx T-25 screws, which you’ll need to remove, too.
Next, open the glove box door, then pry out four clips securing the right-hand side console trim strip and remove the strip.

In this shot, we're well on our way to removing a 2015 nav receiver. The job's not that hard and you can do it yourself. (Crutchfield Research Photo)
Pry up the gear shifter trim panel to release six clips, then remove the trim panel. Place the gear shifter in the lowest position to get it out of the way for the next steps.
Now, pull the climate control assembly toward the rear of the vehicle, then pry out the receiver control panel to release four clips. Disconnect the harnesses and remove the receiver control panel. Remove the two Torx T-25 screws securing the receiver chassis, then disconnect the harnesses and remove the chassis.
As with the earlier models, you’ll need the right harness to keep your factory features, whether you’re replacing the base receiver or the 8" Sony LCD receiver with all the bells and whistles. You’ll see what works with your car when you enter your vehicle information, and if you have questions, you can call or chat with a Crutchfield Advisor.
Tools needed: Panel tool, Torx T-25 driver
Read our Car Stereo Buying Guide for shopping tips and advice.
Shop for car stereos that fit your Ford Focus
Steering wheel audio controls
In most cases, it's reasonably easy to retain your car's steering wheel audio controls when you install a new stereo. When you enter your vehicle information, our database will choose the adapter you need to make your factory steering wheel controls work with a compatible aftermarket receiver.
Speaker replacement is reasonably simple in the Focus, and the sound improvement will be well worth the effort. (Crutchfield Research Photo)
Removing the factory speakers from your Focus
Speaker replacement is a great way to boost the sound in your Focus, even if you don't plan on upgrading the factory radio. The work isn't all that difficult, so it's an excellent project for even the first-time car audio DIY-er.
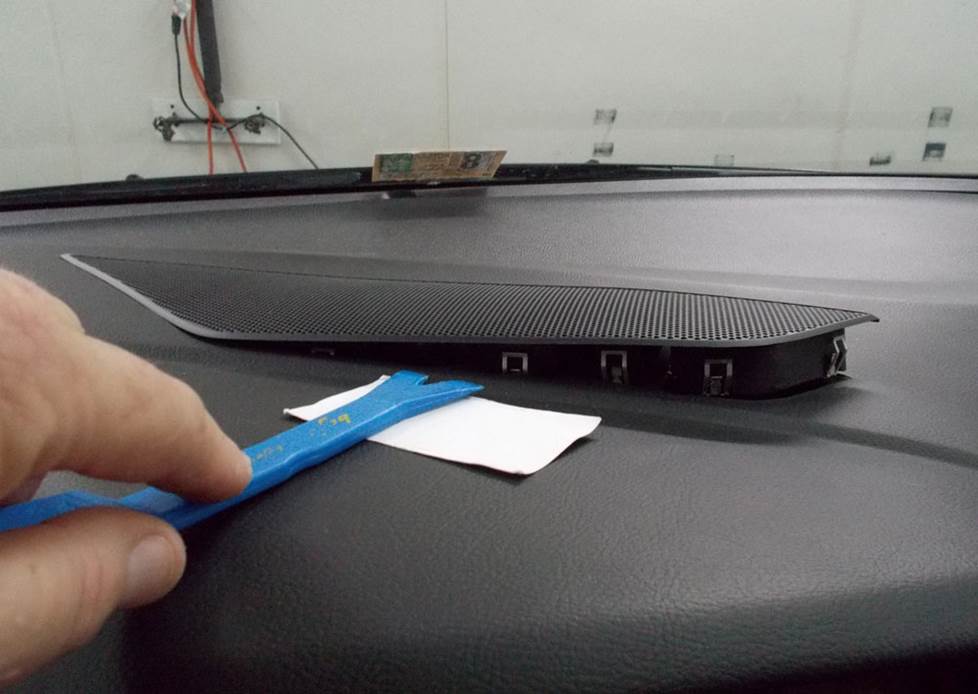
A well-placed piece of scrap paper will protect the dash while you're removing the center dash speaker. (Crutchfield Research Photo)
Removing the center dash speaker
The premium Sony systems include a 3-1/2" speaker in the center of the dash. Removing and replacing this speaker is very easy, so it should definitely be a part of the plan if you’re upgrading a Sony system.
While protecting the dash with a piece of paper, carefully pry up the center dash grille This will release 14 retaining clips, after which you’ll remove the speaker/grille assembly, disconnect the harness, and remove the assembly. Once all that’s done, remove the two Torx T-25 screws securing the speaker to the grille and remove the speaker.
Plenty of aftermarket speakers will fit here, but a wiring harness is not available. To connect the new speaker to the car’s wiring, you’ll need to splice, solder, or use Posi-Products speaker connectors.
Tools needed: Panel tool, Torx T-25 driver
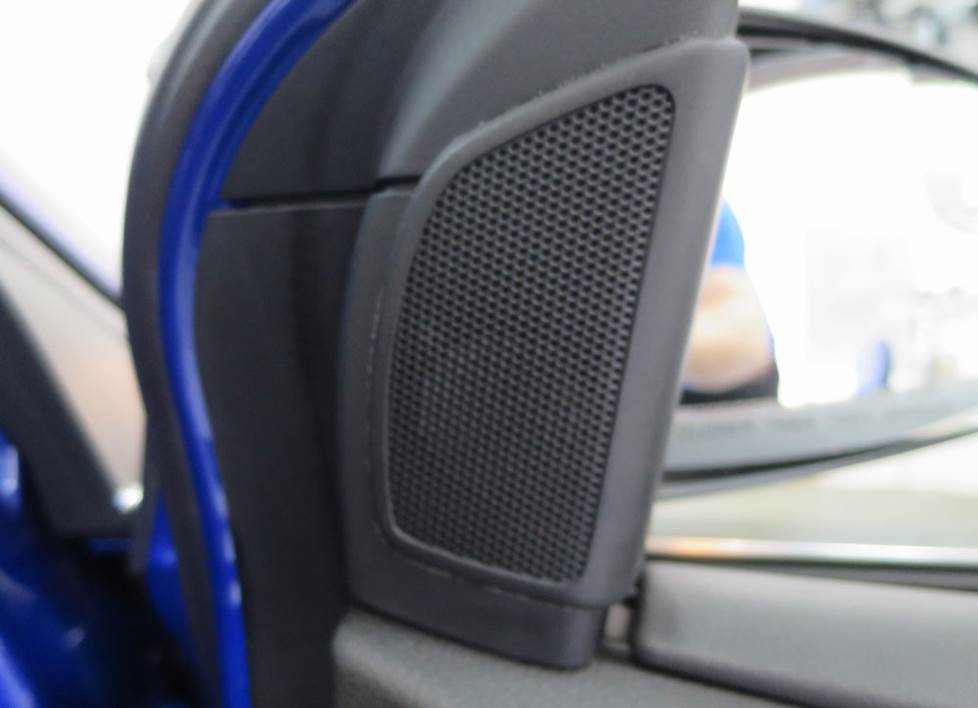
These sail panel tweeters are quite easy to remove and replace. (Crutchfield Research Photo)
Removing the sail panel tweeters
In non-Sony cars, you’ll find 1.643" tweeters in the front door sail panels. To remove them, start at the rear edge and pry out the sail panel grille, then disconnect the harness and remove the tweeter/grille assembly. Once that’s out, pry the tweeter out of the grille to release three clips, then remove the tweeter.
There’s no wiring harness for this location either, so you’ll need to splice, solder, or use Posi-Products speaker connectors. And while there are plenty of component tweeters that physically fit here, you’ll still need to use hot glue, silicone, or our universal backstraps to secure them.
Tools needed: Panel tool, small flat blade screwdriver
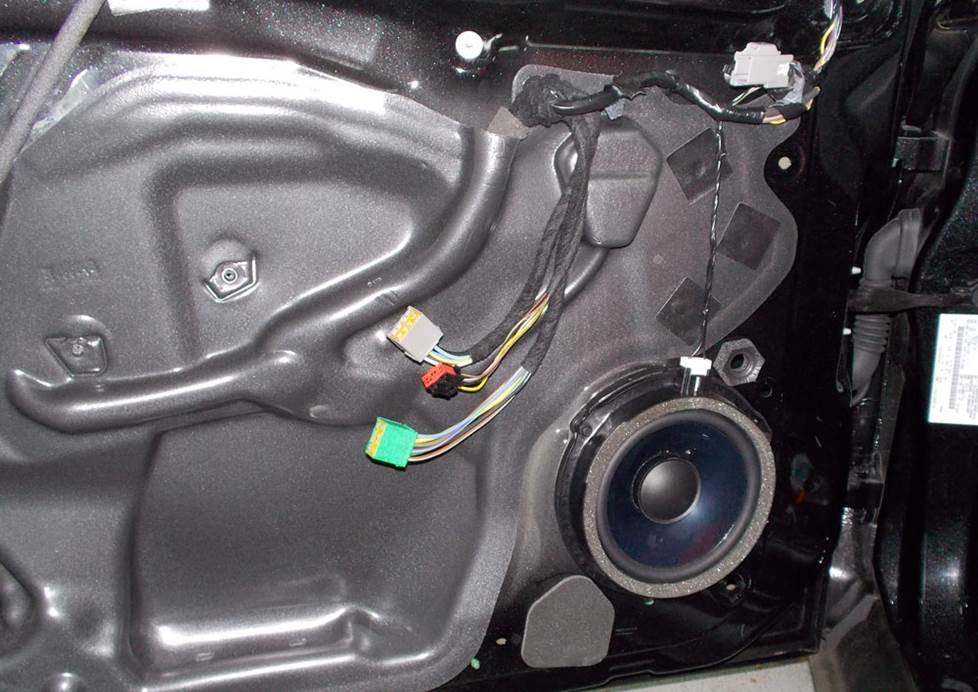
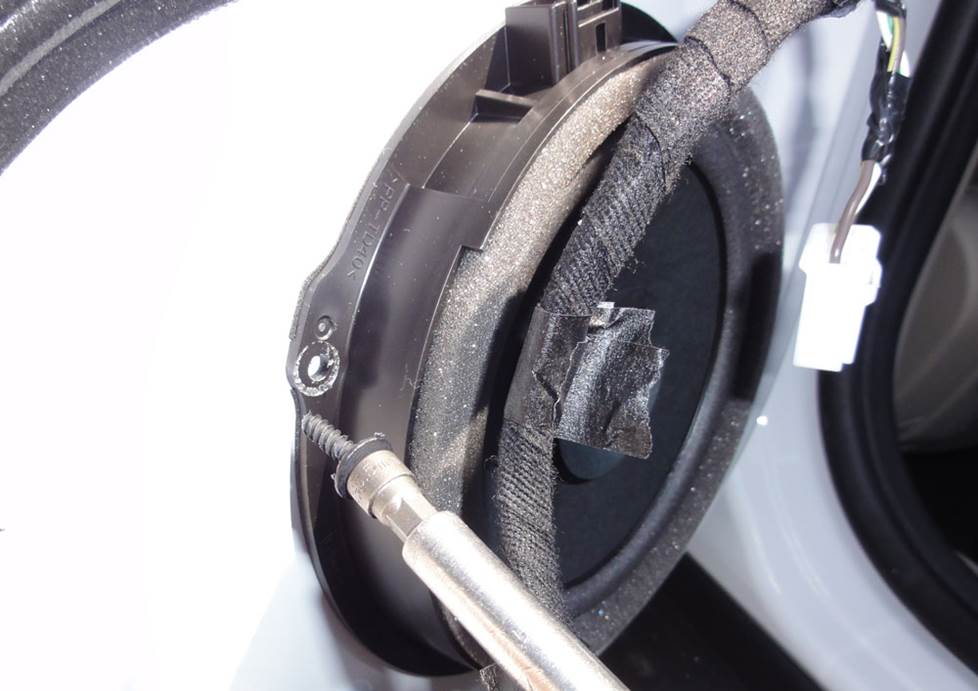
You'll need to remove the door panels to get to the front door speakers. (Crutchfield Research Photo)
Removing the front door speakers
The front doors house a pair of 6-3/4" speakers (woofers, technically), and the removal and replacement process is the same regardless of whether you’re starting with a base system or the Sony system. A variety of same-size or 6-1/2" speakers will work here, so there’s plenty to choose from. You’ll need mounting brackets for some of them, and we’ll include them with your speaker purchase.
In some cases, you’ll need to drill two new screw holes to mount the aftermarket speaker bracket to the door steel. This isn’t exactly hard, but you are drilling holes into your car, so you’ll want to work carefully and definitely wear eye protection.
All the step-by-step disassembly instructions can be found in the Crutchfield MasterSheet™ included with your speaker purchase.
Be sure to test the speakers before you start putting things back together.
Tools needed: Panel tool, Torx T-25 driver, 7/32" socket, ratchet and extension
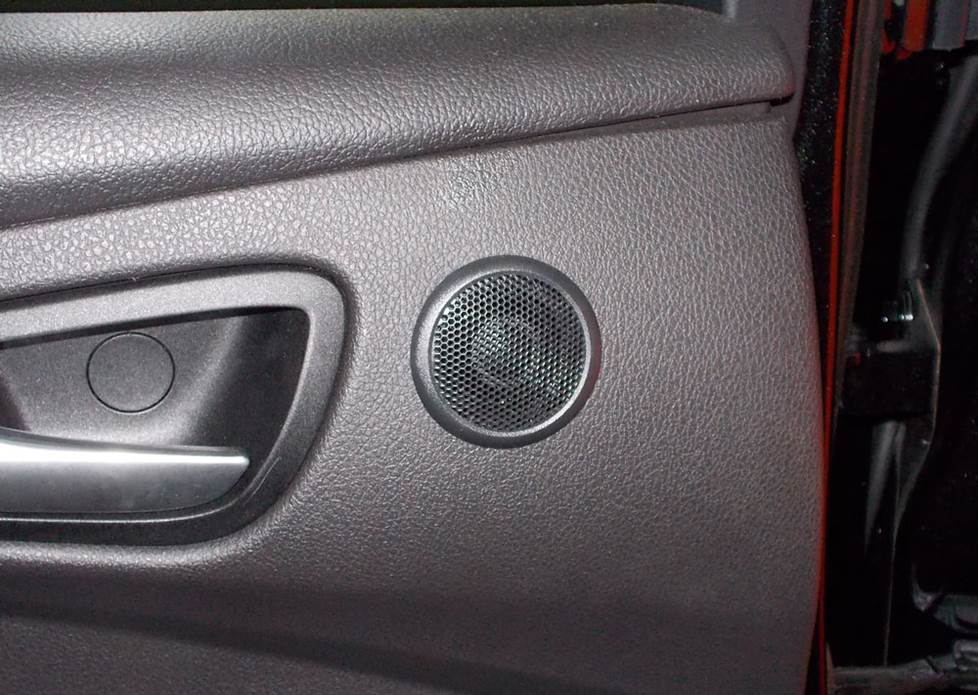
The Sony system includes component speakers in the rear doors. This, as you've probably guessed, is one of the tweeters. (Crutchfield Research Photo)
Removing the rear door speakers
The rear doors also house 6-3/4" factory speakers. The base models have a pair of full-range models, while the Sony system offers a pair of woofers and a matching pair of tweeters.
The removal and replacement process for the rear doors is very much like what gets done with the front doors, and it’s all covered in the illustrated, step-by-step disassembly instructions included with your Crutchfield car audio purchase.
Mounting brackets, if needed, will be included with your speaker purchase. In some cases, you’ll need to drill two new screw holes to mount the aftermarket speaker bracket to the door steel, so be careful and wear eye protection.
For Sony-equipped cars, there’s no wiring harness available for your aftermarket tweeters, so you’ll need to splice, solder, or use Posi-Products speaker connectors back here. Your new tweeters will be a bit smaller than the 1.637" factory models, so you’ll need to use hot glue, silicone, or our universal backstraps to secure them.
Tools needed: Panel tool, Torx T-25 driver, 7/32" socket, ratchet and extension
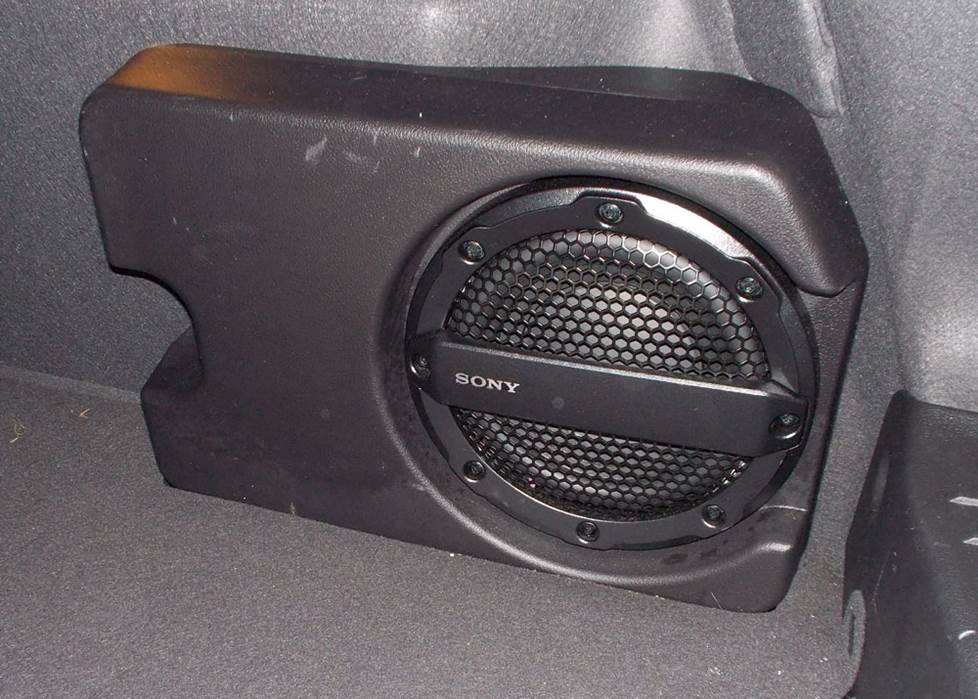
This 8" subwoofer can be found in Sony-equipped Focus hatchbacks. It's pretty easy to reach and replace. (Crutchfield Research Photo)
Removing the rear side panel subwoofer
Hatcback models equipped with the Sony system sport an 8" subwoofer mounted in an enclosure on the passenger side of the cargo area. This is a low-impedance speaker, so replacing it with a standard 4-ohm aftermarket subwoofer will result in lower volume levels.
Depending on which aftermarket sub you choose, you may have to drill new mounting screw holes or fabricate a speaker bracket. We’ll let you know if this is the case before you buy anything.
On the other hand, you can always bypass the stock amplifier and install an aftermarket bass system (see the next section). If you have sub/amp questions, give us a call or chat. Our experts will help you find the right bass solution for your Focus.
Removing the stock sub is pretty simple.
- First, you’ll remove the eight Torx T-25 screws securing the grille to the enclosure and remove the grille.
- Next, remove one 10mm nut securing the front of the enclosure.
- Remove the cargo floor panel, then remove the foam block on the passenger's side.
- Remove the two 10mm nuts securing the bottom of the enclosure, lift it up, disconnect the harness, and remove it.
- Finally, remove the 8mm bolt securing the back of the woofer to the enclosure, then remove the woofer.
In most cases, you’ll need to trim off three plastic location tabs from the woofer mounting surface to allow your new sub to fit flush in the enclosure. This will not affect reinstallation of the factory sub, should you ever need to do that.
Tools needed: Torx T-25 driver, 8mm & 10mm socket, ratchet and extension
Read our Car Speakers Buying Guide for more information.
Shop for speakers that fit your Ford Focus

if your Focus hatchback doesn't already have a subwoofer like this one does, there's plenty of room in the cargo area for a sub box. (Crutchfield Research Photo)
More bass in your Focus
If your Focus doesn't have a factory sub or you want to replace it with something bigger and better, you have some options. The sedan offers a 40" W x 19" H x 25"/36" D space, so there's a decent amount of space for a subwoofer box. The hatchback gives you a slightly different space, but the basic dimensions are the same because of the cargo cover.
If you don't want to fill up your cargo area with space-eating box of bass, you might want to check out our selection of powered subwoofers.
Learn more about building a bass system in our Car Subwoofer Buying Guide.
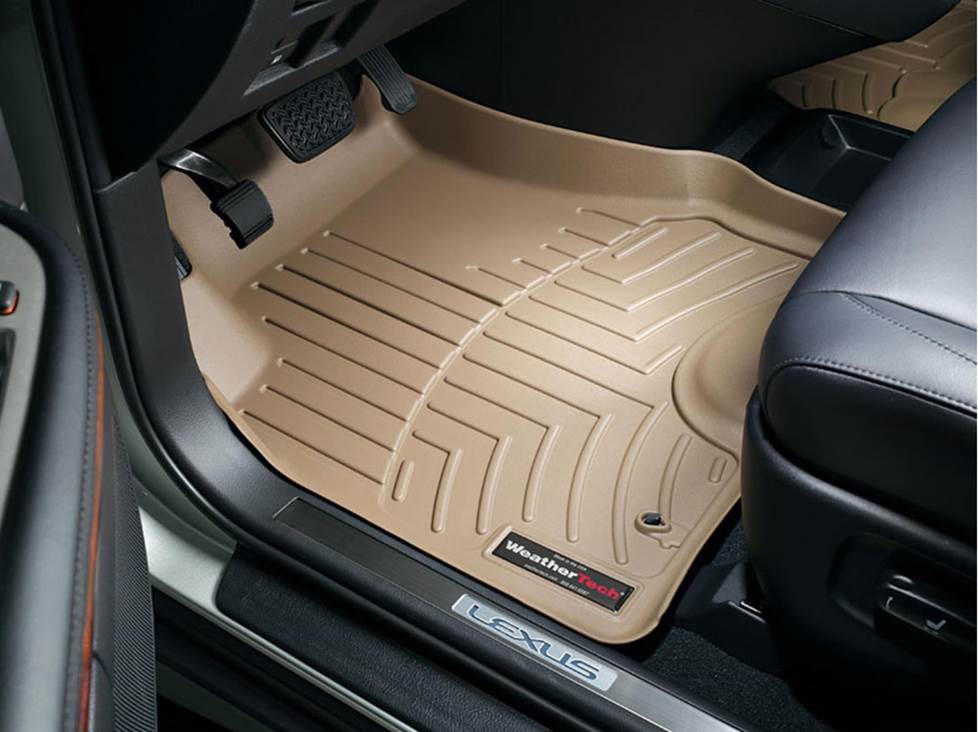
A set of custom-fit WeatherTech floor liners will protect the carpeting in your Focus
Other options for your Ford Focus
Here are some other smart upgrade ideas for your Focus.
Protect the carpeting
Daily life has a way of destroying factory carpeting, even if you're careful. Floor mats and cargo mats from WeatherTech will help protect your floors from dirt and damage.
Add an amp (or two)
A new 4-channel amplifier will help you get the most out of your new speakers. You'll get cleaner power (and a lot more of it), which will result in much, much better sound. A mono amp can provide the juice you need for a new subwoofer, too. Learn more about adding amps to your system in our Car Amplifier Buying Guide.
Add a sound processor for better sound from your factory radio
If you choose to keep the stock radio, install a sound processor to send a clear, clean signal to your new amp. Sound processors remove any limitations on the signal imposed by the factory radio. The better the signal, the better the sound. Read our article explaining factory sound processors to learn more.
A security system will protect your car
Installing a security system in your Focus isn't easy (security systems rarely are), but it's definitely a good idea. Our Crutchfield Advisors can help figure out what you need to get the job done, but we usually recommend taking your car and new gear to a professional installer.
Let's get started!
Ready to shop? Use our vehicle selector to find the gear that will fit your car or truck. If you have questions of your own, give us a shout via phone, chat, or email.
Free lifetime tech support is included with every Crutchfield purchase.


Comments (0)