Adding some clarity and fun to a new Subaru
Upgrading the audio and installing a Thule bike rack to a 2015 Subaru XV Crosstrek

Mark, an IT specialist, knew he wanted to perform two upgrades on his new 2015 Subaru XV Crosstrek. But instead of paying a professional installer like he had done in his previous vehicle, Mark asked his good friend (and Crutchfield car audio buyer) Stephen if he could install all of this gear himself. He was understandably hesitant, but Stephen let him know that with help from Crutchfield, he definitely could.

Ready to tackle Virginia's beautiful Skyline Drive, Mark unloads his bike from his new Thule rack.
Sizing up the factory stereo system
When I first began talking to Mark about new audio gear for his XV Crosstrek, I immediately sensed his passion for music. As we went for a spin in his new car, he showed off a wide variety of music playing from his iPhone®. He told me he wasn't getting the clarity, depth, and detail he wanted out of his music. Everything seemed to be jumbled in the mid-range. Mark's also a self-admitted tech geek, and he told me about a DJ app he had written for the music at his wedding. So, I knew he was serious about getting the most out of his music in his new ride.
Mark originally wanted to replace the factory radio because he wanted to incorporate some new technologies to work with his iPhone, although he admitted he hadn't fully toyed around with the factory radio. He was disappointed to learn that a receiver installation kit hadn't yet been released for his dash at the time, so a new radio wasn't an option right away. However, installation kits are now available for this Subaru, so he can upgrade the stereo if he wants.

The Subaru's factory radio offered some cool features, and Mark could certainly work with it for now.
We managed to restore Mark's excitement by letting him know that a speaker change would pay immediate dividends to his audio upgrade. Aftermarket speakers generally have larger magnets, tougher cone material, and pliable surrounds. What's all that mean? It means Mark's getting a bigger sound with more punch, better definition, and improved clarity from all instruments in the music.

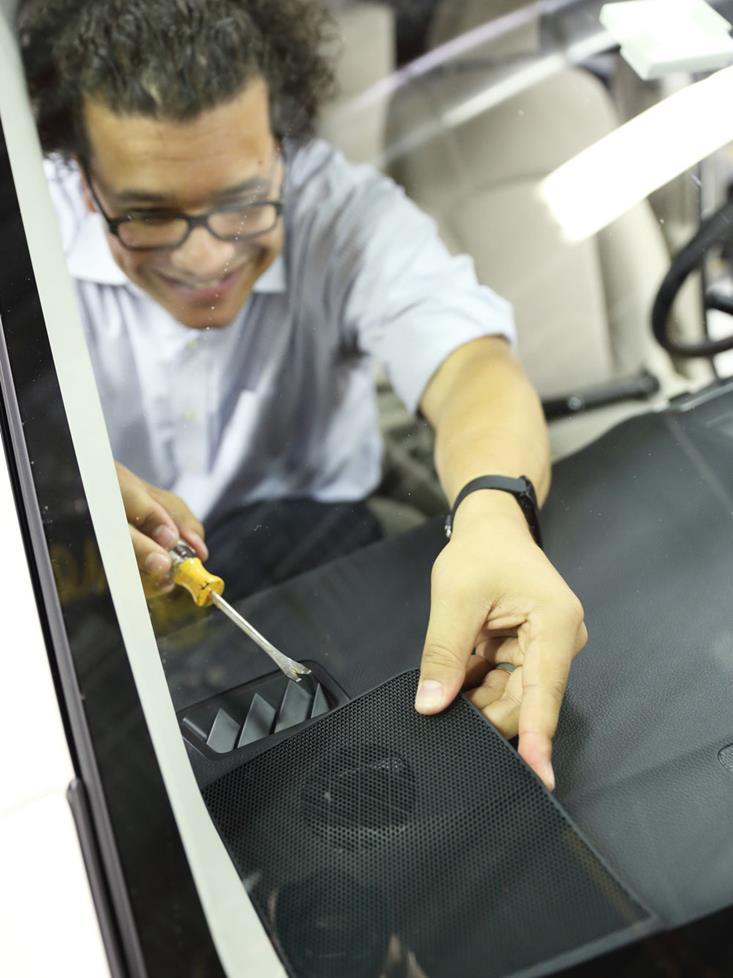
Removing the factory speakers
Crutchfield was still in the process of creating the MasterSheet instructions for Mark's Subaru at the time of his installation, but Crutchfield's vehicle research team already had all the information we needed for Mark to be able to remove the factory speakers from his XV Crosstrek. Mark began by prying off the dash tweeter grilles. Next, he simply unscrewed two screws and detached the wiring harness. This first step served as a great confidence booster for Mark.
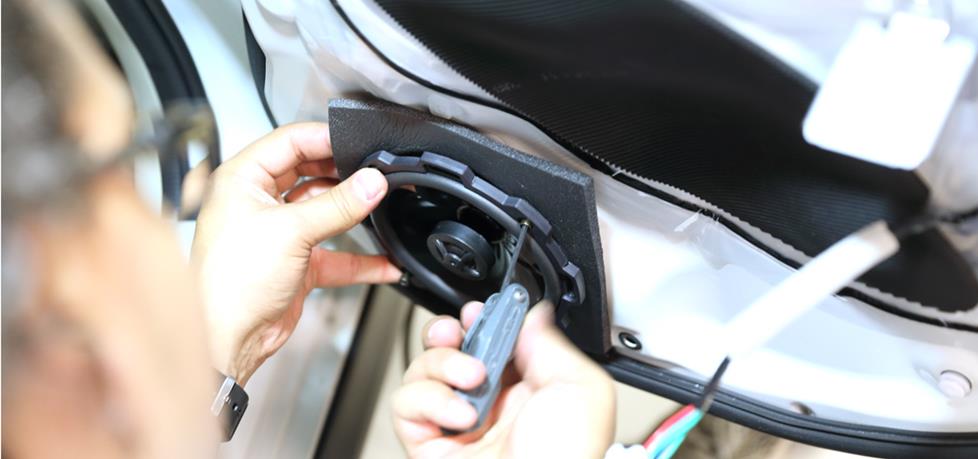
After the tweeters were out, he moved to the four door speakers. Using Bojo pry tools, Mark popped off each of the door panels, disconnected the wiring harnesses, and detached the door lever cables so he could get to the stock speakers. He took out the screws holding the speakers in place, pulled out the speakers, and detached the wiring harnesses.
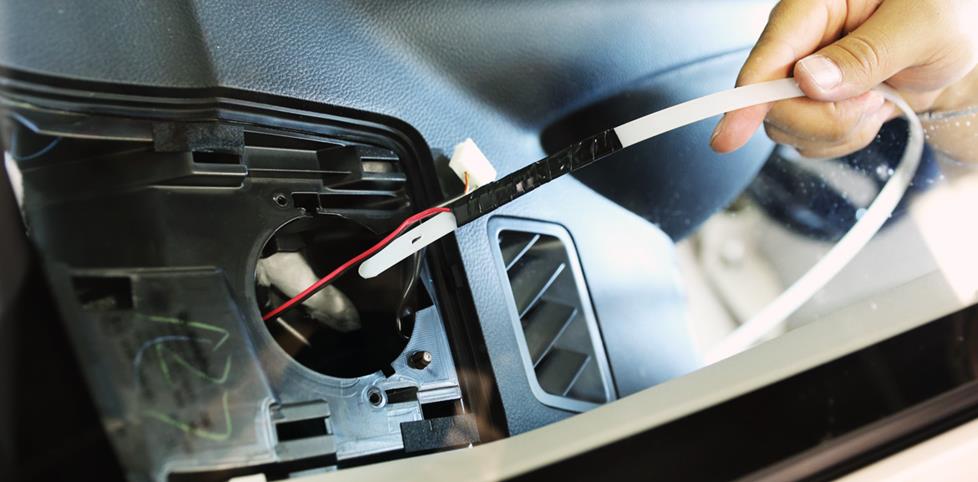
Mark uses a Wire Worm to fish the speaker wire through the dash tweeter opening.
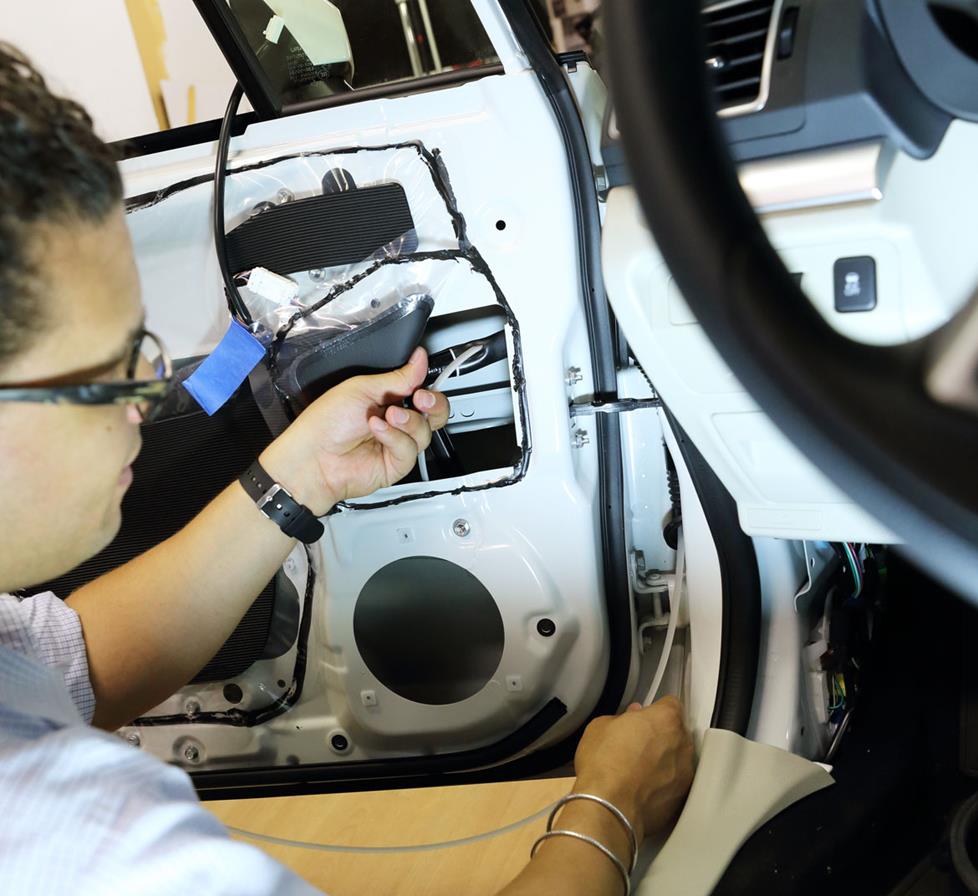
Mark works the speaker wire through the door, so he can link the woofer and tweeter.
Prepping for the component speakers
The position of the factory tweeters created a unique challenge for Mark. He was installing Rockford Fosgate Punch P165-SI component speakers up front. These component speakers include separate woofers and tweeters, but Mark had to connect the wires between the tweeter locations in the dash to the woofer locations in the doors.
We instructed Mark to extend the wire that had been included in the box by soldering on an extra length of speaker wire, and then to fish that wire from the tweeter locations, through the door grommets, and to the door locations to connect the woofers. He taped the wire to a Pro.Fit Wire Worm and guided the wire from the dash to the doors, spraying it with some Febreze® to prevent the wire from getting stuck in the rubber grommet.

Installing the tweeters
With the wiring in place, Mark turned to the tweeters. Tweeters generally aren't a "drop-in" replacement in factory locations, so we recommended using universal backstraps to serve as brackets for the dash locations. Mark bent the brackets around the tweeter cups, secured them with screws, and then screwed them in to the dash locations after attaching the wires.
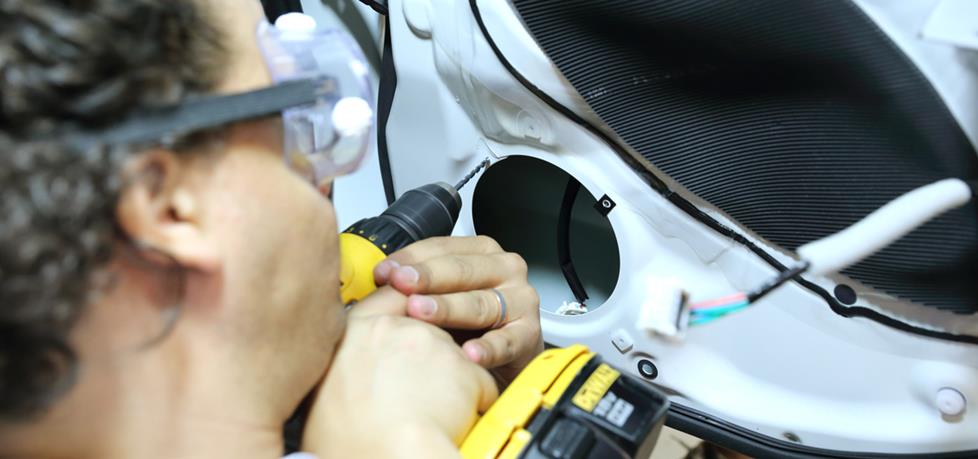
Minor modifications
Like many vehicles, this Subaru's speaker locations didn't offer standard-sized mounting hole patterns. And there aren't any mounting brackets available for the XV Crosstrek to compensate for this, so Mark had to re-drill screw holes to get the new woofers mounted in the front doors and the Rockford Fosgate Punch P152 5-1/4" speakers into the rear doors.
This was understandably the biggest concern of the installation for Mark. The last thing Mark wanted to do was modify his new vehicle, but we reassured him that it really wasn't going to be too difficult, and the modifications wouldn't show up at all once he was done.
Mark used a pen and a speaker to mark the holes on the sheet metal, then made a pilot dimple in the door with a punch and hammer. (The dimple will keep the drill bit on target and prevent it from skittering across the door's surface.)
Since Mark was working with some contours that may not create a good seal between the speaker and metal, we suggested that adding foam baffles behind the speakers would help create that seal and close any gaps. Mark carefully drilled the marked holes, put the speakers in the baffles, and screwed them into the door locations. On the front door speakers, we cut out the back of the baffles, so he wouldn't lose any bass response.

The Rockford Fosgate powered subwoofer looks right at home
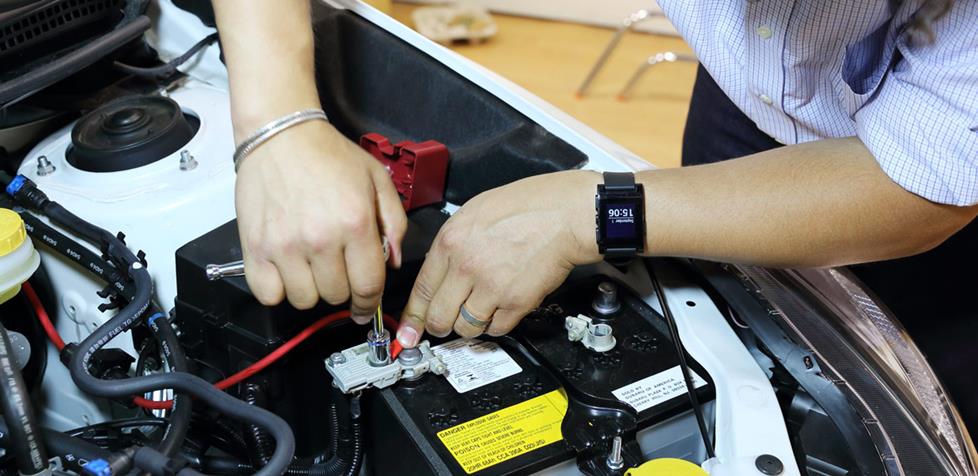
Mark attaches the power cable to the Subaru's battery.
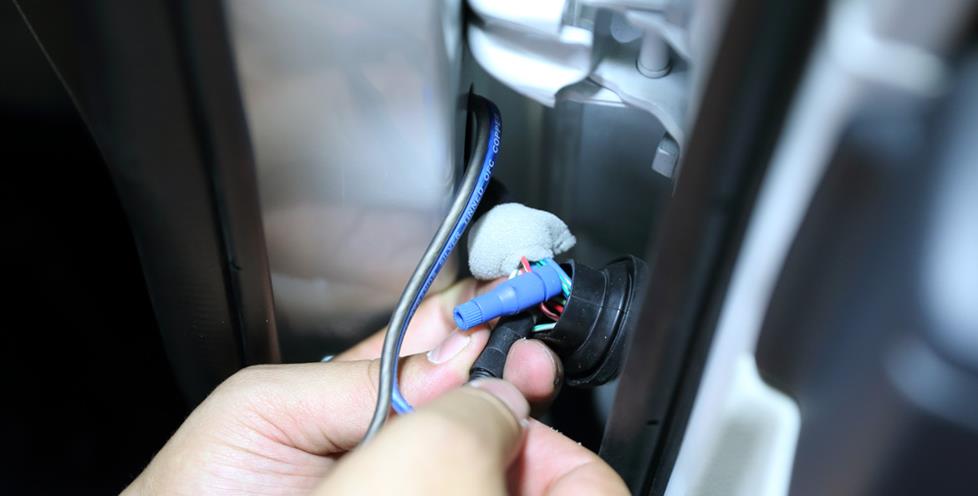
Posi-Tap connects let Mark tap into existing speaker wires without cutting.
Adding some bass
Now it was time to add a little thump to the system. We recommended a powered subwoofer to round out the sound in Mark's new audio system. He initially didn't think he and his wife would get much out of a subwoofer, since they weren't really looking for the chest pounding throttle you'd hear in a dance club, nor were they keen on losing cargo space.
We explained that a sub can nicely complement a system's bass deficiencies, and a powered sub (a combination of an amp, sub, and enclosure) didn't necessarily mean they'd lose their hatchback space. With the Rockford Fosgate Punch P300-10 10" powered sub, Mark could even quickly and safely detach the sub from its wiring to give him more cargo room when he needed it.
Installing a powered subwoofer requires running a few wires thoughout the vehicle, but with a good plan of attack, the results are well worth it. Mark ran the main power cable from the battery in the engine compartment, through a grommet in the bulkhead, and under the door trim panels on its way to the rear cargo area.
After removing some of the rear cargo flooring, he found a chassis bolt with no paint on it, so he could connect the ground cable. A good ground is essential in reducing the chance for noise in your sound system. And to get the audio signal, Mark tapped into the rear speaker wires in the side pillars by using Posi-Tap connectors.
Finally, the sound check
And with the speakers and subwoofer installed, Mark connected the battery, queued up a song on his phone, and powered up the radio. This big, broad smile came over his face, as he immediately let us know his system sounded so much better. The individual instruments were separate and distinct, while the music was much more controlled and offered more pop than the factory system had. Mark reassembled his vehicle and was ready to cruise. Not only did he have a better sound experience, but we could see some pride in the fact that he did the work. He was a happy camper; he told us later he was giggling as he thumped on down the road.


Mark secures a Thule bike carrying system to the Subaru's roof rack.
Finishing it off with a Thule bike rack
Mark and his wife recently started cycling, so they wanted a way to carry their bikes on their new vehicle. That's where Thule came in. Thule offers a great roof rack system that secures their bikes out of the way, and is simple to install. While Mark used older Thule models, you'll find our current selection of Thule bike carriers and accessories here.
Lasting impressions
What was already a cool new vehicle had just become even cooler. Mark was really impressed by the improvement the new speakers and subwoofer made to the overall sound. He also had a safe way to carry his bikes, while still giving him access to the rear hatch. Mark let us know the work and time was well worth the effort, and he was really looking forward to installing a new radio when a kit was available.


Ron
Posted on 6/22/2022
The article is for a 2015 model year Crosstrek and yet there is no cataloging a 2015? WTF
Jeff from Bristol
Posted on 12/4/2019
I just purchased the R/F Punch P300-12 from you. How difficult is the connection to the factory stereo in the 2015 XV Crosstrek?
Alexander H. from Crutchfield
on 12/4/2019
Jason from Mckinnleyville
Posted on 3/28/2019
I'm installing an LC2i to run an amp for my subs off of the stock non-navigation HU in my 2015 Subaru xv Crosstrek, do you know the colors and or positions of the front speaker wire outputs on the harness, I'm getting a lot of conflicting info from the internet. Thanks.
Alexander H. from Crutchfield
on 3/28/2019
Chris from Crystal Beach
Posted on 1/7/2018
I'm glad I found this article ! I have a 2018 Crosstrek with the factory system. I'm planning to add JL Audio C1 components in front and JL C1's in the rear doors. Also I plan on adding a simple JL Audio JX400/4D to run them. It was suggested that I put the XD400 amp and the Fix86 to really bring it to life. I have my doubts though. I'm not an audiophile. To my ears, the factory system sounds decent, but really just needs good speakers and a bit more power. Reading through this article helps in choosing the more basic option. Thanks !
Alexander Hrabe from Crutchfield
Posted on 9/5/2017
Cristian, not in this case. The powered sub accepts either a line level or speaker level signal.
Cristian Gil from cvh32093
Posted on 9/4/2017
Hi, does this set up require an line output converter?
Dave Delamere from Crutchfield
Posted on 7/29/2017
Marcello, we have no information about OEM Subaru stereos since we don't sell them. You may want to check out our online OutfitMyCar application to determine what stereos fit your Impreza. You'll probably find that aftermarket stereos we do carry offer more features, are more powerful, and cost less than factory options.
Marcello Palombi from Washington DC
Posted on 7/28/2017
Hey guys! So I have a 2013 Subaru Impreza sport limited. Love the car but the stereo is outdated and as you guys know, phones keep updating but the car stereo doesn't. Is there a way I can get a whole new stereo, I'd love to buy an OEM from the new 2016 models and have it installed. Is that an option or will subaru not do that? My Bluetooth isn't really connecting wel anymore.
Alexander Hrabe from Crutchfield
Posted on 7/13/2017
Blair, we used the top grommet on the passenger side.
Blair
Posted on 7/12/2017
Great write up of the install, which Grommet did you run your power wire through?