2016-2019 Ford Explorer
How to upgrade the stereo system in your Explorer

In brief: This Crutchfield Research Garage article gives you an overview of your Explorer's stock stereo system and your aftermarket upgrade options. We'll tell you all about:
- The factory stereo system
- Removing the factory radio
- Removing the factory speakers
- Adding more bass
- Other options for your Explorer
Then, use our vehicle selector to find the gear that will fit your Explorer.
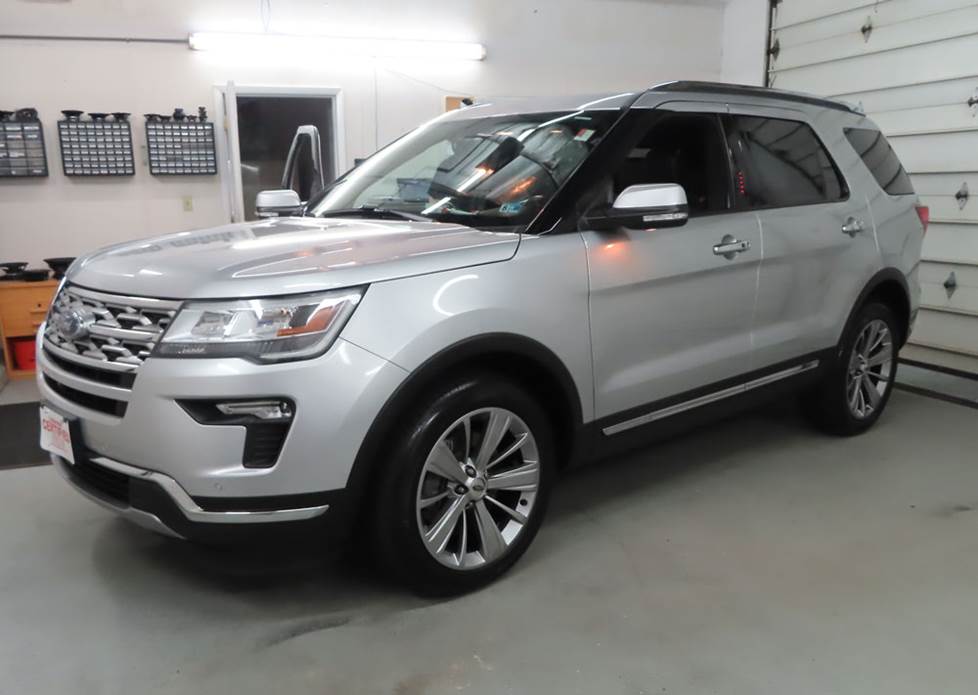
Overview of the Ford Explorer
Time flies in the SUV business. It seems like only yesterday that Ford introduced the mid-sized Explorer SUV, but that was way back in 1991 and wow, the game has changed. The original Explorers were very cool in their day, but compared to today's models, those boxy, Ranger-based SUVs look (and drive) like farm machinery.
The fifth-generation Explorer got a significant mid-cycle refresh in 2016, with a sleek new nose, a revised engine lineup, and a host of comfort and safety enhancements. The factory stereo systems were, as ever, pretty decent (especially the 500-watt Sony premium system), but if you're serious about sound, you'll want to upgrade your Explorer's audio gear.
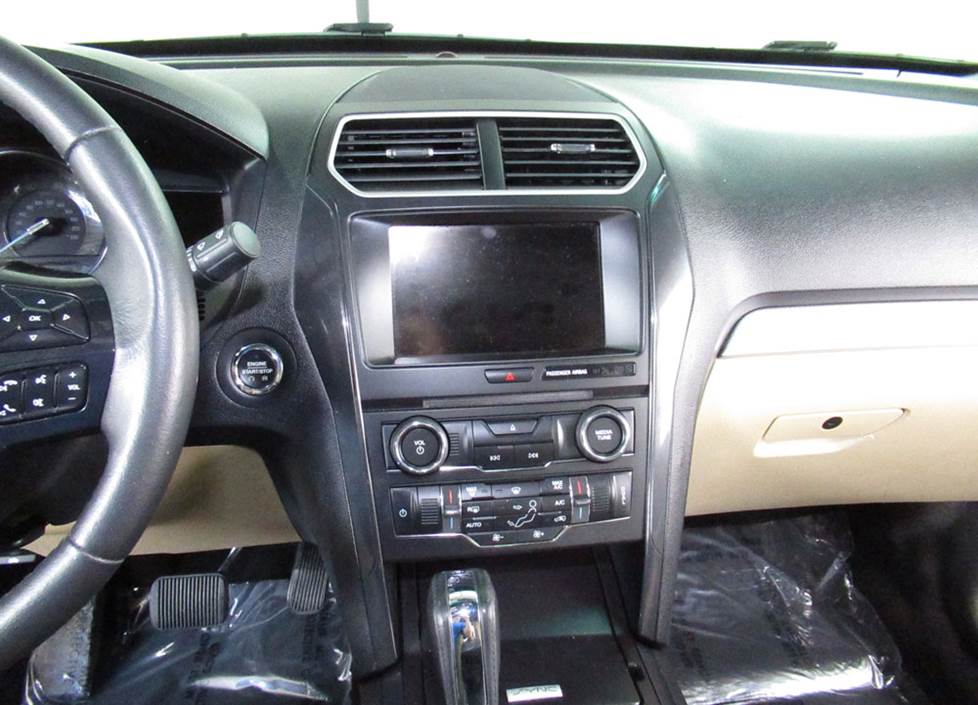
The base radio is this 4.2" LCD that carried over from the previous model (Crutchfield Research Photo)
The factory stereo system
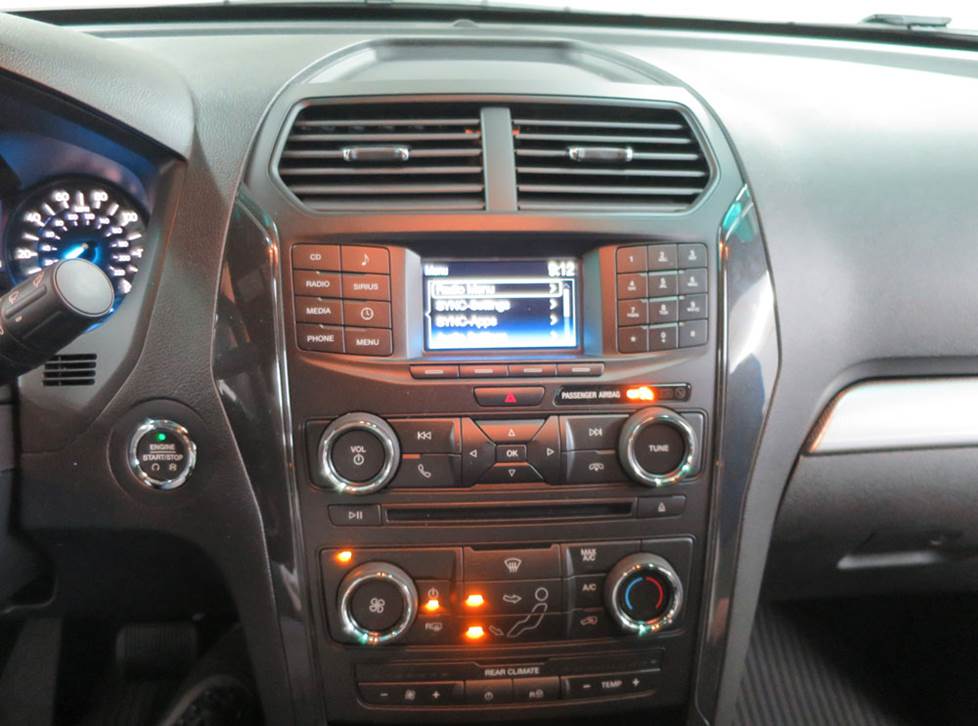
The refreshed Explorer offers three receiver choices, a 4.2" LCD, an 8" LCD, and a Sony receiver that's the centerpiece of the premium system.
- The 8" receiver is reasonably easy to deal with, which is not the case for the other two.
- Replacing the 4.2" model involves fabricating a receiver mounting bracket and, because there’s no adapter available, hard-wiring all the wiring connections. Direct Replacement kits are the main exception to this (more below).
- We don’t recommend replacing the Sony receiver at all, since the climate controls are integrated into the radio itself.
In some cases, the only aftermarket receivers will be digital media receivers that don't play CDs. So if you still enjoy listening to CDs when you're driving your Explorer, you might want to keep the stock radio and upgrade in other areas. Thankfully, you can replace all the speakers in your Explorer, so even if you can’t or don’t want to replace the stock radio, big-time audio improvement is still possible.
In related news, when you replace the factory radio, you'll lose the factory AUX and USB inputs, not to mention SYNC functions. So keep that in mind when you're looking for a new receiver, too.
If you would like to avoid messing with the dash and have a factory 4.2" display, Direct Replacement packages fit right in without cutting or modification. You’ll get great performance and a clean factory look. A Direct Replacement solution offers a better-performing upgrade that replaces your factory display with a 10.1" floating screen. You also get greater functionality, better sound, and improved expandability.
A Direct Replacement solution replaces your factory screen with a better-performing upgrade that either mounts an 8” replacement screen in the same spot or replaces it with a 10.1” floating screen. You also get greater functionality, better sound, and improved expandability.
From 2017-on, the Explorer's base radio was this 8" LCD model. It can be replaced by a variety of aftermarket stereos (Crutchfield Research Photo)
Removing the Explorer's factory radio
Whether you have the 4.2" receiver or the 8" model, the removal process is the same. Removing and replacing the 8" receiver is a reasonable project for the DIY-er, but the 4.2" model’s previously-noted bracket and harness issues make it something more suitable for your friendly neighborhood car audio professional.
Before you start, there are a few things you’ll need to take care of. First, you’ll want to hit the eject button on the stock receiver to make sure there’s nothing in there you want to keep. Next, in the interest of safety, you’ll need to set the parking brake and disconnect the negative battery cable to prevent any electrical short.
Once that’s all taken care of, you’ll be ready to grab your tools and get to work. Starting at the top, use a panel tool to pry off both receiver side trim strips to release five retaining clips on each, then remove both strips. That will expose four 7mm screws, which you’ll need to remove.
Next, pull the receiver/climate control panel to release two retaining clips, then disconnect the wiring harness and remove the control panel. Remove the four 7mm screws securing the factory radio chassis to the dash, then pull the chassis out, disconnect the harness, and remove the chassis.
Detailed stereo and speaker removal instructions

You'll need to use the factory radio's brackets in order to install your new receiver. If you don't have the brackets, you can obtain them from your dealership.
A dash kit/wiring harness is available for 2016-up Explorers equipped with 8"/non-Sony receivers, and you’ll save money when you order it along with your Crutchfield receiver purchase. The kit and harness come with their own installation instructions, and all the necessary radio and speaker removal instructions can be found in the illustrated, step-by-step Crutchfield MasterSheet included with your stereo purchase.
Once you’ve connected the new receiver and harness to the truck’s wiring (including the airbag harness, which is a very important thing), test to make sure the receiver’s working. If it is, you can start putting the dash back together.
Tools needed: Panel tool, 7mm socket, ratchet and extension
Read our Car Stereo Buying Guide for shopping tips and advice.
Shop for car stereos that fit your Ford Explorer
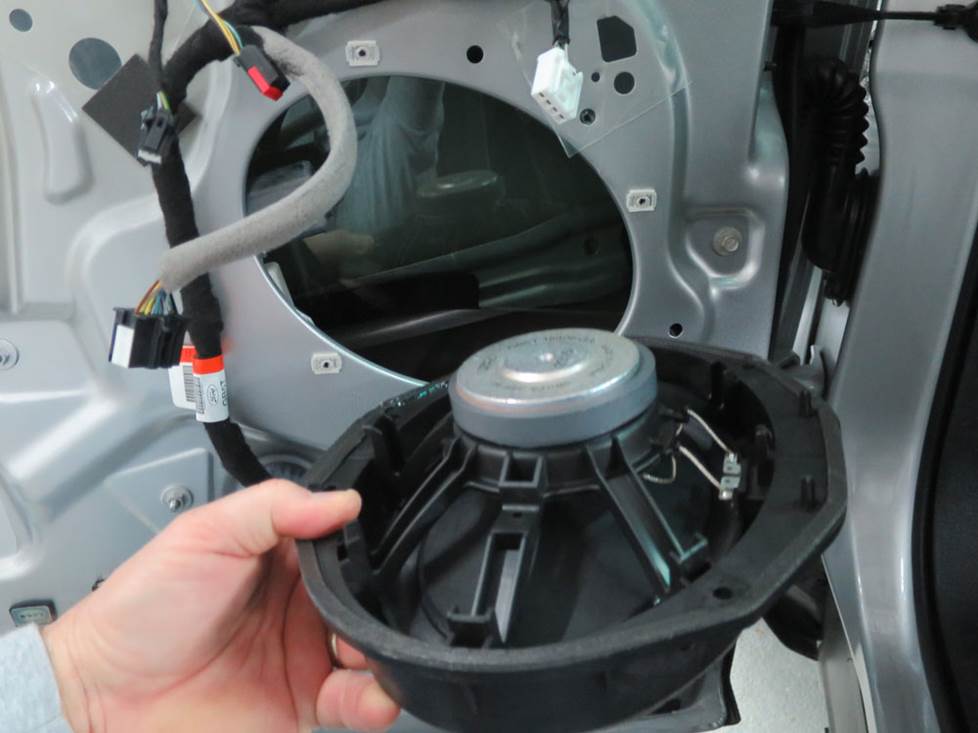
The Explorer's door speakers are pretty easy to deal with once you've removed the door panels (Crutchfield Research Photo)
Removing your Explorer's factory speakers
The Explorer's speakers are generally easy to deal with, but if you're replacing the rear side or pillar speakers, or the factory 8" sub, there is a bit of work and effort involved.
When you're replacing the radio, you might as well replace the center dash speaker, too (Crutchfield Research Photo)
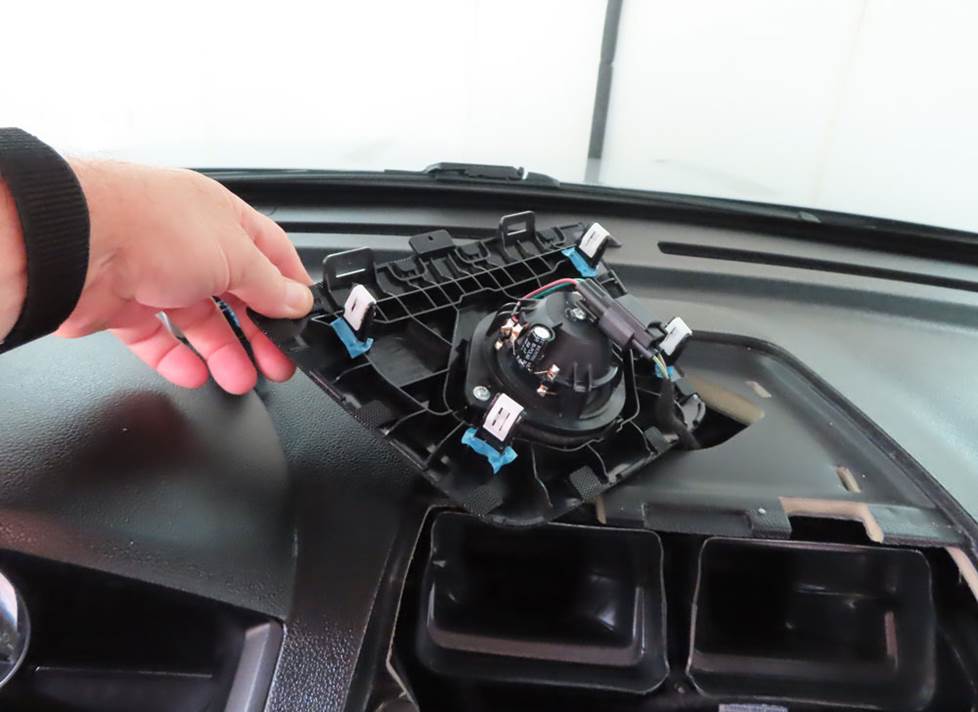
Removing the center dash speaker
The Explorer’s 3-1/2" center dash speaker is pretty easy to reach and replace. If you’re replacing the radio, you’re pretty much halfway home, actually, so as long as you’re doing that, you might as well save some time and do this, too.
Once you’re “in,” pry up the center dash speaker grille to release four clips. Disconnect the wiring harness and remove the speaker/grille assembly, then remove the two Torx T20 screws securing the speaker to the rear of the grille and remove the speaker. Keep those screws handy, because you’ll need them to secure the new speaker.
There’s no speaker wiring adapter available at the moment, so you’ll need to splice, solder, or use Posi-Products speaker connectors to connect your new 3-1/2" speaker to the truck’s wiring.
Once you’ve connected the speaker (and the radio) and made sure all the airbag wiring harnesses are connected, test the speaker to make sure it’s working. Then put the dash back together.
Tools needed: Panel tool, 7mm socket, ratchet and extension, Torx T-20 driver
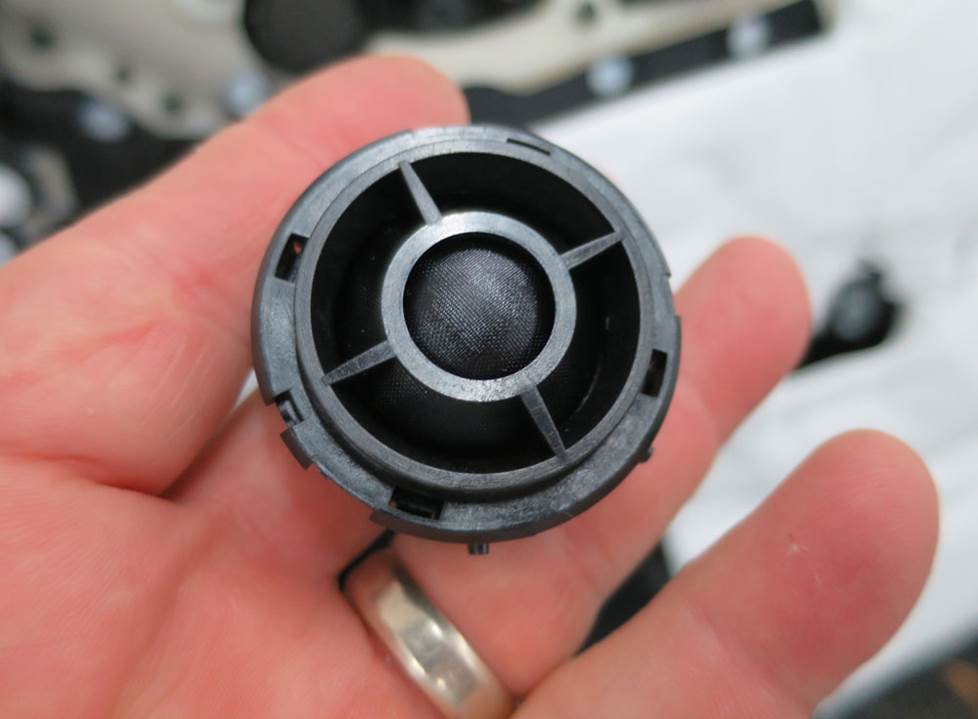
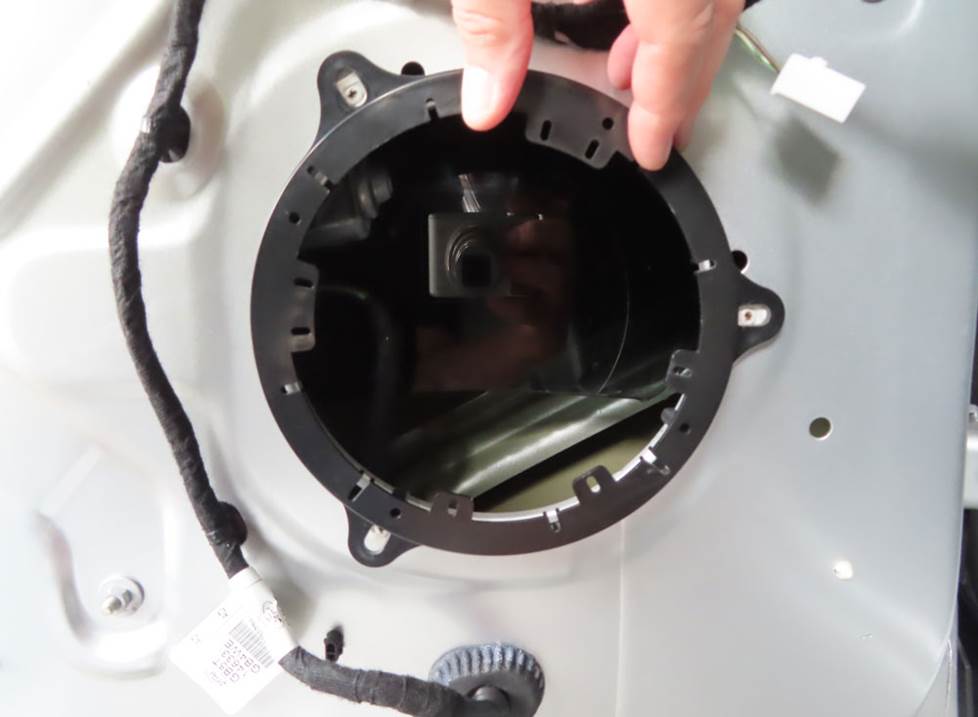
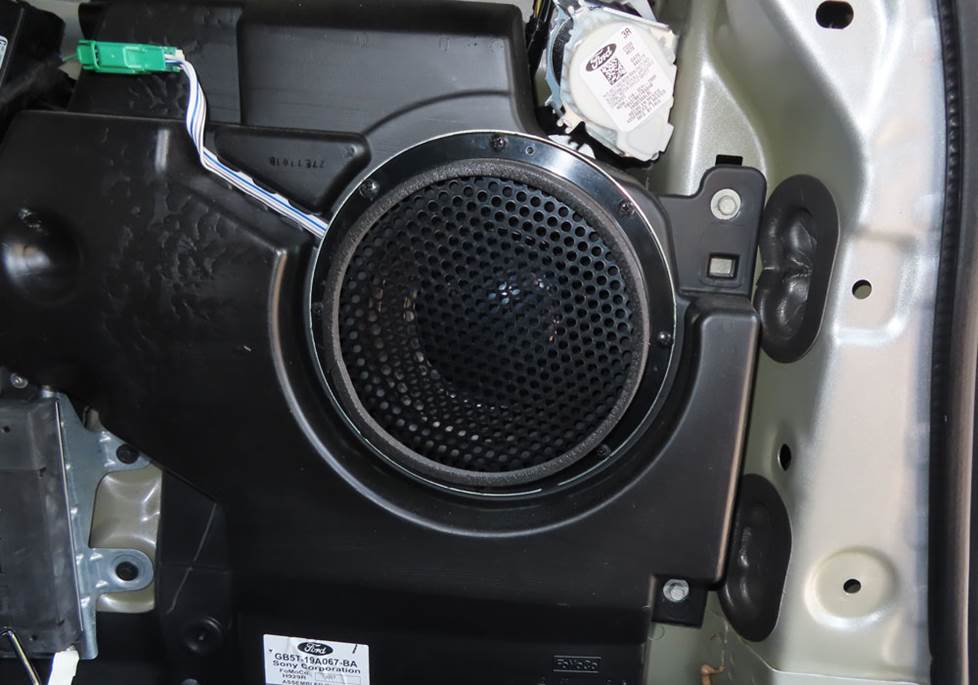
The front doors house component speakers — woofers and sail panel tweeters (Crutchfield Research Photo)
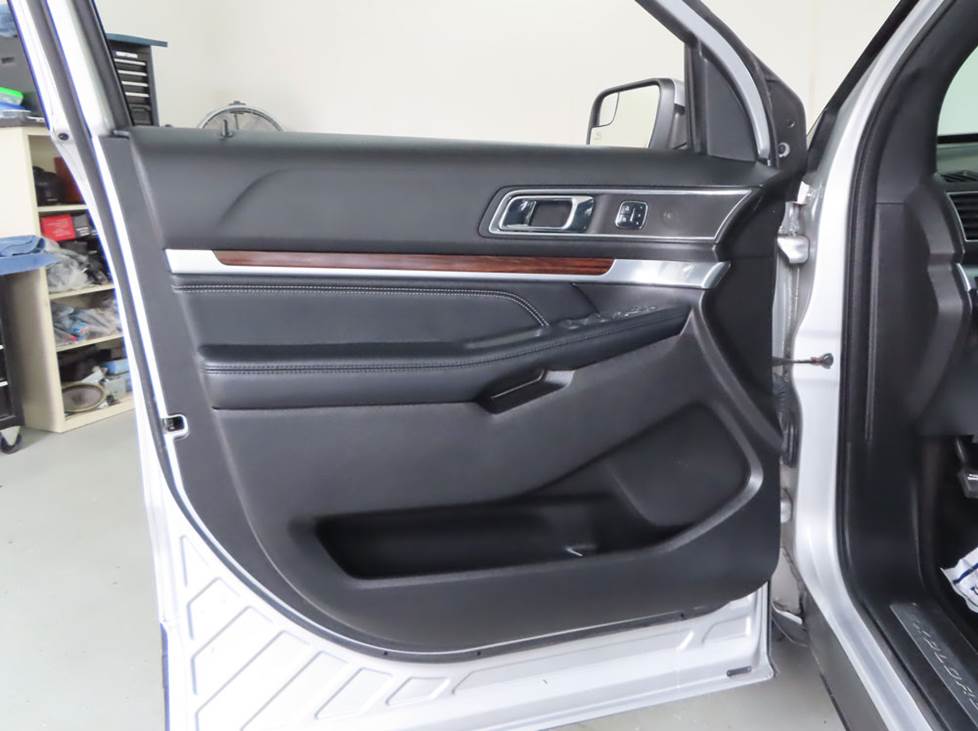
Removing the front door speakers
The Explorer, regardless of which stock system is present, has a pair of speakers in each door. You can replace the 6"x9" woofers and the 1.632" tweeters with a wide variety of aftermarket component speaker sets.
The job’s not hard, but you will need to remove the door panel. To do this, you’ll start at the top corner and pry off the sail panel to release three clips, then remove the panel.
Next, pry out the screw cover behind the door release to release three clips, then remove one exposed 10mm screw. Pry up the power options switch panel to release eight clips, then disconnect the wiring harness, remove this panel, then remove the exposed 10mm screw.
Remove two 7mm screws along the bottom edge of the door panel, then use your panel tool to pry out the sides and bottom of the door panel to release nine retaining clips. Disconnect the wiring harnesses and door release cable, then remove the door panel and store it in a clean, safe space. To remove the speakers, follow the instructions in your Crutchfield MasterSheet.
When you replace the tweeters, you’ll need to either fabricate a mounting bracket yourself or use our universal backstraps to secure the aftermarket tweeters. You’ll also need to splice, solder, or use Posi-Products speaker connectors to connect the tweeters.
The tweeters are wired in parallel with the front door woofers (Crutchfield Research Photo)
With non-Sony systems, the front tweeters are wired in parallel with the front door speakers. The parallel connection is made on the factory woofer, so when you remove that woofer, the tweeter won’t work unless you use a Metra 72-5602 harness or splice the tweeter wires into the woofer wiring. If you have questions about this (and you probably do), talk to one of our expert Crutchfield Advisors to make sure you order everything you need to replace your Explorer’s front door speakers.
As for the woofers, a variety of 6-1/2", 6-3/4", or 6"x9" aftermarket speakers will work in the Explorer. In some cases, you will need mounting brackets, and if so, we’ll include them (and the necessary wiring harness adapter) with your Crutchfield purchase.
Once your new speakers are secured, test them to make sure they’re working. If so, you’re ready to start putting the doors back together. Make sure there aren’t any rogue wires getting in the way of anything, and also be sure to check the door and lock functionality.
Tools Required: Panel tool, 7mm and 10mm sockets, ratchet and extension, needle-nose pliers
In some cases, you'll need mounting brackets for your new speakers. If so, we'll include them with your order. (Crutchfield Research Photo)
Removing the rear door speakers
The Explorer’s rear doors house 6-3/4" speakers, and you can replace them with same-size or 6-1/2" aftermarket speakers. You’ll need to remove these door panels, too, and the process is quite similar to that used on the front doors. Mounting brackets will be included with your speaker purchase if needed. All the details can be found in your illustrated, step-by-step Crutchfield MasterSheet.
Tools Required: Panel tool, 7mm and 10mm sockets, ratchet and extension, needle-nose pliers

The rear side speakers are kind of a pain to get to, but the work itself isn't that difficult (Crutchfield Research Photo)
Removing the rear side speakers
The rear side panel speakers, found in the 2016 9-speaker system only, are 3-1/2" models that can be replaced by a healthy assortment of aftermarket models.
These speakers are attached to the side panels, which you’ll need to mostly remove to reach and replace them. The job’s not hard, but there are a fair number of steps involved, so plan your day accordingly. There’s nothing here the average DIY-er can’t do, but it’s important to work carefully, stay organized, and remain patient.
There’s no speaker wiring adapter available for this speaker location, either, so you’ll need to splice, solder, or use Posi-Products speaker connectors to connect your new 3-1/2” speaker to your Explorer’s wiring. When you’re done installing the new speakers and re-installing the panels, make sure the seats and seat belts are secured to the manufacturer’s specifications.
If you have questions, remember that your Crutchfield purchase includes free tech support for the life of the gear. Our Virginia-based tech experts are here seven days a week and they’ll be happy to help you with your car audio project.
Tools needed: Panel tool, Torx T-20 driver

You'll need to remove the side panels to get to these rear pillar speakers, too (Crutchfield Research Photo)
Removing the rear pillar speakers
In the Sony-equipped Explorers, the hindmost high notes emanate from a pair of 3-1/2" rear pillar speakers. They’re not the easiest speakers to get to, since removing the rear side panels is a busy, multi-step process, but the effort’s worth it — especially if you also replace the rear subwoofer while you’re back there. A lot of the same panel-removal work is involved, so if you’re going to do one job, it’s a good idea (or at least a smart use of your time) to do the other.
There’s no speaker wiring adapter available for this speaker location, so you’ll need to splice, solder, or use Posi-Products speaker connectors. Panel removal instructions can be found in your Crutchfield MasterSheet. You can do this, but remember to stay patient and stay organized while you’re doing it.
Tools needed: Panel tool, 8mm socket, ratchet and extension, Torx T-20 driver
The 8" Sony subwoofer can be found in the right rear side of the cargo area (Crutchfield Research Photo)
Removing the rear side subwoofer
As noted above, removing and replacing anything in the rear of the Explorer is a rather work-intensive process. The 8" Sony subwoofer isn’t bad for a factory sub, but if you’re serious about sound, the work is worth it back here.
Again, this isn’t hard to do, but there is a lot to be done. Patience and organization are your friends here, so if you can be both chill and a little bit OCD at the same time, you’ll be fine.
You’ll need to drill new mounting hole to install your new 8” aftermarket sub in the enclosure. This isn’t hard, but you are drilling into part of an SUV you might still be paying for, so work carefully here and definitely wear eye protection.
Be sure to test the sub (and pillar speakers, if applicable) before putting the panels back together. And definitely make sure the seats and seat belts are secured to the manufacturer’s specs.
Tools needed: Panel tool, Phillips screwdriver, 8mm and 10mm sockets, ratchet and extension, drill with 1/8" bit
Read our Car Speakers Buying Guide for more information.
Shop for speakers that fit your Ford Explorer
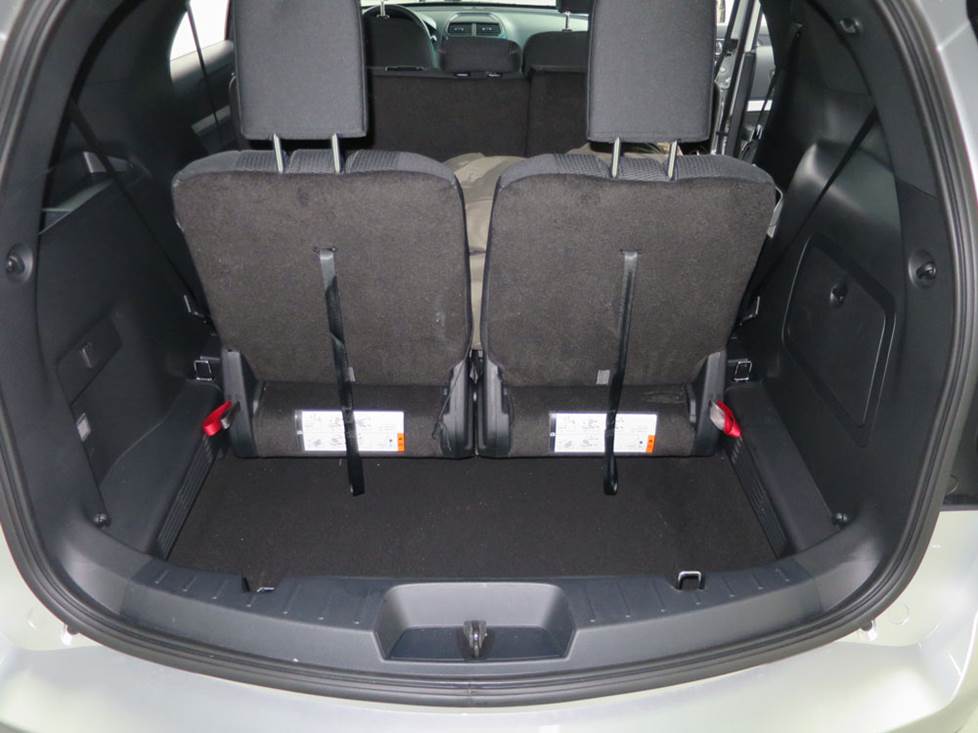
With the seats up, your bass space is somewhat limited. With the seats out of the way, you can build something pretty awesome. It just depends on your everyday needs. (Crutchfield Research Photo)
More bass in your Explorer
If you don’t have a rear sub to replace (or just want to add even more bass), the Explorer gives you some options to, well, explore.
In an SUV this size, there’s room for lots of stuff, and that can include a large subwoofer box. With the third-row seats in the “up” position, you have a 42" W x 24" H x 12"/15" D space to work with, so that should be enough to bring some serious boom to your Explorer.
Of course, not everyone cares more about bass than anything else. For better bass that won’t devour your cargo space, a powered subwoofer can fill out your Explorer’s sound nicely.
Learn more about building a bass system in our Car Subwoofer Buying Guide.
Shop for vehicle-specific subwoofers for your Ford Explorer

Installing Dynamat is one way to maximize your sound quality
Other options for your Ford Explorer
With a vehicle like the Explorer, there are lots of ways to upgrade your entertainment quality and everyday utility.
Add sound damping to block noise
These Explorers are pretty quiet as SUVs go, but as trucks age, creaks and groans can start to intrude on your driving serenity. A Dynamat Xtreme Door Kit is the perfect way to seal in sound. This heavy-duty insulating material is easy to install, and it really makes a difference. One kit will take care of the front doors in your Explorer. The rear doors and the rear hatch are also good areas to target if you build a serious sound system.
Add an amplifier and improve the sound
If you're mostly using your Explorer to haul gear and kids and the kids' gear, you can still have an amazing system without sacrificing square footage — look for amplifiers with small footprints to fit in the out-of-the-way spaces in your cargo area. Learn more about adding amps to your system in our Car Amplifier Buying Guide.
Remote start and security systems
Adding remote start capability to your vehicle lets you warm it up in the winter or cool it down in the summer. The iDatastart system is incredibly convenient and makes it easier than ever to install a remote start system, so we highly recommend it. The module requires a vehicle-specific T-harness (sold separately) to connect with your vehicle's computer, security, and ignition systems, so we ask that you call to order so that we can make sure you get the right harness for your ride.
You can also talk to your Crutchfield Advisor about a security system. They’re not as easy to install (we usually suggest letting a professional do the job), but we can help you choose a system that’ll work in your vehicle.
Let's get started!
Ready to shop? Use our vehicle selector to find the gear that will fit your car or truck. If you have questions, give us a shout via phone or chat.


Kevin
Posted on 7/12/2023
How is The 3.5 inch center speaker wired in this vehicle? Does it have its own channel or is it wired in with another speaker? And if it's wired in with another speaker doesn't that greatly effect the impedence?
Crutchfield Writing Team from Crutchfield
on 7/13/2023
Victor Guzman from Highland
Posted on 3/28/2022
Hi I have a 2017 Ford Explorer XLT I just want to know what colors are the wires for the speakers. I can't find a diagram anywhere. Thanks
Jon Paul from Crutchfield
on 3/29/2022
Mark W Simmons from Lakeland
Posted on 3/28/2021
Ive got a 2015 XLT. I may have a bit of an oddity as mine is equipped with the 202B package. I have the NON Sony 8" MyFord Touch, with 9 speaker "Premium Sound. (Frnt Center channel, 6x9 and tweeters in frnt doors, 6.5s rear doors, 3.5" pillar speakers by the 3rd row, NO factory amplifier or sub. What are my options?
Jon Paul from Crutchfield
on 3/29/2021
Taylor Mahaffey from Limerick, ME
Posted on 2/2/2021
Great article! Would it be beneficial to replace just factory speakers without replacing the amp? If not, can you recommend an amp to run all these speakers? Thanks!
Jon Paul from Crutchfield
on 2/2/2021