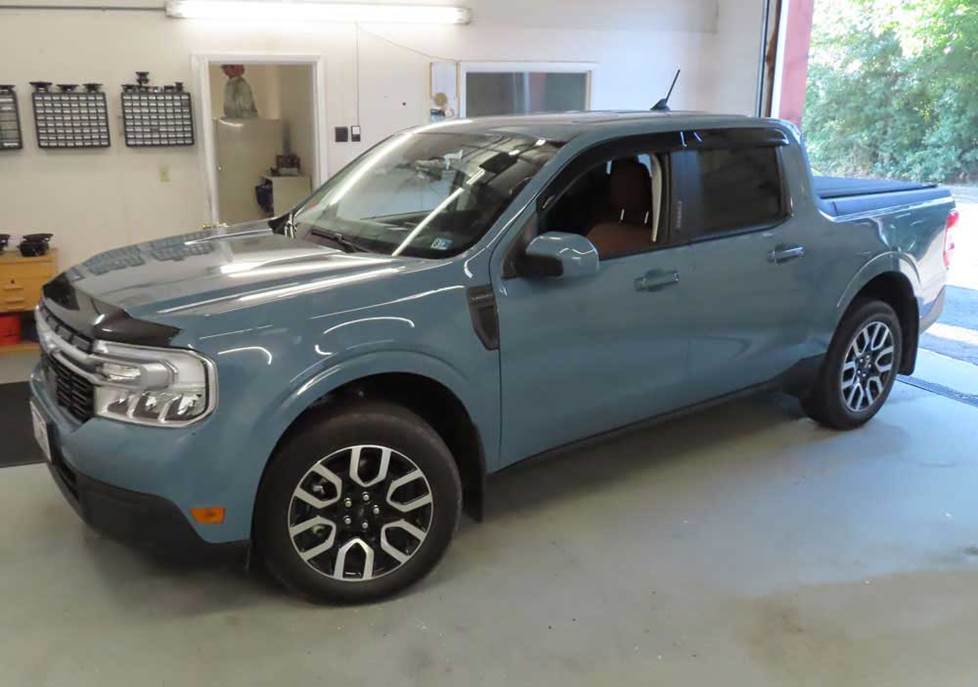
2022-up Ford Maverick
How to upgrade the stereo system in your Maverick

In brief: This Crutchfield Research Garage article gives you an overview of your Maverick's stock stereo system and your aftermarket upgrade options. We'll tell you all about:
- The factory stereo system
- Removing the factory speakers
- Adding more bass
- Other options for your Maverick
Then, use our vehicle selector to find the gear that will fit your Maverick.
Overview of the Ford Maverick
You may have noticed that full-size trucks are bigger and brawnier than ever these days. And while people who want and/or need the biggest, baddest truck around are thoroughly okay with that, a truck that’s tall enough to play pro basketball and almost exactly one lane wide isn't for everybody. That’s an actual highway lane, mind you, not a basketball lane.
For those who want or need a truck, but don’t want or need fill-ups that cost as much as a mortgage payment, smaller trucks are finally back again. While the new Maverick is a lot bigger than the old Ford Courier, it’s much handier that a full-size F-Series. Thus, you get a thoroughly capable truck that takes up less space and costs less to own. That should leave some spare money for audio upgrades, which is where we come in.
Read on to learn more about the aftermarket audio possibilities for your Maverick. We’ll tell you what you can do and how to do it.
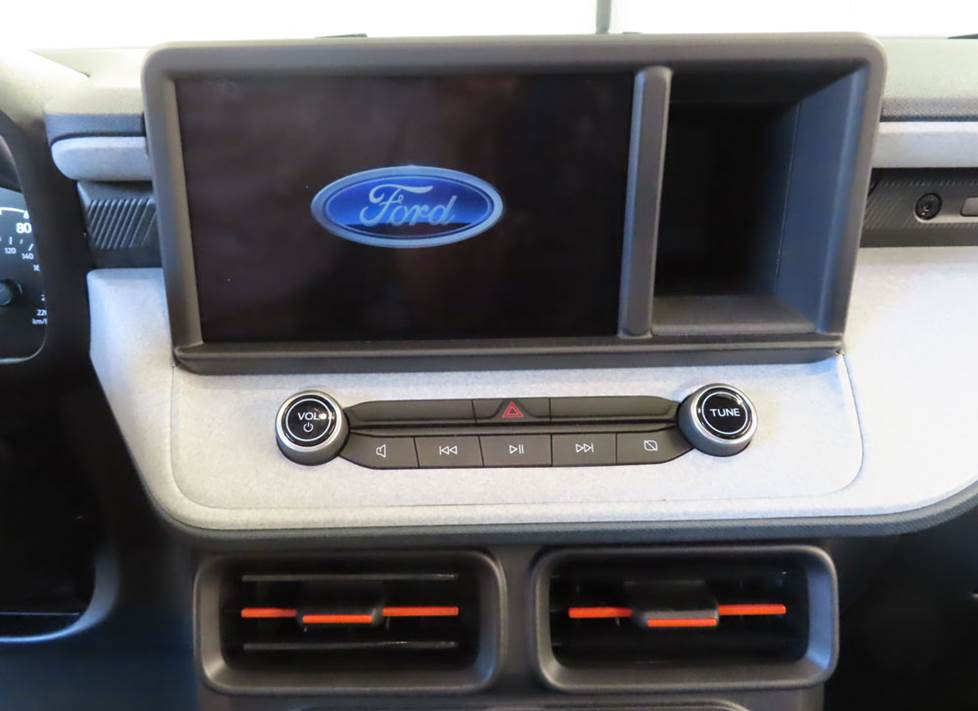
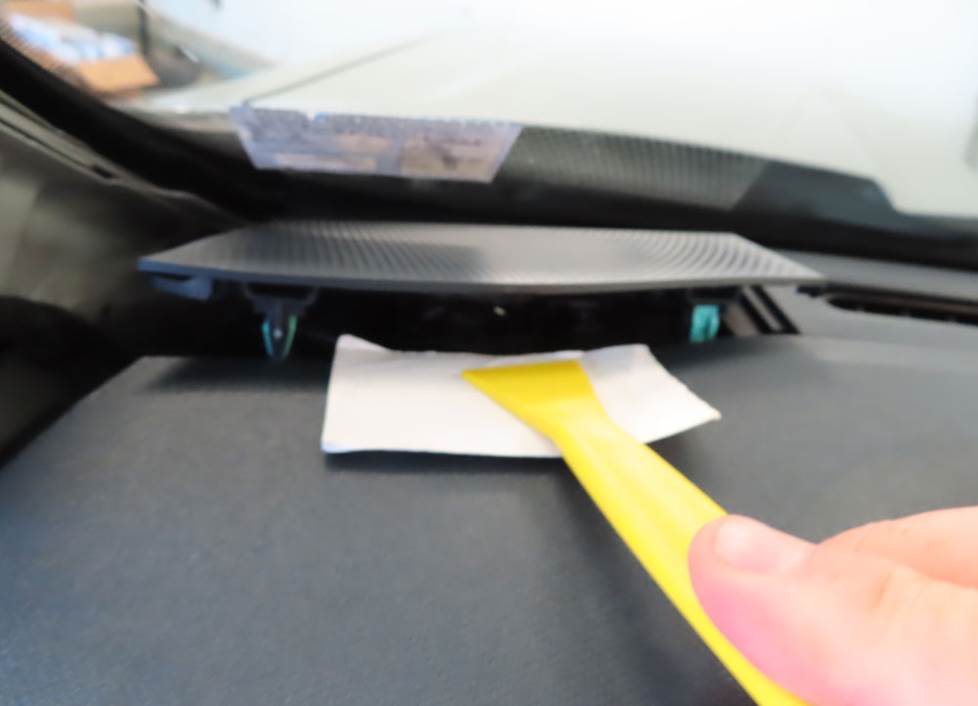
The factory "radio" does a whole lot more than play music, so replacing it really isn't possible (Crutchfield Research Photo)
The factory stereo system
The Maverick’s stock stereo systems consist of a 6-speaker base combo and a Bang & Olufsen system that adds a center dash speaker and a rear wall subwoofer. They’re not bad, especially the B&O system, but we know a lot of Maverick owners are going to want better sound as soon as they can get around to it.
The factory receiver is, obviously, nothing like the standard single-DIN (2" tall) or double-DIN (4" tall) receivers found in older Ford trucks. There’s a lot more going on in that screen than just music-playing. As a result, replacing it is simply not a thing you can do at this time.
That said, there are still circumstances in which you might need to access the harnesses, and you’ll find the instructions you need to do that job in the Crutchfield ResearchNotes™ included with your Crutchfield car audio purchase. It’s actually pretty easy, because you don’t need to remove the receiver module to get to those harnesses.
Hybrid note
A hybrid's gas-electric hybrid powertrain makes upgrading the stereo a little more complicated. As you might expect, hybrid Mavericks contain some very sensitive electronics, so here are a couple of things to keep in mind:
- Be sure to only use a multi-meter when testing wires, and NEVER use a test light to test wires in this vehicle. Doing so could cause some serious (by which we mean dangerous and expensive) damage.
- A hybrid is not the car to choose if you want to build a massively powerful audio system. The thirsty current draw of a high-powered stereo is not a good thing for the hybrid system, so don't exceed a 30-amp current draw or 350-watt RMS power rating.
The B&O amplifier
The factory Bang & Olufsen amplifier is located behind the rear seat back cushion on the passenger's side. While this amp does a lot of good work, do note that this system’s center dash speaker and rear pillar speakers are powered by the tuner/amplifier module located behind your Maverick’s climate controls.
Replacing the stock speakers is the surest way to improve the sound in your Maverick (Crutchfield Research Photo)
Removing the factory speakers
Whether you’re replacing the standard or Bang & Olufsen speakers, the process is reasonably simple and our Crutchfield ResearchNotes will give you the step-by-step instructions you need to do the job.
This center dash speaker is found only in the Bang & Olufsen system (Crutchfield Research Photo)
Removing the Maverick's center dash speaker (B&O only)
The Bang & Olufsen system includes a 3-1/2" center dash speaker. It’s not hard to remove and replace, but there are a few things you’ll want to know before you start shopping. First off, replacing this high-impedance factory speaker with a standard 4-ohm speaker will result in higher volume levels, so keep that in mind.
You'll need to remove the locating pins from the factory location to install your new speaker. This will not affect reinstallation of the factory speaker.
Tools needed: Panel tool, 7mm socket, ratchet and extension, pliers
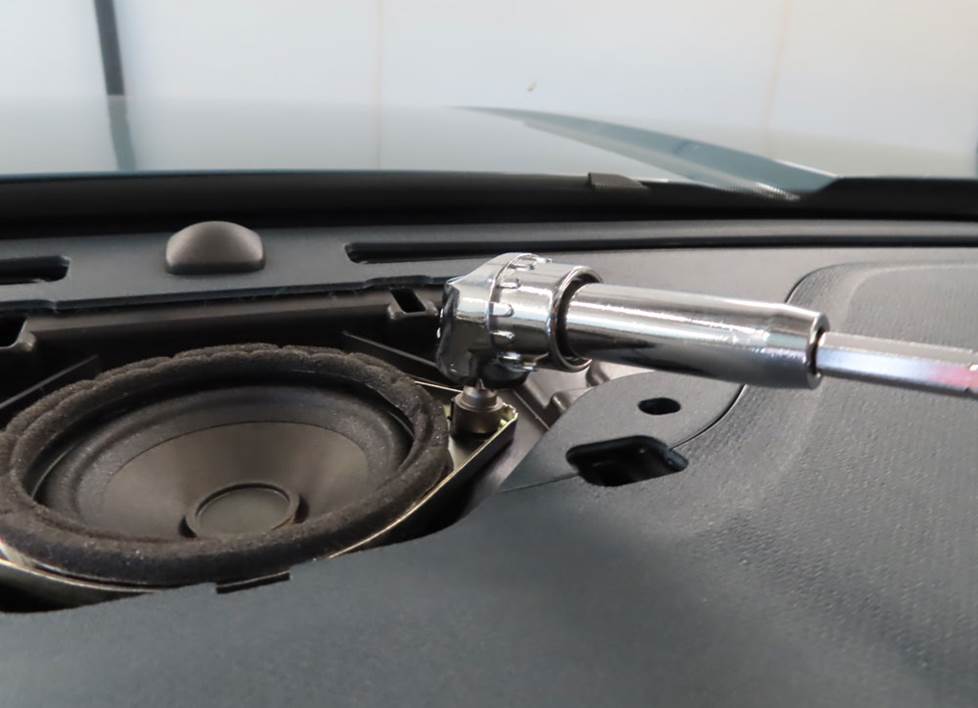
All Mavericks sport speakers in the dash corners, and they're pretty easy to remove and replace (Crutchfield Research Photo)
Removing the Maverick's corner dash tweeters
You’ll find a 1.545" speaker nestled in each dash corner. These factory speakers are reasonably easy to reach and remove, but as with the B&O center dash speaker, there are some things you’ll need to be aware of.
The impedance issue is present here, too, so shop wisely. Also, there are no wiring harness adapters available for these speakers either, so you’ll need to splice, solder, or use Posi-Products speaker connectors to connect them to the truck’s wiring. And you'll need to use hot glue, silicone, or our universal backstraps to secure your new speakers.
In vehicles with the base audio system, the corner dash tweeters are wired in parallel with the corresponding front door woofers. With the Bang & Olufsen system, they aren’t.
As for the actual speaker removal process, you’ll start at the top edge and use a panel tool to pry off the front pillar trim panel to release two clips. Remove one 10mm nut securing the trim panel tether to the truck’s body, then lift the trim panel and remove it. Pry up the rear edge of the corner dash grille to release two clips, then remove the grille. Pry the tweeter out of the dash socket to release three tabs, then disconnect the harness and remove the tweeter.
Tools Required: Panel tool, deep 10mm socket, ratchet, and extension
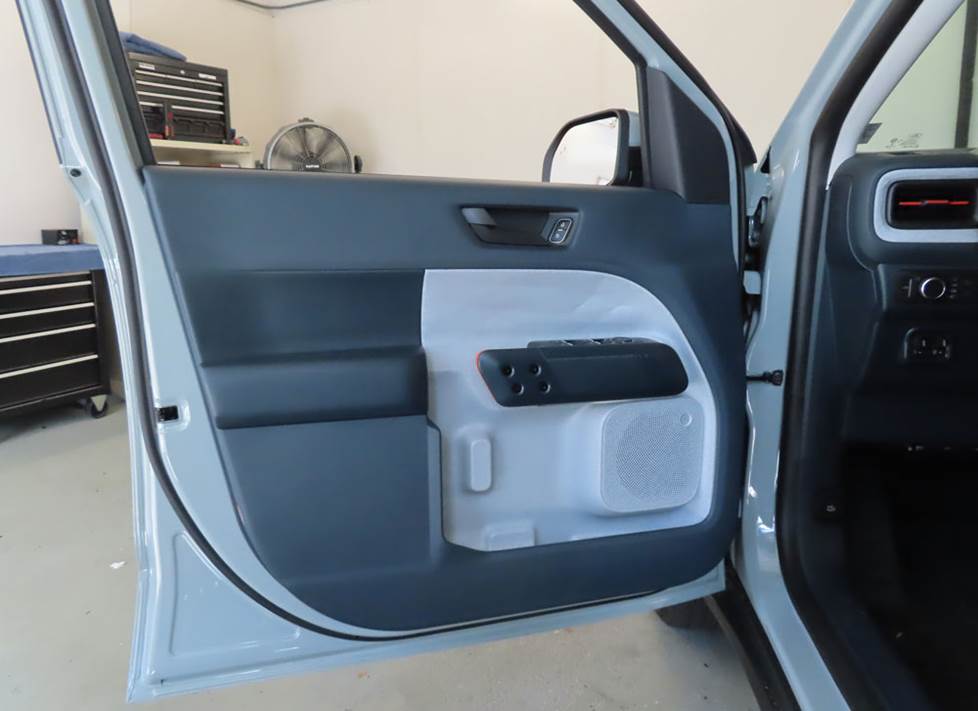
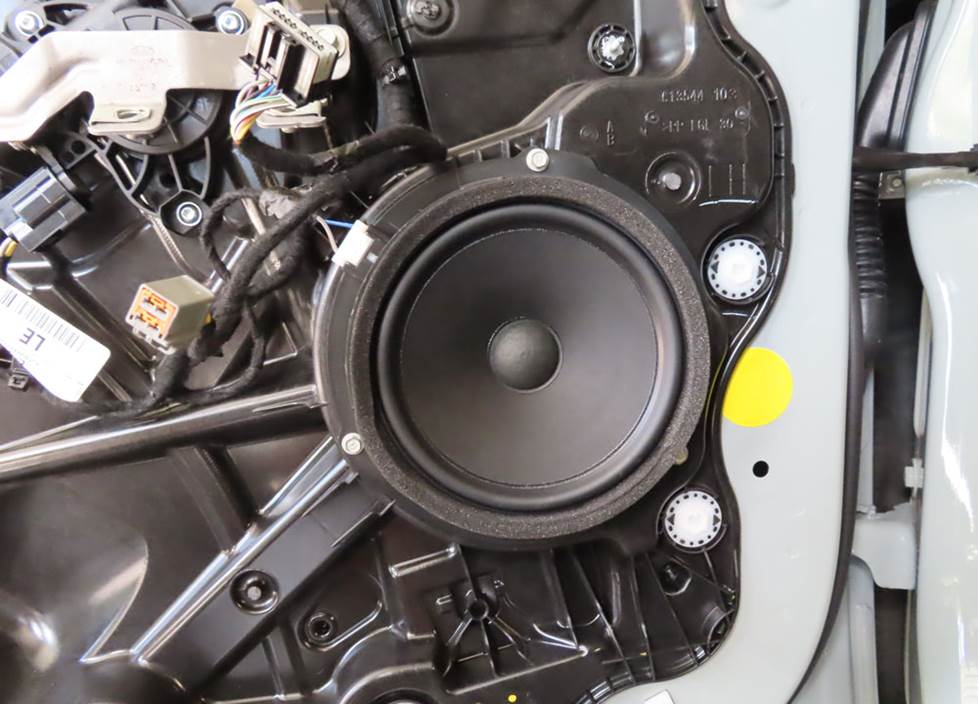
You'll need to remove the door panels to get to these factory speakers (Crutchfield Research Photo)
Removing the Maverick's front door woofers
Both Maverick audio systems include 6-3/4" speakers in the front doors, and the removal/replacement process is the same regardless of which system you’re upgrading. You will need to remove the door panels to get to the speaker, but the job’s not that hard and our instructions will guide you through it.
A wide variety of aftermarket speakers will fit here, but you’ll need speaker mounting brackets to install most of them. We’ll include the brackets with your Crutchfield speaker purchase. The instructions for the brackets and the included wiring harness adapters will help you get your new speakers installed. Do note that you'll need to remove the inner tabs on the aftermarket speaker brackets to install any new 6-3/4" speakers.
Tools Required: Panel tool, small flat blade screwdriver, 7mm and 8mm sockets, ratchet, and extension

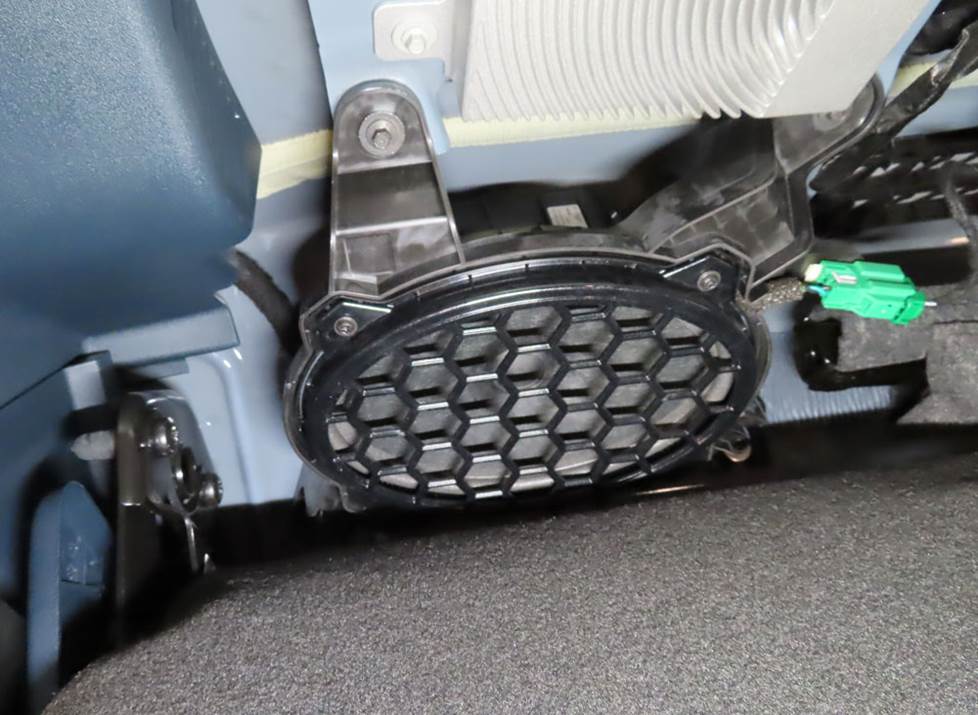
Th rear pillar speakers are the most challenging ones to remove and replace in the Maverick (Crutchfield Research Photo)
Removing the Maverick's rear pillar speakers
The Maverick’s rear pillar speakers are 4" two-hole models. There are plenty of aftermarket replacements available, but a suitable wiring harness adapter is not available. As with some of the other locations, you’ll need to splice, solder, or use Posi-Products speaker connectors to make them work with the truck’s wiring.
The removal/replacement process is a little more involved for this location, due primarily to the fact that you’ll need to deal with the rear seats and remove some panels to get to these speakers. While none of the steps are all that difficult, there are several of them and this’ll take some time. Our advice is to work carefully, stay patient, and keep everything you’re removing neat and organized. That’ll make it a lot easier to put everything back together once you’ve tested the new speakers to make sure they’re working.
Because of the two-hole design, you'll need to remove two or more mounting tabs from each of your new speakers before you install them. You can do that with pliers or a blade, but remember to be careful when you’re dealing with sharp things. Eye protection is recommended.
Tools Required: Panel tool, 7mm socket, ratchet and extension, pliers
The B&O system also includes this rear wall-mounted subwoofer (Crutchfield Research Photo)
Removing the Maverick's rear wall subwoofer (B&0)
The Bang & Olufsen subwoofer is a 6"x9" model that’s located behind the rear seat. As a result, it’s very easy to get to. Just fold down the rear seat’s back cushion, then remove the four Torx T25 screws securing the subwoofer to the enclosure. Pry off the harness, disconnect it, and remove the subwoofer.
You'll re-use the factory enclosure when you install your new subwoofer. But, depending on which subwoofer you choose, you may need to drill new screw holes or fabricate a speaker bracket. Drilling a few holes isn’t all that hard, but you are drilling holes into your own truck, so you’ll want to work carefully, know what’s around the drilling area, and definitely wear eye protection.
Tools Required: Torx T25 driver
Read our Car Speakers Buying Guide for more information.
Shop for speakers that fit your Ford Maverick
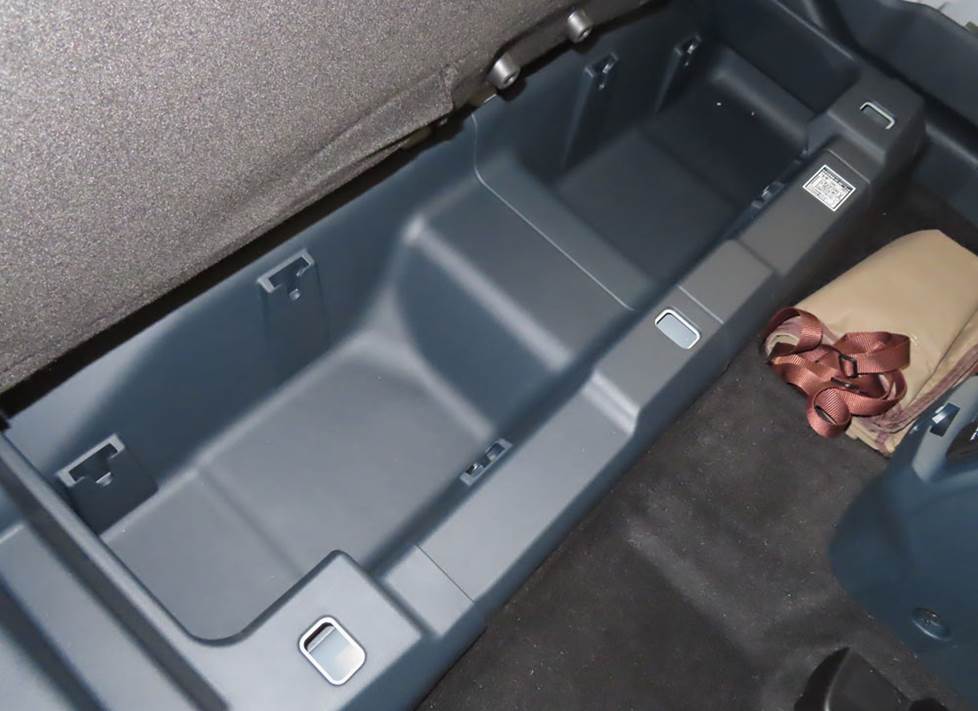
You can use these underseat bins for storage or aftermarket subwoofers (Crutchfield Research Photo)
More bass in your Maverick
The amount of space for bass in your Maverick isn’t vast, but there are ways to add some extra boom. There are two storage trays under the rear seat of non-hybrid models, each measuring 9"D (top to bottom), 18"W (side to side), and 10"L (front to back). One enclosure can be installed in each tray.
Only one tray is present in hybrid Mavericks, so there’s less room for bass. But, as noted above, hybrids and power-sucking audio gear aren’t the best combo in the first place.
Learn more about building a bass system in our Car Subwoofer Buying Guide.
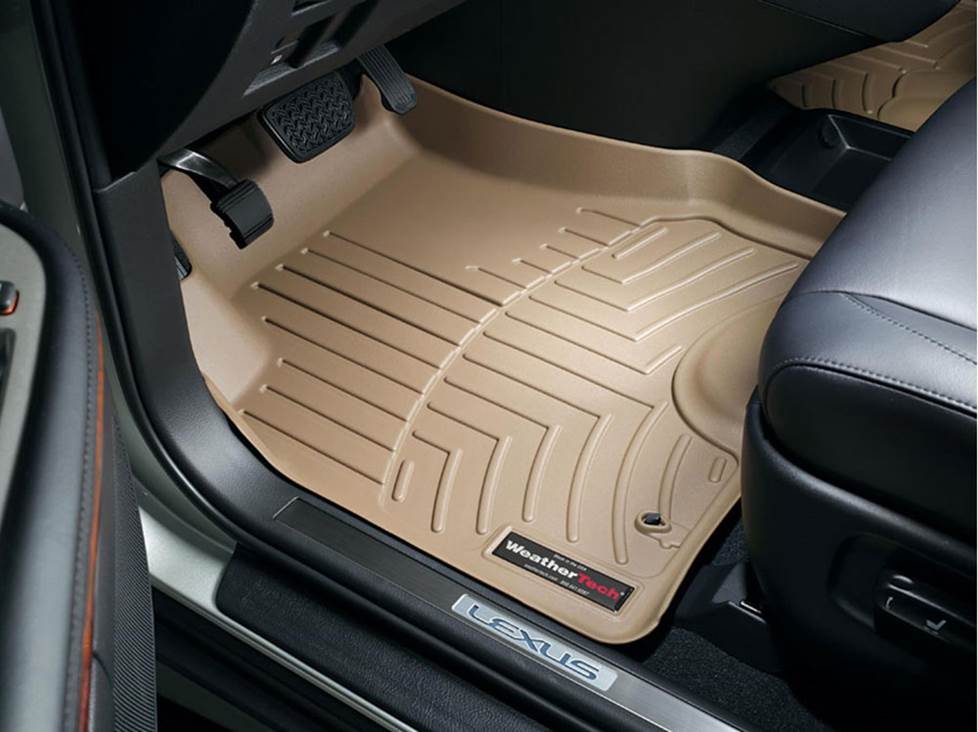
Keep your Maverick's carpeting looking good with a set of custom-fit WeatherTech Floor Liners
Other options for your Maverick
With a vehicle like the Maverick, there are lots of ways to upgrade your entertainment quality and everyday utility.
Protect your carpeting with WeatherTech mats
The Maverick is a very cool truck, but the factory floor mats are...just regular old factory floor mats. Whether you're doing outdoorsy truck stuff or just tooling around town, those mats might not be up to the job. A set of custom floor liners from WeatherTech will help protect the carpeting from dirt and damage.
Add sound damping to block noise
Big tires and blunt corners can raise quite a ruckus on the road. A Dynamat Xtreme Door Kit is the perfect way to seal in sound. This heavy-duty insulating material is easy to install, and it really makes a difference. One kit will take care of the front doors in your Maverick. The rear doors are also worth targeting if you're building a seriously powerful sound system.
Remote start and security systems
Adding remote start capability to your Maverick lets you warm it up in the winter or cool it down in the summer. The iDatastart system is incredibly convenient and makes it easier than ever to install a remote start system, so we highly recommend it. The module requires a vehicle-specific T-harness (sold separately) to connect with your vehicle's computer, security, and ignition systems, so we ask that you call to order so that we can make sure you get the right harness for your ride.
You can also talk to your Crutchfield Advisor about a security system. They’re not as easy to install (we usually suggest letting a professional do the job), but we can help you choose a system that’ll work in your vehicle.
Let's get started!
Ready to shop? Use our vehicle selector to find the gear that will fit your car or truck. If you have questions, give us a shout via phone or chat.


Comments (0)