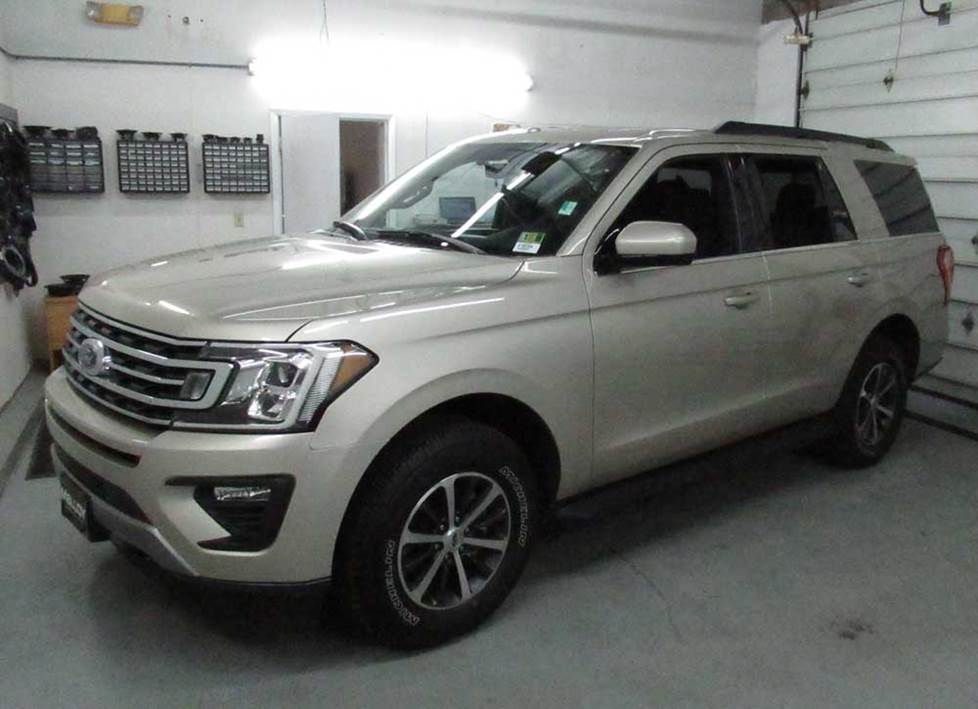
2018-2021 Ford Expedition
How to upgrade the stereo system in your Expedition or Expedition Max

In brief: This Crutchfield Research Garage article gives you an overview of your Expedition's stock stereo system and your aftermarket upgrade options. We'll tell you all about:
- The factory stereo system
- Removing the factory speakers
- Adding more bass
- Other options for your Expedition or Expedition Max
Then, use our vehicle selector to find the gear that will fit your Ford.
Overview of the Ford Expedition
Not everyone needs a full-size SUV, but if you do, you do. When it comes to hauling people, pets, and stuff – often at the same time – in style and comfort, a vehicle like the Ford Expedition is hard to beat.
The fourth-gen Expedition took everything that was good about the older ones (which was a lot) and brought it up to more modern standards. Trucks like this never seem like they change all that much, but they’re quietly getting better all the time. And bigger, too.
The standard Expedition is merely enormous, while the Expedition Max is so large that the onboard computer system has been replaced by an HOA. Just kidding – it’s only about a foot longer than the regular model, but you get the point. Both models were available with some reasonably decent factory audio gear, but if you want to fill this space with sound, you’ll want to upgrade with aftermarket gear. Or maybe just fold down the seats and hire a band....

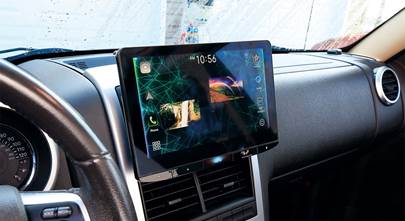
If you have the base 4.2" LCD radio, you have the option of installing a Direct Replacement package, which puts a floating 10” screen in front of your dash without modifications (Crutchfield Research Photo)
The factory stereo system
Like the vehicle itself, the Expedition’s factory radios come in Large (a 4.2" LCD) and Extra-Large (an 8" LCD). There’s a 9-speaker base system, plus a 12-speaker Bang & Olufsen Play audio system that adds a pair of rear pillar speakers and a 10" rear side panel subwoofer.
Replacing the stock radio is an interesting proposition in this SUV, both in terms of what you can do and how you’ll do it.
We now recommend replacing the stereo in all Expeditions covered by this article. If your Expedition has the Bang & Olufsen Play system, replacing the radio will require an amplifier replacement.
If you have a 2018 or 2019 model with the standard 8" LCD, you can replace that receiver with a variety of aftermarket models. An iDatalink-ready stereo will be needed if you want to retain your Expedition's personalization settings menu, though, and you’ll also need a special iDatalink harness to connect the new radio to the Expedition’s wiring.
If you have the base 4.2" LCD radio, you now have the option of installing a Direct Replacement package, which puts a floating 10” screen in front of your dash without modifications. You’ll get greater functionality, better sound, and improved expandability.
When you enter your vehicle information, we’ll make sure you get the receiver you want and the iDatalink harness you need. If you have questions, our experts are here to help.
Detailed stereo and speaker removal instructions
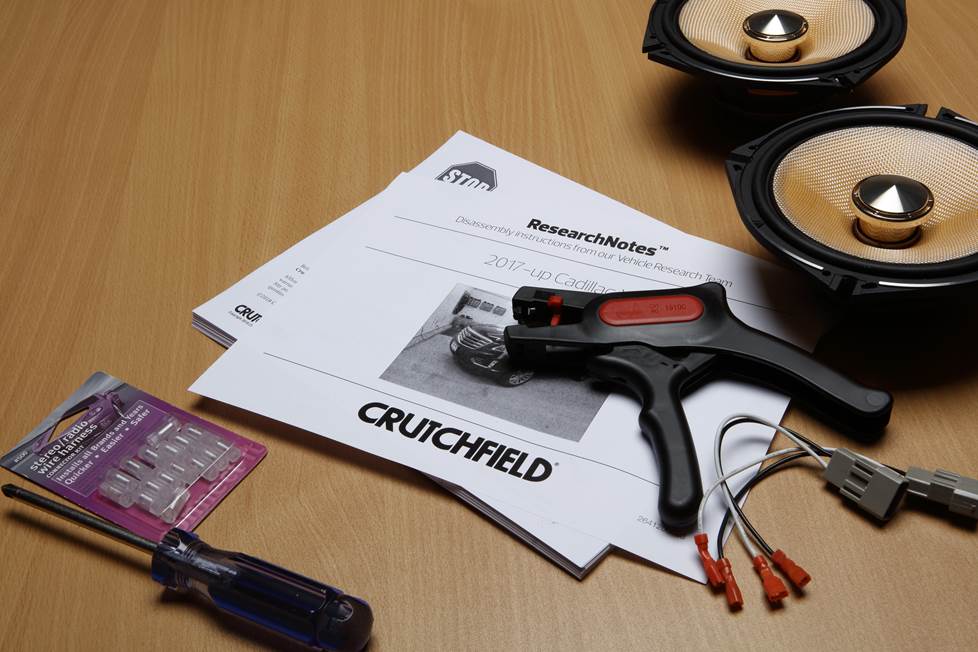
All of the receivers come out the same basic way, and we’ll give you all the step-by-step details in the Crutchfield ResearchNotes™ that are included with your order.
Do note that if you replace the factory radio, the factory Sync 3 system won't work anymore.
Tools needed: Panel tool, 7mm socket, ratchet and extension
Read our Car Stereo Buying Guide for shopping tips and advice.
Shop for car stereos that fit your Ford Expedition
Steering wheel audio controls
It's relatively easy to retain your truck's steering wheel audio controls when you install a new stereo. When you enter your vehicle information, our database will choose the adapter you need to make your factory steering wheel controls work with your new receiver.

The Expedition's 8" LCD can be replaced. If you have the Bang & Olufsen Play system, plan on replacing the amplifier as part of the job. (Crutchfield Research Photo)
Removing the Expedition's factory speakers
Upgrading the speakers will dramatically improve the sound in your Expedition, even if you have to (or want to) stick with the stock receiver. If you want to do the job yourself, our Crutchfield ResearchNotes™ have all the step-by-step instructions you'll need to get it done. That document (a $10 value) is included free with your Crutchfield car audio purchase.

The center dash speaker is pretty easy to deal with (Crutchfield Research Photo)
Removing the center dash speaker
The 3-1/2" speaker in the center of the dash is pretty easy to deal with. Just use a panel tool to pry up the grille's four clips, remove the grille, then remove the two Torx T20 screws securing the speaker to the dash. From there, just disconnect the harness and remove the speaker.
There’s no wiring harness available for this speaker location, so you'll have to splice, solder, or use Posi-Products speaker connectors to connect the new piece to the stock wiring. Also, in most cases, you’ll need to use pliers to remove the locator pins and allow the new speaker to fit flush under the factory grille.
In vehicles without the Bang & Olufsen Play Audio system, replacing the high-impedance factory speaker with a standard 4-ohm speaker will result in higher volume levels. Keep that in mind when you’re shopping.
Tools needed: Panel tool, Torx T20 driver, pliers

The front pillar speakers are attached directly to the panels (Crutchfield Research Photo)
Removing the front pillar tweeters
The Expedition’s front pillars are home to 1.650" speakers that are attached to the pillar panels. They’re not all that hard to remove, and there are some nice aftermarket replacements available. As with the center dash speakers, pay close attention to the impedance figures, since replacing these high-impedance models with 4-ohm speakers will produce less-than-satisfactory results.
There aren’t any wiring harnesses for this location, so you’ll need to splice, solder, or use Posi-Products connectors here. There aren’t any mounting brackets either, so you’ll need to use hot glue, silicone, or our universal backstraps to secure the new speakers to the panels.
Tools needed: Panel tool, 3/8" socket, ratchet and extension, Torx T20 driver, hook tool

You'll need to remove the door panels to access the front woofers (Crutchfield Research Photo)
Removing the front door woofers
The 6"x9" front door speakers can be replaced by a nice variety of same-size, 6-1/2", or 6-3/4" aftermarket models. You’ll need to remove the door panels to get to the stock speakers, but that’s not a terribly difficult thing to do and you’ll find all the instructions you’ll need in your Crutchfield ResearchNotes™.
You’ll need mounting brackets to install most aftermarket speakers, and we’ll include them with your Crutchfield purchase. You may need to make some small modifications to the door panels to create some extra, space, but that’s not as hard as it might seem.
If you choose aftermarket 6-3/4" speakers, you'll need to remove the inner tabs on the speaker brackets, so work carefully.
Tools needed: Panel tool, small flat blade screwdriver, 7mm socket, ratchet and extension, utility knife

The rear doors include 6-3/4" woofers and panel-mounted tweeters (Crutchfield Research Photo)
Removing the rear door speakers
In the Expedition’s rear doors, you’ll find 6-3/4" woofers and 1.569" tweeters. You’ll need to remove the door panels to get to them, so while you’re up, we’d suggest replacing all of them at the same time. Be sure to store those panels in a safe, dry place until you’re ready to put them back on the doors.
When you enter your vehicle information, you’ll find a nice assortment of aftermarket tweeters that will fit in this location. These are high-impedance speakers, so installing lower impedance models will result in higher volume levels. Keep that in mind when you’re shopping.
Your aftermarket tweeters can be flush-mounted through the holes in the door panels that are created by removing the factory tweeters. There are no mounting brackets available, so you’ll need to use hot glue, silicone, or some more universal backstraps to secure the new ones. There aren’t any wiring harnesses that will work here either, so you’ll need to splice, solder, or use Posi-Products speaker connectors to connect the new tweeters to the truck’s wiring.

The factory rear door woofers, on the other hand, are mounted to the doors (Crutchfield Research Photo)
There are plenty of nice replacements for the woofers, too. You’ll need speaker mounting brackets for most of them, and we’ll include the correct brackets with your Crutchfield speaker purchase. If you’re going to install 6-3/4” models, you'll need to remove the inner tabs on the aftermarket speaker brackets.
In many cases, you’ll need to cut off the back of the factory plastic speaker grilles to get any new speakers to fit. That’s not hard to do, but we recommend working carefully when you do it.
Tools needed (tweeters): Panel tool, small flat blade screwdriver, 7mm socket, ratchet and extension
Tools needed (woofers): Panel tool, small flat blade screwdriver, 7mm socket, ratchet and extension, utility knife

The Bang and Olufsen Play system adds these rear pillar speakers (Crutchfield Research Photo)
Removing the rear pillar speakers (B&O system only)
The Bang & Olufsen Play system includes 2-3/4" speakers in the rear pillars. They’re pretty easy to get to, but to get the new ones to fit, you’ll need to open the screw holes on each speaker, then (carefully) cut off the locator pins to allow your speaker to fit flush.
There’s no wiring harness for this location, so you’ll need to splice, solder, or use some more Posi-Products speaker connectors to connect the new tweeters.
Tools needed: Panel tool, Torx T20 driver, pliers

As you can see, getting to the B&O subwoofer takes a lot of work (Crutchfield Research Photo)
Removing the rear side panel subwoofer (B&O system only)
A 10" subwoofer is another bonus that comes with the Bang & Olufsen Play system. There are plenty of aftermarket 10” subs to choose from, and you’ll be able to re-use the factory enclosure when you install your new subwoofer. Depending on which subwoofer you choose, though, you may need to drill new screw holes or fabricate a speaker bracket. Again, not hard, but work carefully.
Getting to the factory sub is kind of hard, though. It’s not that any of the steps are especially taxing, it’s just that there are a whole bunch of steps. You can do this, but you’ll need to clear off a sizable block of time to do it. You’ll need to stay organized, too, because you’ll remove lots of parts and pieces that will all have to go back where they came from when you reassemble the rear side panel area.
Patience, care, and caution will serve you well if you choose to do this job yourself. You’ll find all the step-by-step disassembly information you need in your Crutchfield ResearchNotes™. That document adds some info on getting to the factory amp, which is also located back here.
Tools needed: Panel tool, 7mm, 8mm, 10mm, 13mm and 15mm sockets, ratchet and extension, Torx T20 driver, hook tool, drill with 1/8" bit
Read our Car Speakers Buying Guide for more information.
Shop for speakers that fit your Ford Expedition

Even with the third-row seats up, the Expedition's cargo area has some room for a sub box (Crutchfield Research Photo)
More bass in your Expedition
As you’ve probably already noticed, there’s all kinds of space for bass in the Expedition’s vast cargo area. With the third row seat in the “up” position, we measured a 51"W x 20"H x 11"/16"D space. That’ll hold a pretty good-sized subwoofer enclosure, but if you fold that seat down, there’s even more space for a sub box and all kinds of other stuff.
If you’re more concerned about using that space for actual cargo, you can still give your Expedition’s bass a boost by installing a more compact powered subwoofer.
Learn more about building a bass system in our Car Subwoofer Buying Guide.

Keep your Expedition's carpeting looking sharp with a set of custom-fit WeatherTech floor liners
Other options for your Expedition
Here are some other cool ideas for improving your Expedition or Expedition Max.
Protect your carpeting with custom floor liners
Driving any truck eventually leads to doing truck-type things, which can take a toll on the carpeting. WeatherTech floor mats and liners will help protect your Expedition's floors from dirt and damage.
Quiet road roar with Dynamat
Like any big SUV, the Expedition can get a bit loud at speed. To combat wind noise and road roar, you can install Dynamat in the doors and (if you go for a big sub) rear hatch area. This sound-deadening material will allow you to really enjoy your music.
Rear-view cameras for better visibility
An Expedition is an enormous vehicle, and maneuvering in a crowded parking lot can be a big challenge. If you want a better view of what's behind you, we offer rear-view cameras from Kenwood, Alpine, Sony, Pioneer, and more. Some are designed to work with same-brand receivers only, but others come with a composite video connector and will work with almost any video receiver.
Add an amplifier and fill your truck with music
If you want real power, you need an aftermarket amplifier. You'll find plenty of great spots to mount amplifiers in the Expedition (under the seats or behind interior panels, for example), but consider the size of the amp and remember that it will need air to operate efficiently.
Car security systems
Installing a security system in your Expedition isn't easy (security systems rarely are), but it's definitely a good idea. Our Crutchfield Advisors can help figure out what you need to get the job done, but we usually recommend taking your car and new gear to a professional installer.
Let's get started!
Ready to shop? Use our vehicle selector to find the gear that will fit your car or truck. If you have questions, give us a shout via phone or chat.


Comments (0)