Angle management: How to adjust your turntable's vertical tracking angle
Understanding the subtleties of adjusting your VTA

Adjusting the Vertical Tracking Angle might seem like a deep dive into turntable geekery but trust me — it’s one of those tweaks that can bring out the best in your sound, if your setup actually needs it (we’ll get to that).
What is the Vertical Tracking Angle?
The Vertical Tracking Angle (or VTA) refers to the angle of your tonearm and stylus when it’s lowered onto a record. The goal? To ensure the stylus sits just right in the groove, delivering balanced, detailed, and dynamic sound.
I revisited this adjustment recently when I swapped out my trusty Yamaha linear tracking model for my tried and true Technics SL-1200MK2. After pulling it out of storage and giving it a proper setup, I dropped the needle on a newer pressing of Rubber Soul. Right away, I noticed the tonearm was riding a little high — not quite level. It tracked fine, and the music wasn’t bad (obviously), but it sounded a touch bright.
So I started making small tweaks to the VTA, listening between each one. After just a bit of effort, I got the arm sitting level during playback, and boom — what a difference. The brightness mellowed out, and the whole soundstage opened up. Everything felt more balanced, more alive… right there with me. Or as the lads might say, “in my ears and in my eyes."
Read first!
Before you start fiddling with screws, we need to establish something: If you've got a brand-new turntable or one that’s still rocking all its original parts (cartridge, platter, mat, etc.), then skip this adjustment. Seriously. Manufacturers have already fine-tuned your setup to work perfectly out of the box. So, unless you’ve swapped parts, customized your rig, or tinkered a bit with things, there’s no need to mess with the VTA — it’s already good to go.
Also, like most things in the turntable world, there are simple answers and, well, less simple ones. We won’t dive into the stylus rake angle (SRA) conversation or any of the usual geometry, science, or fancy tools that some folks use to fine-tune this adjustment. Instead, we’ll keep things entry-level, which should work just fine for most setups.
Why does VTA matter?
Tweaking your Vertical Tracking Angle isn’t exactly glamorous — but if it's off, it's a necessary step. Getting it just right is an important step in the 'table offering the kind of detail, depth, and balance that makes vinyl downright magical. But here’s the catch: even a slight misalignment can throw things off.
If the back of your tonearm’s riding too high, the stylus ends up with too steep an angle, causing it to nosedive into the groove. That means your sound turns edgy and overly bright, with treble taking over. You might hear harsh “s” sounds (sibilance) or notice your music losing warmth, sounding thin and kind of sterile. Also, that steep an angle can actually stress out your stylus. Most cantilevers aren’t built to bend like that, so over time, you could be looking at real damage.
If the back of your tonearm’s sitting too low, the stylus leans too far back — causing a bass overload. The sound gets thick, bloated, and muddy, with highs and mids getting totally buried. And if it’s really off, the back of the cartridge might even scrape the record, and that’s a whole new level of trouble.
When your VTA is dialed in, the stylus rides the groove at the perfect angle — no tipping too far forward or leaning back. You’ll get beautifully balanced sound with rich, full bass that doesn’t overwhelm, clear and present mids, and highs that sparkle without getting harsh.
.jpg)
You’ll notice the difference in dynamics too — more punch, more depth, more energy. Instruments pop, and the soundstage widens out, so everything feels more alive and immersive.
Can I adjust my turntable's VTA?
Before you start tweaking, here’s a quick tip — make sure your turntable actually lets you adjust VTA. Not all of them do. And for the ones that do, the method can vary: some use set screws, some have a locking lever, others let you twist a dial.
Here are a few examples:
Some Audio-Technica 'tables offer an adjustment dial at the base of the tonearm assembly, which can be unlocked by a simple lever. Turning the dial will bring the whole assembly either up or down.

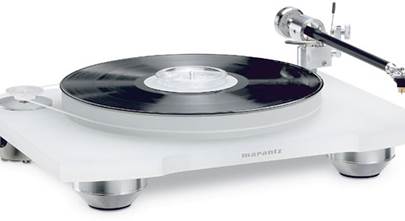
The Denon shown below uses a thin rod connected to the base of the tonearm for adjustment. Turning it will raise or lower the height.

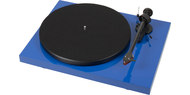
Music Hall designed their VTA adjustment to be simple — just turn the knob at the top of the tonearm assembly. Rotating it will raise or lower the arm as needed.

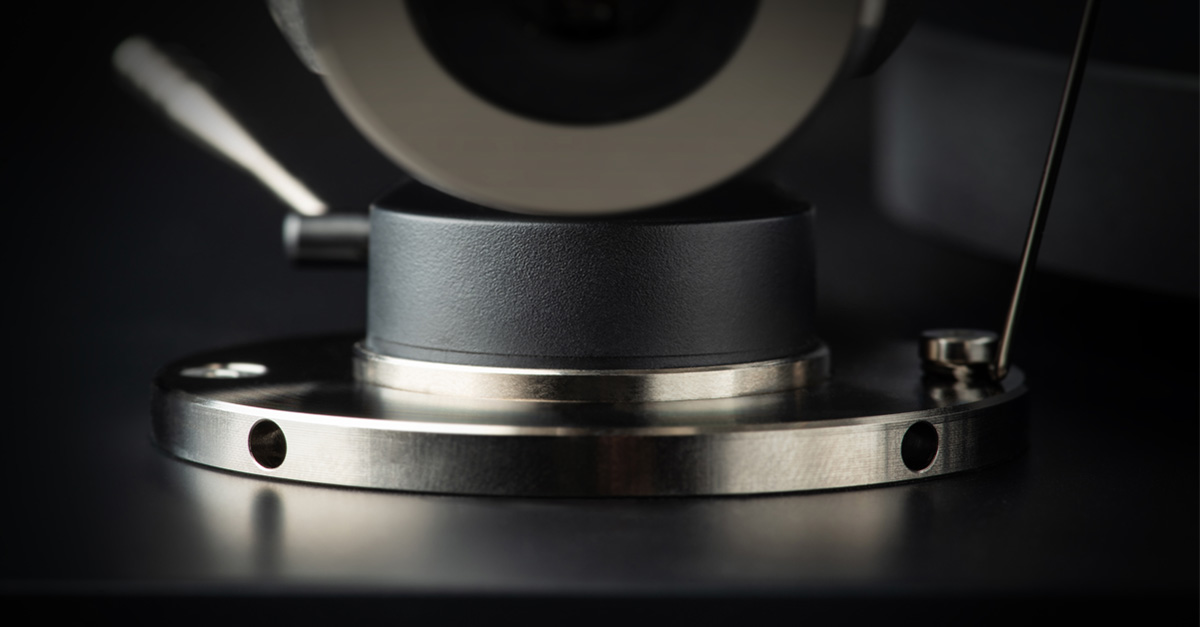
And finally, Mobile Fidelity uses a locking screw at the base of the tonearm. Loosening it allows you to adjust the height of the arm.

These are just a few examples of how this process can be done, and as you can see, they are all different. Check your specific model's manual to get yourself familiar with the process beforehand.
Thinking about upgrading your cartridge or swapping in a new platter mat?
Both can change the height of your setup — which means your VTA might need a tweak. That’s why knowing if your turntable offers Vertical Tracking Adjustment is important. If you’re in the market, these models have it.
Making the adjustment
Step one: See if the arm is level
This is the heart of the VTA adjustment. Ideally, your tonearm should sit level with the record while it's playing. As mentioned earlier, most tonearms come pre-set this way from the factory. But if yours isn’t — whether due to a setup error or because you’ve swapped mats or cartridges — that’s what you’re adjusting for: getting the arm level so that you can expect the best results from your stylus.
A simple visual check is usually all it takes to see if any adjustments are needed. Place the stylus on the record and start playback. Get down to eye level and view it from the side. If you’re like me, you might need to grab your glasses and bump up the lights. If the arm looks level, chances are it’s good to go and doesn’t need any tweaking.

What you’re aiming for is a tonearm that sits nice and level as the record spins.
If the arm looks off — meaning it also sounds off — then proceed to the next step.
Step two: Give it a listen
Cue up a familiar record, one you know by heart. Ideally something with clear vocals, crisp cymbals, and solid bass. Start playback and listen closely. Does the sound seem wrong? Maybe a bit too bright or too muddy? Using your ears is a helpful way of determining what the next step should be.
Step three: Make small tweaks
If the sound of the record is too bright or harsh, lowering the tonearm slightly may help that. If it's too bass-heavy or murky, then raise it a bit. For the sake of safety (of both your record and your stylus), it's recommended to do this adjustment while not playing the record. And remember, just a millimeter or two can make a big difference either way, so go slow. After each tweak, play that same track again. You’re aiming for that “just right” sweet spot — clear highs, full bass, and nice separation between instruments.
Step four: Lock it in
Once it sounds dialed, lock the tonearm height adjustment in place and you should be set. And since this is not a setting that needs to be tweaked often, you shouldn't have to revisit the process anytime soon.
And there you have it. Sure, adjusting VTA isn’t as flashy as cueing up a fresh 180-gram pressing of Sgt. Pepper's — but it’s the kind of behind-the-scenes setup tweak that helps your music shine. With just a few careful adjustments, you’ll have your records sounding smoother, punchier, and more dynamic. In other words: like they should.
Got questions?
If you have questions about turntables, contact our friendly Crutchfield Advisors. And remember, you get free tech support for as long as you own your gear.


Comments (0)