How to change your guitar's strings
A step-by-step guide to string replacement, including how to choose the best ones

In this article: We'll talk about how to choose and install the best strings for your guitar, including...
...And we'll give you some maintenance tips that can help your strings last longer.
G
uitar strings don’t last forever. If you've never changed guitar strings before, don't worry — it's a straightforward process that anyone can learn in one sitting. Our step-by-step guide will help make your first string change a smooth and safe operation.
When to change your guitar strings
If your guitar sounds dull, muffled, or won’t stay in tune, it might be time for a new set of strings. You'll probably be surprised by how much it can change the way it feels when you play.

A new set of strings can make your guitar sound and play its best.
How to choose the best strings for your guitar
The two main considerations when choosing guitar strings are gauge (thickness) and material. Gauge influences playability, tone, and tuning stability. String material mostly affects tone and feel.
Let's take a look at the main characteristics of different string gauges and materials to help you figure out the best string choice for your guitar and playing style.
Different string gauges
String gauge is a measurement of the thickness of each string in thousandths of an inch. A string labeled “.009” is nine thousandths of an inch thick. The next size up is .010," ten thousandths of an inch. That size increase may seem miniscule, but it can make a big difference in feel and sound.
Gauges are often named for the set's smallest string. This super light gauge electric guitar set from D'Addario goes from .009" to .042," so they're called "9s." 9s and 10s are the most popular electric guitar string gauges.
The chart below describes the basic characteristics of the most common guitar string gauges. Keep in mind that the actual measurement numbers are more important than the names — for example, D'Addario calls its 10-46 set "Light" while Fender calls its 10-46 set "Regular."
In general, lighter gauges are easier to fret and bend — pushing or pulling the string with your fretting finger to raise the pitch. Heavier strings have better tuning stability and more substantial tone and sustain. Some acoustic guitars are designed to handle light gauge strings only.
| String gauge | Electric measurements | Acoustic measurements | Sound characteristics | |
|---|---|---|---|---|
| Extra light | .008 - .038 | .011 - .052 | Trebly tone with super-easy playability. Great for beginners and certain shredders. | |
| Light | .009 - .042 | .012 - .053 | Brighter tone with easy playability. Great for soloing and single-note runs. | |
| Medium | .010 - .046 | .013 - .036 | Warmer tone with smooth playability. Higher tension improves tuning stability. | |
| Heavy | .011 - .049 | .014 - .059 | Thicker tone. High tension requires more effort for fretting but provides better tuning stability. | |
| Extra heavy | .012 - .060 | n/a | Thick, warm tone. Excellent tuning stability. Great for jazz. |
It can be fun to experiment with different gauges. Just remember that if you go up more than one size it could affect tuning accuracy — or intonation — along the neck. This isn't a big deal, as you can compensate for that with a simple adjustment.
Different string materials
A set of strings almost always includes two or three "plain" strings (the higher or treble strings) and three or four "wound" strings (the lower or bass strings) that have a thin wire wrapping.
Round-wound strings are the most popular. They usually use a hexagonal steel core with round wrap wire. The different metals used for the winding give them a range of characteristic tones.
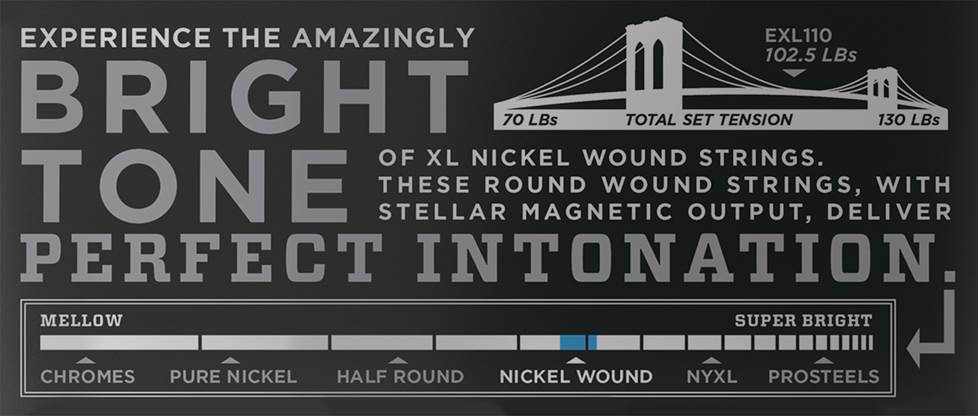
D'Addario nickel wound strings have a balanced, moderately bright tone.
Common electric guitar string materials
- nickel-plated steel is the most popular, with a balanced tone
- stainless steel is brighter-sounding and corrosion-resistant
- pure nickel is warmer sounding
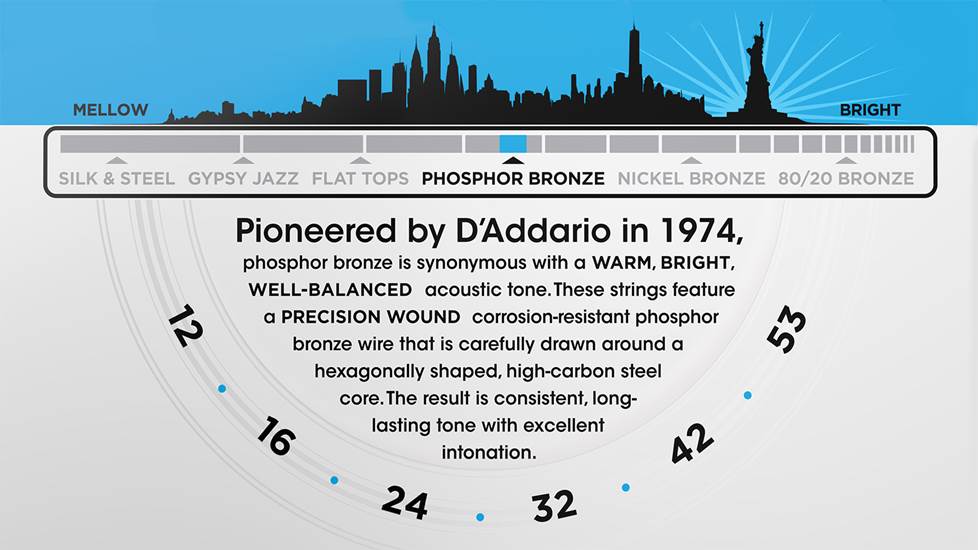
The well-balanced tone of D'Addario's Phosphor Bronze acoustic guitar strings make them the most popular.
Common acoustic guitar string materials
- Phosphor Bronze have a well-balanced tone and are the most popular
- 80/20 Bronze sound brighter
- Nickel Bronze have a clear, focused sound that emphasizes the wood of the guitar
You can get flat-wound strings, with (you guessed it) a flat wrap wire over a round core. They feel smooth under your fingers and impart a mellower attack and overall tone. You can also find "half-rounds" — a hybrid that is more like round-wounds with a flattened outer edge on the wrap wire.
Some guitar strings also come in a coated version. These usually cost more, but provide extended string life since they don't corrode as quickly as uncoated strings, thanks to an invisible, micro-thin polymer layer.
How to change your guitar strings
Find a comfortable place and make sure you have all the stuff you need. You might want to change your strings on a work bench with a work mat and neck cradle, or just hold the guitar in your lap.
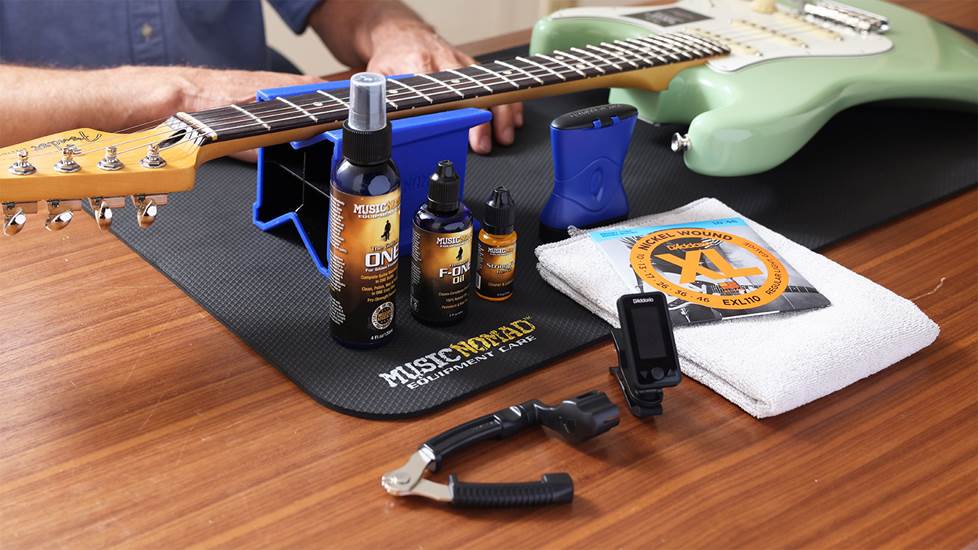
1. Get your strings and tools together
Here's what you'll need need to get started:
- A new set of strings
- String winder (optional, but helpful)
- Wire cutters (for removing old strings and trimming excess string)
- Tuner (clip-on, pedal, or app)
- Soft cloth (optional, for cleaning)
My kit for string changing also includes an all-in-one string winder/cutter and endpin puller, plus nut lube.
2. Remove the old strings
You can loosen the strings and then cut them, or loosen them enough to remove them without cutting them.
Sometimes I remove all the old strings at once. That gives you the option to clean and condition your fretboard as well as polish the parts of the guitar body under the strings where dust tends to gather.
Usually, I remove one string and replace it before moving on to the next string, starting with the bass strings. Since guitar strings put a lot of tension on the neck, replacing one string at a time helps keep things stable — but don’t worry, your guitar is built to handle this.
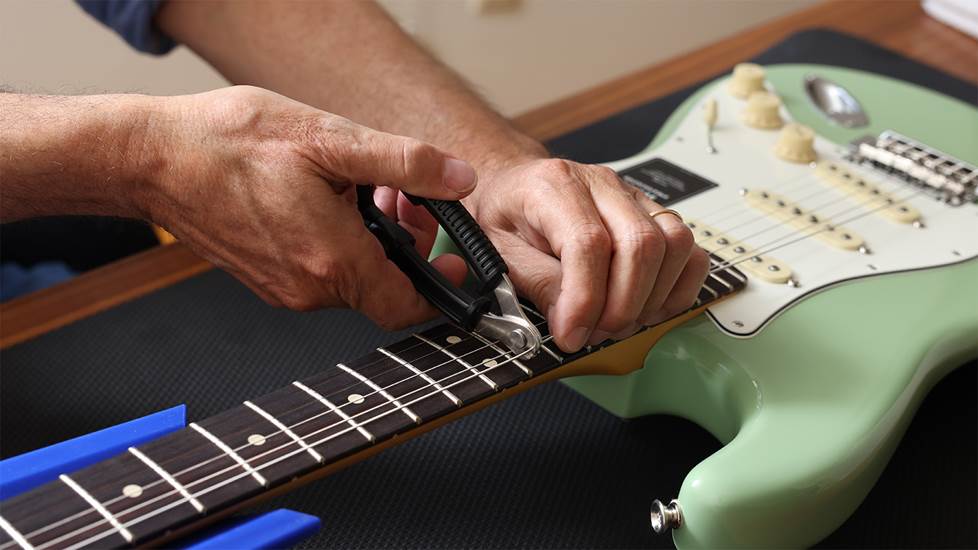
3. Lube string contact points
It's fine if you skip this step, but I've found that it improves tuning stability by reducing friction in the string slots of the nut and at the contact points on the saddles — these may be grooves or just a smooth surface.
If your guitar has one or two string trees, put a little under those too. All you need is a miniscule amount, and a tube of nut lube can last for years. Graphite also works, but it can be messy.
4. Make sure ball ends are seated properly at the bridge
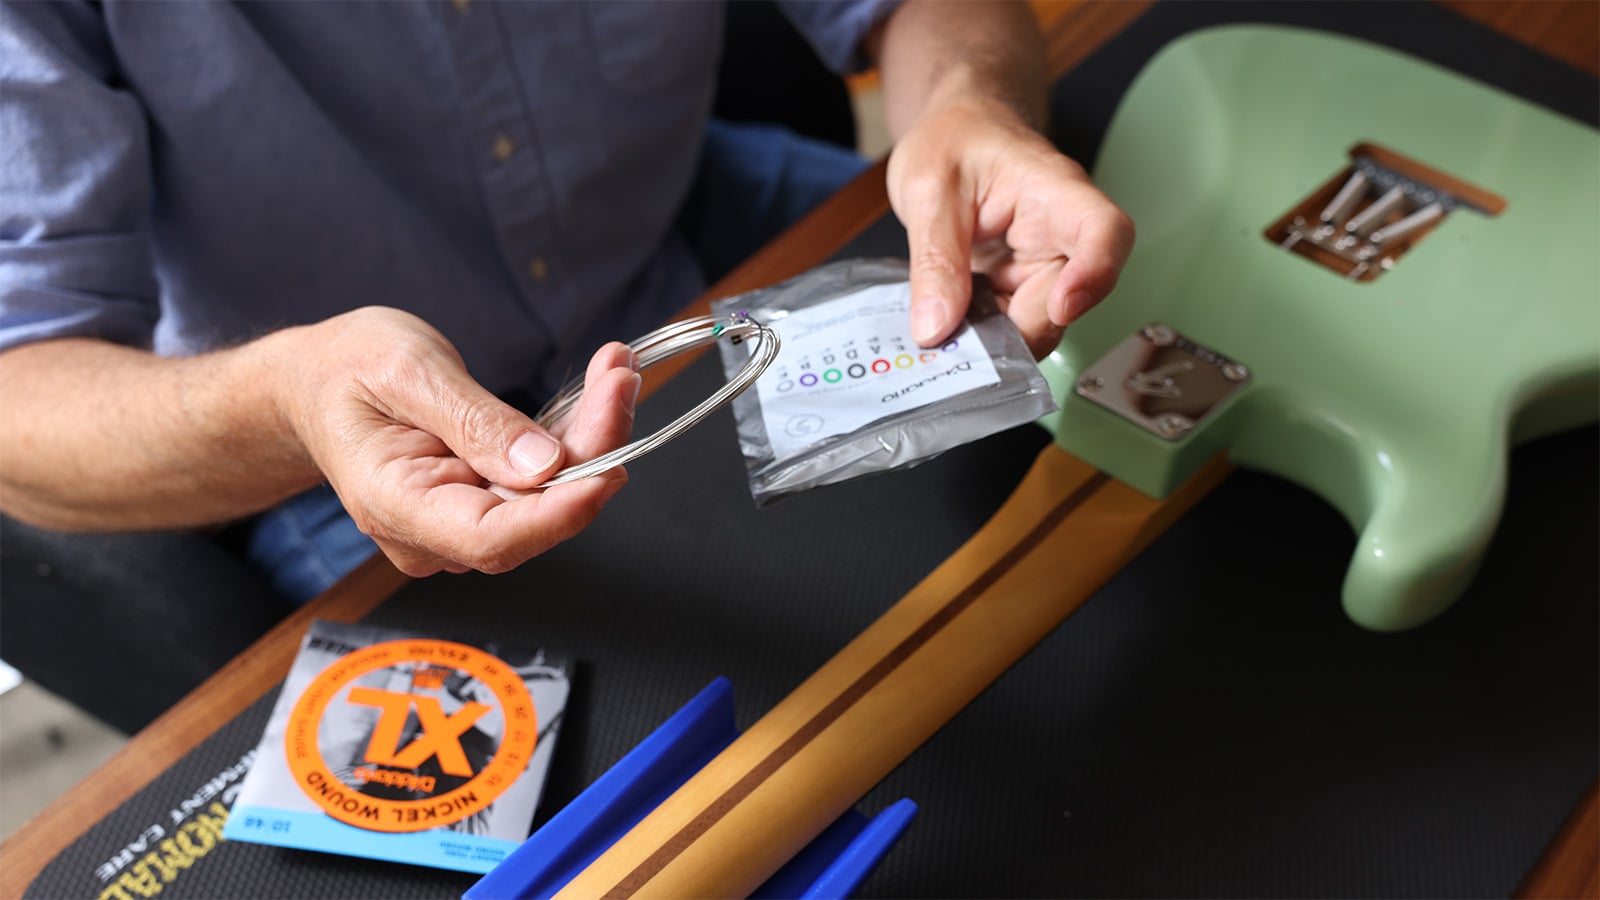
Open your strings and uncoil them carefully to avoid accidental kinking.
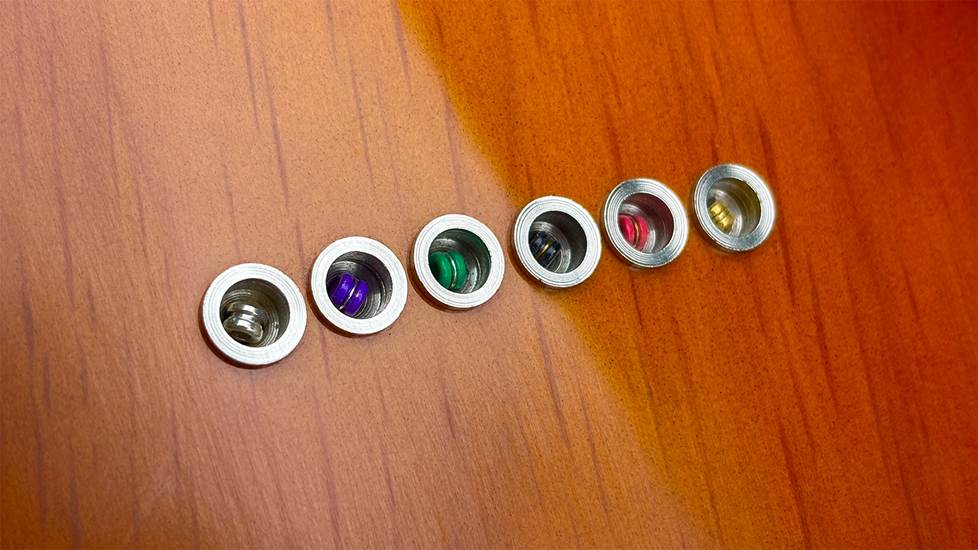
Most guitar strings have a ball on one end that locks into place at the bridge. Some strings use color-coded balls to help you keep track of which string goes where.
The ball ends of strings load differently through different types of bridges. With most electric guitar bridges, you thread the string through a hole that has a socket that the ball end locks into when you pull it tight.
Most acoustic guitar bridges use endpins. You put the ball end into the hole, insert the endpin, and pull the ball end tight while holding the endpin down.
Sometimes pulling the endpins free to remove the old string is hard — try pushing the old string down into the hole to free the pin, or use an endpin puller. Don't use metal pliers unless you pad the jaws and protect your guitar.
5. Secure the string with a kink at the tuning post
Different types of tuning posts use slightly different methods for attaching the strings. The two most common types of tuning posts are traditional and split-shaft, and there are also locking tuners, which are a popular option for people who change strings a lot because they simplify and speed up the process.
For traditional and split-shaft posts, you’ll want to leave about two inches of extra string to wrap around the tuning post — maybe a bit less with the thicker wrapped strings. You want the string to wrap around the post a few times but not overload it. You don’t need to do this for locking tuners because the locking mechanism provides the needed stability.
Here's a breakdown of how the process works for each type of tuner:
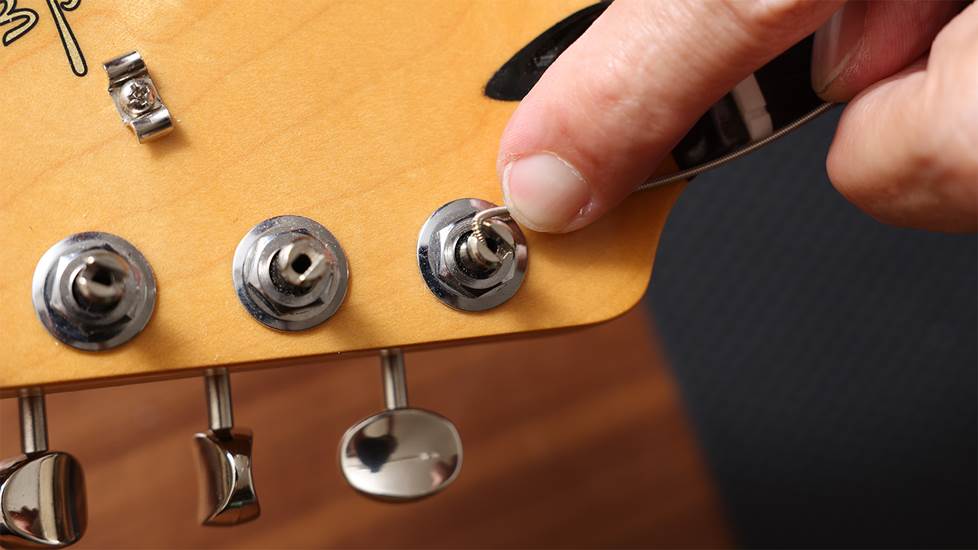
Traditional tuning posts
Thread the string straight through the hole in the post, then turn the tuning peg until the post is at a 90-degree angle with the strings. Then kink the string tight to the post — as shown in the image at the top of this section. That helps it stay securely in tune.
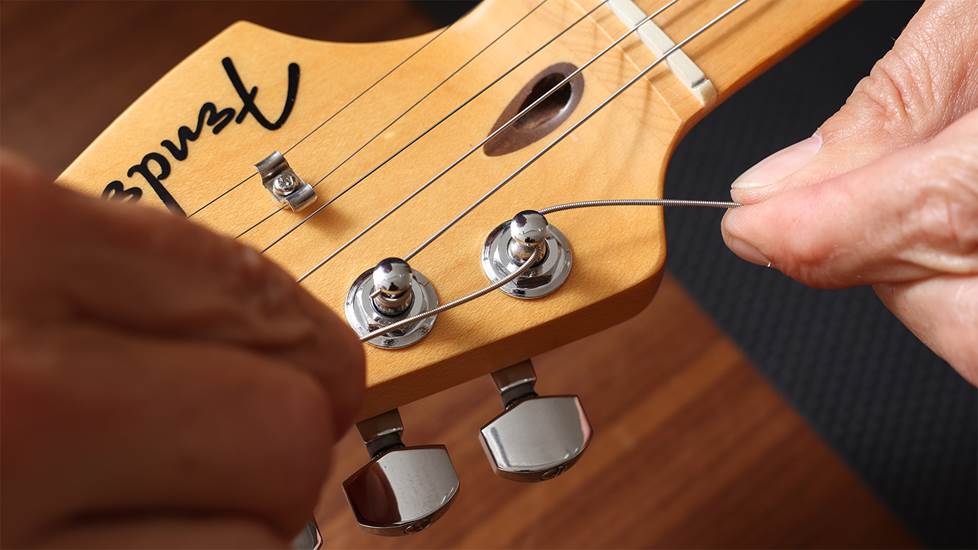
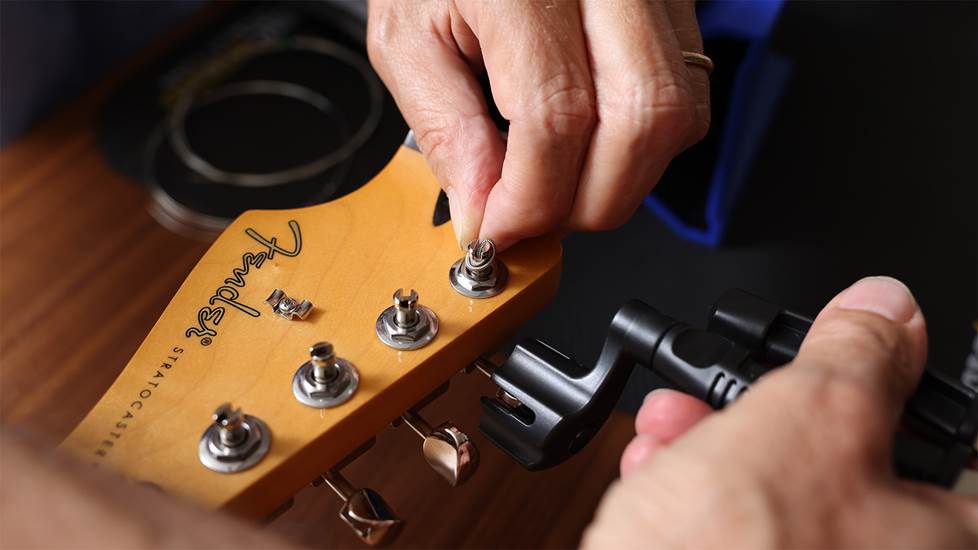
Split-shaft tuning posts
With split-shaft tuners, you cut the string to the right length, stick it as far as it will go straight into the hole between the split in the shaft, then kink it tight to the post — shown below.
Locking tuning posts
Locking tuners have a hole through the post like traditional tuners. But you don't need extra wraps or a kink when you use locking tuners. Simply pull the string through and tighten the string-lock knob on the back of the tuning machine — but don't overtighten or you could break the string.
6. Tighten the string to tune
Use a string winder (like the one shown in the image above) or just your fingers and thumb to tighten the string up to tune. Use your other hand to maintain enough tension on the string that the windings don't pop off the post as you tighten.
When you're holding the guitar in playing position, turn the tuning pegs on top counter-clockwise to tighten. And turn the pegs on the bottom the opposite way to tighten.
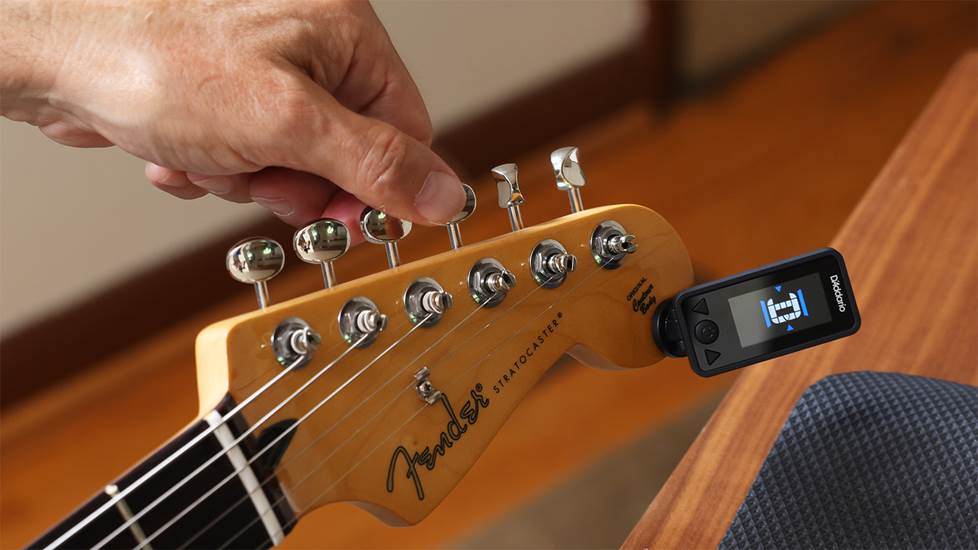
A clip-on tuner like this one from D'Addario can help you get your strings up to pitch accurately.
The string should wrap neatly and snugly from top to bottom around the post. I like for all my wraps to go below the hole on the post, but some players like one wrap above and the rest below. Snip off the excess string on the free ends of traditional and locking tuning posts.
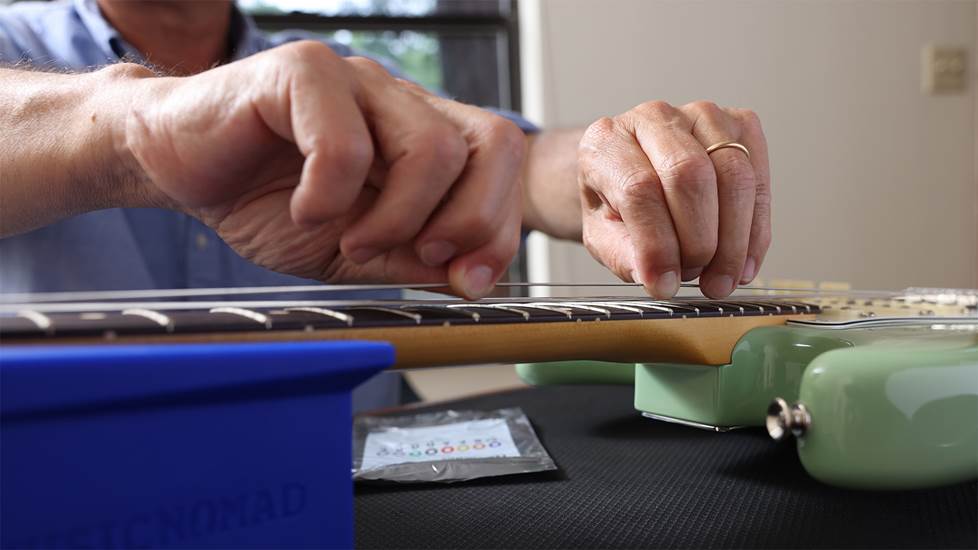
7. Pull and play the strings in
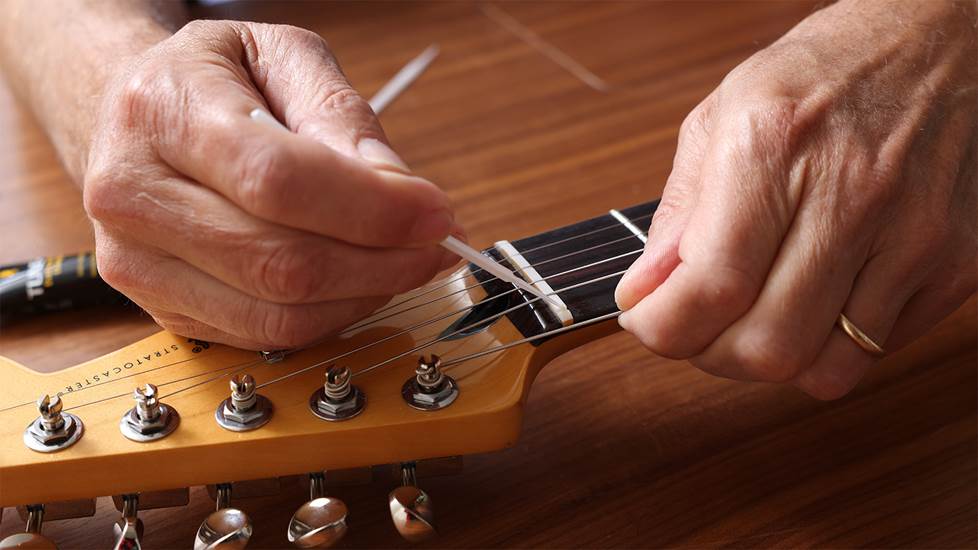
New strings take a little time to fully stretch into tuning stability. To speed things up, you can pinch the string at the twelfth fret, pull up gently, then retune.
That helps set a new string at the nut and saddle contact points. Playing your guitar helps too — in case you need another reason.
Take care of your strings
You can prolong the usable life of your strings by keeping them clean. Wipe them down with a microfiber cloth after playing, especially if you sweat on them. You can also use a string cleaner/conditioner that protects them from corrosion and reduces finger friction.
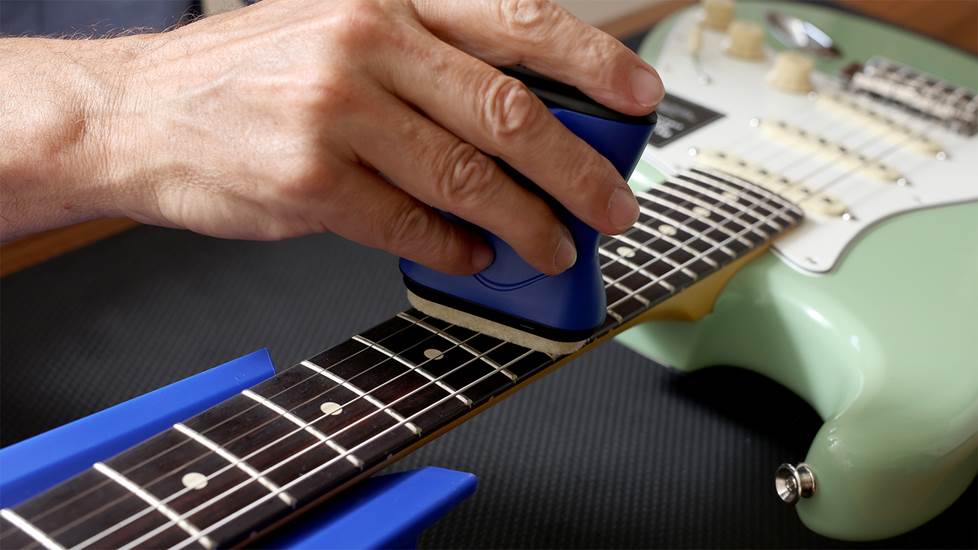
Conditioning your strings can prevent corrosion and prolong their lifespan as well as reduce friction on your fingers.
Still have questions?
Crutchfield has a long history of employing and supporting musicians. If you have questions, give one of our Advisors a call at 1-800-315-0443 or contact us online. Free lifetime tech support is included with your Crutchfield purchase.


Comments (0)