The right angle: How to use a mirror to adjust a turntable's azimuth
Taking your turntable's stylus from off axis to on point

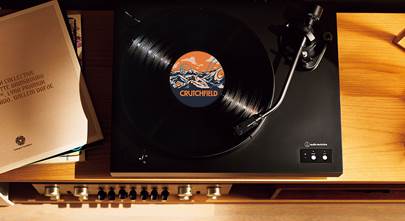
So you’ve got your turntable all set up, you cue up your favorite record — let’s say Neil Diamond’s Hot August Night — but as it spins, you notice that something’s just a little off. “Sweet Caroline” doesn’t sound so sweet. Maybe the vocals are drifting to one side, or the soundstage isn’t as wide and glorious as you remember.
Bummer.
But before you start swapping cables or blaming your speakers, it’s worth checking to see if your azimuth is aligned.
What is azimuth?
It sounds like a made-up word — or maybe the name of a sci-fi author — but nope, azimuth is one of those fancy-sounding terms audiophiles love to toss around. Don’t worry, though — it’s nowhere near as intimidating as it sounds.
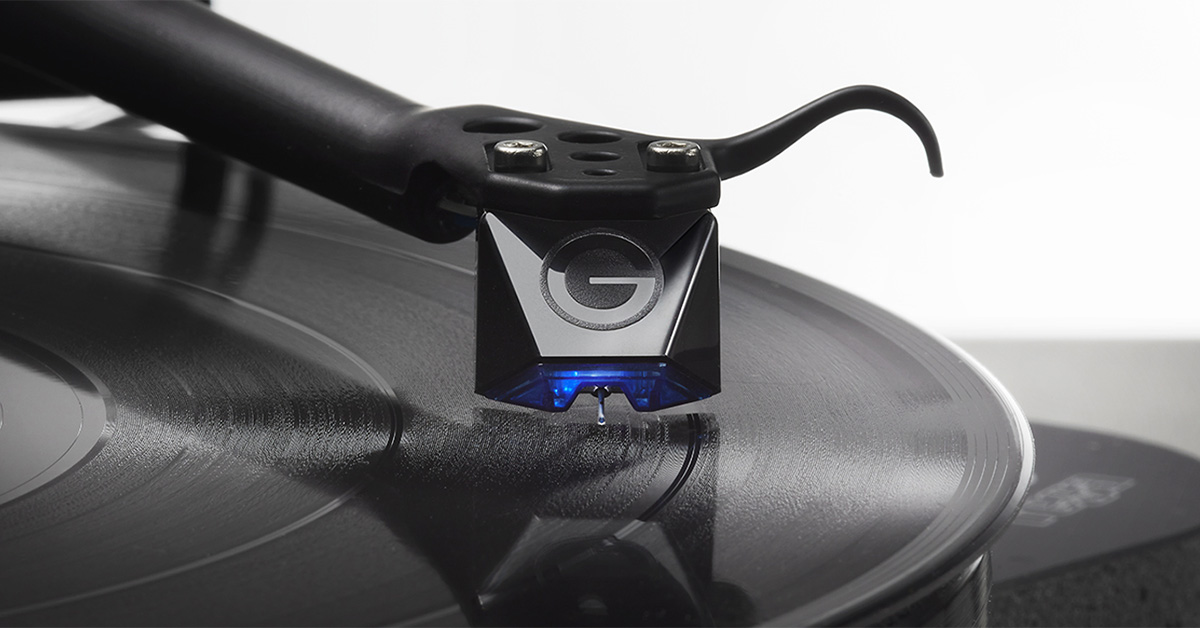
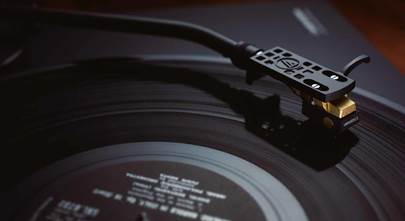
In the turntable world, azimuth refers to the vertical angle of your stylus relative to the groove walls. In simpler terms, when you're looking at the cartridge head on, it's about whether the stylus is perfectly vertical or leaning slightly to one side.

A properly adjusted azimuth has the stylus sitting perpendicular and the headshell horizontal to the platter
Read first!
Just like with the Vertical Tracking Angle adjustment, if you’ve got a brand-new turntable, skip this step — seriously. Manufacturers typically fine-tune everything at the factory, and azimuth alignment is rarely off straight out of the box. Unless you’ve swapped the cartridge, tinkered a bit, or noticed something sounding off, there’s probably no need to adjust the azimuth. It’s likely dialed in and good to go.
Also, like most things in the turntable world, there are simple answers and, well, less simple ones. We’re not diving into the more advanced option. Instead, we’ll stick to a straightforward, entry-level method that should work well for most setups.

Using a mirror to see the position of a stylus is an easy way to check the azimuth
Check the azimuth
If your stylus leans even a little to one side, it’ll start favoring one groove wall over the other — which can throw off your stereo balance, shift instruments around in the mix, boost one channel more than the other, and flatten that nice wide soundstage. You might also hear more crosstalk, with left and right channels bleeding into each other.
And it doesn’t stop there: misaligned azimuth can wear out both your stylus and your records unevenly, and it can trip up the stylus on louder or more complex passages, causing distortion or even skipping. Some stylus shapes are a bit more forgiving, though, so if the misalignment is minor, you might be just fine.

The easiest way to check your azimuth is with a simple visual test — just grab a small, thin mirror (and maybe your glasses, in case your eyes’ azimuth is off too.) Place the mirror flat on the platter, gently swing the tonearm over, and lower the stylus onto the mirror. From a head-on view, your cartridge and its reflection should form a straight, clean line. If they tilt away from each other, your azimuth is off.
Next steps
If the mirror reveals that your azimuth is off, an adjustment might be necessary. Unfortunately, not all tonearms offer azimuth adjustment, but if yours does, it’s worth getting familiar with the process before moving on.
Here are a few common scenarios:
Headshell-end adjustment

An adjustment screw at the headshell end of the tonearm allows for precise tweaking — just a slight turn loosens the headshell for repositioning.
Tonearm base-end adjustment

Some turntables require loosening a screw (or screws) at the back of the tonearm assembly. Just a slight turn will let the arm rotate to correct the angle. Remember — these screws only need to be loosened, not removed.
Adjustable headshell collar

Some turntables offer a headshell with built-in azimuth adjustment. Loosening a screw on the side of the headshell allows the locking collar to rotate, if needed.
These are just a few examples, but whatever your turntable offers, take time to research the adjustment method before getting hands on.
What if my turntable doesn't offer azimuth adjustment?
Ideally, azimuth should be properly set at the factory on turntables that don’t offer user adjustment — but things happen. If your turntable doesn’t allow for azimuth adjustment and you notice the stylus sitting slightly off (whether due to a cartridge defect or an issue with the tonearm), your options are somewhat limited.
The steps below cover how to adjust azimuth on turntables that are built for it, but if yours isn’t, there’s still hope. If the headshell is removable, you might be able to gently rotate it to straighten out the stylus. Some cartridges can also be shimmed — slipping a tiny piece of material, like construction paper or a washer, between the cartridge and one side of the headshell to fine-tune the angle. If that doesn’t do the trick, you may need to swap cartridges — or in rare cases, look into servicing or replacing the tonearm.
Making the adjustment
Before you dive in, go ahead and power off your turntable. Also, since you don’t want anything moving while you're making precise adjustments, secure the tonearm in its rest and lock it down. The last thing you want is the tonearm swinging around or surprising you mid-tweak.
1. Loosen the screw
Go to the set screw you located, and use the right tool to loosen it just slightly. Remember, you’re not taking it out — just loosening it enough so the headshell or tonearm tube can rotate gently side to side. That slight movement gives you just enough control to dial in the azimuth without throwing off the rest of your setup.
2. Go slowly
Gently rotate the headshell or arm tube just a bit clockwise or counterclockwise — whichever direction gets you closer — while looking straight at the stylus from the front. You’re aiming for a perfectly vertical position, no leaning left or right.
3. Retighten and recheck
Once you’re happy with the alignment, go ahead and tighten up that set screw — just snug enough, no need to crank it. Be careful not to strip it or bump the alignment while you’re locking it in. Then take a quick moment to double-check your work. A final peek with the mirror can give you peace of mind that everything’s dialed in just right.
4. Test it out
Finally, cue up your favorite record again and give it a spin. You’re listening for a balanced soundstage, a solid center image, and no odd harshness in either channel. If "Sweet Caroline" sounds sweet again, your azimuth is back on track.
Other methods to explore
The mirror trick is a fantastic starting point — simple, visual, and effective for most listeners. But if you're the type who likes to dig deeper, there are more advanced tools and techniques out there. Test records with dedicated azimuth tracks can help pinpoint channel balance and crosstalk, and simple items like protractors can be used to assist with alignment. Devices like the Fozgometer offer precise electrical readings and some audiophiles even use oscilloscopes, multimeters, or digital analysis software for pinpoint accuracy.
Whether you stick with the mirror or go full lab coat, the key is dialing in your setup to make your records sound "so good, so good, so good!" — and that’s always worth the effort.
Need a little help?
One of our expert Advisors can talk to you about turntables that offer azimuth adjustment, or help you pick out a new stylus if needed. They're knowledgeable, friendly, and they love music as much as you do.
And don't hesitate to call us if you hit a snag during the adjustment process. Free lifetime tech support is included with every Crutchfield purchase.


Larry
Posted on 3/18/2026
Hopefully I don't encounter those problems because at 77 years old I'm lucky I can see the stylus never mind alignment!
TERRY from MCHENRY
Posted on 2/14/2026
Informative and helpful.