
5 tips for amazing sunrise photos
How to take great sunrise pictures and have a blast while doing it

I
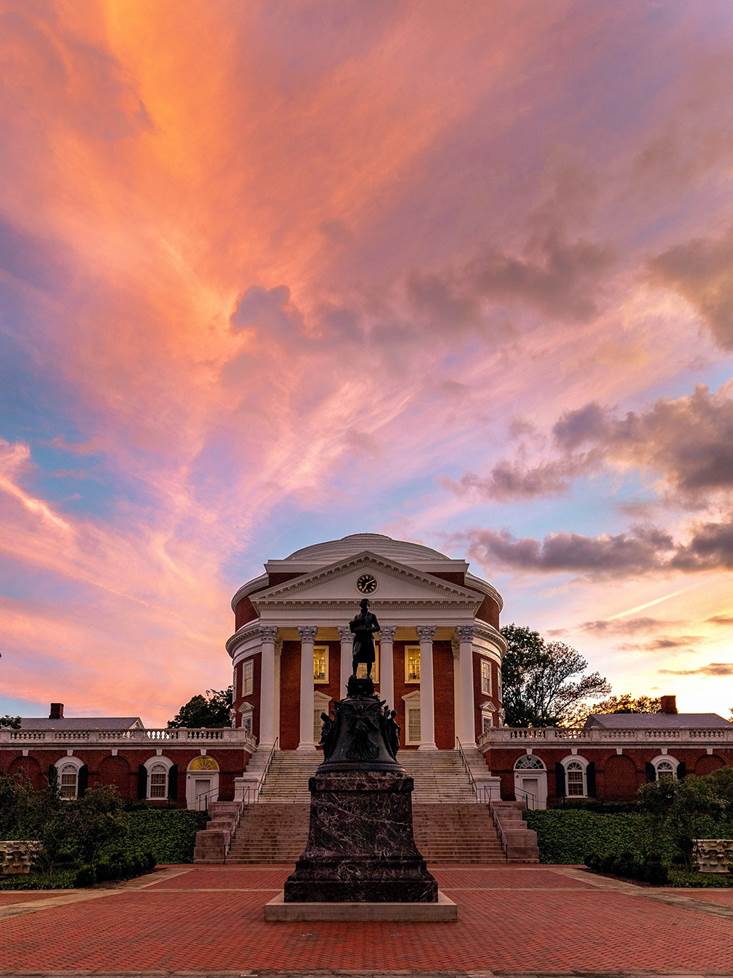
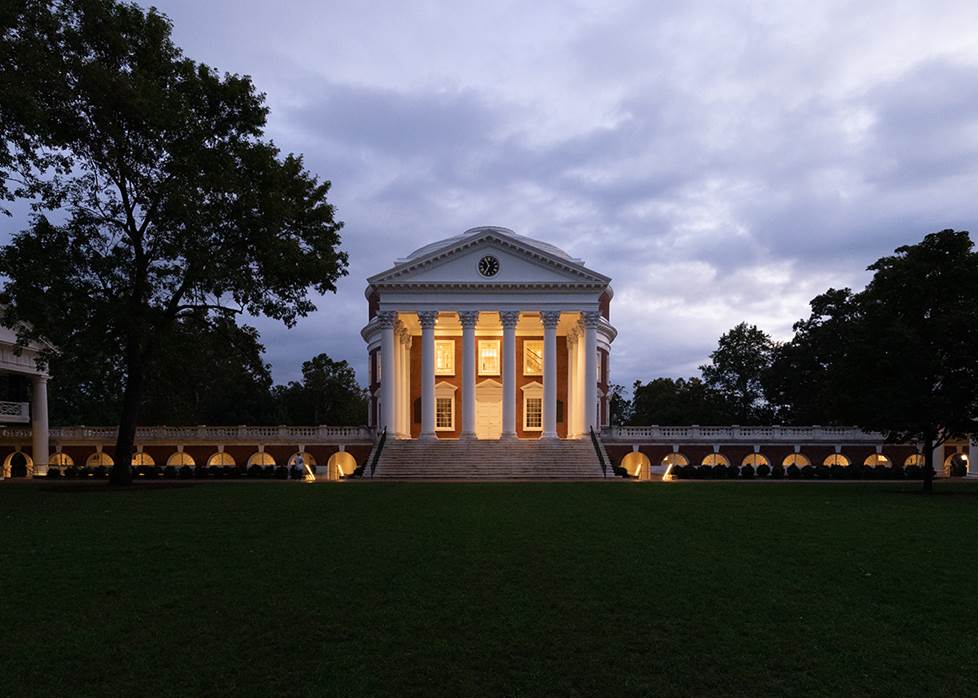
once saw a sunrise photo at the University of Virginia that was so stunning it inspired me to try my hand at the same composition. I ventured out into the frosty winter darkness, and waited for what I expected to be a glorious display of light and color in the sky.
Much to my chagrin it was a clear morning — which meant all I saw were blue skies and a bright yellow ball. Talk about a letdown! Thankfully, that first experience didn’t dissuade me from trying again. I've now taken hundreds of sunrise photos at UVA, and love heading out before dawn to see what the new day's light will offer.
In this article, I'll walk you through some of the key things I've learned about low-light photography over the years. I've included some of my favorite sunrise photos, along with the settings that I used. My hope is that you'll find these tips helpful for capturing great shots that you’ll look forward to sharing with friends and family.
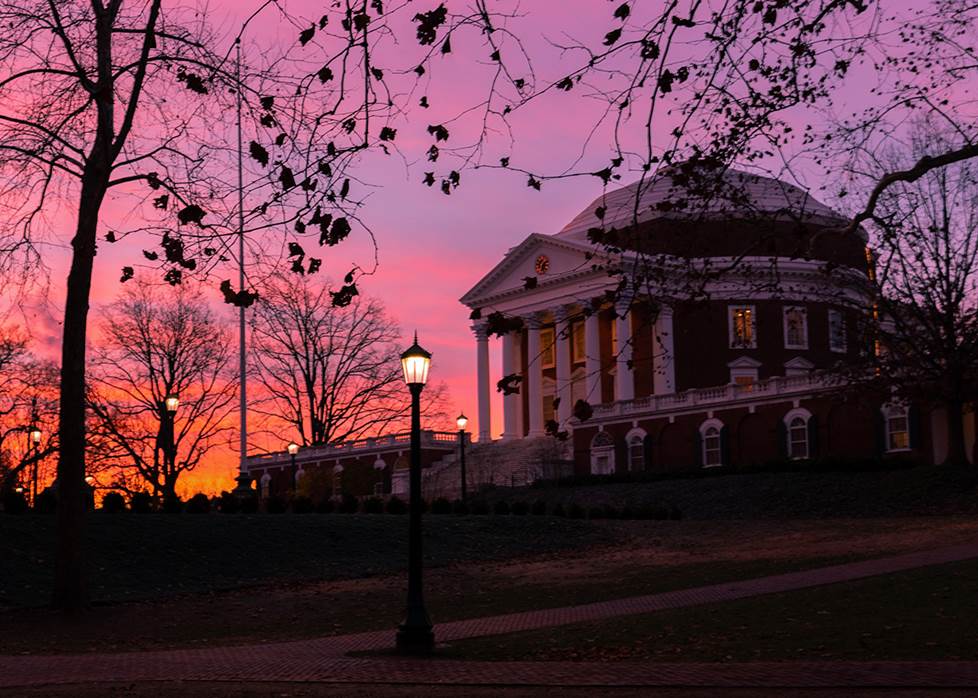
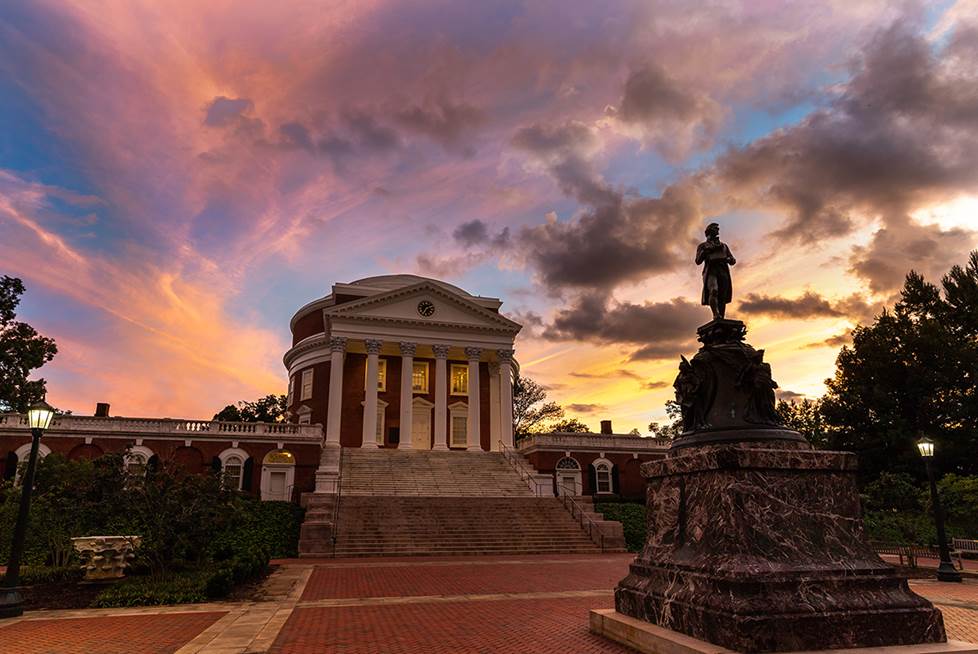
Winter sunrises — like this one behind the Rotunda at UVA — can create brilliantly colorful morning skies (shot at 1/20, f/7.1, ISO 200).
Sunrises are great...but what about sunsets?
The great thing about sunrise photography is that all of the same exposure and composition considerations that we'll talk about also apply to taking sunset photos. The only difference is that instead of gradually working with more light as the sun rises, you have less light as it sets.
I love a good sunset. But I'll let you in on a secret: there are almost always fewer people around during sunrise. That means you're much more likely to compose an image without a group of people chatting just in front of the horizon as you click an otherwise perfect photo.
The north side of UVA's famed Rotunda offers spectacular sunset opportunities, provided there aren't tons of people milling around (shot at 1/30, f/5.6, ISO 200).
1. Get there early, stay late, and come back again
Great pictures are all about being in the right place at the right time. For the sunrise, this means being at your photo spot well before the sun comes up. I like to be on location at least 30 minutes prior to sunrise to figure out the perspective and composition that I want to capture. This also gives me ample time to dial in my settings and get my tripod set up if I'm using one that day.
An early arrival also provides an opportunity to take photos during the blue hour, which is the period of time just before sunrise when the black of night starts to soften. These inky blue skies make an excellent background for white buildings or well-lit foregrounds.
I shot this long-exposure photo during the blue hour. I recommend using a medium aperture like f/9 to keep everything in focus, a low ISO (100) to keep noise down, and experimenting with the shutter speed to get your desired effects.
Have a fun trip coming up? Getting to your destination early gives you a head start on the crowds. This is particularly important at well-traveled locations like national parks and other popular photographic destinations. Be sure to bring a flashlight or headlamp so that you can more easily get your gear set up in the dark.
Once you've taken your sunrise shots, stick around to see if any other interesting light or colors appear. Cloud conditions can change quickly (more on that in a minute), and sometimes the best shots of the day come after the sun has fully risen. And if you don't get great shots your first trip out, don't give up! Each day presents a new opportunity to take photos, and no two sunrises are ever the same.
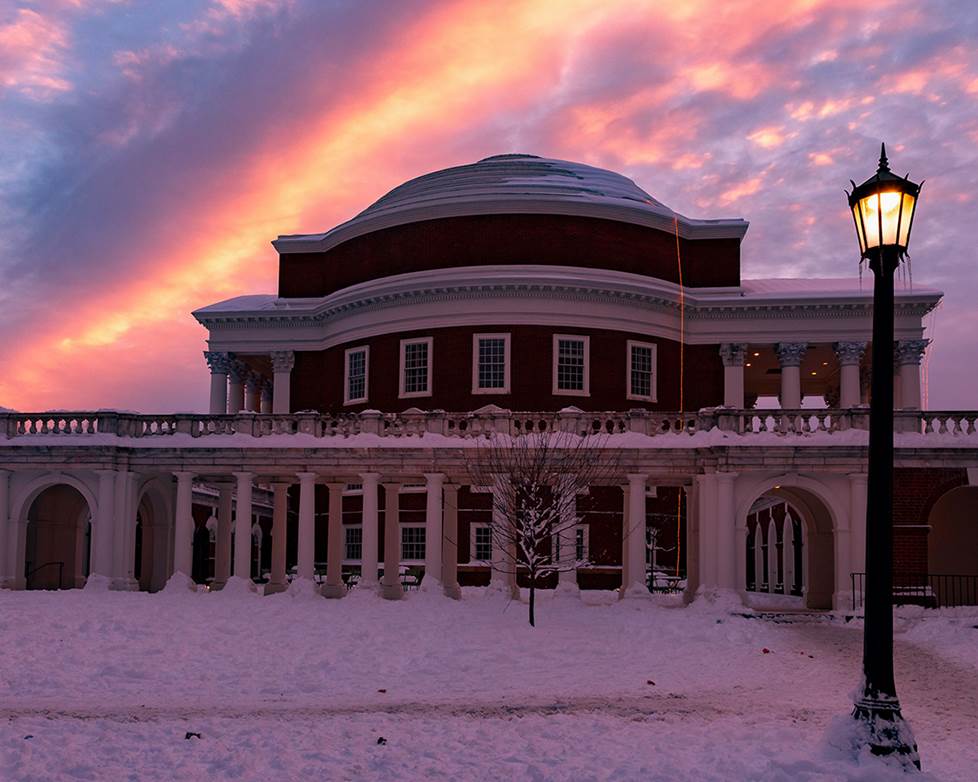
This post-snowstorm sunrise shot almost didn't happen. The January sky was super cloudy all morning, but the cloud coverage broke at just the right time to capture some interesting light (shot at 1/125, f/9, ISO 400).
Don't be caught in the dark
Where and when the sun appears on the horizon varies quite a bit throughout the year. A sun positioning app is a great tool for tracking its whereabouts. The Photographer’s Ephemeris is an excellent choice for both iOS® and Android™ devices.
The Photographer’s Ephemeris, or TPE, is a popular app for photographers that lets you know where and when the sun (and moon) will rise and set in a given location.
2. It's all about the clouds
There's a common element in nearly all of my sunrise photos: interesting clouds! For me, cloud coverage makes or breaks the visual impact of sunrise photography. That's why I take a look outside as soon as I get up each morning.
If I'm greeted with a clear starry sky, I go right back to bed, since I know the clouds that I want won't be there. However, when I peek outside and see good cloud coverage, I grab my gear and head out to see what I can capture.
When I look at the sky I'm hoping to see enough clouds to make the scattered light look pretty, but not too much coverage that the sun gets blocked. My ideal scenario is a sky that's mostly full of cirrus clouds. They have a swirly texture that I love, and their relatively even contrast across the sky lends well to good sunrise photos.
Stratus and nimbus clouds can provide interesting "skyscapes" as well. Look for medium- or high-coverage clouds (instead of ones that are low in the sky), as these often yield the most dramatic colors and interesting formations.
This summer sky was peppered with a variety of cloud formations, including wispy cirrus and fluffy nimbus clouds. The contrast between them combined for quite the sunset that evening (shot at 1/30, f/5.6, ISO 200).
Keep an eye on how quickly or slowly the clouds are moving. Things may not look promising right away, but the sky’s landscape can change rapidly, and patience is often rewarded. A jet or two streaking across the sky can provide visual interest to your shot that wasn't there a couple of minutes ago.
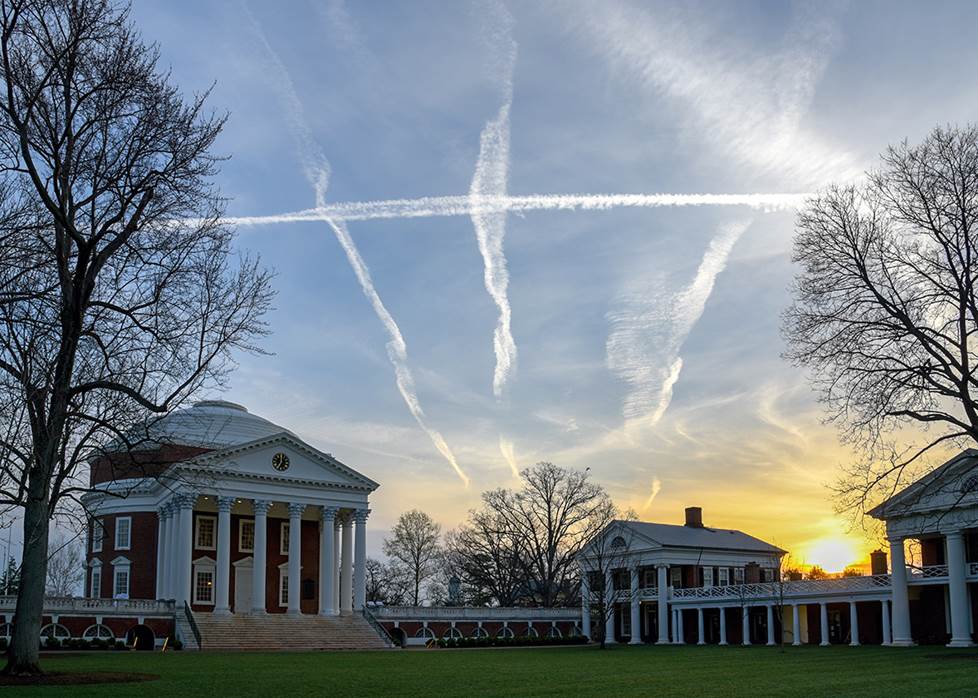
Jet contrails from passing planes help shape the sky's story. If I had taken this shot a few minutes earlier, it would have had a totally different feel (shot at 1/160, f/9, ISO 100).
3. Know your camera and how to change its settings
In my experience, the biggest factor in capturing a great sunrise photo is getting the exposure right. As the sun comes up, the sky is brighter than the foreground. The contrast between these different parts of the image presents a challenge — our goal is to find the middle ground between the two.
Getting the exposure right can be tricky, and definitely takes practice. In fact, my first few rounds of sunrise photos stunk. I eventually discovered that slightly underexposing the sky was what worked for me. This makes for relatively dark foregrounds, but those shadows can be lifted later to better match the sky (I'll talk more about image processing in tip 4).
Interchangeable lens cameras
If you're using a DLSR or mirrorless camera for sunrise photography, then manual mode is your best friend. You can quickly adjust shutter speed, aperture, and ISO to ensure your image isn't under- or over-exposed.
For landscape photography — including sunrises and sunsets — I start with an aperture of f/9 for a large depth of field and maximum sharpness. I then select a shutter speed and ISO that give me the exposure that I want. If I still need more light, I can "open up" my lens to a wider aperture (lower f number) to let more light in.
If you're not comfortable setting your exposure manually, don't sweat it! Program mode ("P" on many cameras) gives you the ability to adjust your exposure up or down as a whole without adjusting shutter speed, aperture, or ISO individually.
It took me a while to get the hang of manually setting my exposure. But once I did, my ability to get the shots I wanted changed dramatically. If you're interested in getting more hands-on with your camera — and getting out of automatic mode — program mode is a great place to start.
Point-and-shoot cameras
If you're using a point-and-shoot camera, check to see if you have a "scene" mode for sunrise, sunset, or dawn. These modes have settings that are optimized for low-light and high-contrast lighting situations, and the results can be pretty nice.
A note on point-and-shoot cameras: auto or scene modes often use slow shutter speeds to let in enough light during sunrise or sunset. If you're hand-holding your camera, that means you may end up with blurry photos. To avoid this, I recommend using a tripod, or setting your camera on a stable surface. Using your camera's timer function or a remote control is also a great way to keep it still during longer exposures.

Fast-moving clouds can create a sense of drama in the sky. Stabilize your camera and use a slow shutter speed to capture the action (shot at 1/80, f/5.6, ISO 100).
Smartphones
Sometimes the only camera we have available is our smartphone, and that's okay! One simple tip is to tap the sky on your phone if that’s what you want to expose for. This dials the exposure down to avoid blowing out the highlights, and lets you capture the "mood" of the sunrise more effectively.
Some phones have a native exposure slider built into the camera app to let you adjust exposure manually. There are also a number of third-party camera apps that offer manual exposure control. Your phone's HDR (high dynamic range) feature is worth exploring too. It stitches multiple exposures together to balance out the light and dark areas of your shot.
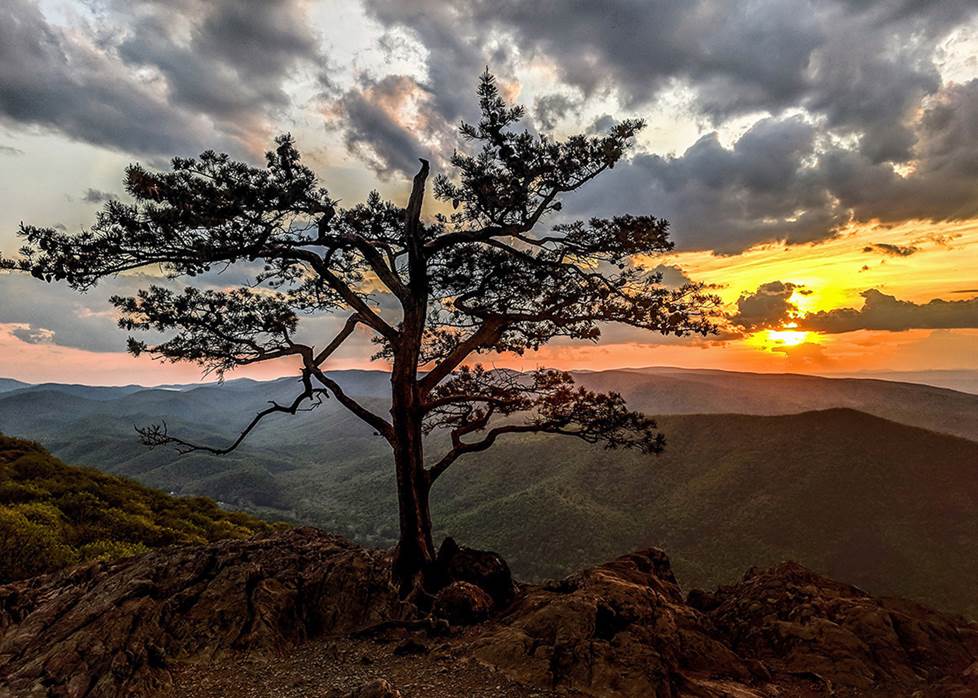
You don't need a fancy interchangeable lens camera to take a decent sunrise or sunset photo. I used my Google Pixel to take this shot at Raven's Roost on the Blue Ridge Parkway, and was pleased with how it turned out.
4. Try editing your images for better results
Nearly all photos (sunrise or otherwise) require some post-processing to look their best. Simple changes like straightening out your horizon, or cropping out distracting elements can make an image significantly more impactful.
Sometimes you'll need to brighten, darken, or desaturate your photo to make the scene look the way it did when you captured it. I adjust the highlights, shadows, and white balance (color temperature) on nearly every photo I keep.
There are a million ways to edit your photos. You can use your phone's native software, or an app like Instagram or VSCO to make changes before sharing them online. You can also use Adobe Lightroom on your computer for more advanced changes (my personal favorite).
If you aren't sure where to start, check out some image editing tutorials on YouTube. There are tons of videos available for whatever image editing platform you're using.
Should you shoot in JPEG or RAW?
The biggest improvement in the quality of my photos was changing from taking pictures in JPEG to shooting in RAW. It breaks down like this: when a camera captures an image it can do one of two things — adjust exposure, color temperature, contrast, and more automatically, or it can leave those steps to you.
When you take photos in JPEG, the camera determines these adjustments and gives you a completed image. In RAW, the camera doesn't apply any processing to the image; it merely saves the captured light and all of the image adjustments are done by you.
There's absolutely nothing wrong with shooting in JPEG — it's convenient, and the results can be pretty darn nice. That said, it's astonishing what developing a RAW file can do, provided you have the time and interest to process your images. I know shooting in RAW isn't for everyone, or for every situation, but I want you to at least be aware of your options.
Below you'll see a RAW photo of the Rotunda (left) alongside the completed image after I processed it (right). My edits only took a few minutes in Lightroom, and the new image conveys the vibrancy of that stormy morning far better than if my camera tried to render it on its own.

Slide between these two images to see what a few minutes of developing a RAW file can yield (shot at 1/40, f/5, ISO 320).
Many cameras can shoot in RAW and JPEG at the same time, so you can compare results side by side after you've developed your RAW file. Some phones, like my Google Pixel 3XL, have a RAW option built in. The iPhone® can support RAW capture through third-party camera apps, like Halide Camera or Lightroom CC.
5. Have fun exploring your creativity
I believe that taking great photos — and having fun while doing it — doesn't require having expensive gear or deep technical knowledge. Regardless of what camera you're using, if you have a sense of adventure and a curiosity to find unique perspectives, then you can have a blast capturing moments that you'll enjoy revisiting and sharing with others.
So get out there and shoot some photos! The more you challenge yourself to look for something new, the more rewarding your images will be. As a bonus, your technical skills will develop naturally along the way.
If you find yourself taking the same photos over and over again (hand raised — guilty as charged), move your feet! Some of my favorite photos have come from changing vantage points and seeing things from a different angle.
Be willing to move around for different foregrounds, subjects of interest, or even a better view of the sunrise (or sunset, if that's your jam). Being flexible and not locking yourself into a single composition can completely change your experience and the quality of your photos.
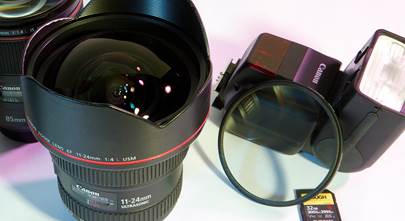
A little about my setup
There's an excellent chance I'll be outside tomorrow morning photographing the sunrise. So what gear will I have in hand?
My main camera body is the Canon 6D Mark II, and I generally pair it with the Canon EF 16-35mm f/4L IS lens for sunrise photography. For landscapes, this wide-angle lens is unbeatable — it's razor sharp throughout the frame, and has image stabilization that's incredibly useful with slower shutter speeds.
The other lens that's on my camera for sunrise shots is the Canon 24-105mm f/4L IS. Its versatile zoom range offers both wide-angle and telephoto capabilities. Nearly all of the photos in this article were shot with these two lenses.
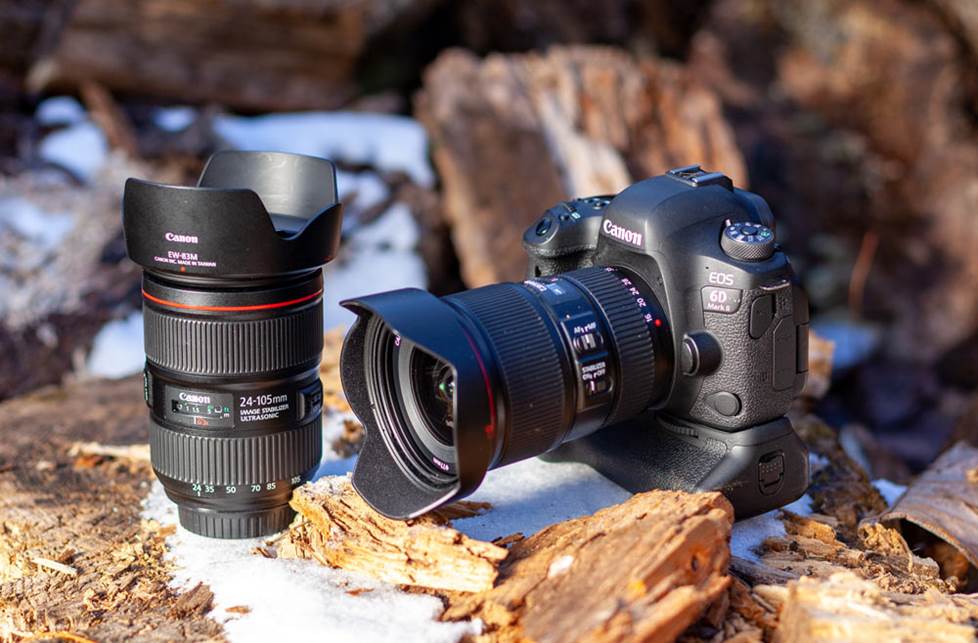
I shoot year-round, so having gear that I can use in any weather is important. These two Canon L-Series lenses are among my favorite that I own, and are by my side (or on my camera) during every sunrise shoot.
Jump into the conversation
Have a question about what gear to use, or what settings are best? I love talking about this stuff. Leave me a comment below, and let's get the conversation going!
See what you can create
I'll leave you with a personal challenge: set an early alarm one day this week, and go out and photograph the sunrise. Quiet mornings with Mother Nature are one of life's greatest luxuries, especially with a camera (and coffee) in hand.


Heather from CRYSTAL LAKE
Posted on 9/26/2022
Hi. I live in the Chicagoland area. I have loved photography for a long time but never have had the time to learn how to use all my settings. I have a Canon rebel T4i. I live on a lake so I LOVE shooting the sky at any time of day. Generally I love water photos of any kind! Lakes, oceans, waterfalls. I also love the outdoors. We hike, waterski, snowmobile, ride dirt bikes so I take scenic photos all the time. My family is part of a waterski team and very involved in band so the other photos I take are of those activities, action shots and needing to go from up close to the whole football field. I love being able to blur background and catch individual waterdrops. I would love some suggestions on cost effective lenses. I currently have a 70-300 which is not working properly (hoping to get it fixed) and an 18 -135mm 1:3.5-5.6 IS . Would love to learn more and any input you may have. Thanks so much. Heather.
Deia Z. from Crutchfield
on 9/27/2022
Sylvia
Posted on 2/21/2019
I have a older cannon and pulling it back out to play with it now. The info you shared is great and easy enough to follow. How about inside pictures of rooms etc.? I do real estate and see there is so much high tech stuff being used today. Not sure if I really need to spend more money.
Kramer Crane from Crutchfield
on 2/22/2019
For indoor real estate photography, the key is to use a wide-angle lens and get as much light into the room as possible. If you let me know which model Canon camera and lens(es) you have, I'm happy to give you some specific settings and techniques to try.