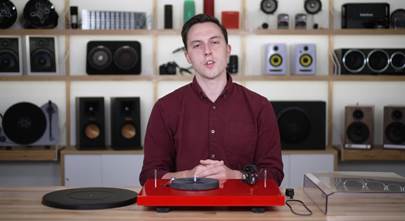
How to change the needle on a record player
Quick and easy steps to replace your cartridge stylus — no tools needed

Sometime in my mid-20s, I inherited the family turntable — a stunning Yamaha YP-series gem from the 1970s. It had been my dad’s pride and joy throughout my childhood, but after his leap to digital tech, it started to gather dust. Growing up with its warm, rich sound, I couldn’t wait to fire it up and bask in the clarity it promised.
That thrill didn’t last. Turns out, the stylus had a split. Whether it was years of faithful use or a mishap from my overly enthusiastic younger self (yeah, I’ll own that), didn’t matter — the thing needed fixing pronto.
When it came to swapping the stylus, I was clueless. After snagging a replacement from a quirky little record shop downtown, I cautiously fumbled through the process, convinced I’d break something. It ended up being way easier than I expected, and once I got it right, the payoff was instant — crystal-clear, warm nostalgia that made all the effort worth it.
So, what is a stylus?
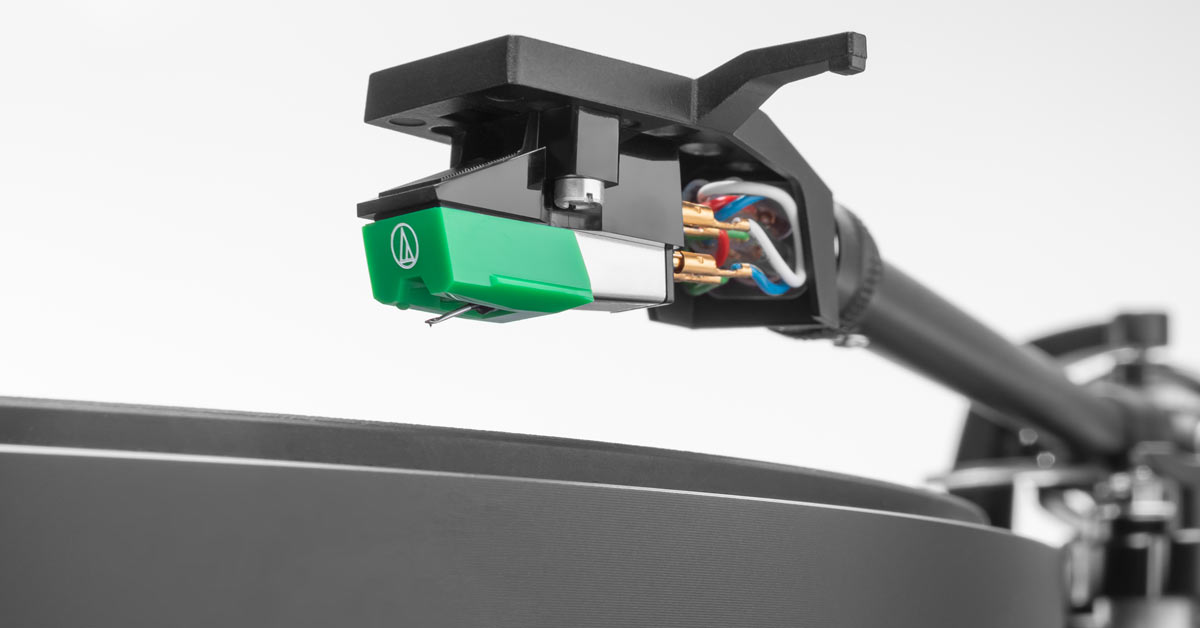
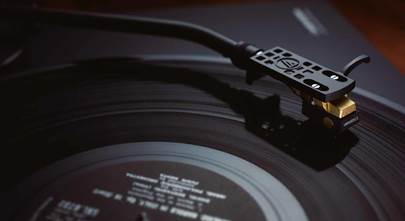
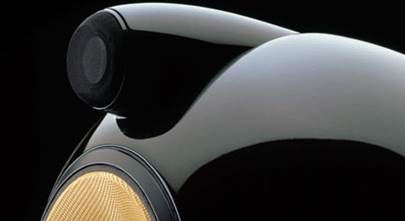
The turntable needle (or "stylus," if you're hip to the lingo) is the tiny, precision-crafted tip at the end of the tonearm. Usually made from diamond or another tough material, it’s housed in the cartridge and translates the groove on your record into electrical signals, which eventually become sound. Over time, and many, many hours of enjoyment, the stylus naturally wears down and will need replacing in order to keep your playback crisp and your records happy.

The stylus (or needle) is the heart of your turntable, translating grooves into sound and keeping your music crisp and clear.
How do I know if my turntable stylus needs replacing?
If you're hearing distortion, crackling, static, fuzziness, or just a general drop in clarity and detail, that's a big clue. Also, if your clean, scratch-free records start skipping, it could mean your stylus is worn or split. If you're experiencing any of these issues, take a close look at your stylus. If it looks crooked or misshapen, it's definitely time for a new one.
Making the swap
Swapping out your stylus is pretty straightforward, but a few handy tricks can make the process even smoother. Here’s a step-by-step guide to help you nail the swap, plus some tips to keep your new stylus in tip-top shape afterward.
Now, let’s get your records back on track!
Power down and protect your gear
First things first — turn off your turntable. This keeps things safe and avoids any accidental spins while you work. If there’s a record on the platter, take it off to keep it pristine. Also, if you have a stylus guard or protective cap on your cartridge, let's remove that as well.
Locate the cartridge and stylus
The stylus enclosure sits at the end of the cartridge, but depending on the design, it can sometimes be tricky to tell where the stylus ends and the cartridge begins.

The enclosure is often a different color than the cartridge and is usually branded in some fashion. Here's a pro tip: having your replacement stylus ready is a big help during the swap, as it can guide you in matching the housing's shape and pattern.
Just a heads-up: not every stylus works with every cartridge, and some aren’t replaceable — meaning you’ll need to swap the entire cartridge instead.
Gently remove the old stylus
Here’s where I tripped up as a younger man, but it’s way simpler than it seems. Grip the stylus housing (never the needle!) and gently pull outward and downward until it slides out. Easy, right?

If it feels stuck, don’t stress — check your turntable manual for the details. Stylus designs can vary, but this method works like a charm for most of them.
Attach the new stylus
Now, grab that replacement stylus and double-check it’s the right fit for your cartridge. Got a match? Sweet — you’re almost there!

Line up the new stylus with the cartridge slot, then gently push it inward and upward, the reverse of how you removed the old one. Keep going until it clicks or feels snug. No need to force it — this is all about finesse, not strength.
Test the new stylus
Turn your turntable back on, lower the needle on your favorite record, and take a listen. Is it silky smooth? Congrats, you nailed it! If something sounds off, give the stylus another look, just to make sure it's fully seated.
Tips and tricks for keeping your stylus in tip-top shape
Now that we’ve covered how to swap your stylus, here are some additional tips for making sure you won’t have to do it again any time soon.
Keep your stylus clean
Dust and debris are the stylus' worst enemies. Use a soft stylus brush to gently clean the needle after every few plays. For those extra-dirty stylus tips, a little stylus cleaning fluid can do the trick. Always brush from back to front (the direction the record spins) to keep things safe and avoid damage.

Use a stylus cleaning brush to clear away dust and debris — always brush gently from back to front (never side-to-side or front-to-back) to keep your stylus safe.
Clean those records
The stylus loves to pick up debris from record grooves, so keeping those grooves clean is the way to go. Regularly running your records through a washing or vacuum cleaning system not only keeps your records grime-free but also makes your listening sessions so much better.
If you haven't invested in a cleaning system yet, a soft record cleaning brush works very well to remove surface dust and dirt. If you are like me though and like to find previously loved records in thrift stores, flea markets or dollar bins, really deep groove cleaning is definitely recommended.

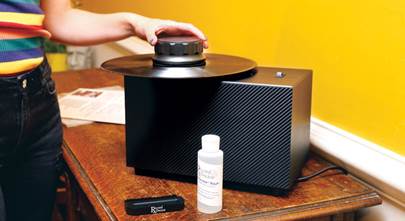
A deep groove cleaning by a record cleaner like the Pro-Ject VC-E2 will keep your grooves grime-free and your stylus in tip-top shape.
Handle with care
Never touch the stylus tip directly (other than with a cleaning brush). When swapping or cleaning it, always handle the housing gently to avoid bending or breaking that delicate needle. And when you're not using the turntable, be sure to lock down the tonearm and use the stylus guard (if your headshell has one) to prevent accidental damage.
Cue carefully
Most record players come with a hydraulic cueing lever — use it. Placing the tonearm manually can lead to a bumpy landing, risking damage to the stylus and possibly scratching or scuffing of your vinyl. The cueing lever, on the other hand, drops the tonearm smoothly onto the spinning record, giving you much better results.
Check the tracking force
Make sure your tonearm is properly balanced and the tracking force matches your cartridge’s specs. Too much force will wear out the stylus too quickly, while too little can make it skip and damage your stylus and your records.
Be mindful
Got a manual turntable? You're probably used to lifting the tonearm at the end of a record and placing it back on its rest. Automatic turntables should handle that for you, but some automatic and semi-automatic models stop the platter and power down without returning the arm.
Be mindful of this — leaving the stylus resting in the run-off groove instead of snug in the arm cradle can put unnecessary stress on it. If you love falling asleep to music or don’t trust your turntable to always lift the arm, consider an automatic tonearm raiser. It’s easy to set up and gives you peace of mind.
Need a little help?
One of our expert Advisors can talk to you about what gear you have, and help you zero in on the right stylus for your setup. They're knowledgeable, friendly, and they love music as much as you do.
And don't hesitate to call us if you hit a snag during the install process. Free lifetime tech support is included with every Crutchfield purchase.


Comments (0)