Component speakers installation guide
Expert tips and advice for installing component speaker systems

Installing component speaker systems involves a few more steps than installing standard full-range speakers. In this installation guide, we'll help by explaining:
C
omponent speakers (also known as “separates”) deliver the best audio experience in the car. They use separate woofers, tweeters, and crossovers to send out detailed, dynamic sound. They also offer the listener greater imaging possibilities than full-range speakers via their increased flexibility in placement, aim, and control.
An overview of component speaker systems
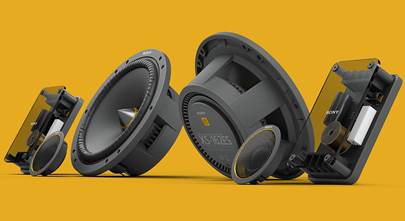
Component speaker systems are composed of three pieces: a woofer to handle the lows and lower midrange frequencies, a tweeter to take care of the highs and upper mids, and a crossover network to split things up between them. We'll discuss each piece below and then get into the installation process.
Woofer placement
Normally, you'll mount the woofers in the factory speaker locations, which are usually in the doors. At most, you'll have to drill extra screw holes, cut a small area of metal or plastic, or file the door panel. And don’t forget, we offer mounting brackets and wiring harness adapters for factory locations in thousands of vehicles, which will help get the woofers securely into place.
Some speakers require a greater degree of cutting and drilling. Before you begin, you must be sure that modifications will not interfere with any car mechanisms, and that the speakers will fit securely. Be aware that the process can be time-consuming, especially for first-time installers. The keys are patience and planning.
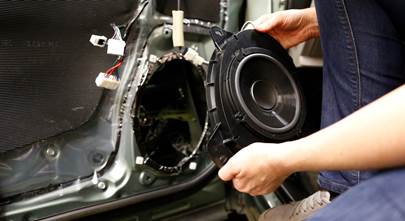
Install your woofer in your door or in your kick panel.
Tweeter placement
You'll mount the tweeters on the doors, the front pillar, or the dash. Tweeter installations almost always require some degree of modifications, even if your vehicle has factory tweeters. The degree of modification depends on the mounting method.
- Whenever possible, use the factory tweeter location. The space is already there, but you'll still need to do some custom work to mount the tweeter. When you're done, you'll end up with a clean, factory look.
- When a factory location won't work, the next best option is to flush-mount the tweeter. This requires cutting a hole into the door panel for the tweeter so it sits level with the panel.
- Finally, surface-mounting places the tweeter on top of the door panel, pillar, or dash, with little to no modifications necessary. Of course, this method will leave you with a more noticeable installation, but it's often easier to do.

Place your tweeters in the door, the sail panel, or even the dash.
Crossover types and placement
Think of the crossovers included in a component system as air traffic controllers. But instead of directing incoming aircraft, they’re taking the incoming audio signal from an amplifier or car stereo and then directing the appropriate frequencies to the woofers (lower frequencies) and tweeters (higher frequencies). Component speaker systems can include various types of crossovers which can affect your installation.
In-line filters
Separates that offer in-line or onboard frequency filters, another name for a crossover, can save a step (and time) in the installation process. They’re especially handy when the woofer and tweeter are mounted in the doors, since they tend to be smaller in size. The filter can be directly attached to the speakers or to the wires, so after you mount the woofer and tweeter, you simply connect the speaker wires.
External crossovers
Most conventional component speakers include a separate crossover box. These crossovers often include some added tweaking options and improved crossover slopes (steeper cuts in frequencies) for a more refined sound. The key consideration here is finding a place to mount them.

We'll discuss crossover placement in more detail below.
Systems with no crossovers
Some component systems don't include crossovers or inline filters. These allow you to create an “active system,” using the crossover controls in a car stereo, digital signal processor (DSP), or amplifier to traffic the appropriate frequencies to the speakers. These systems provide superior customization and are intended for diehard audio tweakers.
Wiring component speakers
You'll have to spend some extra time wiring a component speaker system. With systems that come with external crossovers, the wires running from the car stereo must first be routed to the crossover's input so it can do its frequency direction magic, and then from the crossover's output to the individual woofer and tweeter. If you're connecting an amplifier as well, the amp should be wired between the receiver and the crossovers.

diagram with no amp

diagram with amp
Wiring diagrams: Without an amplifier or with an amplifier in the system.
Installation overview
The following installation instructions will also apply if you are adding a set of individual speakers (midranges, tweeters) to your current aftermarket system.
Remember, as with any electronic installation, disconnect the negative cable on your battery before doing anything else. Also, make sure you have the necessary tools on hand.

Disconnect your battery before any installation job.
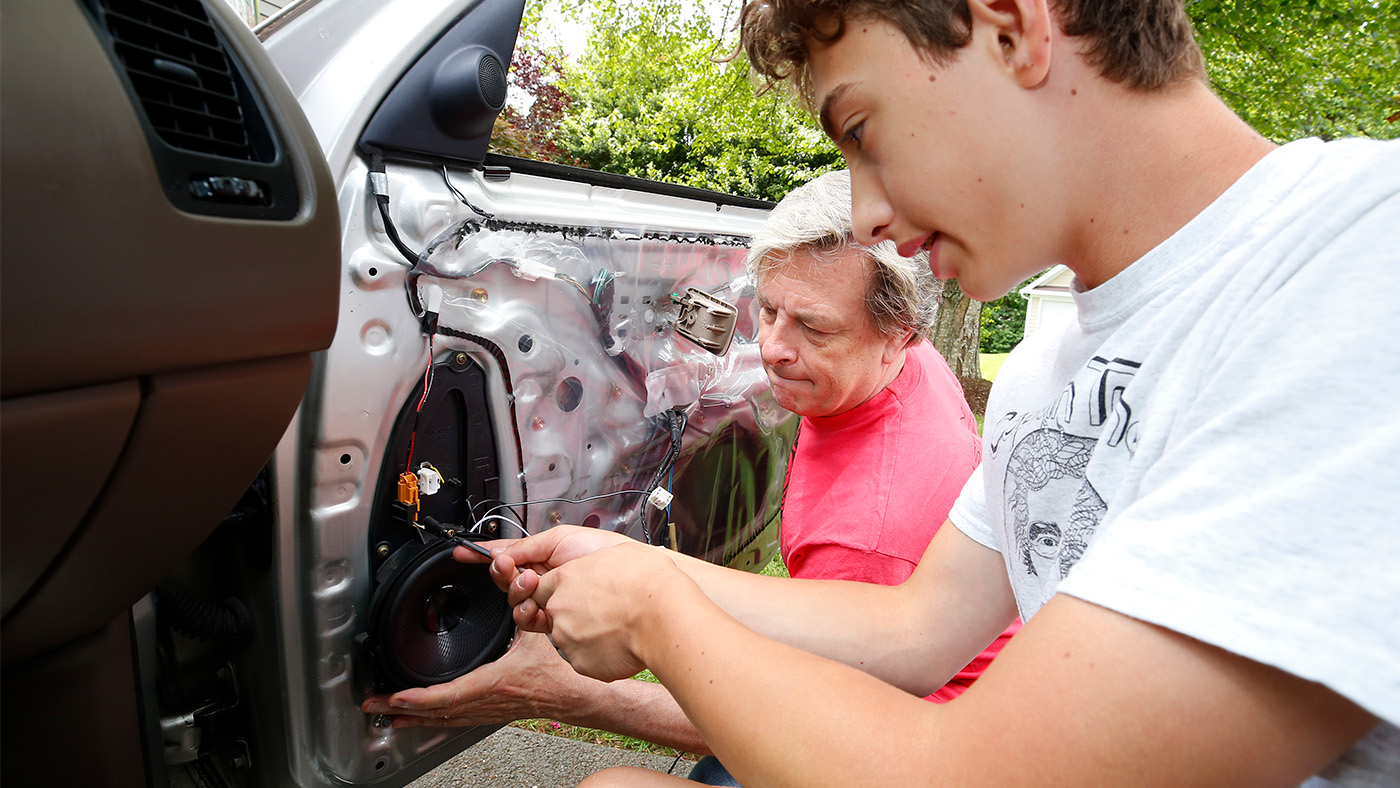
Installing woofers in the doors
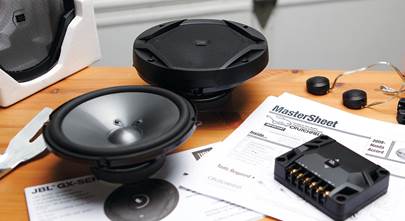
Most car manufacturers install the factory woofers in the door, and your new woofer will often fit into that factory speaker location. In most cases, you’ll need to remove the door panels to access the speakers. Every vehicle will be different, and our exclusive MasterSheet® instructions, included free with your purchase, will cover the specifics of removing your vehicle’s speakers. But, here’s a general overview.
A few notes on older cars
For the most part, removing the door speakers is pretty similar from one car to another. But older cars (from the '90s and earlier) might be different.
Removing the speaker grille – This rare step is usually only possible with much older cars. Using a flathead screwdriver or panel tool, gently pry off the grille of the existing speaker. Grilles secured to the door or attached by friction fittings will require unscrewing or more aggressive prying.
Remove the window crank – Window cranks. If you ever heard anyone say, "Roll down the window," this is why. Occasionally, the window crank can still be found in modern cars. It needs to be removed before you can remove the door panel. Sometimes, you just need to remove a screw from the center of the crank, but most are anchored by a spring clip. You can use a window-crank removal tool or a flathead screwdriver to remove this clip. To remove it, depress the door panel until you can see behind the crank, turn the lever until you see the prongs of the clip, and gently push the crank off with the screwdriver. The clip will pop off, so be careful.

Remove the arm rest and the door panel
Now, back to the modern era. In most cases, you'll need to remove the door panel to access the factory speaker, or to custom install your speakers. Turning to the armrest, which houses various electronic controls, start by unscrewing a few Phillips-head screws and some trim fittings around the handle. Once the armrest is unattached and any powered items are unplugged, you can remove the door panel.
For most cars, you'll find the panel fastened by a few screws and friction fittings. With the screws removed, begin prying off the door panel at the bottom corner. Use a panel tool and work carefully; you don’t want to mar your doors. While alarming at first, don’t be afraid of the loud pop; that’s the friction fittings releasing. Once you loosen the bottom and sides, the panel should hang from some trim at the window well. Simply lift the panel upward, and it should come free. Nexy, you'll have to detach a wiring harness (or two) and the door-release cable.
Set the panel aside and out of the way.
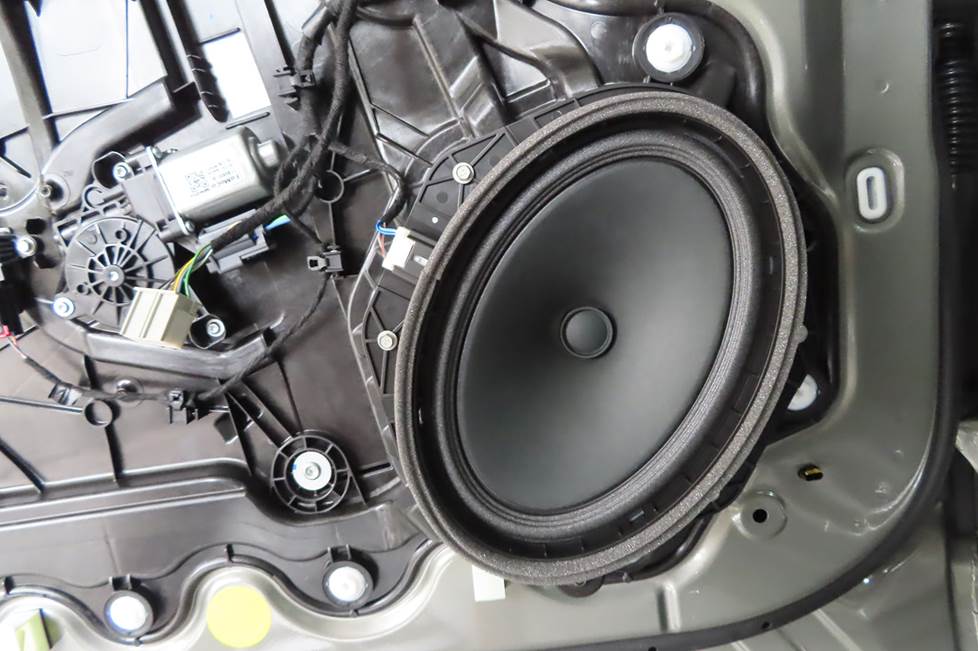
Remove the old speaker
Carefully unscrew and pull out the old speaker, then detach it from the wiring harness.
- Some manufacturers use a sealant foam when mounting the original speakers. You may need to cut through that with a utility knife.
- Some speakers are attached to the door with rivets. You'll need to drill through those to remove the speaker.
Test fit and make adjustments or modifications
If your installation requires an aftermarket mounting bracket, attach that to the speaker first, then position the speaker/bracket assembly up to the mounting location.
Usually, you'll be able to fit the new speaker into the hole with no difficulty, but sometimes the hole can be too narrow or shallow to accommodate it. Or, the factory bracket may hinder the placement. In this case, you may have to file or trim part of your door or speaker opening in order for your speaker to fit properly.
If you purchased your speakers from us, our custom instructions will tell you exactly what you need to do. And our free tech support team is just a phone call away.

Connecting and installing the new woofer
Attach the speaker wires to the correct tabs on the speaker. Remember, the other end of the woofer's wires will attach to the external crossover's woofer outputs. The factory speaker wires (or the new speaker wire, if you're going that route) will attach to the crossover's inputs.
When mounting the woofer, you might need to use "speed" clips (often provided) to give the speaker screws extra support. Refer to the instructions that we and the speaker manufacturers include (which is always a good idea). If you door panel rests on the window ledge, you can let it hang there for testing. Be careful that the inside panel has no protrusions that will damage your new woofer.

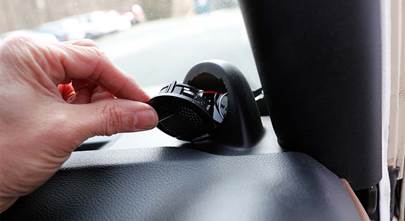
Mounting a tweeter in the factory location using one of our universal brackets
Installing the tweeters
With the woofers installed, let's move on to the tweeters.
Check your vehicle's factory tweeter locations
Some factory tweeter locations will accommodate aftermarket tweeters. If we've researched the factory tweeter locations in your vehicle, we'll show which tweeters can fit there. While they physically may fit in those locations, you almost always have to come up with a way to secure or fasten the tweeter in place. Here are our go-to methods for mounting tweeters:
- Create a bracket using one of our universal backstraps (demonstrated above)
- If the tweeter is a "close fit," you can use hot glue or silicone to fix it in place
When an aftermarket tweeter simply won't fit in the factory location or if there isn't a factory tweeter location, you'll need to either surface mount the tweeters or flush mount them.
Surface-mounting the tweeters
You can surface-mount your tweeters if you want to minimize labor time and modifications, or if you don't have the depth to flush-mount. Surface-mounting may also offer greater angle range than flush-mounting. With a surface-mount, a cup secured to a surface with a screw holds the tweeter in place. You will need to drill a small hole in the panel to secure the mounting cup and run the speaker leads to the tweeter.

Drilling and trimming a flush-mount tweeter hole means more time and effort, but provides a clean, integrated look in the end.
Flush-mounting the tweeters
The advantage of a flush-mount lies in its sleek, factory-look, since the tweeter does not protrude from the panel. Many manufacturers also include angle-mounts that allow you to aim the tweeters slightly, even when they're mounted within the panel.
Installing flush-mounted tweeters
First, trace the tweeter cup on the panel or dash. Use a hole saw (a drill with a serrated circular blade) to cut the hole, and then trim it with a utility knife. Mount the tweeter (your tweeter should come with specific instructions for this step). Feel free to contact our knowledgeable Tech Support crew with any questions if you purchased your speakers from Crutchfield.

Find a safe place to stow and secure your crossover.
Installing the crossover and running the wires
When you install a woofer and a tweeter in the same location like the car door, you can install the crossover in an available spot inside the door panel. However, keep in mind that the crossover needs to stay out of the way of the window rolldown path, keep dry from moisture, and be mounted securely so it doesn’t rattle inside the door.
Merely placing the crossover in the door or kick panel leaves it likely to bounce around. Securing the crossover against vibration can be done in several ways, here are two tried-and-true methods:
- Adhesive pads secured to the back of the crossover and the door’s inner sheet metal usually do the trick.
- If the crossover is going somewhere near any type of bracing in your vehicle, you can use cable ties to secure it to the brace — many speaker manfacturers build mounts on their crossover covers for just this purpose.
Then, put the crossovers through the same rigorous tests as you did the speakers, specifically with respect to window and door mobility.
When the tweeter and woofer are mounted in different locations
Sometimes the door may not be the best option for the crossover, such as when the tweeter-mounting location is in the dash. In these cases, provided your vehicle offers enough space, we recommend working the crossovers into the dash behind the stereo or somewhere else under the dash or behind the kick panels.
You can tap into the factory speaker wire to get the signal to the crossover. Then, you can use factory wiring to send the output signal to the woofer, and run new speaker wires from the crossover location to the tweeters.
Should you use new or existing factory wiring?
If you're powering your new speakers with a factory or aftermarket stereo, the factory speaker wire already installed in your vehicle should work just fine. However, if you plan to install an external amplifier that's rated at 100 watts RMS or more per channel, then we recommend you run new speaker wire. 14- to 16-gauge wire should do the trick.

The rubber boot that protects your door wires' journey to the dash can be a great place to house your speaker wires.
Wiring through the door boot
Once you've found the best location for your component system, you'll need to hook it up. Many vehicles sport a rubber boot that connects between the door and the chassis. Using this boot as a conduit, run your speaker wires off the door, underneath the kick panels, behind the dash, and to your receiver or external amplifier. You can more effectively do this by taping the wire to something like a Pro.Fit Wire Worm and fishing everything through the interior panels.
One of the challenges of many current vehicles is that these conduits now have plugs that can often block the installation of new wire. Other vehicles use molex plugs instead of this wire boot. That means when you open the door, the electronics disconnect from the car.
Drilling a hole for the speaker wire
If your car door doesn't have a rubber boot, you'll have to drill a 5/8" hole to string the wiring through. Before drilling, make sure the hole will have access to the desired speaker location, as structural metal on the inside sometimes blocks the edge of the door. Cover the edges of the hole with a rubber grommet, several layers of electrical tape, or some flexible tubing, so sharp metal won't cut through wiring jackets.
Make sure the door will open all the way, and that the wire will not get pinched by the hinges or door jamb. Once you finish drilling and cutting, remove or vacuum all metal debris before finally installing the speakers to prevent rattling or shorts.
Test-driving your system
At this point, you'll want to test your system before fully reassembling your doors, so you can make any adjustments before the speakers and crossovers are inaccessible. With all speakers in place, you can listen to your stereo to make sure all speakers are getting the proper signal. This also lets you make sound adjustments on your receiver or amplifier if needed. If your crossovers include any type of adjustments, like tweeter level and crossover slope, this is the time to adjust them to your preference.

Most speakers have a positive and negative terminal.
Check the speakers’ phase
If your bass sounds weaker on one side of the car than another, you may have attached a set of speaker wires to the wrong terminals. Simply reverse the leads on one set of terminals of the weak speaker. You can do this either at the speaker or at the crossover, whichever is easier to get to.
Button it up
Once you've confirmed that all the speakers are working and you're satisfied with the settings, finish reattaching your door panel by reversing the above removal steps.
Custom woofer installation and modifications
Here's what you need to know if you want to mount your woofers somewhere other than the factory speaker locations.

Rockford Fosgate components installed in a kick panel pod
Kick panels
Q-Logic’s Q-Forms custom kick panel pods provide a great way to install your components. If available for your vehicle, you can mount both the woofer and tweeter in the custom-fit enclosure. They let you aim and position the speakers in a way that maximizes sound imaging — as close to equidistant from your ears as possible. Using a kick panel pod also eliminates the need to run wires through your door (although some vehicles may require bending the parking brake pedal). Q-forms pods come with detailed installation instructions.
Creating a speaker opening
If there’s a speaker template included with your new speakers, remove it and make sure that the surface you'll be cutting can accommodate the size of the woofer. Also make sure nothing behind the mounting location will obstruct the speaker. For instance, will the window still move freely once the speaker's in place? Will the door open and swing out without interference? Is the locking mechanism unimpeded? You should double check before making any adjustments.
Measure twice, cut once
Once you've decided on the location and mounting depth, use the template as a guide to cutting your hole. If attaching the speaker to the back of a panel (bottom mounting), check to see if you need a mounting ring and if the instructions suggest cutting a certain hole size. Trace your hole on the back side of the door panel, lay the panel on a flat, clean surface, and carefully cut the hole (a sharp utility knife works well on plastic).
On cutting metal
You'll need to drill a starter-hole large enough in which to fit a jigsaw blade. Make sure your jigsaw has a metal-cutting blade. When drilling or cutting, always wear eye protection. Do not cut the door panel and the metal at the same time; you may rip the panel covering. Wrapping the base of the saw with electrical tape may prevent scratching of the surface metal as well. Keep the blade from touching the car's exterior panel, as it can cause pock marks.

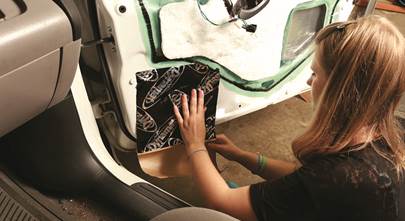
Use speaker baffles or a Dynamat kit to cut down on extraneous noise
Ways to improve the sound even further
After making sure that your speakers are securely installed, there are a few other ways to ensure you get the best bound from them.
Noise damping
Noise-reducing materials stifle speaker rattle, engine rumble, road noise, and any other noises that might emanate from a noisy vehicle environment. Dynamat allows your bass to thunder boldly and your highs to soar clearly, while eliminating competition from extraneous sounds. Noise-damping products, like Dynamat, Hushmat, and others, are available for the door, trunk, speaker, and license frame locations as well as in bulk to create your own shapes.
Speaker distortion
Do you hear annoying distortion? If so, your speakers probably can't handle the power supplied by your amp or receiver. Check the RMS ratings given for your speakers and your amp or receiver. They should be close in power ratings — an amp with a power rating that's a little higher is fine. Regardless, backing off the power a little should clear up the distortion. First, try listening at a slightly lower volume. If that's not enough, try turning down the gain on the amp. For tips on properly setting the gain on your amplifier, check out our video explaining how to set amplifier gain.

Speaker baffles are also a great way to minimize damage to a speaker resulting from dust or moisture.
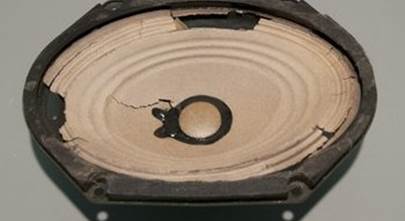
Seal and protect
A vehicle endures all weather conditions and temperature variations — wet, dry, hot, and cold. That means your speakers must, too. Moisture causes speaker damage. A set of foam speaker baffles not only seal out moisture, they also protect the speaker against dust and dirt, block road noise, and reduce rattling at the same time.
Pro tip: Some folks experience a loss of bass response after installing baffles. If you cut a hole in the bottom of the baffle’s rear edge, you’ll retain those precious lower frequencies by allowing air to flow while still protecting the speakers from moisture.
Baffles can also prevent your speakers from shorting out by preventing inadvertent contact between the speaker and the door metal. You can also prevent shorts by wrapping the speaker terminals with electrical tape.

Find out more about the right speakers for your car
Our car speakers buying guide, goes into a lot more detail about how to choose the right speakers (whether a component system or coaxials) for your car audio system. Be sure to check it out. And then use our vehicle selector to find out which speakers will fit your car.
If you have any questions about your options, contact our advisors via phone or chat — they're here to help.


Jose M. from P.R.
Posted on 4/15/2023
Interesting what I read,it is never to late to learn.
Victor Delossantos from San Antonio Texas
Posted on 9/5/2022
I recently bought the Alpine R series component speakers and they come with a inline crossover but would I also set my crossover on my amplifier for my two rear speakers that do not have a crossover ? Would I limit my alpine speakers but adjusting the low pass to say 120-180 ? I have the S series SA32F amplifier. Thanks in advance
Darren from Marietta
Posted on 6/30/2022
I am installing new JBL components with a crossover (2 way and eventually 3way) in my Audi Concert system and the existing factory components drive the tweeter and woofer in front separately from the amp with no crossover - I think using a cap on the tweeter and maybe full range on the woofer. So how do I feed my new crossover when the previous components have 2 separate feeds from the factory amp?
Daniel Montoya from Stephenville
Posted on 5/10/2022
Hello i have a 2013 GMC Sierra 2500HD and i have no idea how to connect a crossover I mean where am i connecting these two?
Crutchfield Writing Team from Crutchfield
on 5/13/2022
Johnny from Shreveport
Posted on 5/2/2022
Howdy, and thanks to your team for helping us all! On a mono amp with two sets of speaker terminals, will the output power be "cut" in half if two subs are connected to an individual of speaker terminal for each speaker--or will output power remain the same, irrespective of speaker wiring, speaker ohm, etc?
Johnny from Shreveport
Posted on 4/24/2022
Howdy! I bought a pair of Alpine Type-R SPR-10TW tweeters and I wanted to have them installed on an amp channel separately. The installer told me he couldn't run the wires through the door and to the amp like the installed door speakers because of a Molex plug that was attached to the body frame and he didn't want to chance drilling a hole in it--so he attached the tweeter wiring to the door speaker wiring. That's not a good scenario, is it? Shouldn't the tweeters be wired directly to the amp itself? To me, that would be reducing the amount of rms power that the tweeter and the door speakers are supposed to be getting separately. (The rms from the amp per channel is 75 watts. Door speakers can handle 80 watts and the tweeters 75 watts separately). Thanks, Johnny
Alexander H. from Crutchfield
on 4/25/2022
Larry from Bellflower
Posted on 9/14/2021
Hi ,I bought the prime 165-s with built in crossover. I have factory tweeters already installed. I'm wondering if I can just unplug the factory tweeter wire and plug them to the new tweeter or is there another way I should wire them . I don't have an amp just the radio.
Alexander H. from Crutchfield
on 9/14/2021
Dave
Posted on 6/30/2021
Hi, I'd been planning to mount the crossovers for my new Focals in the trunk along with the amp and run separate woofer and tweeter wiring forward. But I'm curious about the statement that mounting crossovers close to the speakers decreases noise. How so?
Andrew hill from New york
Posted on 4/25/2021
Can i use a subwoofer with component speakers
Alexander H. from Crutchfield
on 5/3/2021
Daniel from Arlington
Posted on 2/3/2021
4) ts650pro and 4 ds18 pro tweeters with bass blockers built on... can I wire each tweeter off the mid speaker?
Alexander H. from Crutchfield
on 2/4/2021